- Using Network ACL Block an IP Address in AWS
- Using Security Groups Block an IP address in AWS
Let’s learn how to block an IP address in AWS using the network ACL method.
Using Network ACL Block an IP Address in AWS
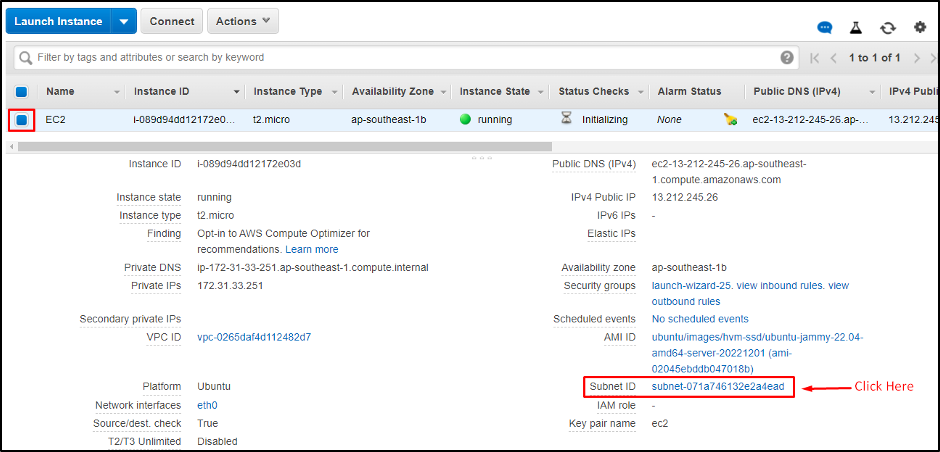
To block an IP address in AWS, you must select the instance by clicking on it. All the information about the selected instance will be available under it. Click on the “Subnet ID” link to change the subnet setting to block an IP:
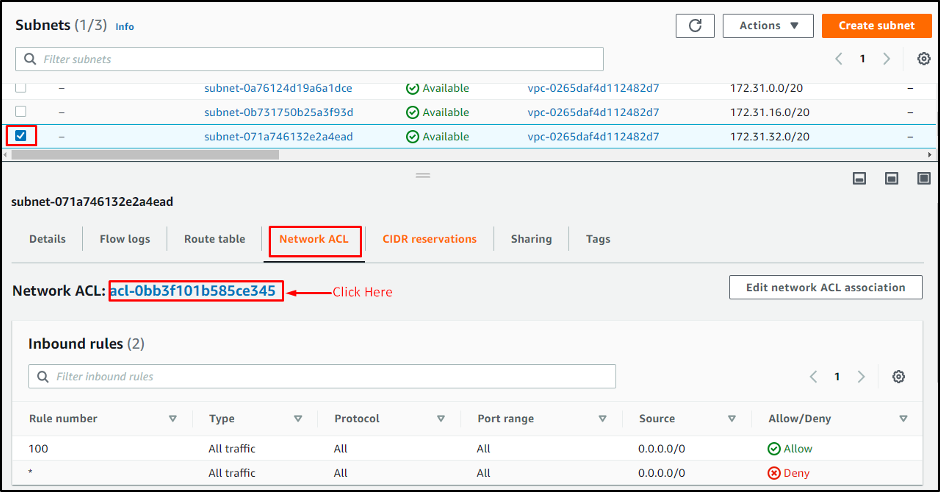
On the “Subnets” page, select your subnet from the list. In its information, you will select the “Network ACL” tab and then click on the “Network ACL” link:
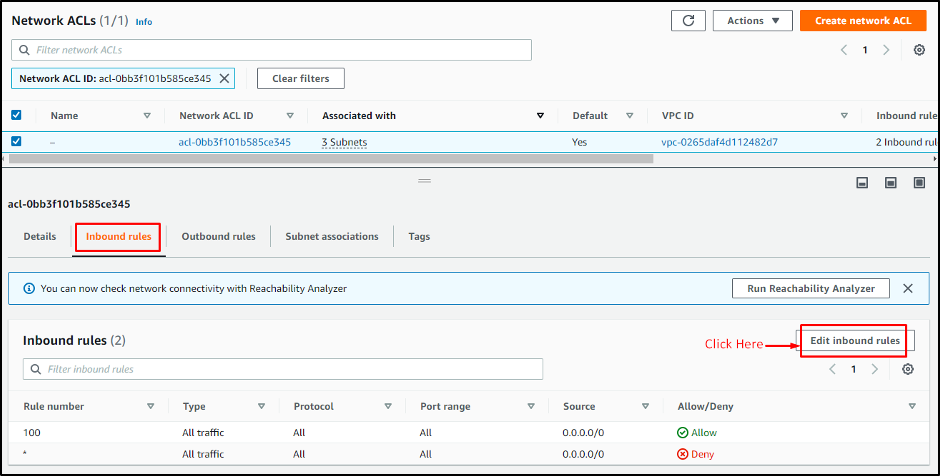
From the Network ACL page, you need to click on the “Edit Inbound rules” button from the “Inbound rules” section:
After clicking on the “Edit inbound rules” button page, you will be directed to the rules page. Here, you can add a rule to block any IP address.
- For that, click on the “Add new rule” button
- A new row will appear, and you can set the rules according to your requirements in that row
- You can enter the IP address in the “Source” cell, that you want to block
- Select “Deny” from the “Allow/Deny” cell to block an IP address
- Click on the “Save changes” button to apply the rule:
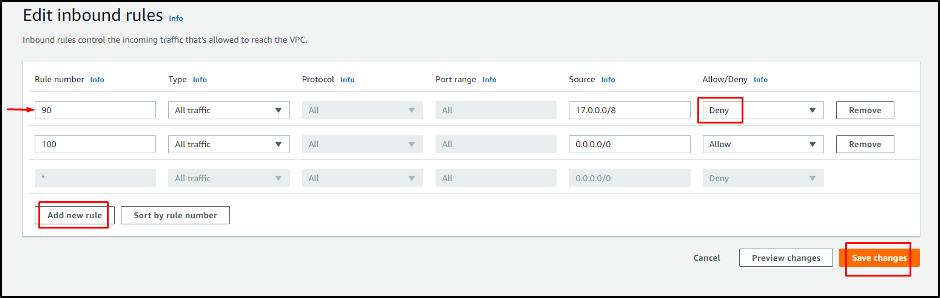
On the “Network ACLs” page, you can see that “Rule number” 90 has been added in the “Inbound rule” section. You have blocked the IP address (17.0.0.0/8) from sending any kind of traffic to our selected instance:
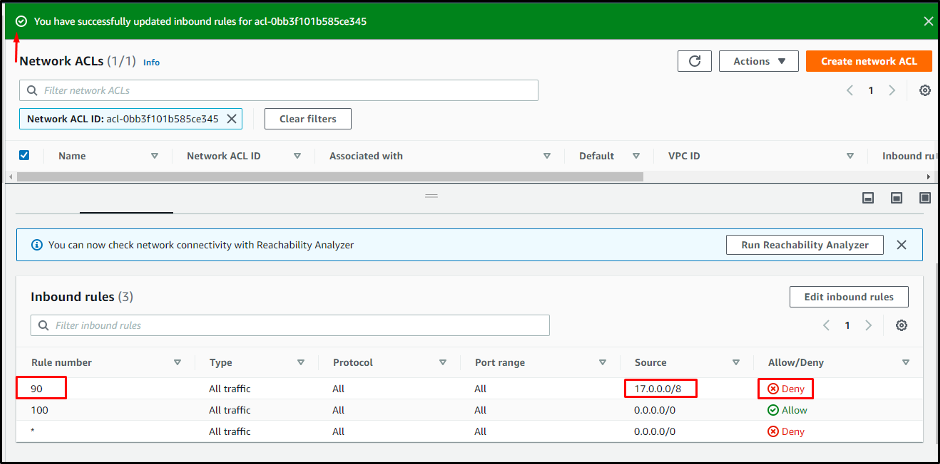
You have successfully blocked an IP address using Network ACL in AWS.
Using Security Groups Block an IP address in AWS
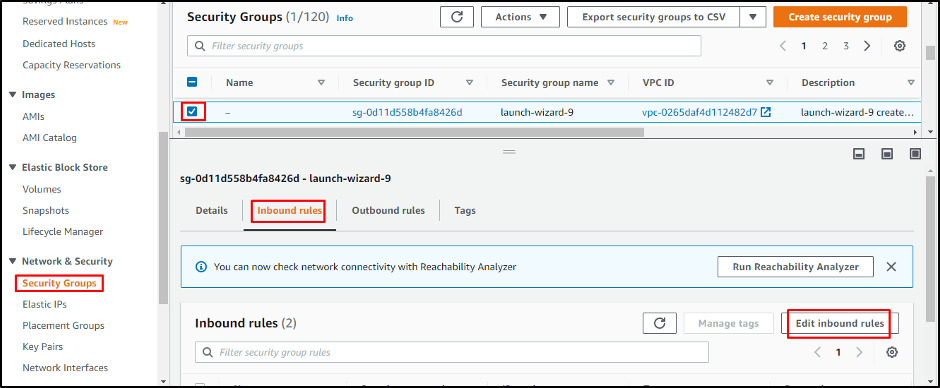
You can not directly block an IP address in AWS using security groups. Instead, you only create a list of all allowed IP Addresses, and all other IP Addresses will automatically be blocked. For that, just visit the security rules of the instance and click on the “Edit inbound rules” button.
From there you need to repeat the above-mentioned process of adding a rule and allowing any IP address. By allowing one IP address you have blocked all of the other IP addresses from getting any kind of traffic.
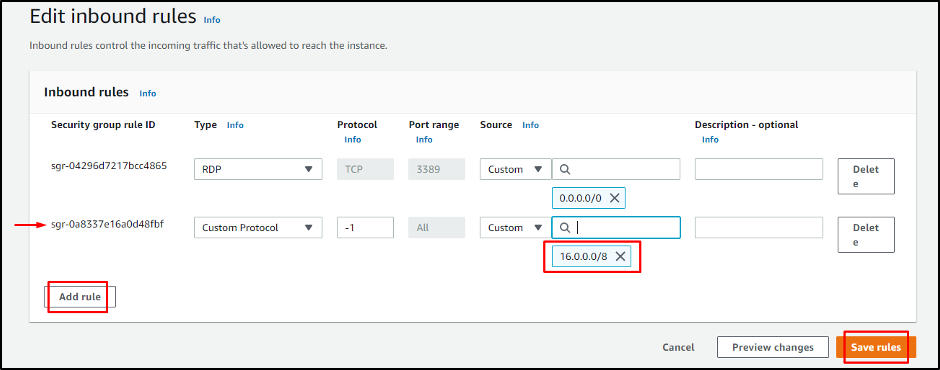
You have successfully blocked IP addresses using the security groups.
Conclusion
You need to edit the Network ACL or security group rules to block an IP address in AWS. You can change the rules in the “Edit Inbound rules” section. By adding a network ACL rule, you can set the source IP address to block it from getting any traffic. On the other hand, adding rules in the security group will allow the specific IP address and block all the other addresses. Rules can be added and deleted at any time according to requirements. In this post, you have learned how to block an IP address in AWS using network ACL and Security groups.