How to Mine Bitcoins with BFG Miner on Ubuntu?
Introduction
Bitcoin is a cryptocurrency which is quite popular among many investors, tech enthusiasts, and some digital sellers/buyers due to its flexible, anonymous and robust nature. However, unlike other monetary currencies, bitcoins can be mined on the fly with the help of a computer system which makes use of a specialized software application known as miners. Currently there are a wide variety of miners out there, and some of the popular miners are CGMiner, BitMinter, BTCMiner, 50 Miner, DiabloMiner , BFG Miner. This article demonstrates how to utilize BFG Miner to produce (mine) bitcoins with ease.
What is BFG Miner?
As stated above, BFG Miner is a bitcoin miner which has the ability to mine bitcoins on a range of devices from ASIC, to FPGA, to GPU, to obsolete CPU systems. As the operating systems, it supports again a range of systems from Arch, to Debian, to Gentoo, to OpenWrt, to Ubuntu. This article focuses on Ubuntu only, but the configuration and mining process are almost the same in other operating systems as well. To get optimum performance out of the miner, it’s recommended to upgrade Ubuntu to the latest stable release before continuing.
The special thing about BFG Miner is it’s completely written in C language, and thus it’s quite efficient at mining bitcoins, at a relatively good speed. The special thing of the C language is, it’s the base of most of the high level programming languages out there, so any application written in C language is quite fast, and free from bloating caused by various functions/classes added by high level programming languages. Also unlike some other Miners, it supports obsolete CPU systems as well to make it compatible with older systems. Other than the CPU system, it supports as stated earlier, ASIC, FPGA and GPU system as well. ASIC stands for Application Specific Integrated Circuit designed especially for a particular purpose, and FPGA stands for Field Programmable Gate Arrays which is another circuitry system consists of semiconductor devices based on a matrix of CLBs (configuration logic blocks) connected through a serious of interconnects which are programmable to fit with a wide variety of functions. Since BFG Miner supports such devices as well, BFG miner is quite compatible with a range of legacy systems. Nowadays professional miners use ASIC systems as its quite efficient at mining Bitcoins much faster, so being supported to legacy system is not much use for professional miners, but for those who are new to bitcoin mining legacy support in BFG Miner may come handy.
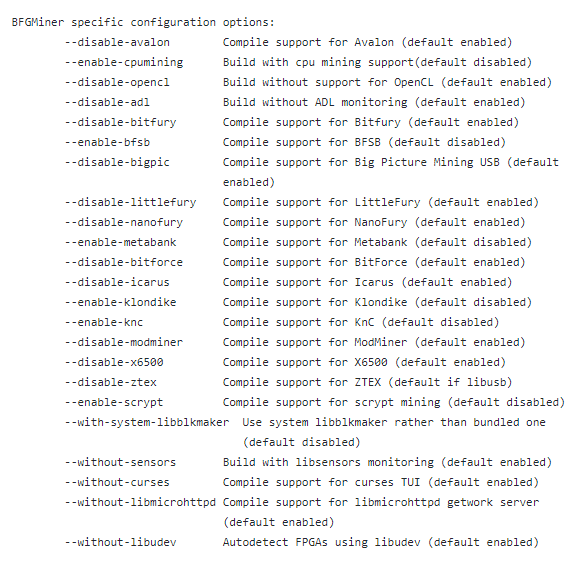
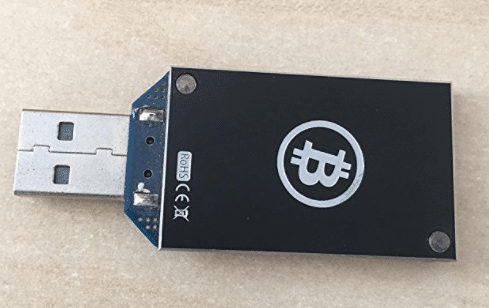
The following image shows an ASIC USB miner which is purchasable through amazon, and there are also FPGA devices as well. It’s highly recommended to have an ASIC device as this in order to start mining bitcoins at a decent speed. In fact, BFG Miner is configured to use ASIC devices by default, so if CPU mining is intended to be used, it has to be compiled with –enable-cpumining parameter. And other supporting parameters are following.
How to Install BFG Miner?
Installing BFG Miner is quite straightforward, as it’s just a matter of typing a single command. However, it’s important to update the package information prior to install it. The following command lines demonstrate how to install BFG Miner.
sudo su
apt-get update
apt-get upgrade
apt-get install bfgminer
The first command grants the user with the administrator right, the second command updates the package information, third command upgrades all the packages in the system to the latest version, finally the bfgminer package can be installed with the default install parameter in apt-get command. Once it’s installed move to the next section to find out how to configure bfgminer for mining bitcoins.
How to Configure BFG Miner?
As with any other bitcoin mining miners, in BFG Miner, it’s important to prepare the preliminary steps before continuing with BFG Miner. First of all, a wallet address to receive the mined coins should be there, secondly a pool is necessary to speed up the mining process, thirdly the credentials should be available to access the pool. However, accessing to a pool isn’t necessary on solo mode, as it doesn’t require connect to an external bitcoin client, but this might be complicated, and time consuming, and thus pool mining is strongly recommended.
- Visit the following URL and register there to be a member of the SlushPool. There are a lot of the pools available, and some pools even charge a fee, so it’s recommended to check the read me files of the pool administrator before start mining on that particular pool.
https://slushpool.com
- Visit the following URL, and register in the coinbase to make a wallet to store bitcoins. There are a lot of the bitcoin wallets out there, but coinbase is strongly recommended for its trustworthiness, and popularity.
https://www.coinbase.com
- Copy the wallet address to clipboard by clicking on the nearby icon.
- Use the following format to initiate the mining process on terminal window.
bfgminer -o http://pool:port -u username -p password
bfgminer -o stratum+tcp://stratum.slushpool.com:3333 -u YOUR_USER_NAME_OF_POOL -p YOUR_PASSWORD_OF_POOL
- Visit the following web url to submit the wallet address. The wallet address is the series of numbers copied from the previous step. After submitting it, make sure to verify it by clicking on the url received to the email used when signing up on slushpool.
https://slushpool.com/settings/bitcoin/payouts/
How to Configure BFG Miner (Advanced)?
Advanced section is for demonstrating how to use multiple pools, and how to use the pool over a proxy server. Multiple pools are useful to speed up the mining process even more, but it further divides the block reward among the miners based on the contribution to the pool. The following format is used to mine with multiple pools.
Using Multiple Pools
bfgminer -o Pool1URL:PORT -u POOL1_USER_NAME -p
POOL1_PASSWORD -o Pool2URL:PORT -u POOL2USERNAME -p
POOL2PASSWORD
The proxy server has to be specified if the pool is over a proxy server. As with the pool URL, the proxy server has its own URL, and the port number along with the classical password and username credentials. As the proxy types it currently supports http, socks4, socks5, ocks4a, socks5h, and when using the respective proxy type replace the scheme (http or https) with one of these given ones.
bfgminer -o POOL_URL:PORT -x PROXY_URL:PORT -u USERNAME -p PASSWORD


