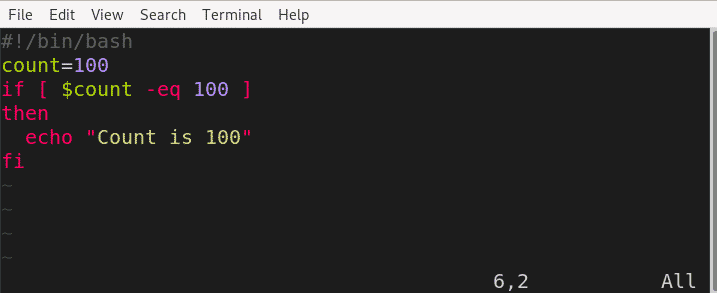
Color schemes are basically a combination of colors that describe how source code can be highlighted. It comes handy as the colors can help you identify various data types, functions, parameters, etc. This way you can find what you are looking for. Sometimes, the syntax highlight can help you find syntax errors. Also, note that the color schemes only applied to the source instead of the editor’s background.
In this article, we will list some of the best vim color schemes and also how to download and install a new color scheme in your Vim editor. In addition, we will also learn how to use the pre-installed color scheme in Vim editor.
Check out following few color schemes to improve your Vim experience:
- Solarized Dark
- Gruvbox
- Ayu
- Palenight
- Inkpot
- Monokai
- Vim-one
- Purify
Turn on syntax highlighting
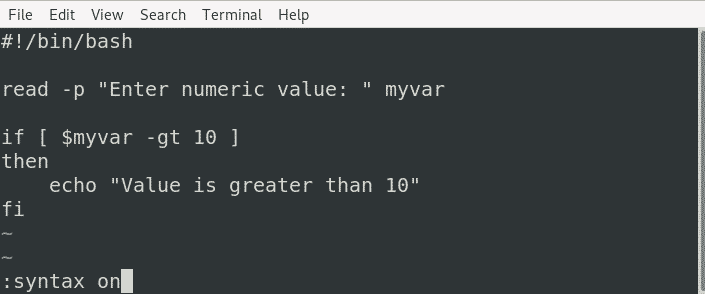
To turn on the syntax highlighting in vim, shift to Normal mode by pressing the Esc key. Then type
It will turn on the syntax highlighting and will show the default theme.
To permanently turn on the syntax highlighting, edit the ~/.vimrc file by using the following command in Terminal:
Then add the following line in it:
View preinstalled color schemes
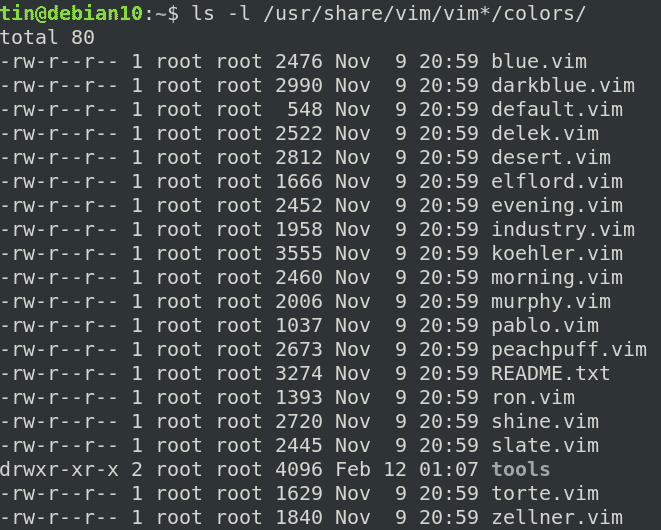
Some color schemes are already installed on your system. You can find those color schemes in the /usr/share/vim/vim*/colors directory as .vim extension.
To view pre9nstalled schemes from the terminal, run the following command in Terminal:
Set a Color Scheme
To set a new color scheme in vim, open vim editor and press Esc to shift to Normal mode. Then type the color scheme followed by the name of the color scheme as follows:
Or just
Also, you can permanently change the vim color scheme be editing the ~/.vimrc file and adding the following line:
Installing a new color scheme
To install a new color scheme for Vim, you will need to download it from the git hub repository. Here I am going to download a vim theme “Monokai” from the Git repository.
For Monokai color scheme, open the following link, then right-click and save it as .vim in your Downloads directory.
https://raw.githubusercontent.com/crusoexia/vim-monokai/master/colors/monokai.vim
Alternatively, you can use wget followed by the wget to download the .vim file. Once downloaded, move the downloaded .vim file to the ~/.vim/colors directory. In some distributions like in mine, this directory might be in /etc/vim/colors. Therefore, to move the .vim file, run the following command:
or
This color scheme is now ready to be used. To test it, open a vim file and type the following line in normal mode:
You can see the new vim color scheme has been installed successfully.
To permanently set the newly installed color scheme, edit the ~/.vimrc file and add the following lines:
:colorscheme monokai
Once done, shift to Normal mode using the Esc key and type the following command to save and exit the file.
Conclusion
This is how you can install and set the new color scheme in your Vim editor. The next time when you open any text file in vim, the syntax highlighting will be by default enabled and the new color scheme is applied. To shift back to the default color scheme, simply replace the new color scheme name with the “default”.


