
1. What is Linux?
Linux is a well-known operating system. In 1991, Linux was created by a university student named Linux Torvalds. All software’s architecture is covered with Linux, as it helps to communicate between the computer program and the system hardware and also manages the requests between them. Linux is open-source software. It is distinguishable from other operating systems in many ways. People having professional skills related to programming can also edit their code, as it is freely available for everyone. Torvalds intended to name his creation as ‘freaks,’ but the administrator used to distribute the code by its creator’s first name and Unix, so that name stuck.
2. Linux Distribution
Linux distribution is a kind of operating system that comprises a whole package management system with a Linux kernel. Linux distribution is easily accessed by downloading any Linux distribution.
A particular example of Linux distribution includes a Kernel, different libraries, GNU tools, a complete desktop environment, and some additional software documentation. McDonald’s example is best to understand the concept of Linux distribution. McDonald’s has multiple franchises in the world, but the services and the quality is the same. Similarly, you can download the operating system of Linux from other distributions from Red Hat, Debian, Ubuntu, or from Slackware where more or all the commands in the terminal would be the same. The McDonald’s example fits here. You can say that each franchise of McDonald’s is like a distribution. So, the examples of Linux distributions are Red Hat, Slackware, Debian, and Ubuntu, etc.
3. Installation Guide
This topic will give you a complete way through which you can install Ubuntu on your system. Follow the steps given below for a smooth installation of Ubuntu:
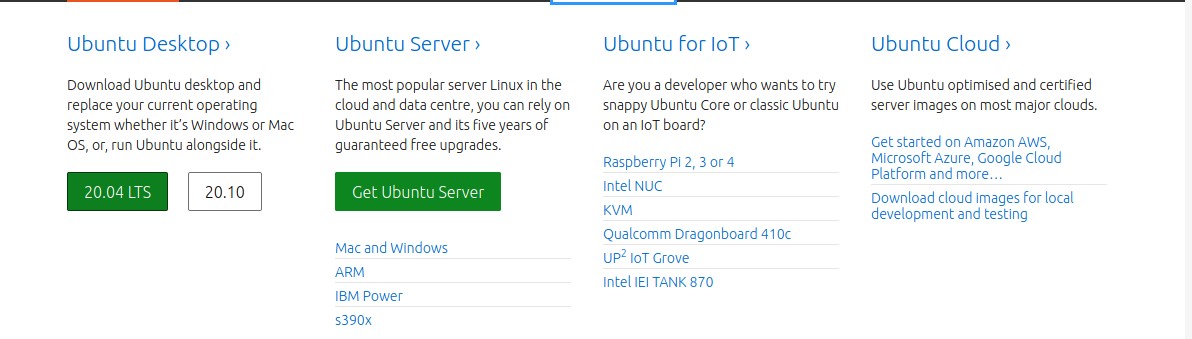
Step 1: Open up your favorite browser and then go the https://ubuntu.com/ and click the Download Section.
Step 2: From the Download Section, you have to download the Ubuntu Desktop LTS.
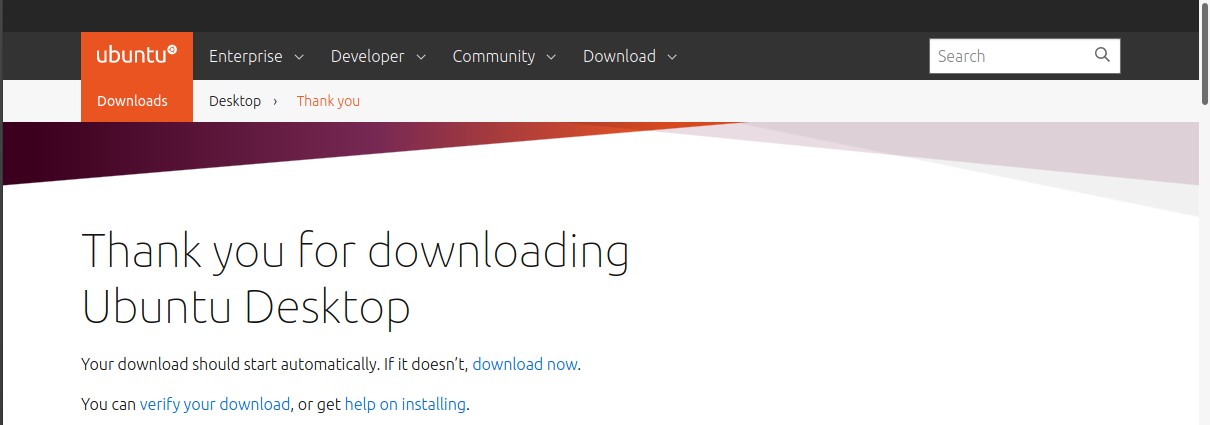
Step 3: Click to download the Ubuntu Desktop file; after clicking this, it will give you a Thank you Message that states Thank you for downloading Ubuntu Desktop.
Step 4: As you are in Windows, you have to make your USB bootable because directly transferring this downloaded operating system into your USN will not make it bootable.
Step 5: Follow the steps for installing Ubuntu Desktop from USB in this tutorial.
Step 6: Restart your system and go to your system’s boot menu by pressing F11 or F12 and set up your operating system from there.
Step 7: Save the settings and then restart your system again to welcome Ubuntu on your system.
4. Command-Line and Terminal
The first question that may come across your mind is, why learn the command line? The thing is that you can’t do everything with GUI; the things that you can’t handle with GUI are smoothly executed using the command line. Secondly, you can do it faster using the command line as compared to GUI.
Next, you are going to discuss two things: Shell and Terminal. The system communicates with the operating system using the shell. Whatever command you will write, the shell will execute it, communicate with the operating system, and will give a command to the operating system to do something that you asked it to do. Then it will provide you the results. The terminal is the window that is going to take that command and will display the results on itself. It is a tool that helps you to interact with the shell, and the shell helps you to interact with the operating system.
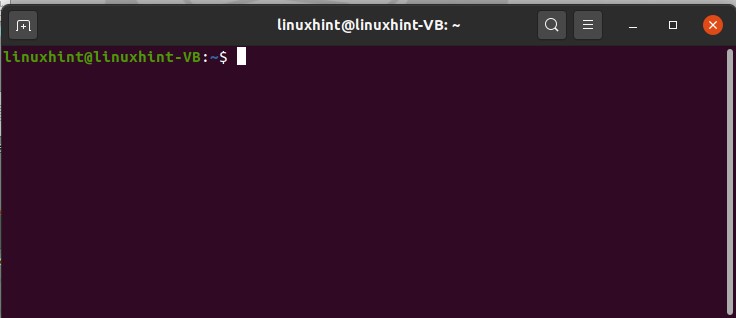
All commands are the same for different Linux based systems. If you want to open up the terminal, you can go search ‘terminal’ manually using the search bar.

There is an alternative way to open the terminal by pressing ‘CTRL+ALT+T’.
5. The Linux File System
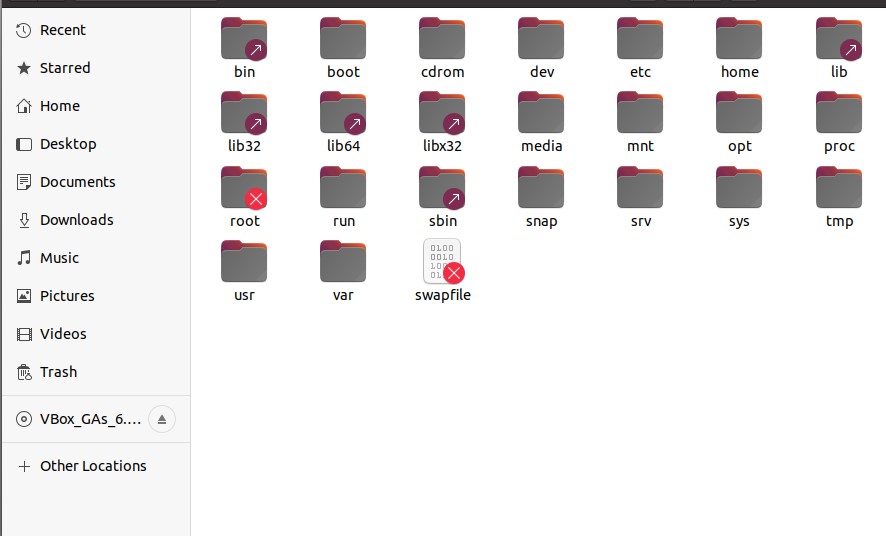
Linux has a hierarchy based file structure. It exists in a tree-like fashion, and all the files and other directories are involved in this structure. In windows, you have ‘Folders.’ Whereas Linux has ‘root’ as its basic directory, and under this directory, all files and folders reside. You can see your root folder in your system by opening the file system, as shown below. It has all the files and folders under it. The root folder is the main folder; then you have subfolders in it like bin, boot, dev, etc. If you click on any of these folders, it will show you different directories reside in it, proving that Linux has a hierarchical structure.
6. Few Example Commands
In this topic, you are going to discuss some example commands of Linux that may help to understand it.
Press CTRL+ALT+T to open terminal.

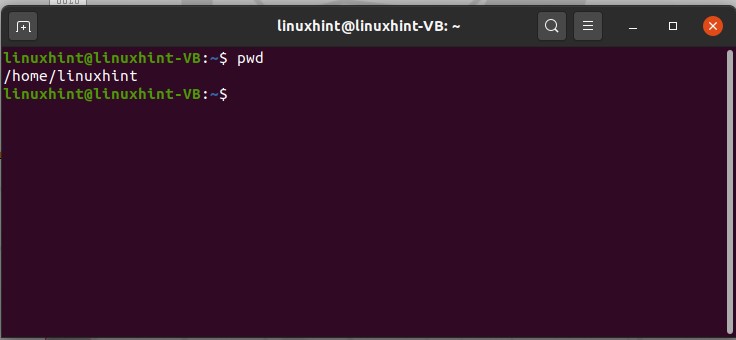
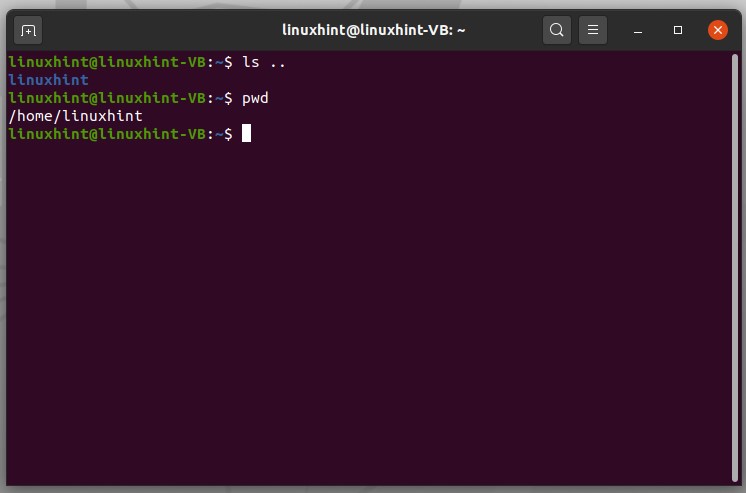
The first command is about the Linux file directory system. Linux has a tree-like system, and for example, if you want to jump into the folder which is deep down somewhere, then you have to go through each folder which is linked to its parent. The first command is ‘pwd command’. pwd stands for the present work directory. Type ‘pwd’ in your terminal, and it will let you know the current/present directory in which you are working. Results will lead you towards the root or home directory.
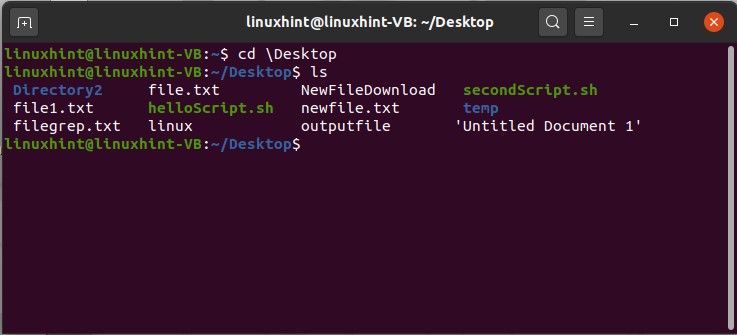
The next command to discuss is ‘cd command’. cd stands for ‘change directory’. This command is used to change the present work directory. Let’s assume you want to move from the current directory to Desktop. For that, type the command given below in your terminal.

For going back to the directory from which you came, write ‘cd ..’ and press enter.
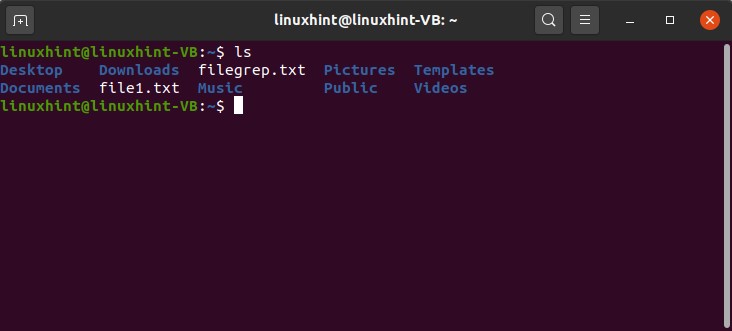
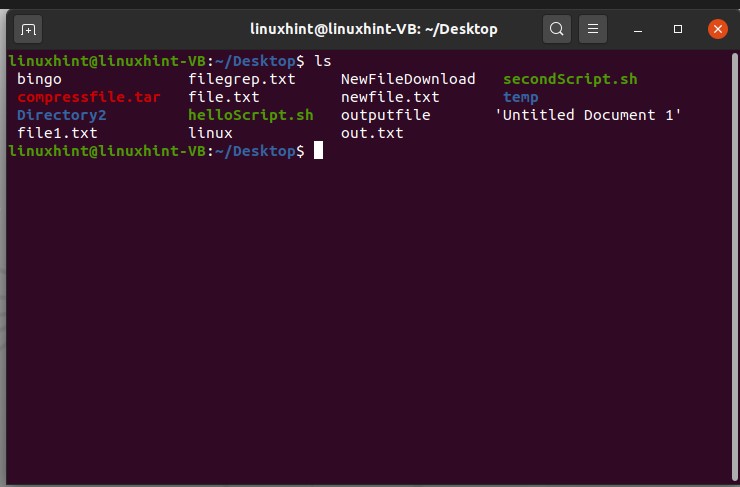
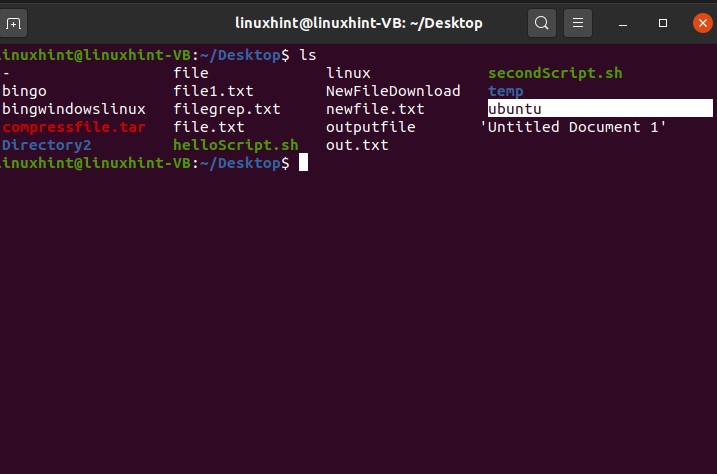
The next command you are going to study is ‘ls command’. As you are currently in your root directory, type ‘ls’ in your terminal to get a list of all the folders that reside inside the root directory.
7. Hard links and Soft links
First of all, let’s discuss what the links are? Links are a simple yet useful way of creating a shortcut to any original directory. Links can be used in many ways for different purposes, such as to link libraries, for creating an appropriate path to a directory, and to ensure that files are present in constant locations or not. These links are used for keeping multiple copies of a single file in different locations. So these are the four possible usages. In these cases, links are shortcuts in a way, but not exactly.
We have much more to learn about links rather than simply creating a shortcut to another location. This created shortcut works as a pointer towards the location of the original file. In the case of Windows, when you create a shortcut for any folder and open it. It automatically refers to the location where it was created. There exists two types of link: Soft links and Hard links. Hard links are used to link files, not the directories. Files other than the current working disk cannot be referred. It refers to the same inodes as the source. These links are useful even after the deletion of the original file. Soft Links, which are also known as symbolic links, are used to reference a file that can be on the same or different disk and to link directories. After the deletion of the original file, a soft link exists as a broken usable link.
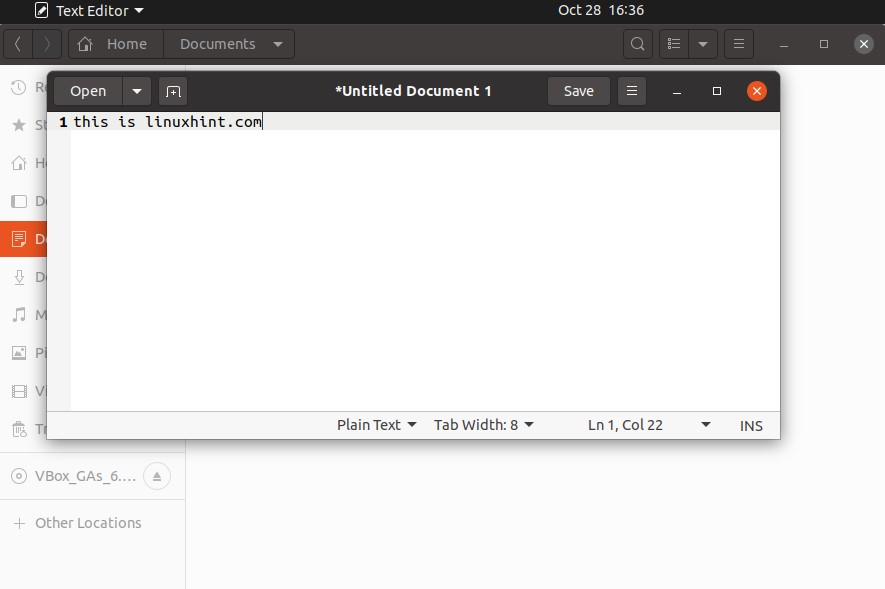
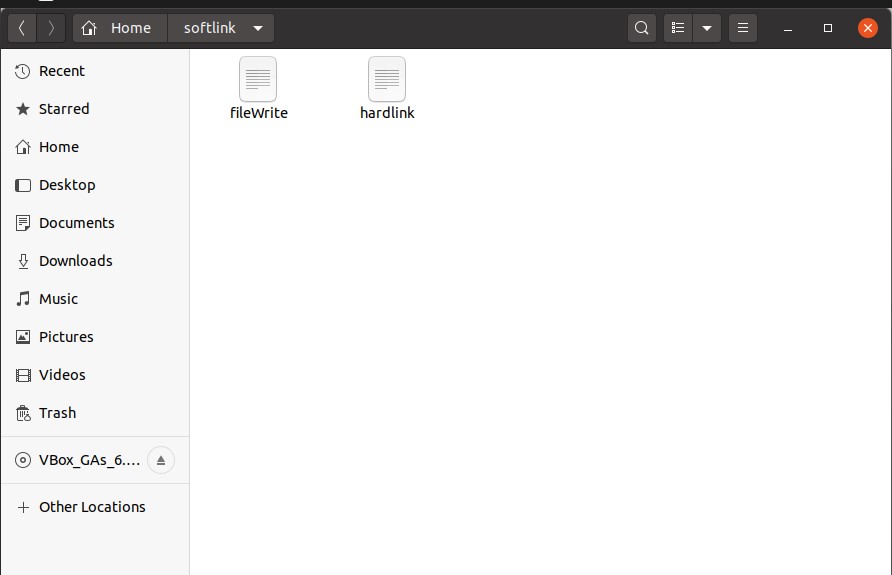
Now let’s create a hard link. For example, you create a text file inside the Document folder.

Write some content in this file and save it as ‘fileWrite’ and open the terminal from this location.
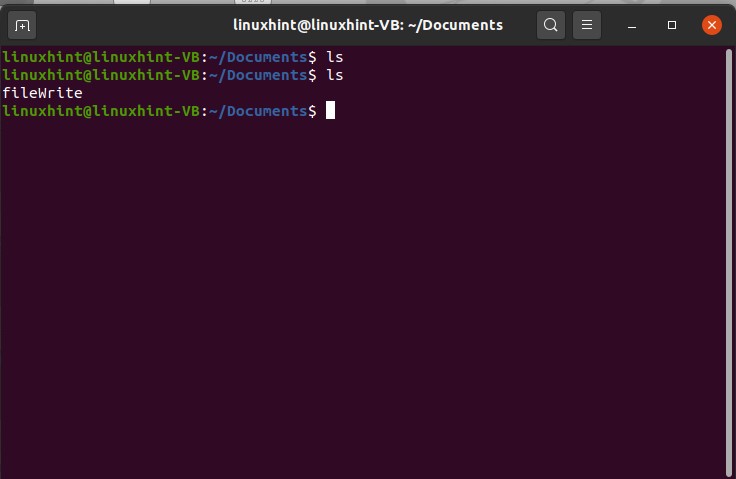
Type ‘ls’ command in the terminal to view the current files and folders in the working directory.


In this ‘ln’ command, you have to specify the file name for which you are going to create a hard link, and then write the name that will be given to the hard link file.
Then again, use the ‘la’ command to check the hard link existence. You can open up this file to check if it has the original file content or not.


So next, you are going to create a soft link for a directory, let’s say for Documents. Open up the terminal from the home directory and execute the following command using the terminal
Then again, use the ‘ls’ command to check if the soft link is created or not. For its confirmation, openup the file and check the content of the file.


8. List File ‘ls’
In this topic, you will learn to list files using the ‘ls’ command. Using the ‘pwd command’ first, check your present or current working directory. Now, if you want to know what is inside this directory, simply type ‘ls’ to view a list of files inside it.

Now, if you want to check what is inside the Documents folder, simply use the cd command to have access to this directory and then type ‘ls’ in the terminal.
$ ls
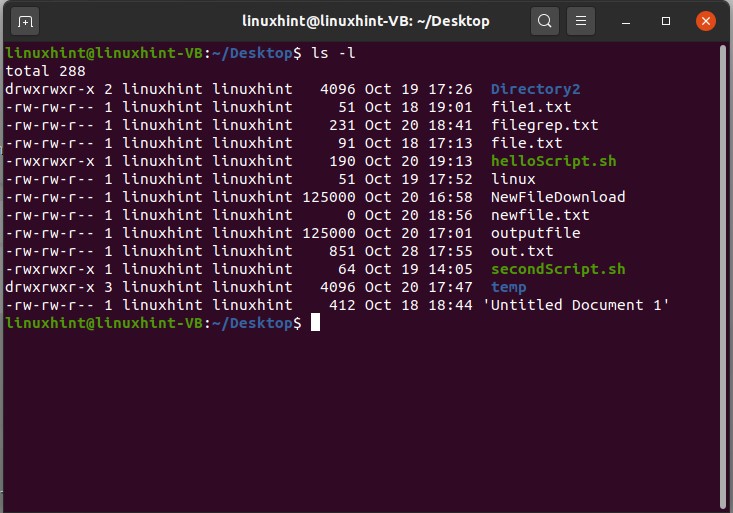
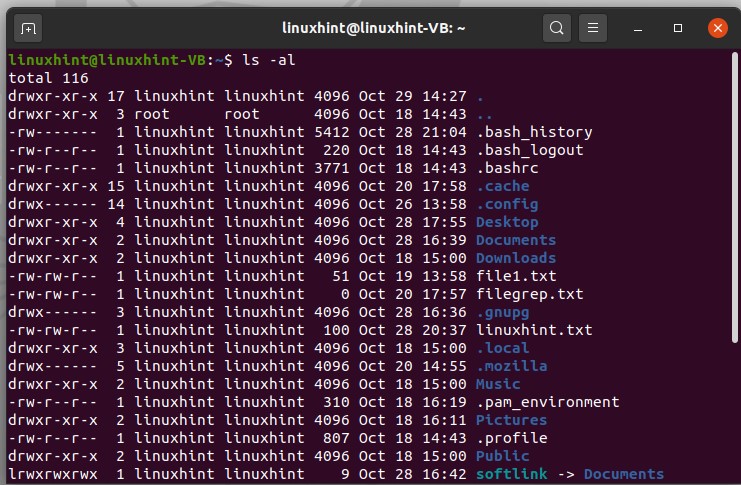
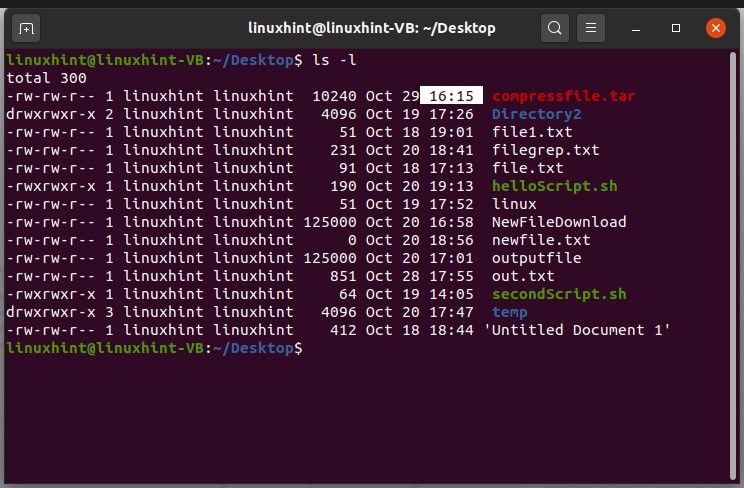
There are other methods to view the list of files, and this method will also give you some information about the files. For this, what you have to do is type ‘ls -l’ in the terminal, and it will show you a long format of the files containing the date and time of file creation, file permissions with the file name, and file size.

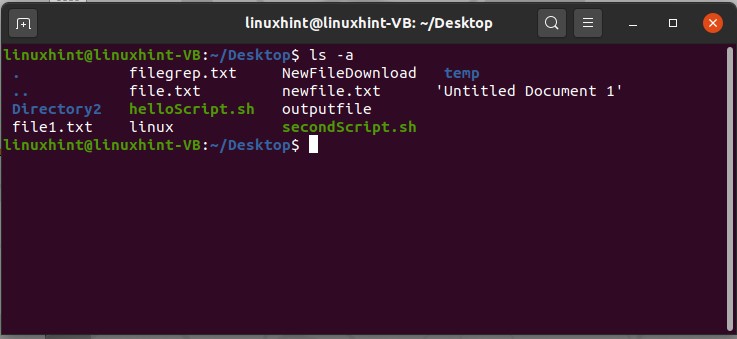
You also view hidden files in any directory. In this case, if you want to view the list of hidden files in the Documents directory, Write ‘ls -a’ in the terminal and hit enter. Hidden files have the starting of their filename with ‘.’, which is its indication as a hidden file.
You can also view the files in the long list, and hidden files combine format. For this purpose, You can use the ‘ls -al’ command, and it will give you the following results.

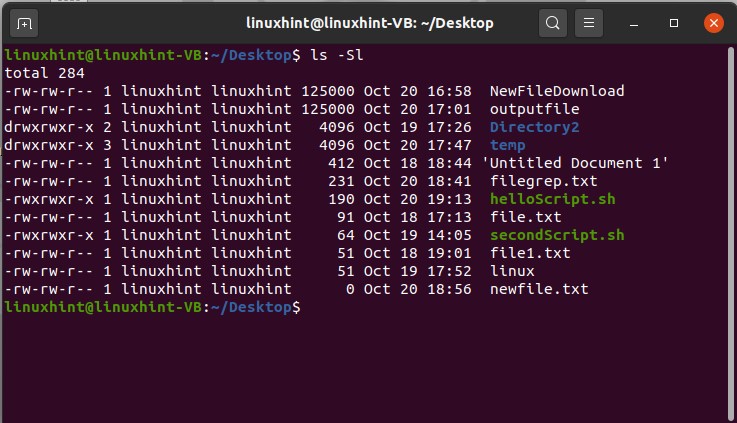
Use the ‘ls -Sl’ command is used to display a list of files which is sorted. This list is sorted based on the descending order of their size. As in output, you can see the first file has the largest file size among all of the other files. If two files have the same sizes, then this command will sort them based on their names.
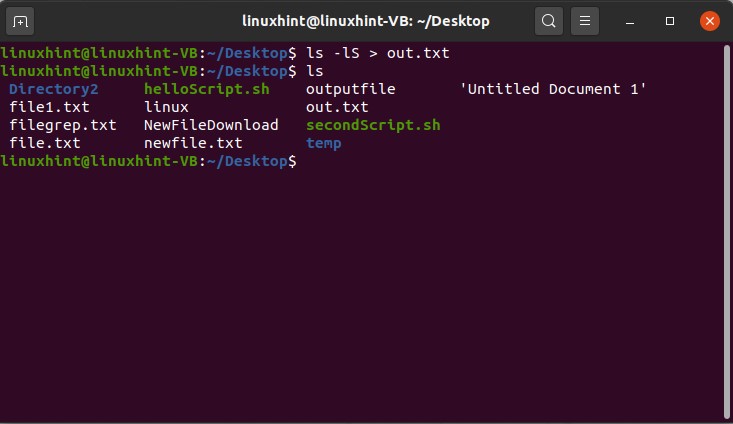
You can copy this information related to files that are currently displayed on the terminal by writing ‘ls -lS > out.txt’, out.txt is the new file that will contain the current content on the terminal. Execute this command, check the content of the out.txt file by opening it.

You can use the ‘man ls’ command to view the complete description of the commands related to ‘ls’ and can apply those commands to view their perspective results.


9. File Permissions
In this topic, you are going to discuss user privileges or file permission. Use the command ‘ls -l’ to see the long list of the files. Here the format ‘-rw-rw-r– ’ is divided into three categories. The first portion represents the owner’s privileges, the second one represents the group privileges, and the third one is for the public.
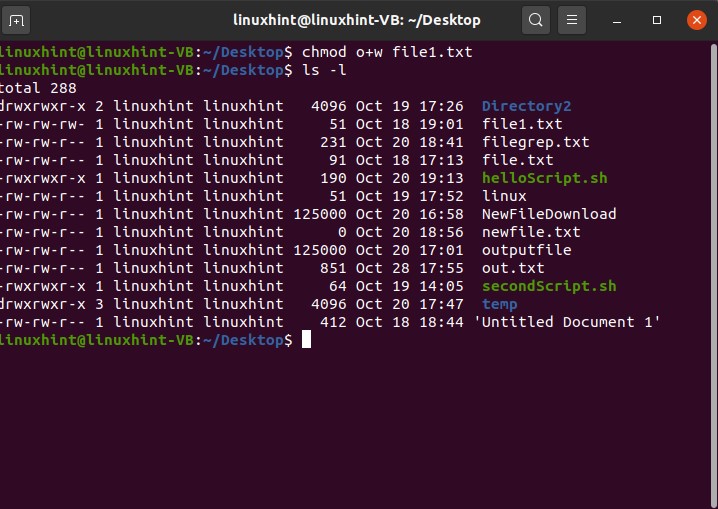
In this format, r stands for read, w stands for write,d for directory, and x for execution. In this format ‘-rw-rw-r– ’, the owner has the permissions to read and write; the group also has the read and write permissions, whereas the public only has the permission to read the file. The permission of these sections can be changed using the terminal. For that, you can remember this thing that here you will use ‘u’ for a user, ‘g’ for the group, and ‘o’ for the public. For example, you have the following file permissions ‘-rw-rw-r– ’ for the file1.txt, and you want to change the permissions for the public group. To add the writing privileges for the public group, use the following command
And press enter. After that, view the long list of the files for confirmation of the changes.
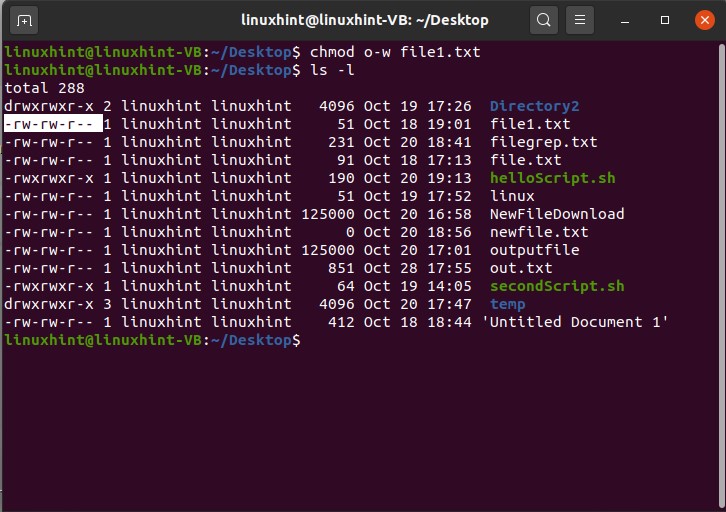
For taking back the writing privilege which is given to the public group of the file1.txt, write
And then ‘ls -l’ to view the changes.
For doing this for all the portions at once (if you are using this educational purpose), first of all, you should know these numbers, which are going to be used in the commands.
4 = ‘read’
2 = ‘ write’
1 = ‘execute’
0 = no permission’
In this command ‘chmod 754 file1.txt’, 7 deals with the owner’s permissions, 5 deals with the group permissions, 4 deals with the public or other users. 4 shows the public has the permission to read, 5 which is (4+1) means that the other groups have the permission to read and execute, and 7 means (4+2+1) that the owner has all the permissions.
10. Environment Variables
Before jumping right into this topic, you need to know what is a variable?.
It is considered as a memory location which is further used for storing a value. The stored value is used for different motives. It can be edited, displayed, and can be resaved after deletion.
Environment variables have dynamic values that affect the process of a program on a computer. They exist in every computer system, and their types may vary. You can create, save, edit, and delete these variables. The environment variable gives information about the behavior of the system. You can check the environment variables on your system. Open up the terminal by pressing CTRL+ALT+T and type ‘echo $PATH’

It will give the path of an environment variable, as shown below. Note that in this command ‘echo $PATH’, PATH is case sensitive.
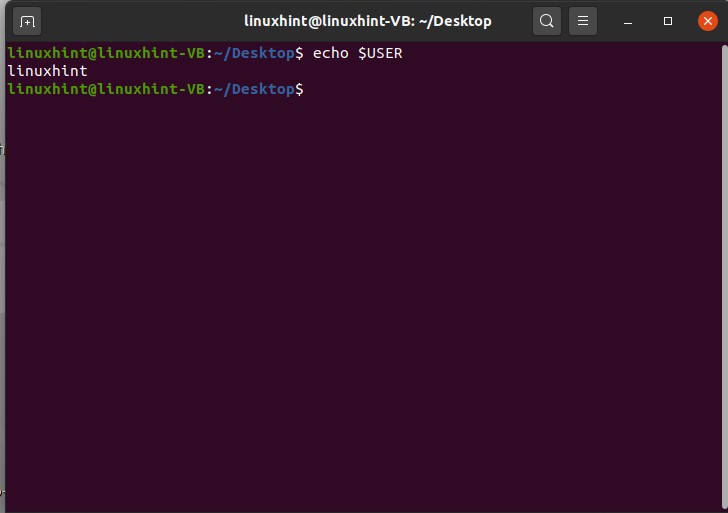
For checking the user environment variable name, type ‘echo $USER’ and hit enter.
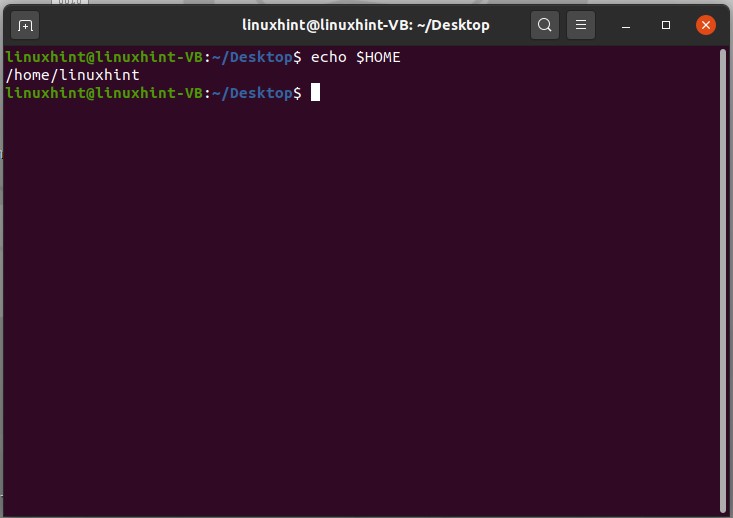
For checking the home directory variable, use the command given below
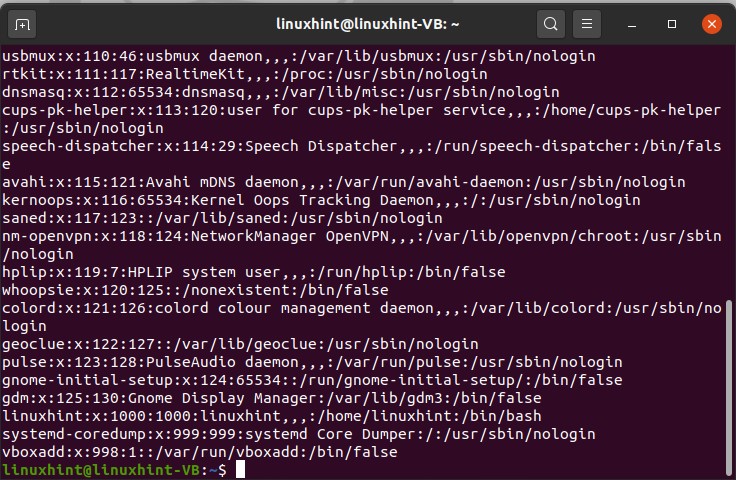
In these different ways, you can see the values stored in specific environment variables. To get a list of variables that exist in your system, type ‘env’ and press enter.
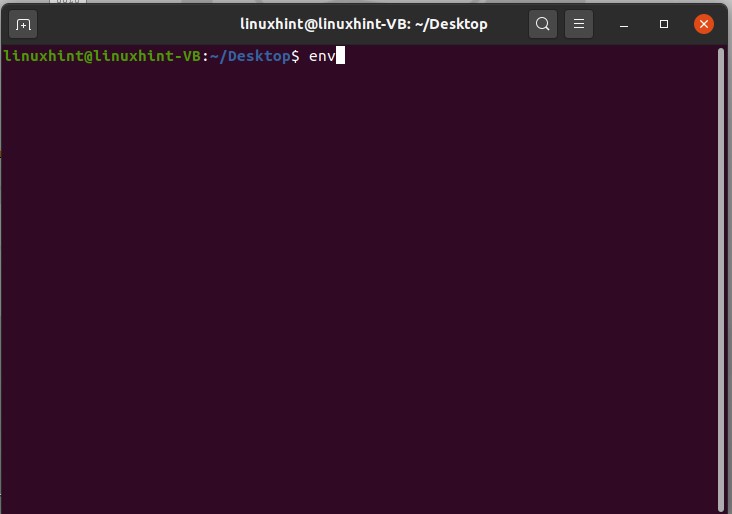
It will give you the following results.

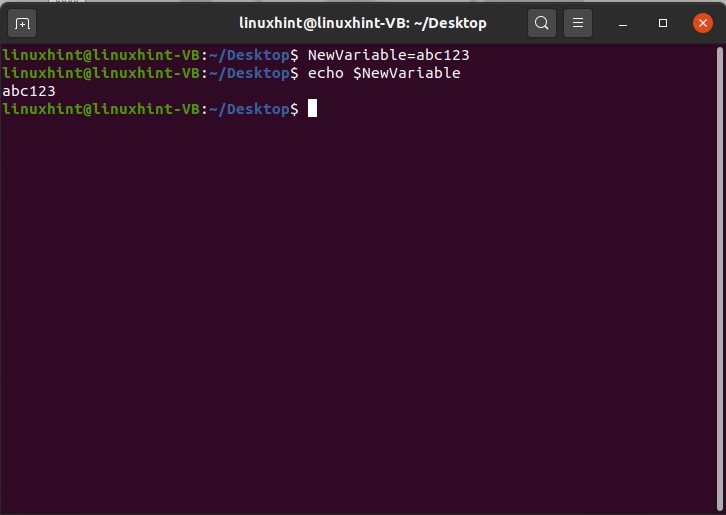
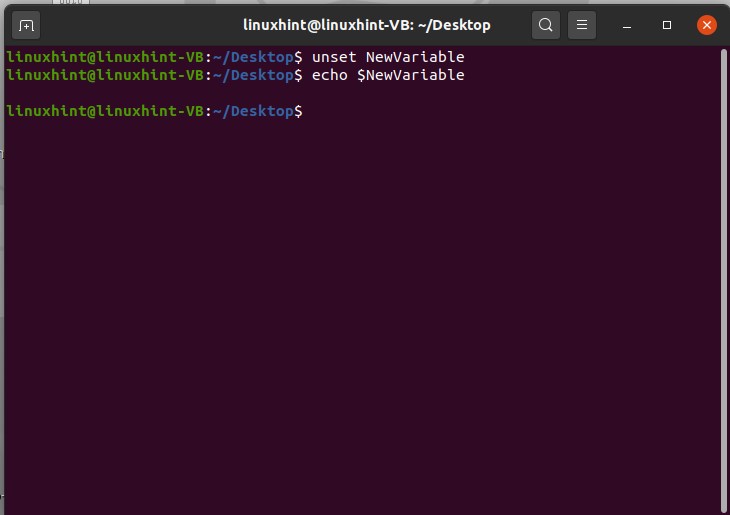
Below written commands are used for the purpose of creating and assigning value to a variable.
$ echo $NewVariable
If you want to remove the value of this new variable, use the unset command
And then echo it to see the results
11. Editing Files
Open up the terminal by pressing CTRL+ALT+T, and then list the files by using the ‘ls’ command.
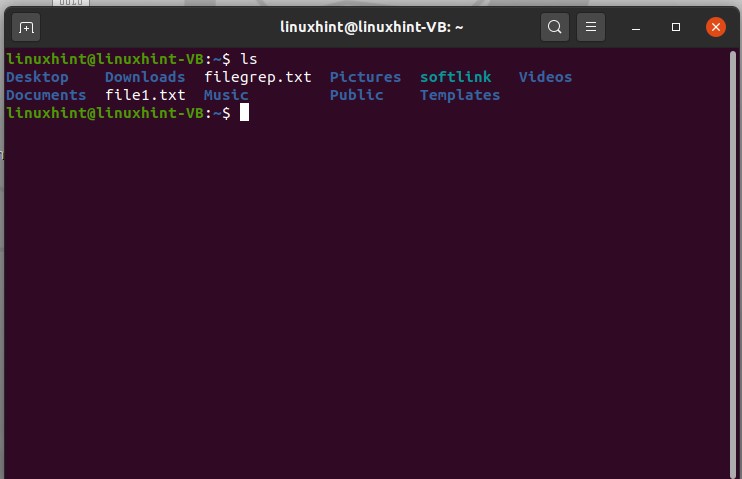
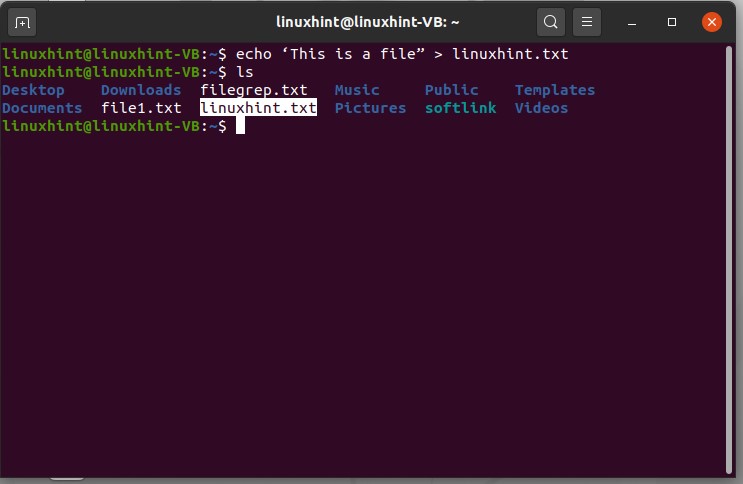
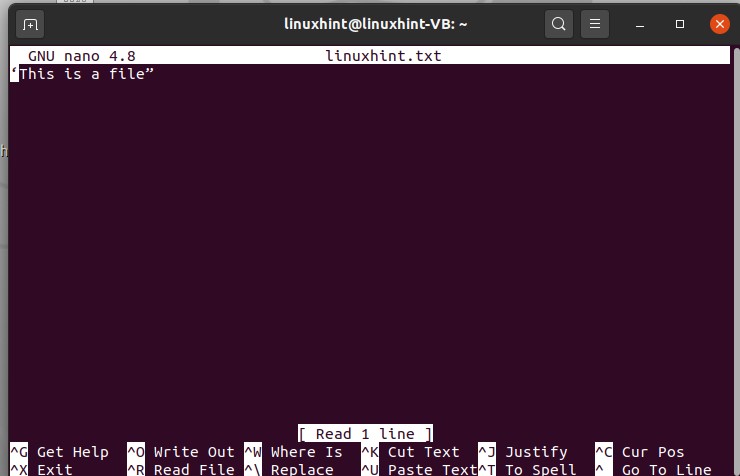
It will display the filenames present in the current working directory. For example, you want to create a file and then edit it by using the terminal, not manually. For that, type the content of the file and write out the file name you want to give.
$ echo ‘This is a file” > linuxhint.txt and then use ‘ls’ command to view the list of files.
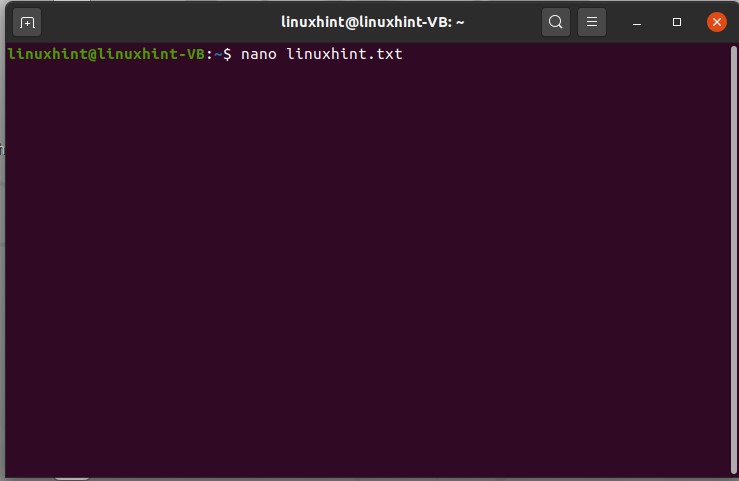
Use the following command to view the file content.

To edit the file using the terminal, type the following command
This is Linux hint
Visit our channel, which is also named as linuxhint
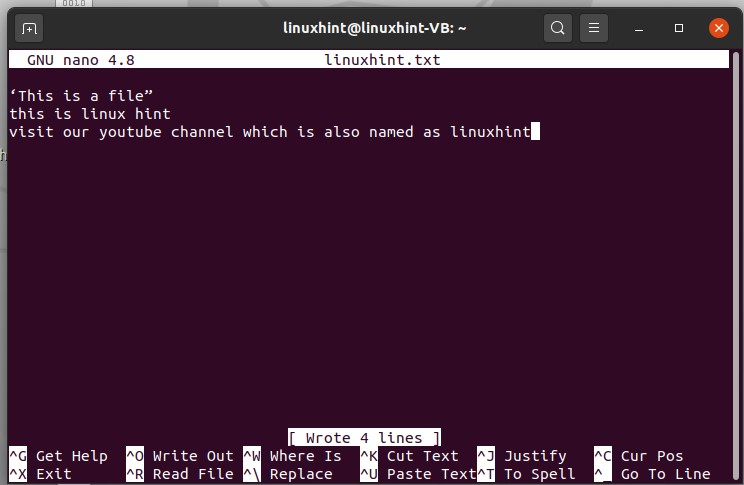
Write the content you want to add to this file and press CTRL+O to write it in the file, and then press enter.
Press CTRL+X to exit.
You can also view the content of the file to check the edited text in it.

12. Pseudo File system (dev proc sys)
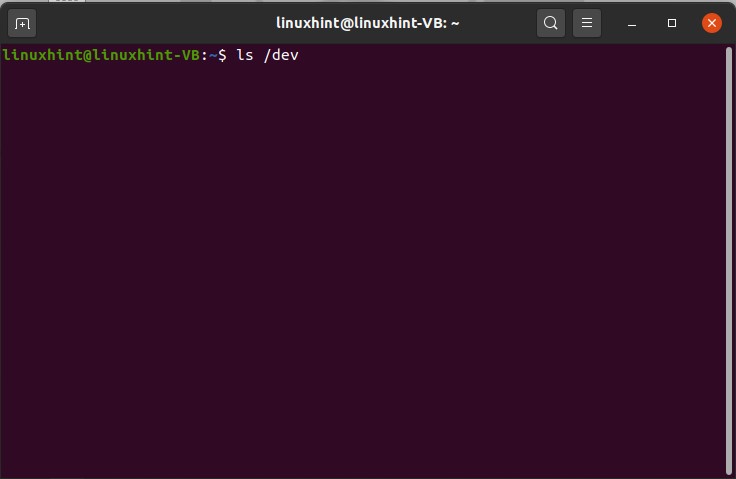
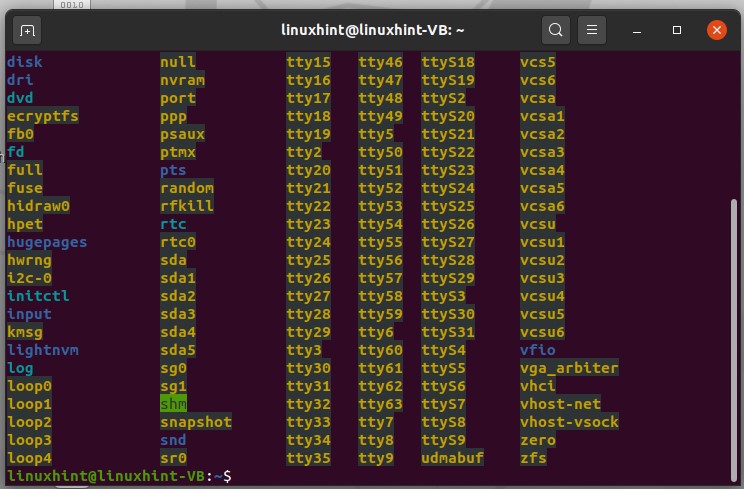
Open up the terminal and type ‘ls /dev’, and press enter. This command will you the list of devices that the system has. These are not physical devices, but the kernel has made some entries.
 3
3
If you want to access the device itself, you have to go through the device tree, which is the result of the above command.
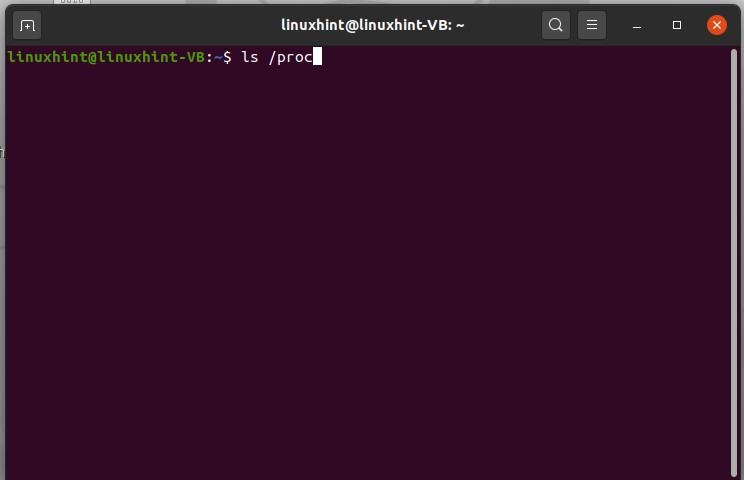
Type ‘ls /proc’ and press enter.
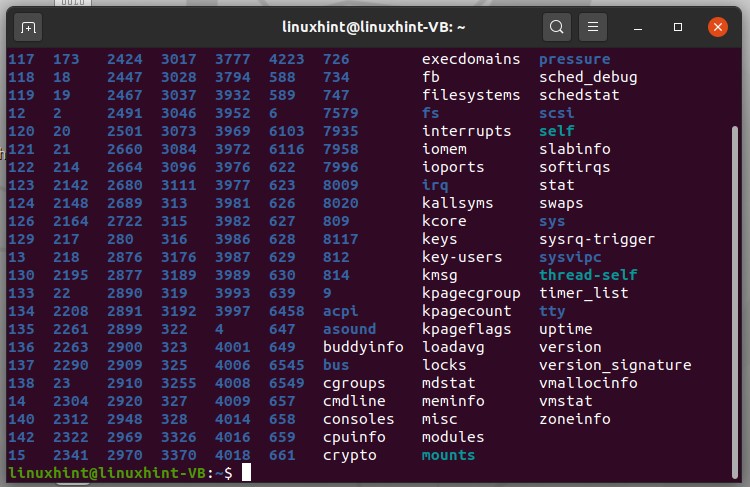
The numbers here represent the ids of the running processes. Number ‘1’ is the first process of the system, which is ‘init process’.Use the process ID to check its status in your system. For example, if you want to check the status of process 1, type ‘cd /proc/1’ and then type ‘ls’ and execute it.
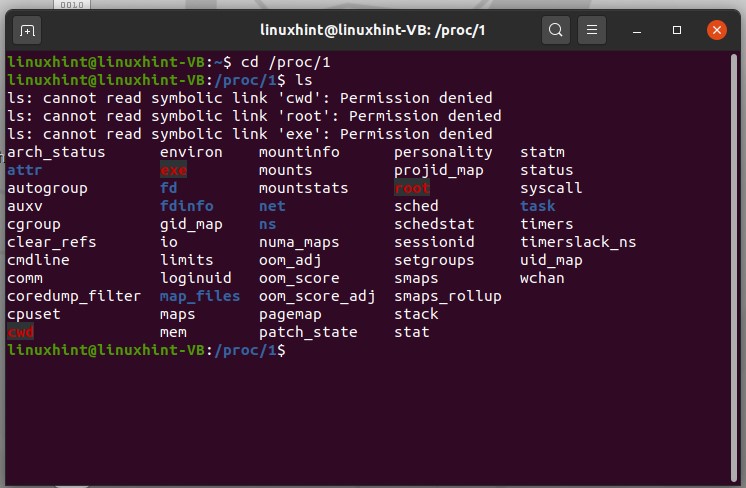
Come out of that path by using ‘ cd ..’

Next, we are going to discuss ‘sys’. write down the following command in your terminal
Now you can see all of the important directories. This is where you cant get a lot of settings that exist within the kernel or operating system. You can get into the kernel and list its files as well.
Now you can see a list of flags, processes.

You can view the content of any of these files by using the cat command with ‘sudo’ as it will require the admin permission.
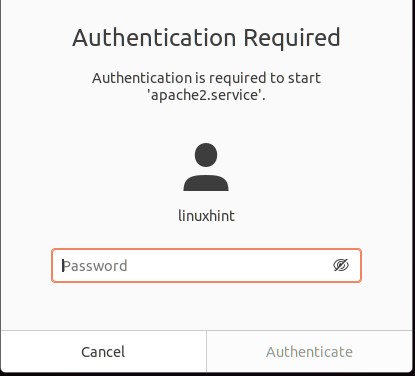
Enter your password.

Here 0 indicates that the flag is at default. Setting the flag can drastically change the system’s behavior.
13. Find Files
The purpose of this topic is to make you learn about searching and finding files through the terminal. First of all, open up the terminal and use the ‘ls’ command, and then to find a file from here, you can write


you can see the command result with all the files having ‘.’ and ‘file1’ in it.
To especially find the file write the command.

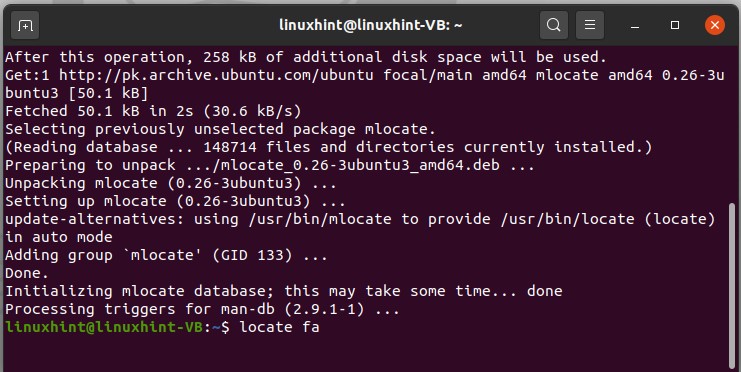
There is another method for doing this thing is by using the ‘locate’ command. This command is going to locate and find everything which matches your keyword.
If the terminal window shows an error for the command, then first install ‘mlocate’ in your system and then try this command again.

It will printout all of the information containing ‘fa’ in it.

14. Dot files
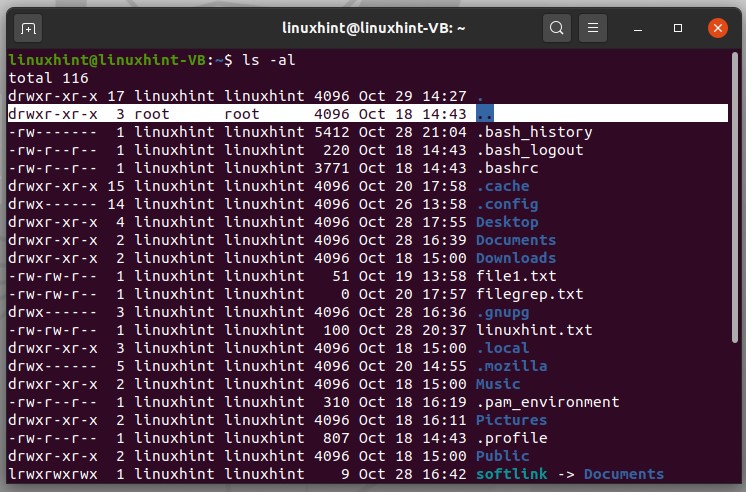
Dot files are those files that are hidden in the normal file system. First of all, to see a combined list of files, type the following command in the terminal.
Here, you can see that one dot represents the user name and two dots represent the root folder.
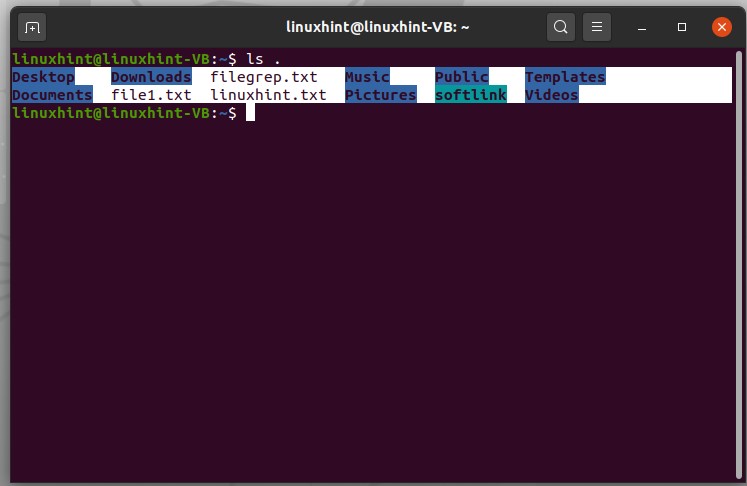
Using the command ‘ls .’ will result in a list of files or the content present in the current directory
‘ls ..’ will display the folder above, which is essentially the user name in this case.
To jump into the content of some forward file, use the command given below.
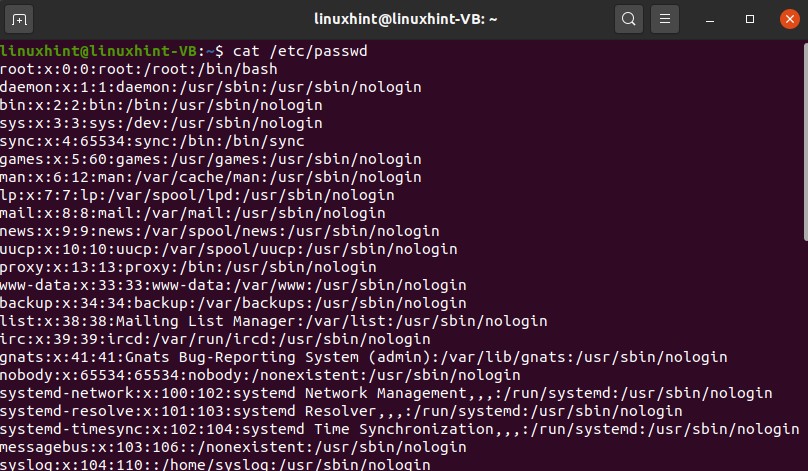
It will display all the content in this passwd file of etc., directly by using double dots.

15. Compression and Decompression
To compress a file from any location, step 1 is to open the terminal from that location of simple open the terminal and use the ‘cd’ command to make that directory the present working directory.
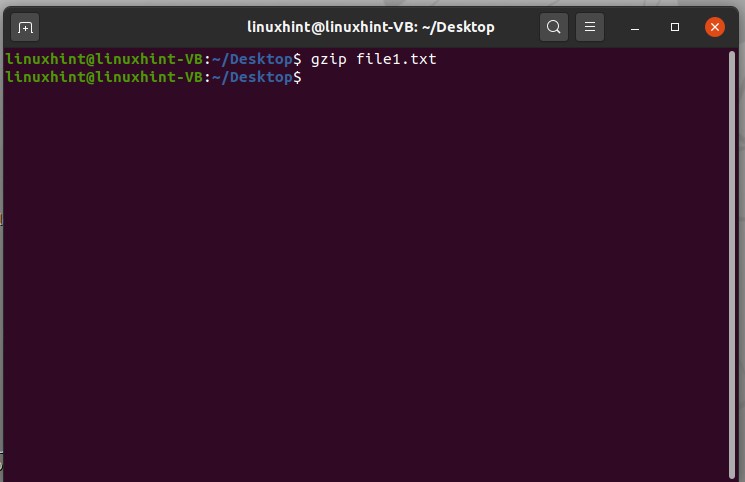
To compress any file, type ’gzip filename’. In this example, you compressed a file named ‘file1.txt’, which is present on the desktop.
Execute the command to see the results.
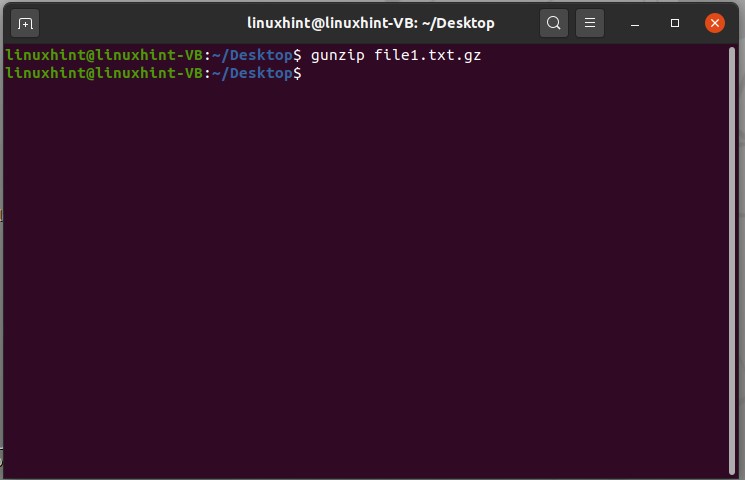
To uncompressed this file, simply write the ‘gunzip’ command with the file name and extension of ‘.gz’ as it is a compressed file.
And now execute the command.
You can also zip multiple files at once in a single folder.
Here, c is for create, v is for display, and f is for file options. These commands will operate in this way: first, it will create a compressed folder, which is named as ‘compressfile’ in this car. Secondly, it will add the ‘file1.txt’ and ‘newfile.txt’ in this folder.
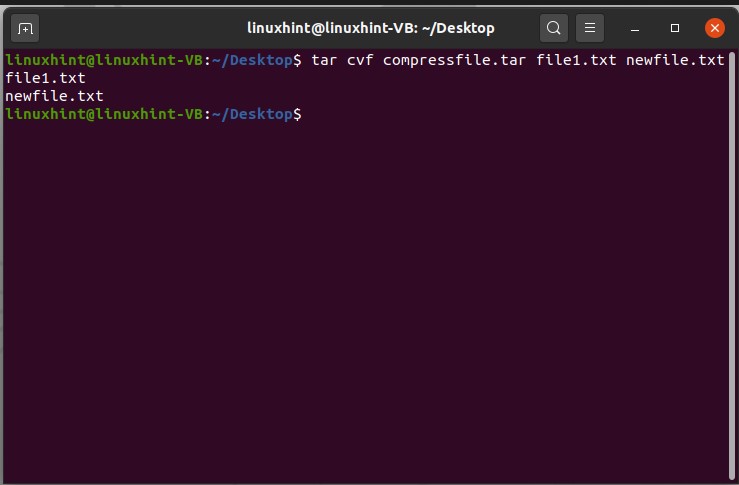

Execute the command and then check the compressfile.tar to see if the file exists there or not.
To decompress the file, type the following command in the terminal

16. Touch command in Linux
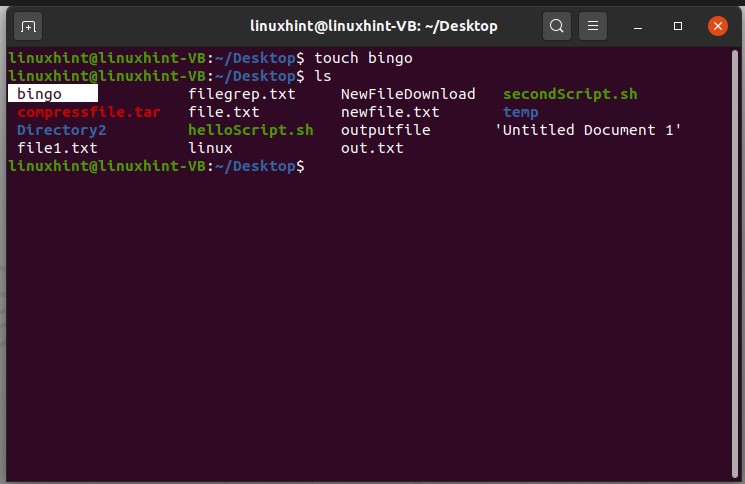
To create a new file using the terminal, a touch command is used. It is also used for changing the timestamp of a file. First, type the ‘ls -command; it will give you a list of files that are present in the current working directory. From here, you can easily see the timestamps of the files.
Let’s create a file first and name it ‘bingo’
And then view the list of the files to confirm its existence.
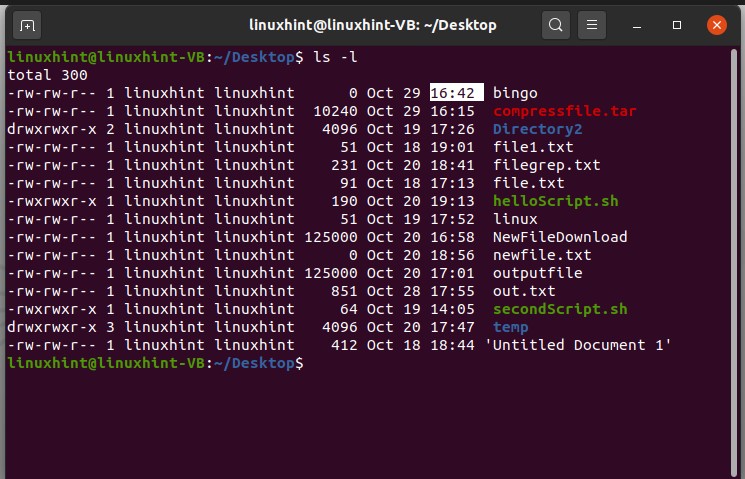
And now, view a long list of files to see the time stamp.
Let’s say you want to change the timestamp of a file named ‘file1.txt’. For that, write the touch command and define your file name with it.
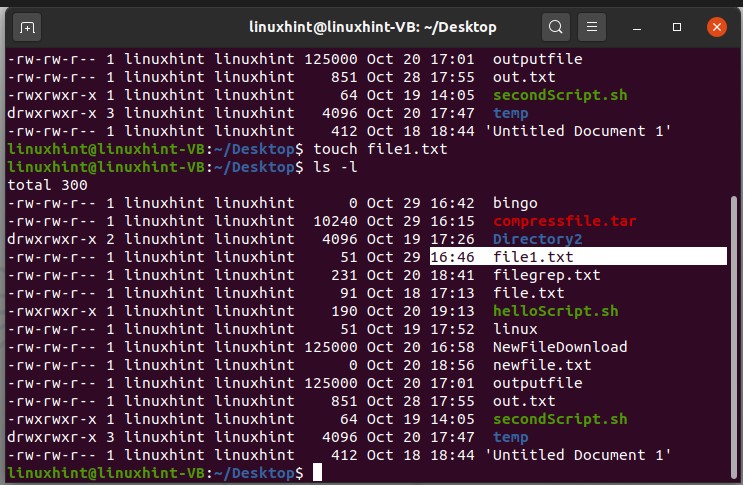
Now, if you have any existing file named ‘file1.txt’, then this command will only change the time stamp of this change and will contain the same content.
17. Create and remove Directories
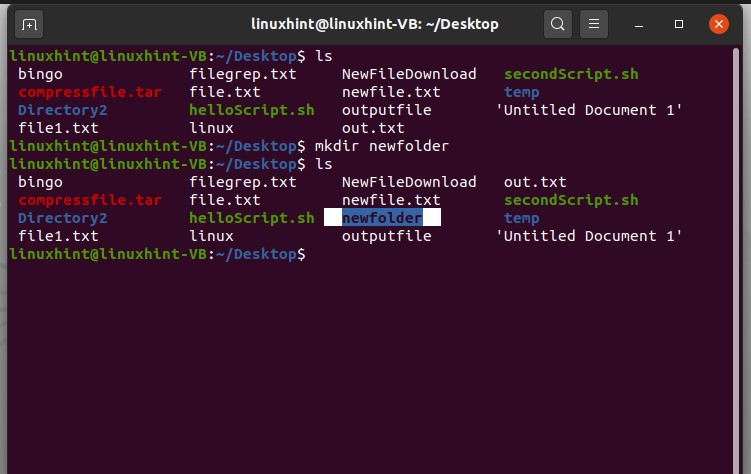
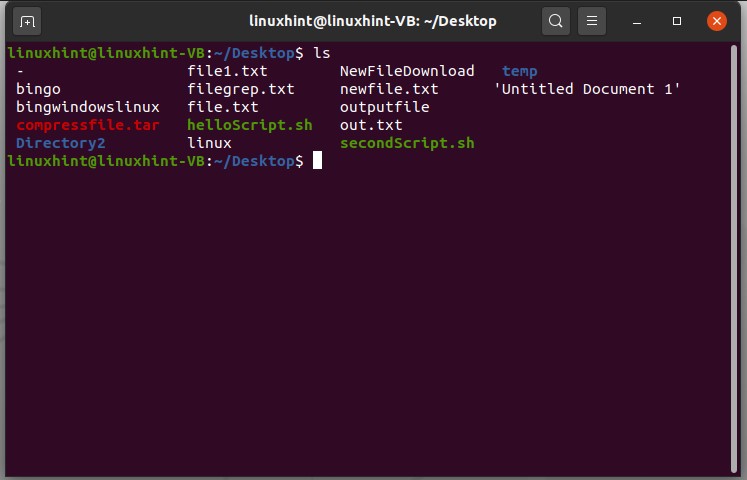
In this topic, you are going to learn how you can create and remove directories in Linux. You can also call those directories ‘folders’. Go to the desktop and open up the terminal. Type the following command for getting the file list.
Now create a folder here. For this, you can use the ‘mkdir’ command, which is the make directory command and type the folder name with it.
Execute the command and again list the files to check that the command worked or not.
You can also delete this folder too. For that, you have to write a command that tells the shell to communicate with the operating system to delete the folder but not the files inside.
And then verify its removal by using the ‘ls’ command.

18. Copy, Paste, Move and Rename files in Linux
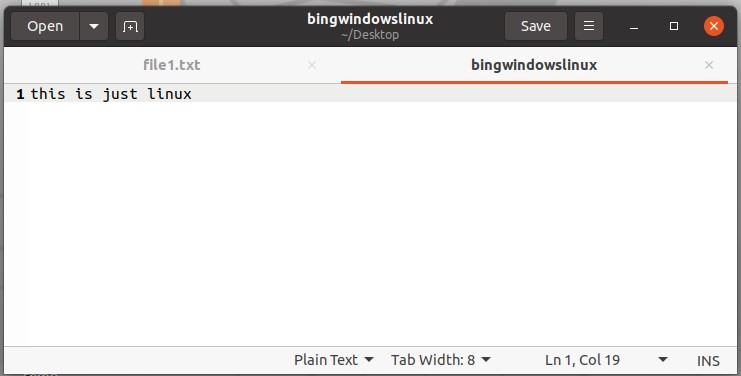
To execute all of the functions mentioned in this topic, firstly, you have to create a separate file. Open up the terminal from the desktop.
Write the command to create a file.
And write some content in it and save the file.

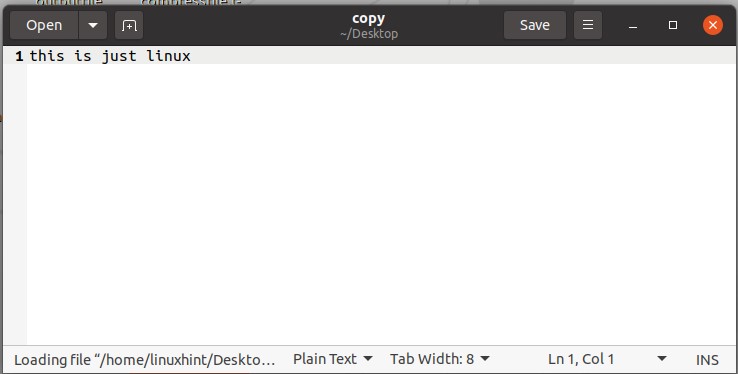
After that, open the terminal again. To copy the content of this ‘bingowindowslinux’ to another file, use the ‘cp’ command with the first file name from which the content is going to be copied to another file.
And then view the list of files.
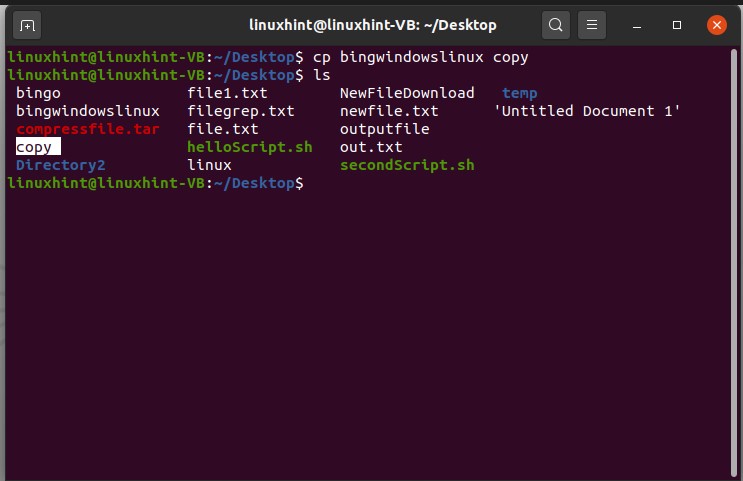
Now open up the file ‘copy’ to see if it’s copied the file content of ‘bingowindowslinux’ in itself.
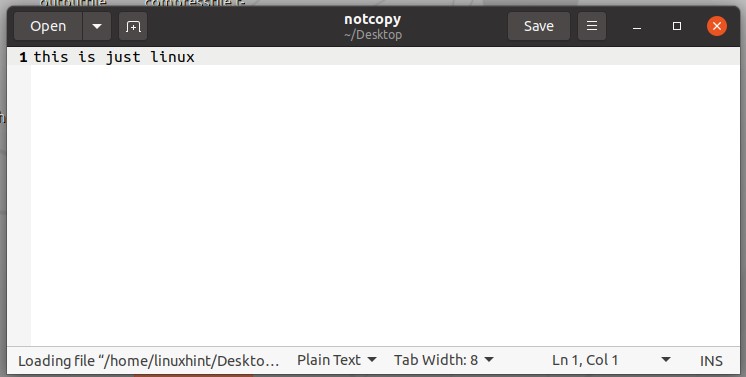
To rename this file, use the move command. ‘move’ command is used to move the file from directory to another, but if you operate this command in the same directory, it will rename the file.
Open this renamed file to view its content.

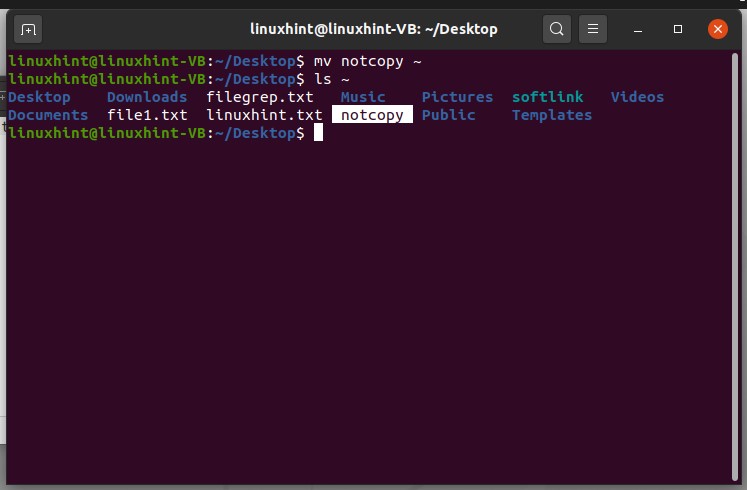
If you want to change the location of this file, you can use the ‘move’ command again by defining the location where you want to move the file.
To move the ‘notcopy’ file to the root’~’ directory, simply write
Then ‘ls ~’ to view the files of the root directory.
19. File name and Spaces in Linux
Firstly view the files on your desktop by $ ls command. If you want to create a file having a file name with space, there exists some modification in the simple touch command.
Executing the command ‘touch new file’ will create separate files, as shown below.
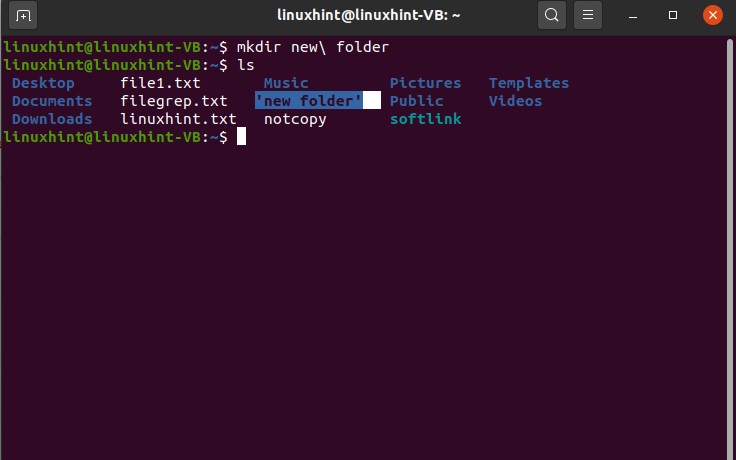
To create a file having spaces in the file name, consider this format:
Execute the command and list the files to see the results.


If you want to create a directory with its name in spaces, simply write
And run the command to see the results.
20. AutoCompletion in Linux
In this topic, you are going to discuss autoCompletion in Linux. Go to your desktop and open the terminal from there.
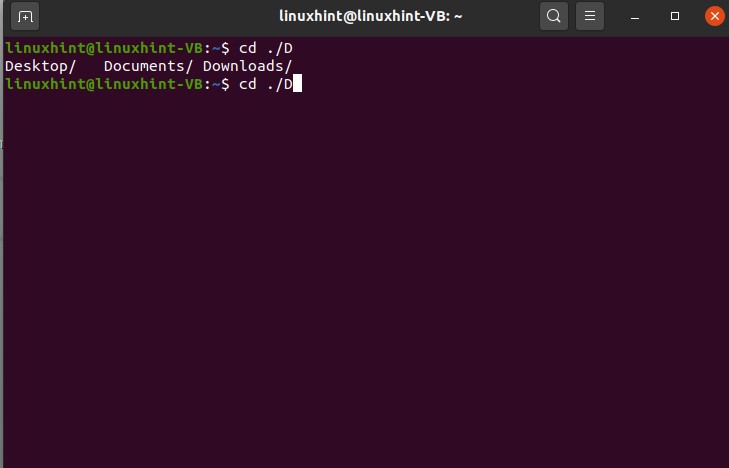
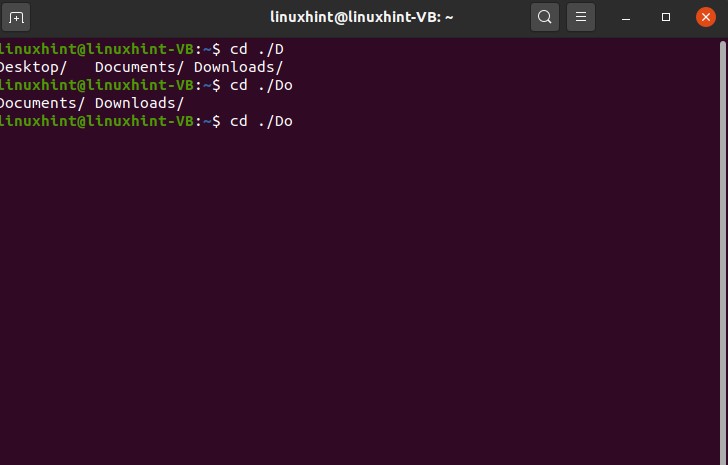
Write ‘ cd./D’ and press the tab
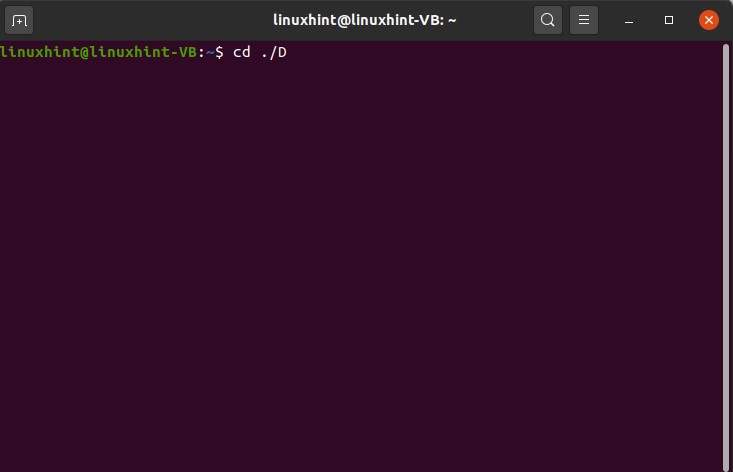
This commands results in giving you three autocompletion possibilities for the ‘D’.
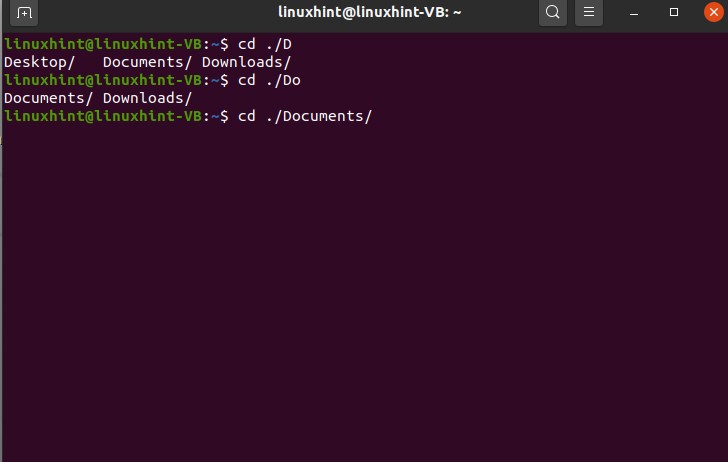
Then type ‘o’ and press tab NOT ENTER, and now you see the autocompletion possibility for the word ’Do’.
Then press ‘c’ and tab; it will automatically complete the word cause there exists only a single possibility for this option.
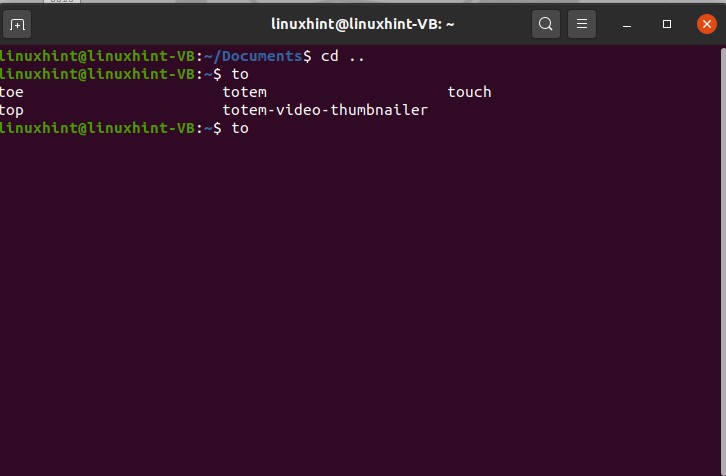
You can use this for the commands too. Autocompletion in commands will let you the options for commands for that specific word.
Type ‘to’ and then press tab. This action will give you the following results

21. Keyboard Shortcuts
In this topic, you will learn about different keyboard shortcuts in Linux.
CTRL+Shift+n is used for creating a new folder.
Shift+delete to delete a file
ALT+Home for going into the home directory
ALT+F4 Close the window
CTRL+ALT+T to open terminal.
ALT+F2 to enter a single command
CTRL+D to remove a line
CTRL+C for copy and CTRL+V for paste.
22. Command-Line history
You can use the ‘history’ command to view the command line history in Linux.


To use any of the commands again from this list, use the following format
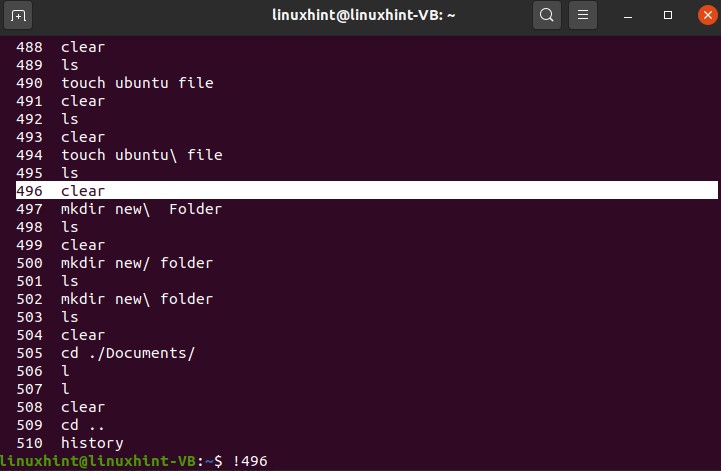
It will clear the window.
Let’s try another command
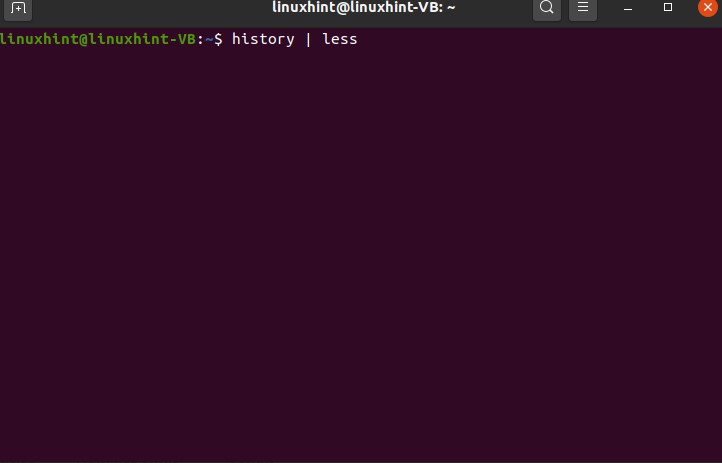

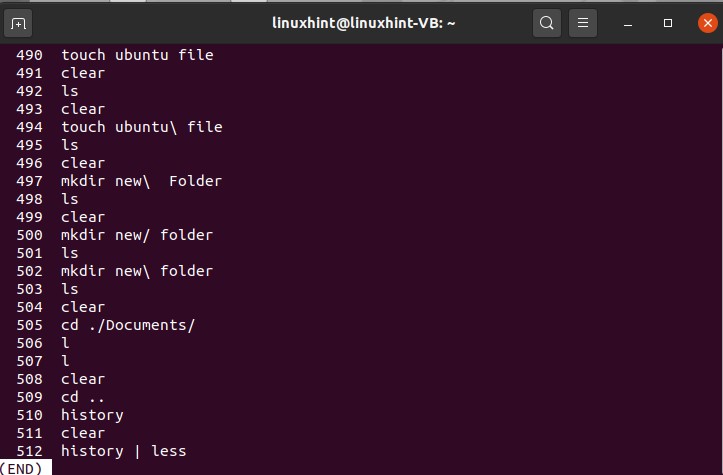
It will result in some of the commands and press enter to see more and more from the total commands. This command will only store the ’500’ commands, and after that, it will start vanishing.
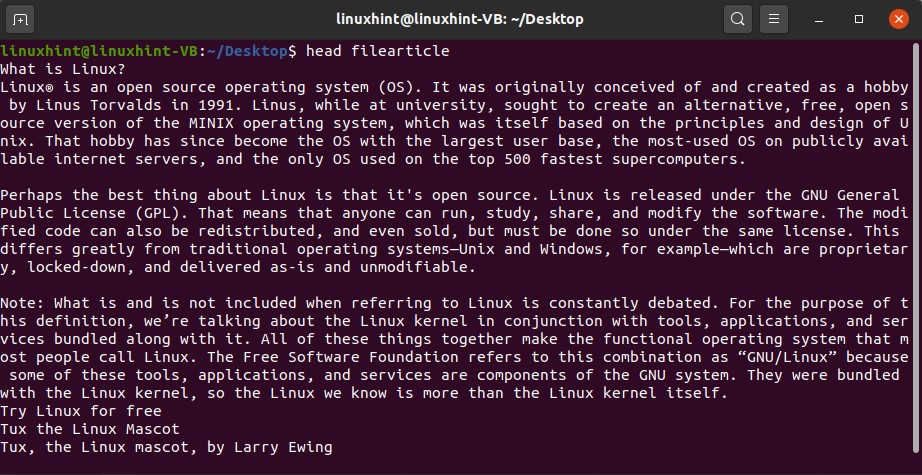
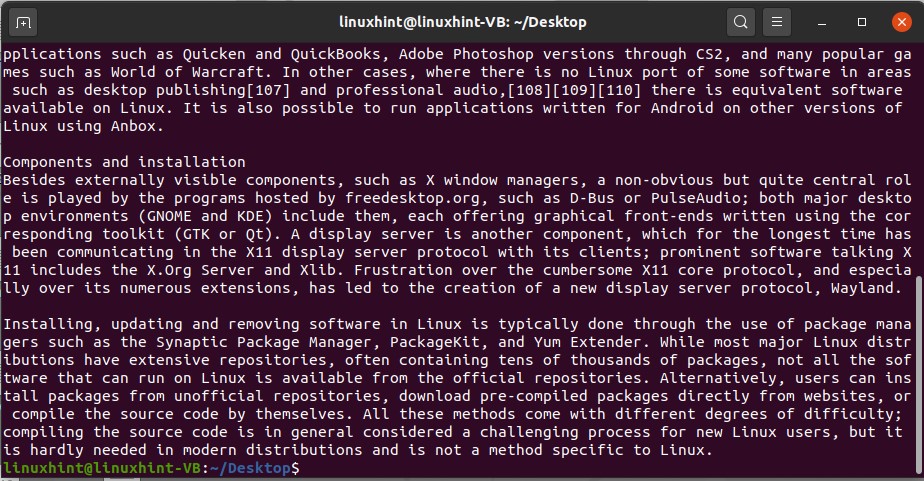
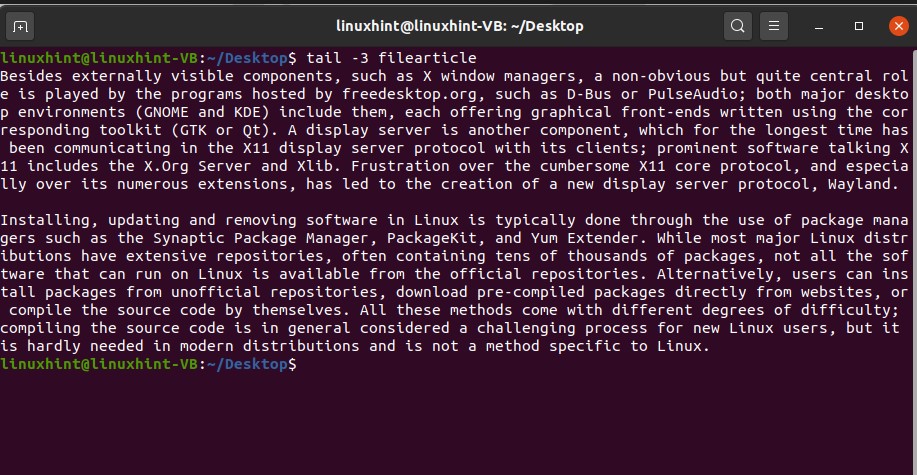
23. Head and Tail commands
Head command is used to get the first part of the upper part of the file whereas, the Tail command is used to get the last part of the lower part of the text file, which is of fixed length.
Open up the terminal using CTRL+ALT+T and go to the desktop directory.
Execute the command to see the results.
To read the last few lines of the document, use the following command
This command will retrieve the last part of the document.
You can read two files at a time, and also extract their upper and loyour part of the documents.


24. wc command
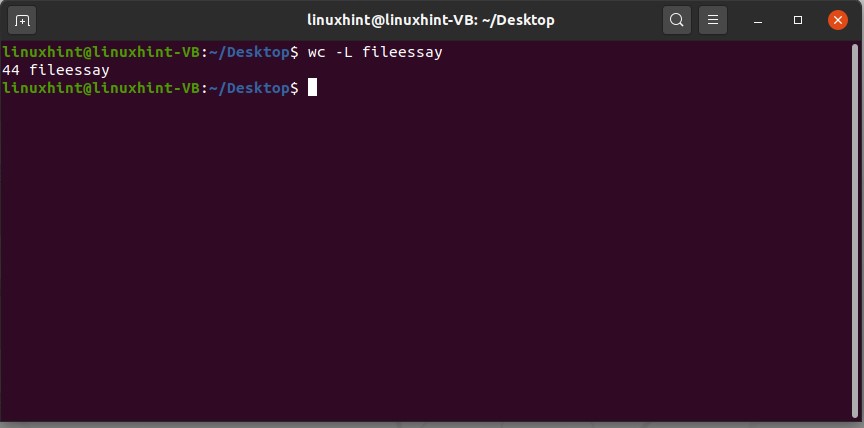
In this topic, you are going to learn about the ‘wc’ command. Wc command tells us about the number of characters, words, and lines of a document.
So try this command on your ‘fileessay’ file.
And check out the values.
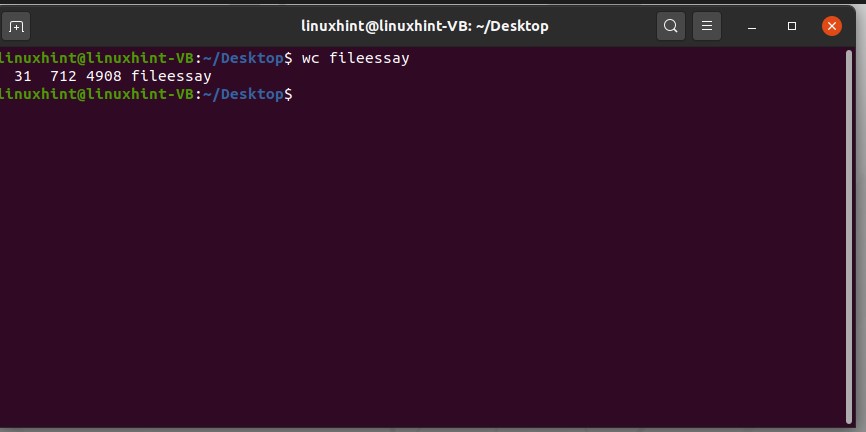
Here, 31 represents the number of words, 712 number of lines, and 4908 number of characters in this ’filessay’ document.
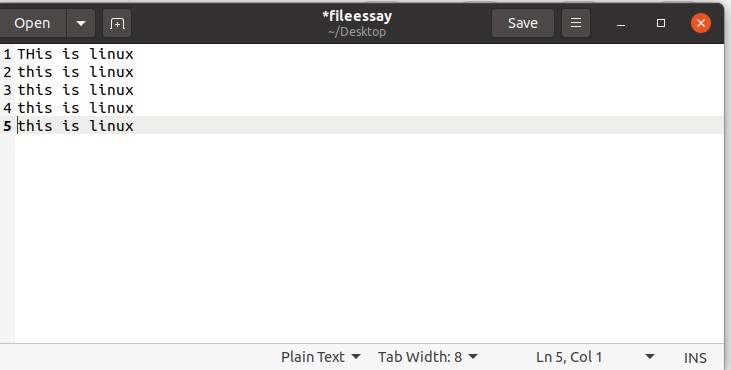
You can change the content of the file, and then again use this ‘wc’ command to see the visible difference.
You can also check these attributes separately. For example, to know the number of characters in this ‘fileessay’ file, type the following command in the terminal.

Use ‘-l’ for getting the number of lines and ‘-w’ for the number of words in this command.

You can also get the number of characters from the longest line of the file. In this, first of all, the command will check the longest line of the document, and then it will display you the number of characters it currently has.
Execute the command to see the query result.
25. Package sources and updating
First of all, you need to know what a package is? A package refers to a compressed file containing all the files that comes with a particular application. The latest Linux distributions have standard repositories that include much software you want to have to have on your Linux system. The built-in Package managers manage the whole installation procedure. The system’s integrity is maintained by ensuring that the installed software is known by the packet manager.
You would be able to download the software from the repository in the following cases. The first one is that the package is not found in the repository, the second is that a package is developed by someone and is not released yet, and the last reason is that you need to install a package with custom dependencies or options that those dependencies are not general
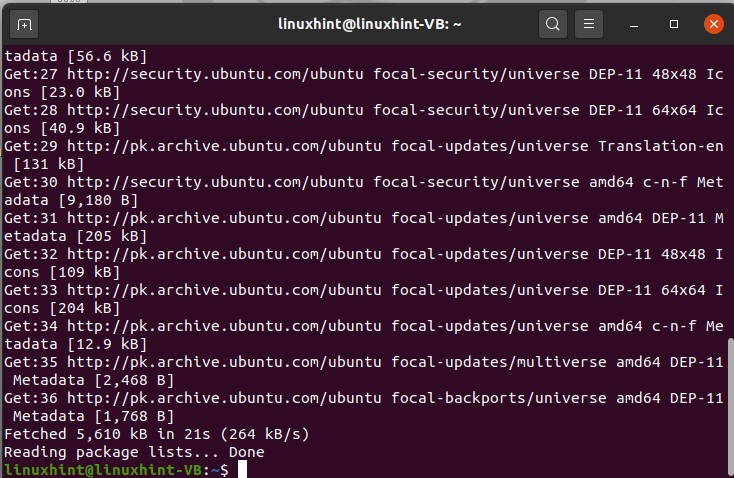
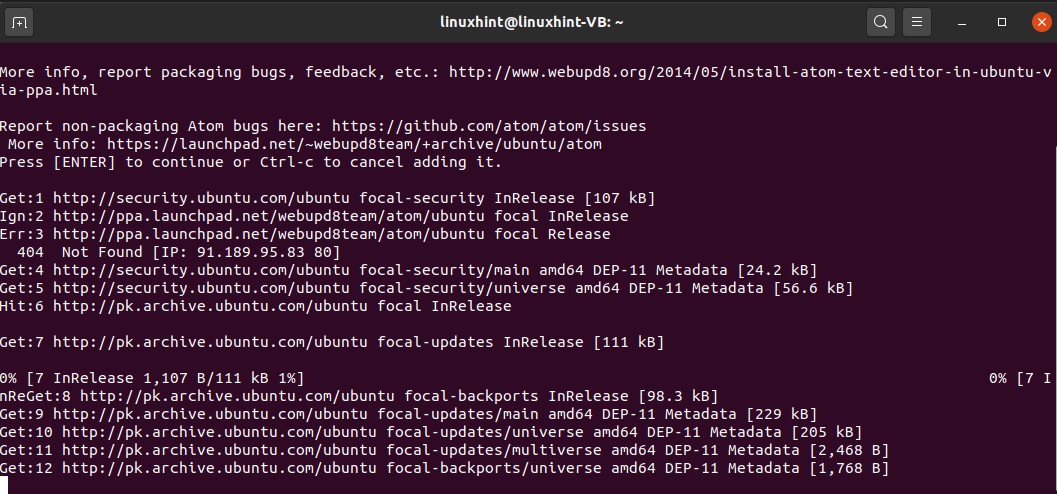
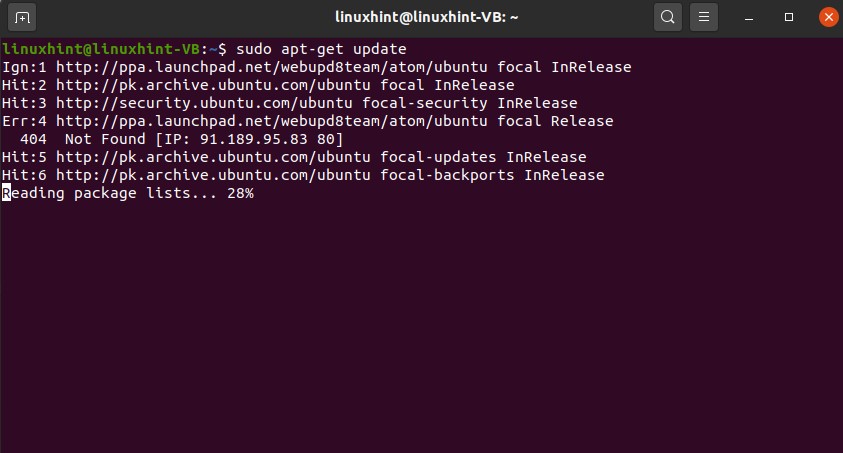
Any package can be easily installed using the sudo command. Sudo is for becoming the root user or superuser. There exist certain tasks that you cannot perform without being the superuser; updating the repository is one of them. Type the following command for updating the repository through the terminal.
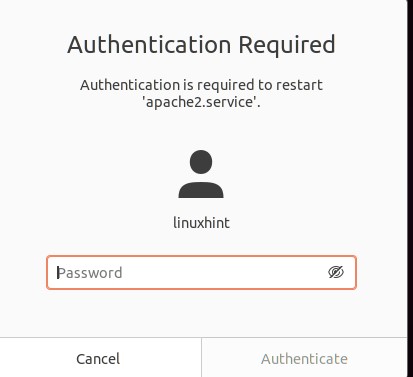
Enter your password to give permission, and then wait for the completion of this process.

26. Package management, Search, Install, Remove
‘apt-cache’ is the simple command that is used for searching a package through the terminal.
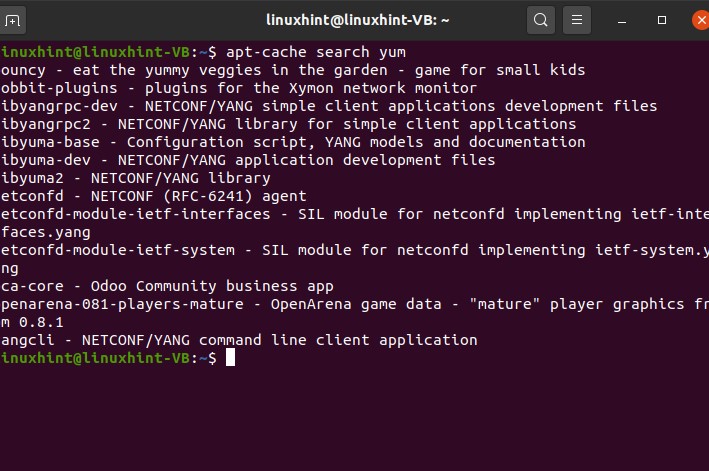
In this command, you are going to search the ‘yum’ package. So this is a simple command to search whatever package name you want to search. This search command will show everything related to yum.
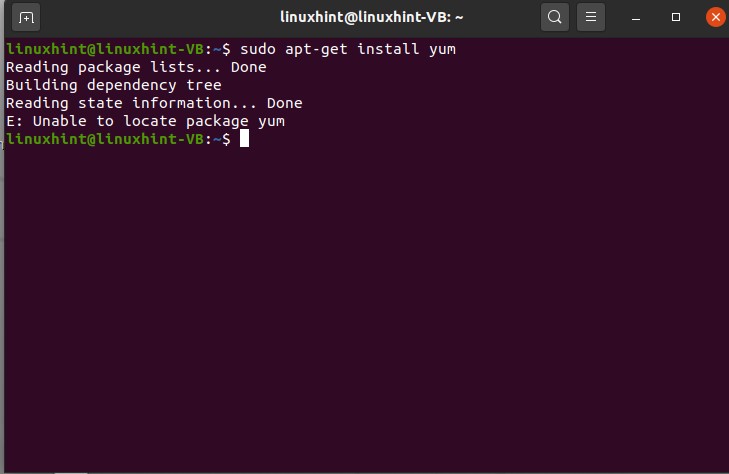
To uninstall this yum package, you can simply use the following command
To delete any package with its configuration settings, the purge command is used.
27. Logging
In Linux, logs are stored in ‘/var/log’ directory. If you want to see the log files, use the following command.
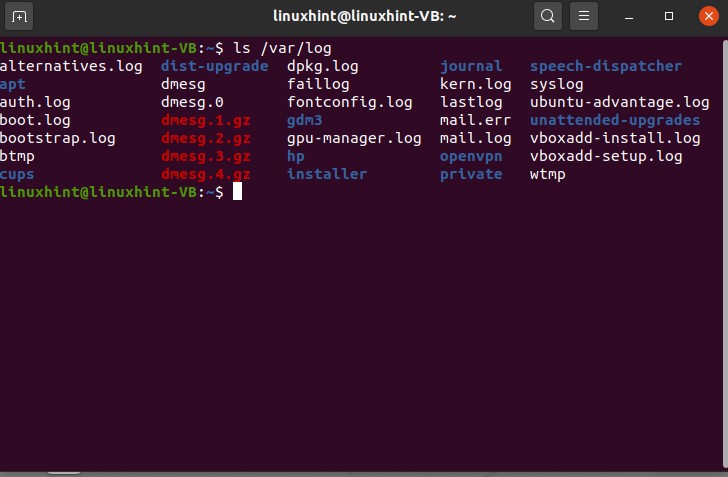
From the output, you can see there exist various log files in your system, like some of them are related to authorization, security, and some are related to kernel, system boot, system log, etc.
To view the content inside of these files, you have to use the ‘cat’ command with the path of the log file. Example command execution is given below.
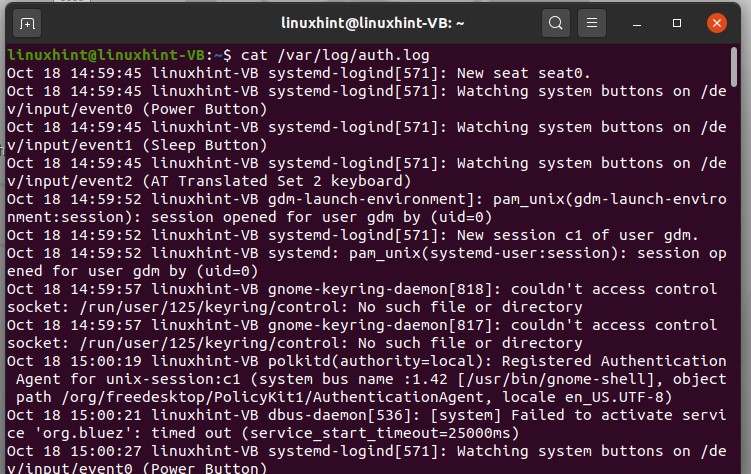


The output shows all the information related to the authorization and security things you have done today, all the files and sessions in which you used your root permissions and worked as a superuser.
28. Services
This topic is about services, okay, so you are going to discuss services in Linux. First, understand the basics of the services. Services in Linux are the background tasks that are waiting to be used. These background applications or sets of applications are the set of essential tasks running in the background, and you don’t even know. An example of typical services would be apache and MySQL.
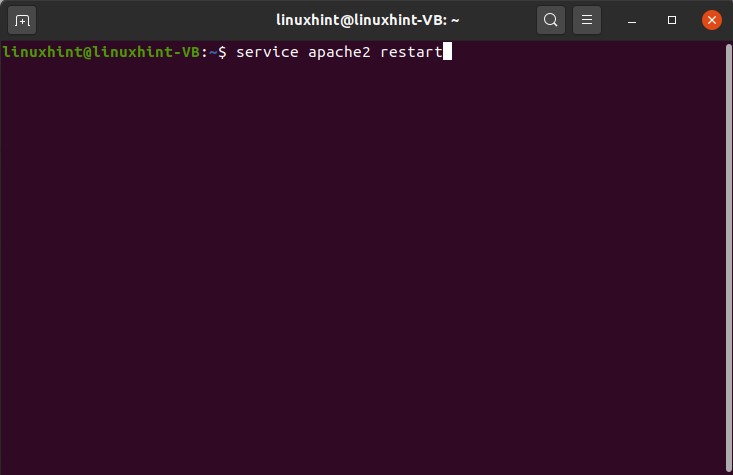
Now let’s see how you can work with services on how you can start, stop, restart, and even check the status of it or check all the services that are running on your system. First of all, you will open up your terminal by pressing CTRL+ALT+T.
here you are going to write

It will tell you about all the services which are running in the background, and ‘+’ means that the service is up and running and it is active the ‘-’ means that the service is not active and it is not running, or maybe it is unrecognized.
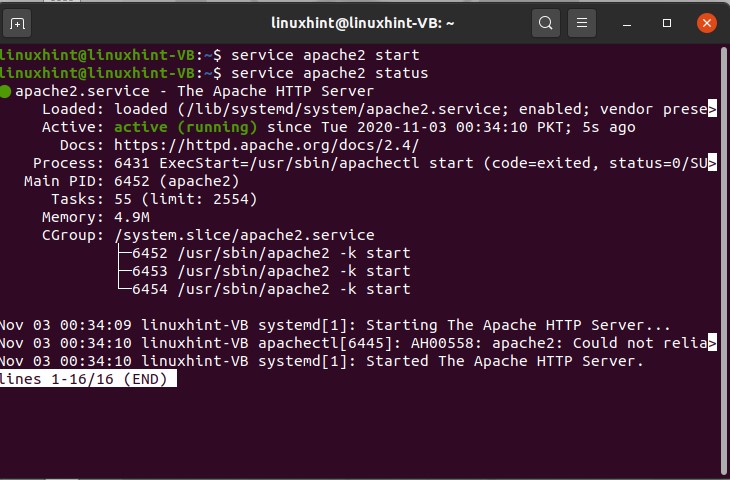
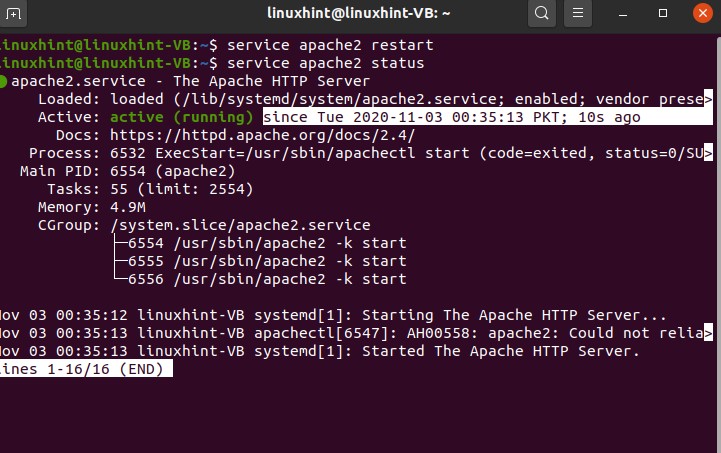
Let’s explore the ‘Apache’ service. First of all, you are going to write ‘service’ and then the service name, which is essentially Apache, and then you write ‘status.’
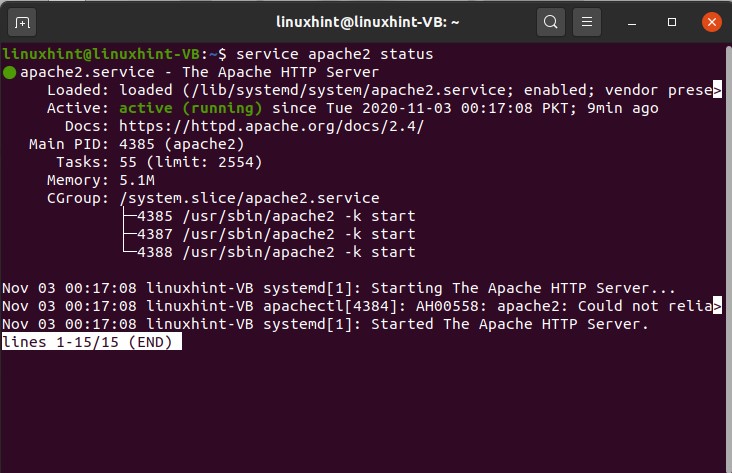
The green dot shows that it is running, and the white dot shows that it has been stopped.
Press ‘CTRL+c’ so that you can come out of it, and you can simply write your command in the terminal.


29. Processes
The process is a computer program in action and carryout the task of the operating systems. Now, what if you want to, you know, see, or check what are the processes that are like going on your system.

Here you can see that you have a list of the processes which are like going on. The PID is nothing but a unique process ID that is given to the process, so it is ideal for defining and identifying a process or anything any entity by the ID number. TTY is the terminal from it is running, and time is the CPU time that it has taken to run the process or complete the process, and CMD is the basic name of the process.
Let’s run an example and see how you can check out the processes and run them. If you run a process named Xlogo, you hit enter, and you can see that this is a process it takes a lot of time here, and you cannot run anything right here.

To write anything, you have to press CTRL+C. It is visible that the Xlogo window is now gone.
To shift this process into the background, what you can do is that you can write
You can see that now this process is running in the background.

30. Utilities
Utilities are also known as commands in Linux.
Utilities are also known as commands; although there is no real differentiation between a command and a utility, there is still a difference between Linux shell commands and standard Linux commands. The utility is nothing but a tool to run a command. ‘ls’, ‘chmod’, ‘mdir’ are some of the utilities used in general.
31. Kernel Modules
Kernel modules are stored in the home directory or the root folder. These are the drivers that can be loaded and unloaded as well as needed or at the boot time. The kernel is the low-level aspect of your computer that sits between the user and hardware, and its job is to how to you know, talk to CPU to communicate with the memory and the communication with the devices. It takes all the information from the application and communication with the hardware, and it also takes all the information from the hardware, and it communicates with the application, so you can say that kernel is a bridge which takes the information from the application to the hardware and from the hardware to the application. For the kernel to communicate with the hardware, it needs to have some specific modules. It needs to have a module that can tell it how to do that, and those modules are available and built-in, and a few of them can be imported. They are externally available, and you can use them as you need them.
Use the following command to check the list of the available modules in your system.
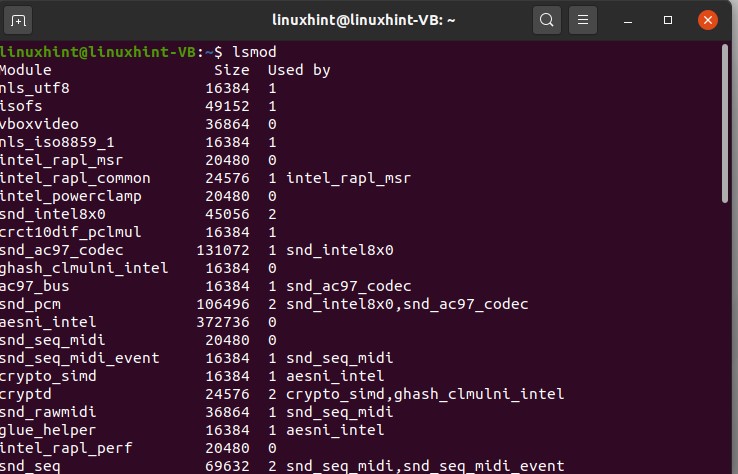

So here, you can see the name of the modules in the first row, and the second row is for a module, and the third one is just the comments or the information against each driver or each kernel module.
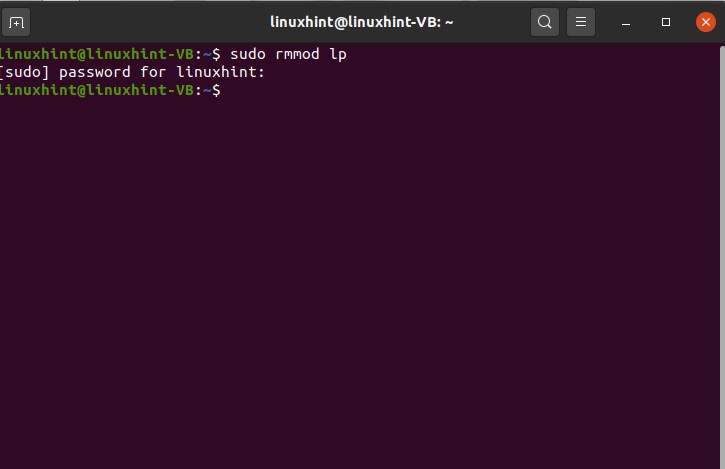
To uninstall a module named ‘lp’, you can write
32. Adding and changing users
This topic is about adding users and changing users. When you add a user, you will add it to a specific group, or you can also create a user as if you don’t want to add it to any group then the user will you will be created and it will generate its own like sort of a unique identity and a unique group sort of thing.
Open up our terminal, so before you add a user to the group, there are a couple of things that you need to know. You should know that in which group you are going to add the user. To know which groups exist on our system, you need to write this command
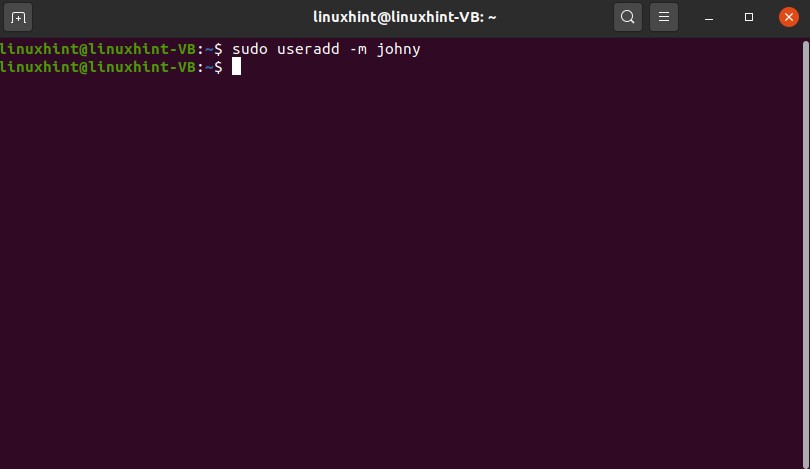
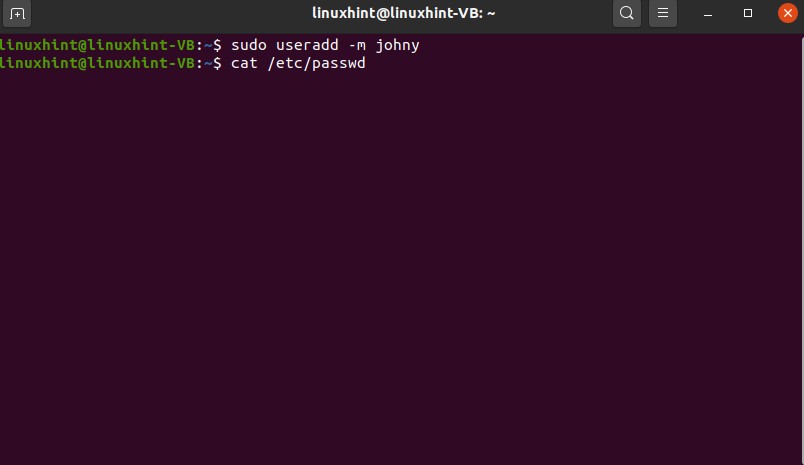
You can see that you have several groups available. Let’s say you want to add a user to this group, so l the user name you want to name the user as John.

As you created the users successfully, you can write

Here you can see that you have a user named John, and this 126 is the group ID of the group ‘colord’.
33. User group and user privileges
In this topic, you are going to learn how to create and delete a user as well as a group and also discuss the user privileges.
Open up the terminal and create a user with its unique group. You can add users individually as well.
And now confirm the existence of this user by opening the content of the ‘passwd’ file

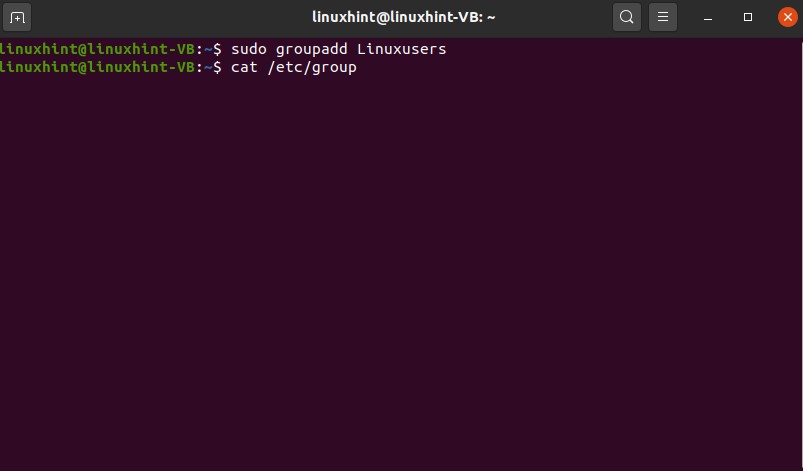
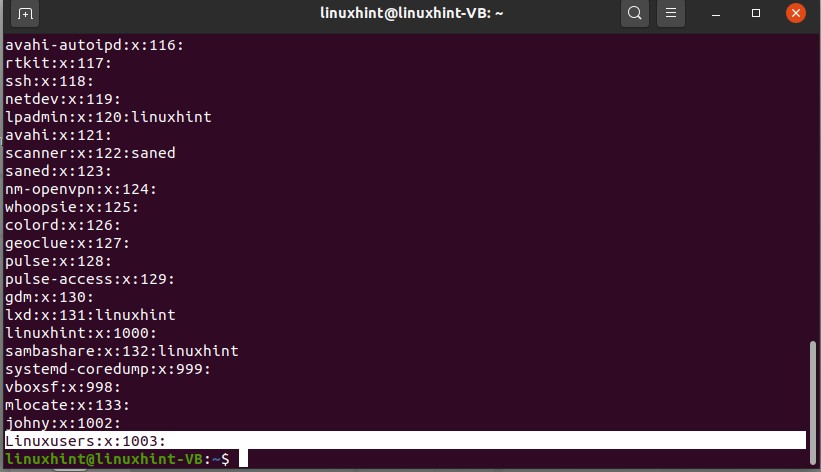
What if you want to create another specific group, and you want to add users to that so adding users to that is very simple, and it is discussed in the previous topic. Now write a command to create a unique group so that you can add any member to it.
Check the content of the group file
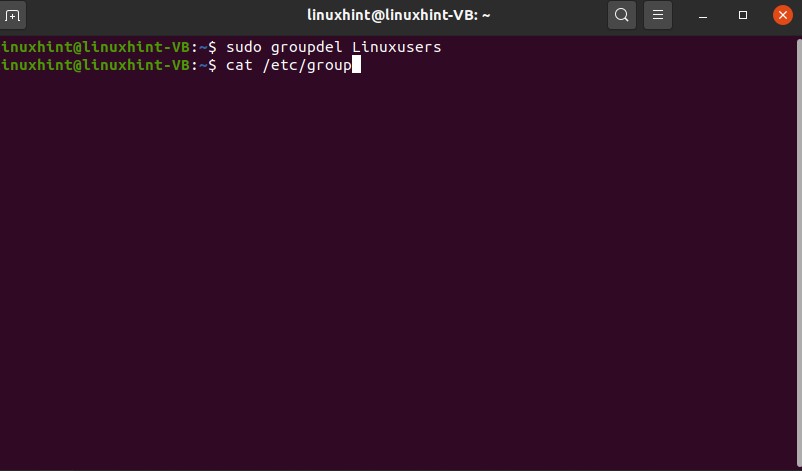
You can also delete the group by using the ‘groupdel’ command
And again, check the group file to confirm its deletion.
34. Using sudo
sudo stands for ‘superuser do’. The idea is that you cannot perform certain actions without being a superuser, and you can ask why is that so? You cannot perform any installation or changes in the root folder without being a superuser because your system needs to be saved so no other user can make any changes other than you. So you have to put in your password, and you need to make your system make sure that it’s you, and then you can make changes in the root folder; otherwise, whatever commands you would write, it would give you the error or the warning. Whenever you see that permission denied message, it means that you need to work as a superuser because these changes are going to affect your root folder.
Using the sudo command, you can update your system.

You can create or delete a new directory and many more actions by becoming a superuser.

35. Network UI
Openup the terminal and write here the first command, which is
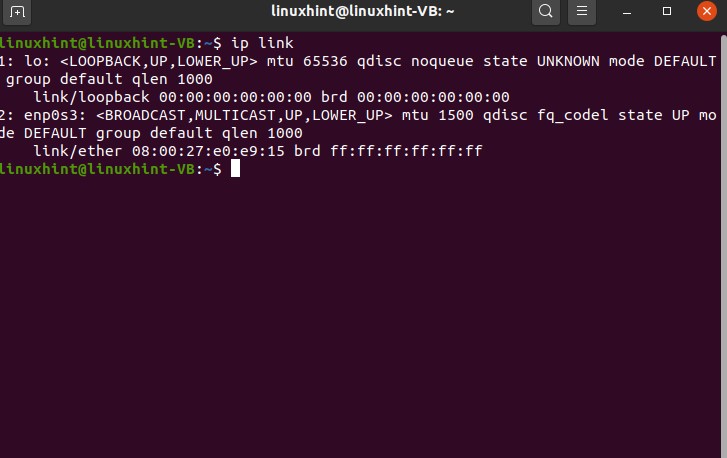
Press enter and see different network interfaces. The number one is this ‘lo’, which stands for Linux host, and others are the ethernet networks. You can see there is a MAC address, which tells us that it is the ether link. If you see here we have ‘UP’, it means that it is ready and available and it can be used so up just tells you that it is available. It doesn’t mean that it is being used; it means that it is available to use. ‘LOWER_UP’ shows that a link is established at the physical layer of the network.
We will also see you know the IP addresses and how do we check them.

To get the information about all of the commands related to ip link, type

Try some of those commands for a better understanding of the topic.
36. DNS (incomplete)
$ hostnamectl set-hostname SERVER.EXAMPLE.COM
10.0.2.15
~$ sudo nano /etc/network/interfaces
$ sudo apt-get install bind9 bind9utils
$ cd /etc/bind
$ nano etc/bind/name.conf
37. Changing nameservers
Open your terminal by using ‘CTRL+ALT+T’ and write the following command in it.
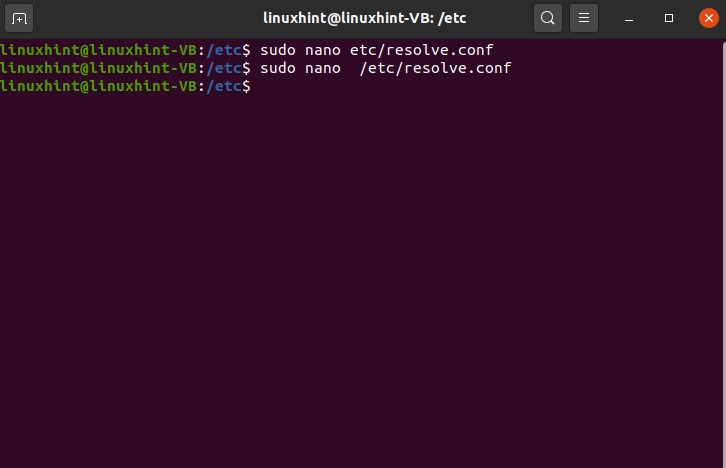
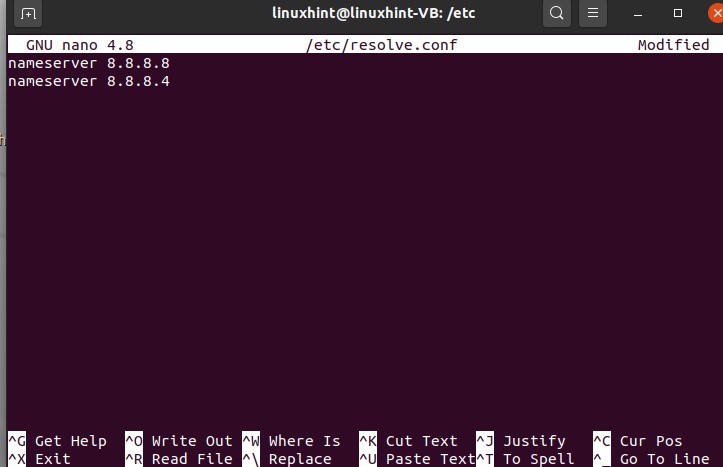
This is the configuration file that has been opened. Now, we are going to write ‘8.8.8.8’ and then we’re going to change another server we’re going to write here ‘8.8.4.4’ so save it, write it out, and then we exit it.
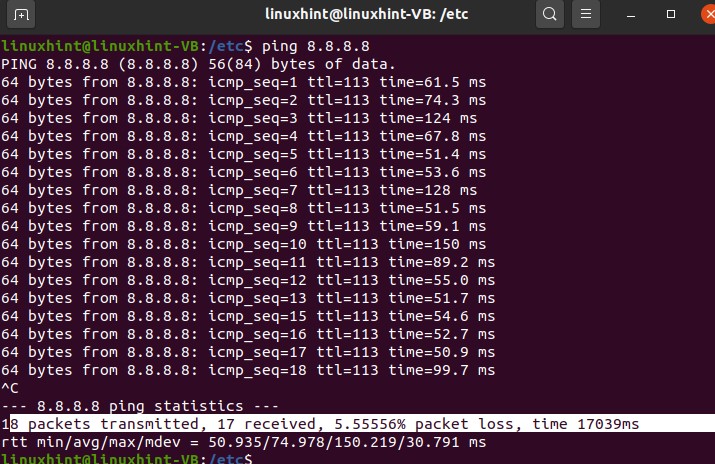
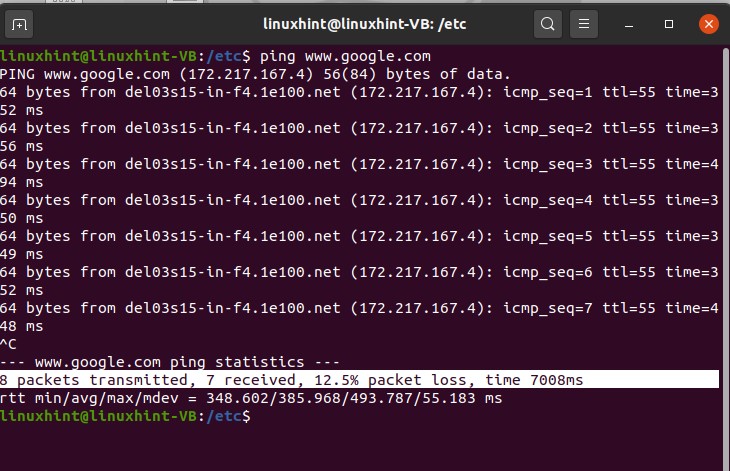
Now before doing anything, let’s let us check that if the changes have been made in the file successfully or not. Write this command ping, which is the packet internet groper, so P is for packet I for Internet, and G is for groper. It communicates between the server and the source and the server and the host. It will verify that our main service has been changed and they’re like a set.

We have set the name server as 8.8.8.8, and now you can see we have started to get reserves; we are getting all the packets, and the communication has begun.
Press ‘CTRL+C’ and you can see it has shown us all the details about the packets which have been sent, received and the information about the packet lost.
38. Basic Troubleshooting
We are going to discuss some basic troubleshooting commands on this topic. Before everything, whenever you get to a Linux host, run the following command to know the version of the Linux.
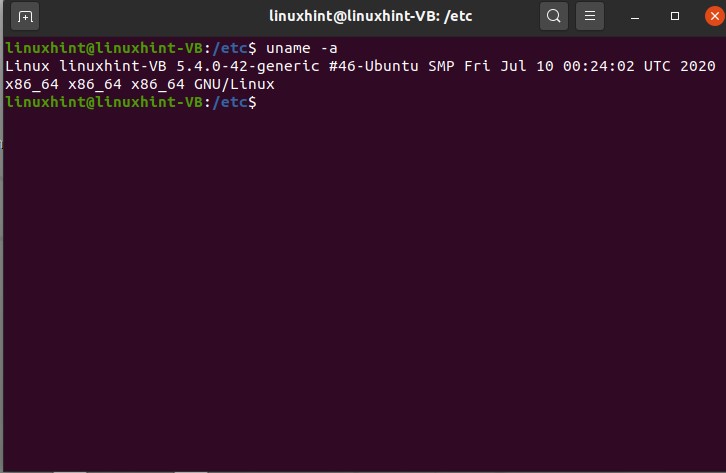
This is essential to know because of the version across different distributions of Linux; the commands might differ. But these commands will work on any Linux distribution, so the first command that we are going to discuss the ping command.
Ping is used for network reachability tests, so if you want to test the network reachability, you will write this ping command. Let’s try to send five requests, and we send it to the IP address 8.8.8.8

Now it would send like five requests, and you can see that five packets have been transmitted, and five have been received, and in that whole scenario, there is a zero percent packet loss.
You can also test the ping command on some IP address where you know there might be a packet loss or something. Give a random IP address and test the command.
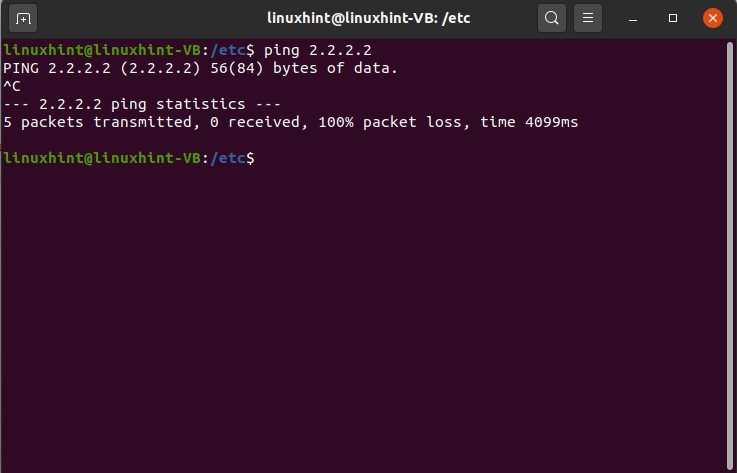
Press ‘CTRL+C’ to know the results.
Ping can also be used with the DNS name as well; you can test it with the ‘www.google.com’.
Now let’s discuss another command, which is ‘traceroute’. This traceroute command trace all the path of the network, and it displays you each activity on each hop.

Results have shown you all the activity through every hop. There is another command that will troubleshoot commands that we would like to discuss, which is ‘dig’. let’s try digging amazon.com, so we have tried to dig amazon.com
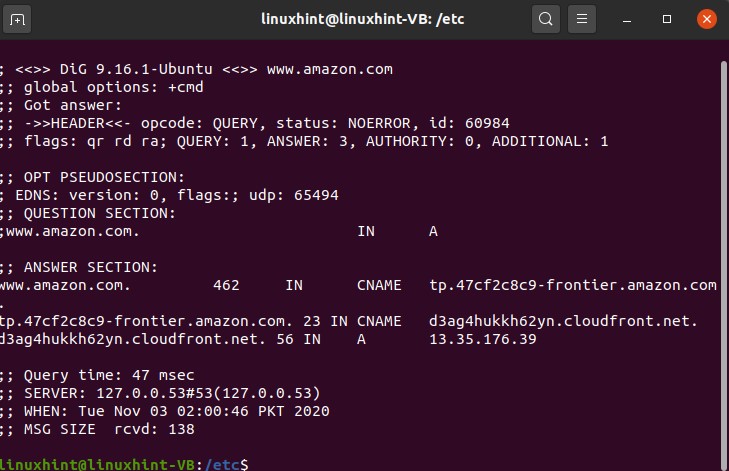
We can get the message size, the name, server IP, QE time.
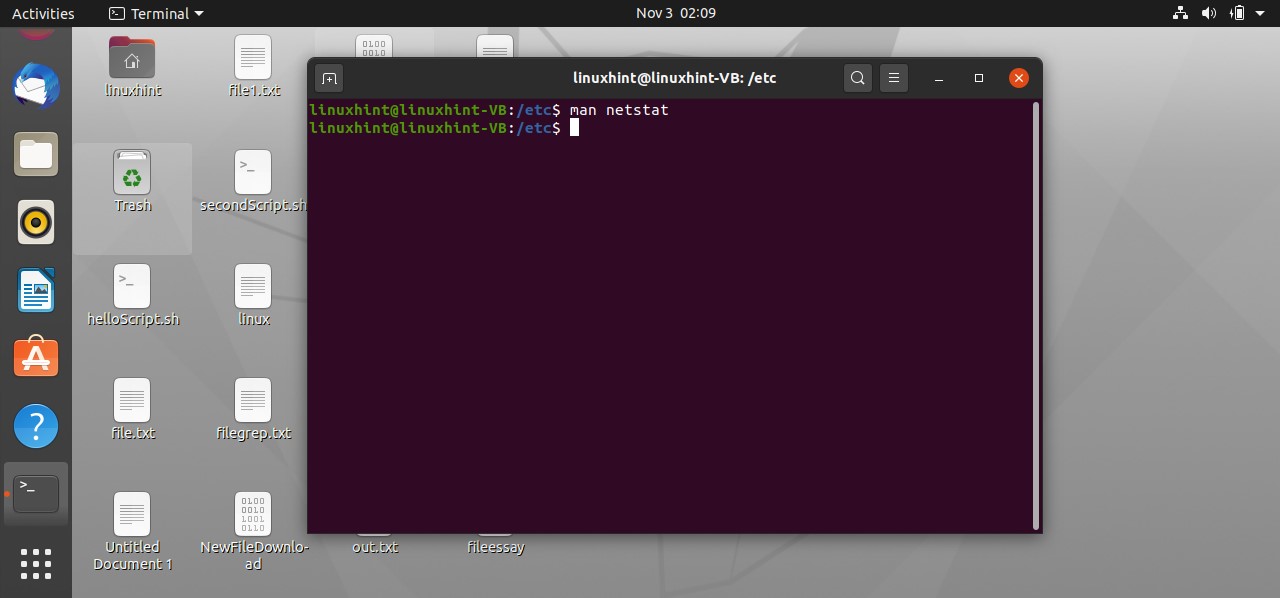
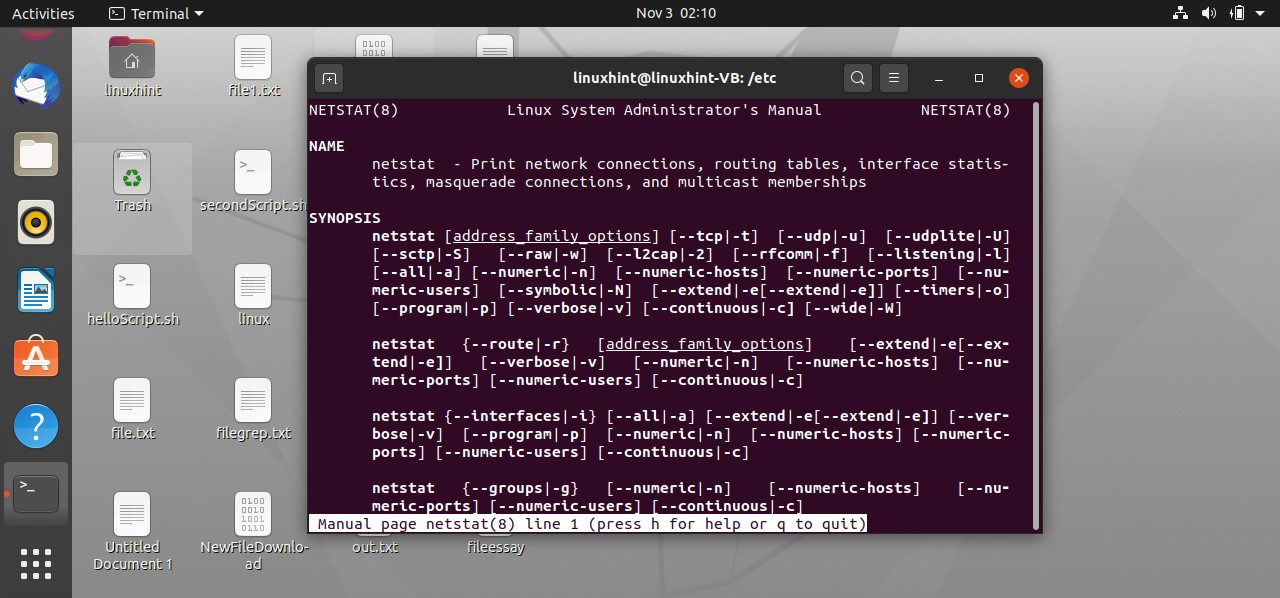
There is another command, ‘netstat’, which represents the network status statistics; it displays you all the active sockets and internet connection.
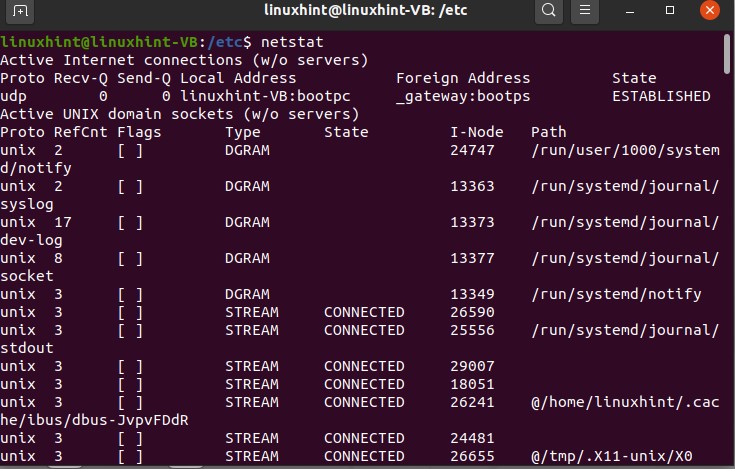
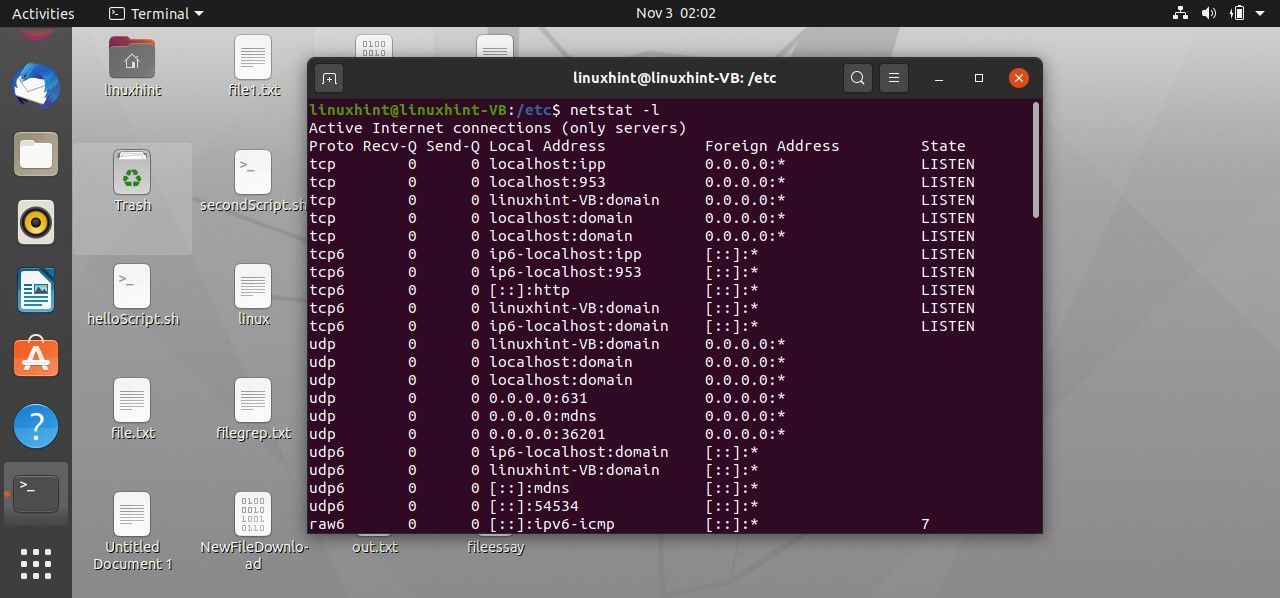
This command will display all the programs which are currently listening and all the internet connections which are listening as well.
39. Informational utilities
Let’s look at some utilities which could provide information about your networking subsystem. The first command is the ‘arp’ command. arp stands for address resolution protocol, so the idea is that every machine has a unique address like every DNS has a unique address in the form of an IP address similarly every machine has a unique address as well which is known as MAC address. ‘arp’ or the address resolution protocol matches the IP address with the MAC address. Locally wherever you want to communicate or you want to communicate in that case, we need a MAC address specifically for local communication from one machine to another machine on the same network or from one machine to the router on the same network.

There is another informational utility, which is ‘route.’
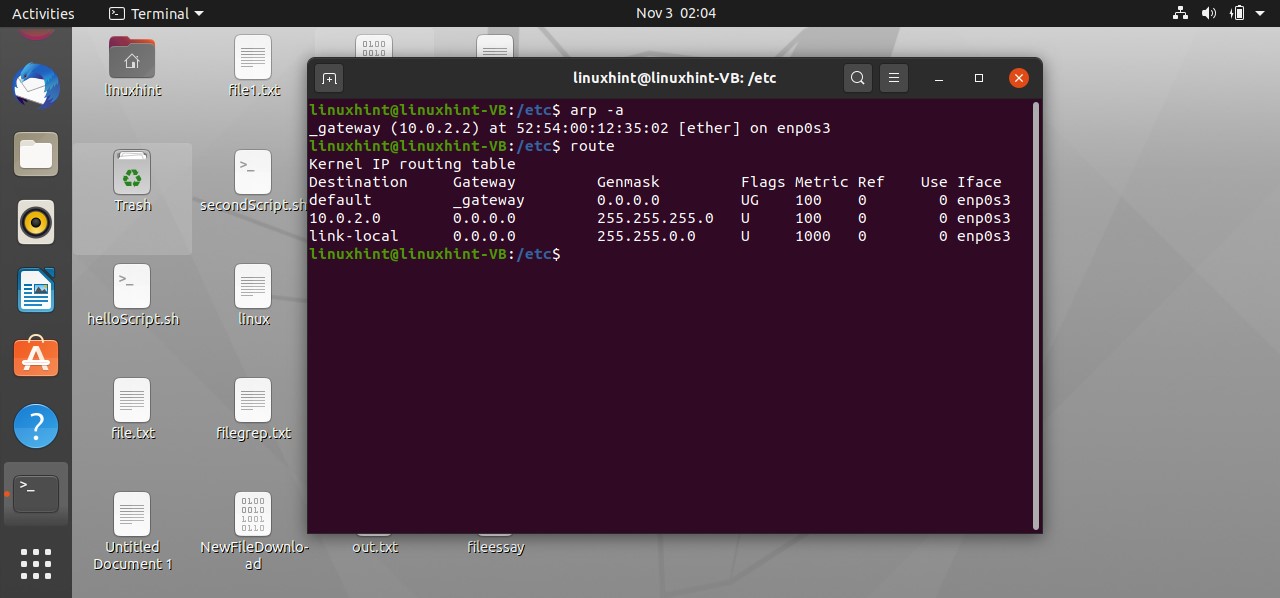
you can see a routing table as a result of the route command execution.
You can also use another utility to view the routing table, but this one shows the IP addresses of the destination instead of its name.

40. Packet Captures
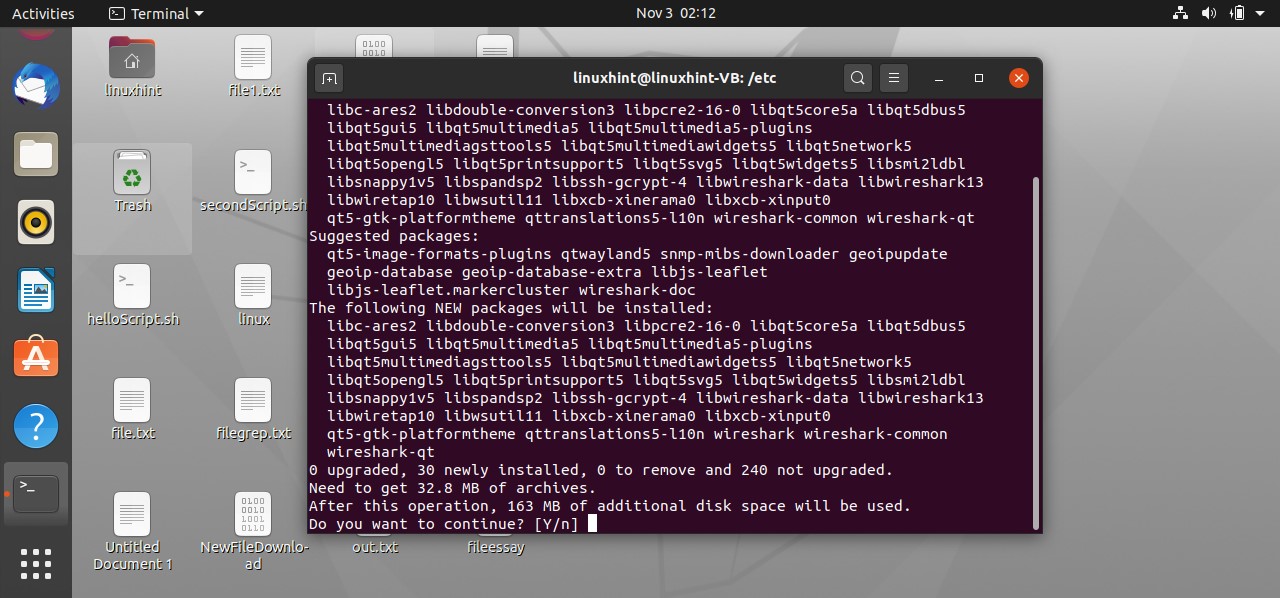
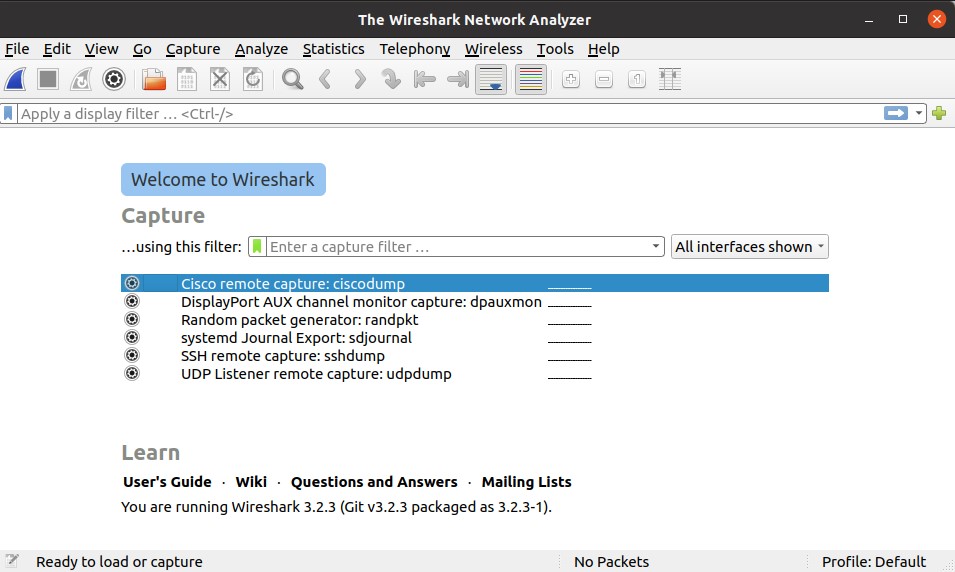
In this topic, you will learn how to capture packets, and we can do that using some packet capturing tool. The most used tool for this purpose is ‘wireshark’. Write the following command to begin its installation on your system.
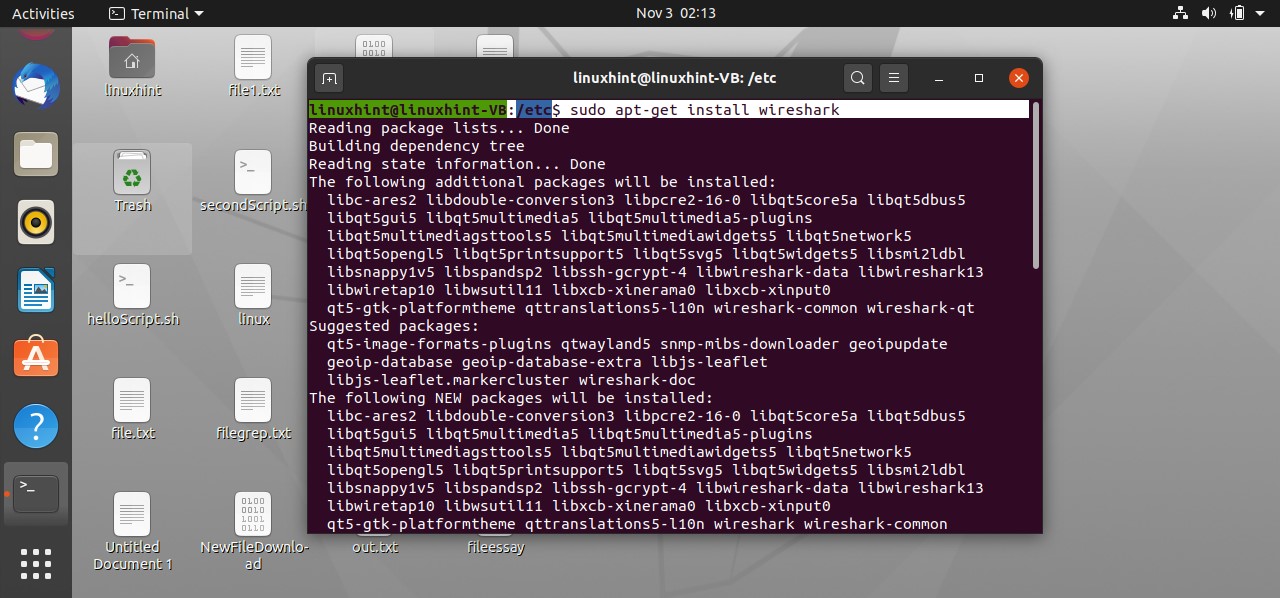
Enter your password when it asks for it. After that, it would ask you for the configuration of Wireshark that if you want to give access to non-superusers so you have to select yes because we want to give access to non-superusers as well and now it would start to you know unpack the packet.

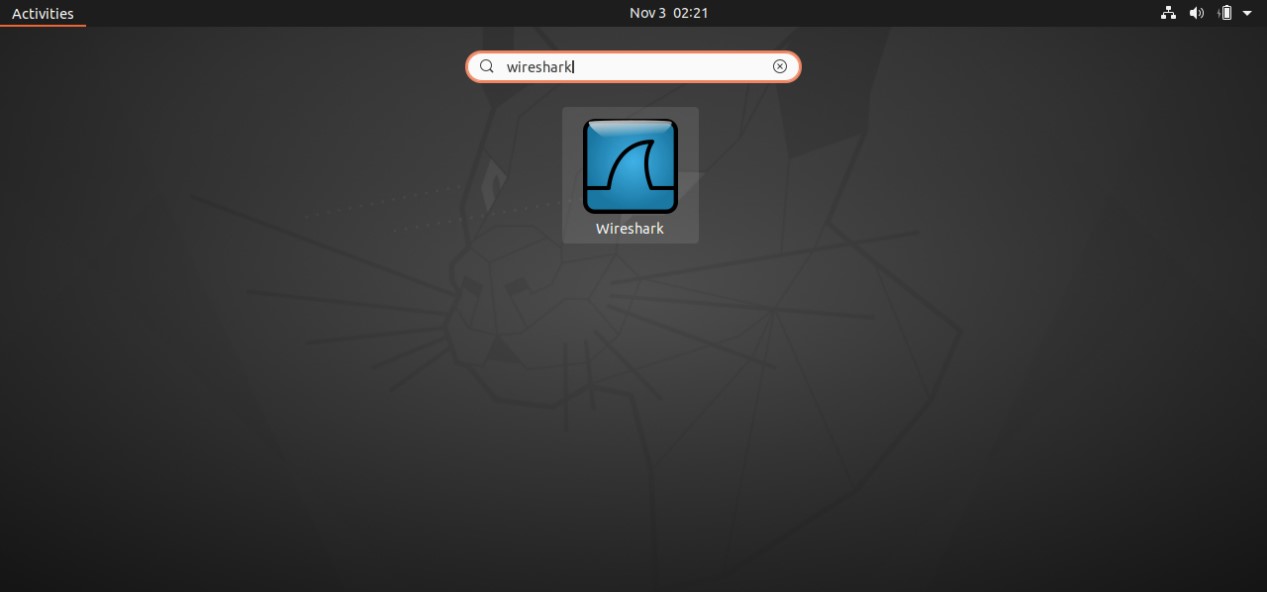
After its installation, open the Wireshark software; first of all, go here on the capture options, and you can see that we have input as cisco remote capture random pattern generator and ssh remote capture, UDP listener. Select the random packet generator, and once you click start and if you do not see any of these options, ten simply restart your system. Sometimes you need to restore the system.
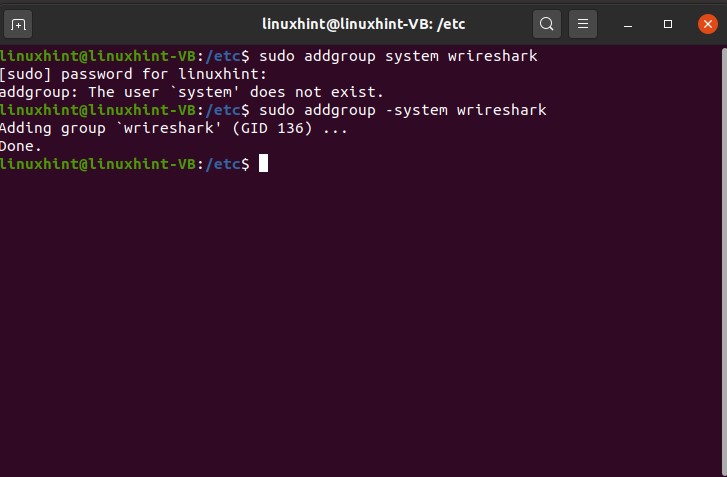
Run a few commands before starting the process of packet capturing and to make sure that you set everything. First of all, check the group of the Wireshark
Make sure that this group exists.
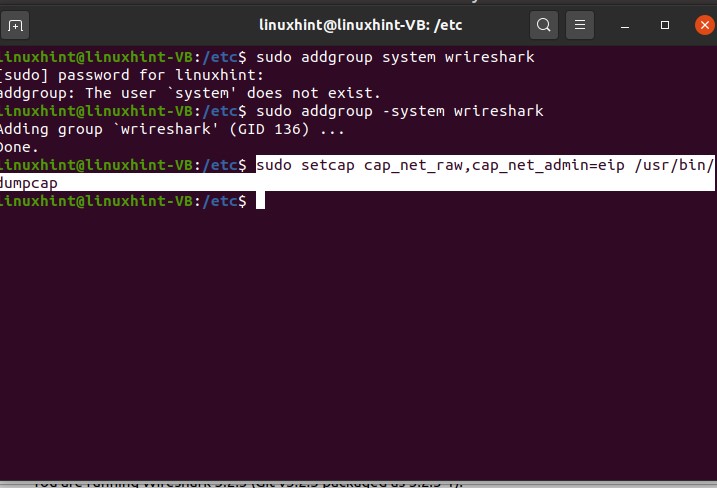
After that write another command
After that, add the user to the Wireshark group.
Now go back to the Wireshark software, and under the same settings, you will see the packet capturing process.

41. IP Tables
In this topic, we are going to discuss IP tables. IP tables are just a set of rules which define your network’s behavior, your machine’s behavior on your network.
The command to view the IP table is given below

you can see this is the first chain is the input, then the second chain that we have is the forward chain, then we have the output chain. Whatever rules you will give to this in this IP table, your machine will follow it. This input rule or the input policy is for sending that traffic to itself like your machine right now whatever input it is taking like if you send traffic you’re sending traffic from your machine to your machine is called the input chain. Whatever rules you will set here, they will be for your machine or your localhost.
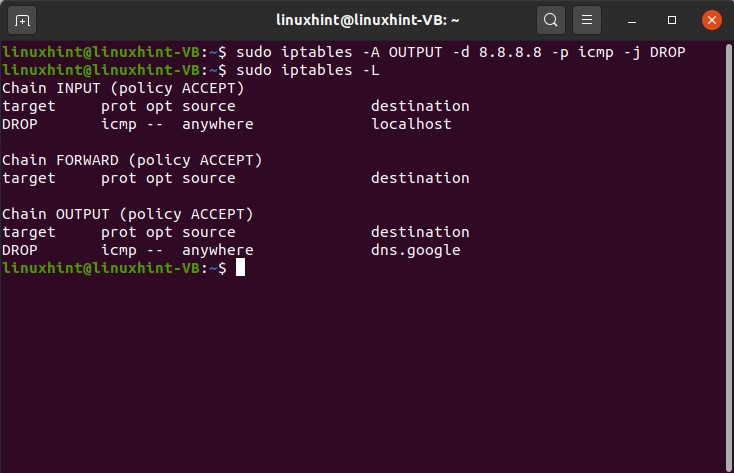
Output chain would send from your machine to some other machine out there in the world or out there on the network that would be the output chain. You can set and define rules for dealing with the output traffic from here, the traffic that you’re sending from your machine to the outside world to any other machine. In this example, you are trying to send traffic from your machine to the outside world to any other machine.
For sending a packet to the local host, execute the following command

Now let’s say we define a rule here, and we do not want to send any packet to ourselves. We define a rule, and we drop the package that we intend to send to ourselves. For that, we set a rule in the IP tables.
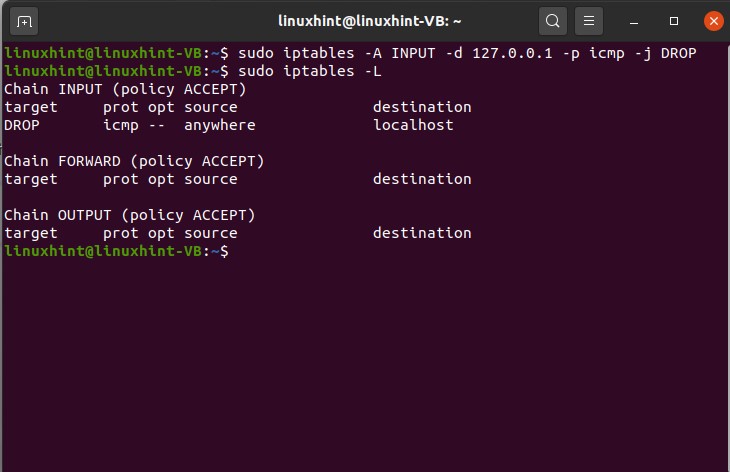
You can see that this command has been executed successfully, so now, if you check the IP tables, you can see that this is a rule that has been added to the input chain, right. You can also define rules for the OUTPUT chain. An example of this is given below.
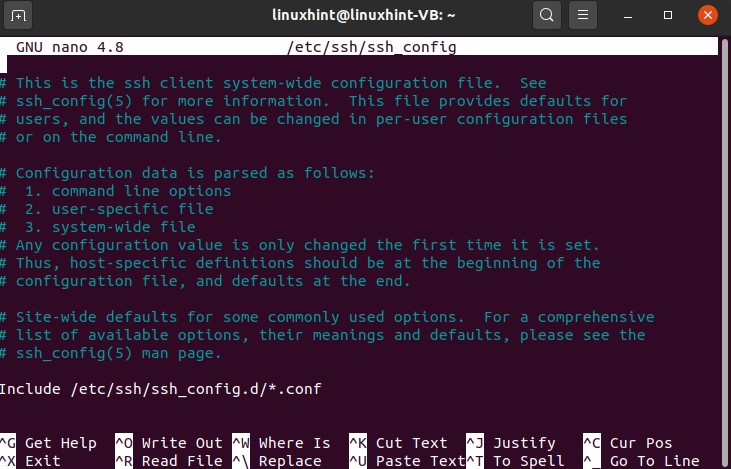
42. SSH servers
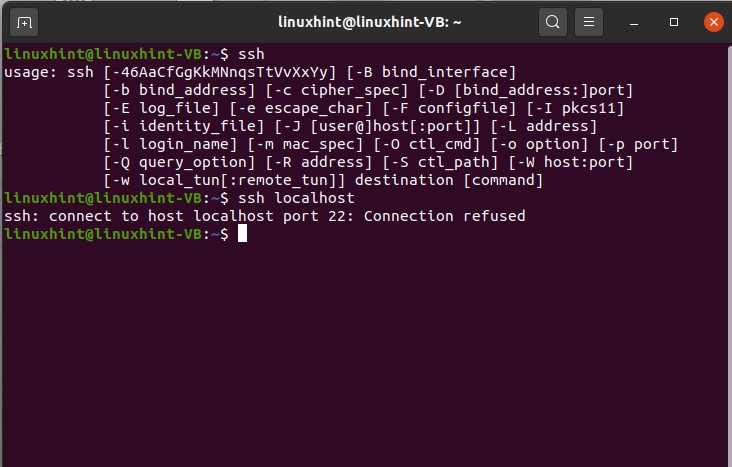
In this topic, you are going to learn how you can enable SSH and install an open server in your system. If your system is an SSH client, then it can connect to any SSH server out there using a simple command. It can connect to any of the SSH servers, and it can use the operating system remotely. To check that if SSH is installed or enabled on your system, type ssh and press enter.
If you see, you know things like this.
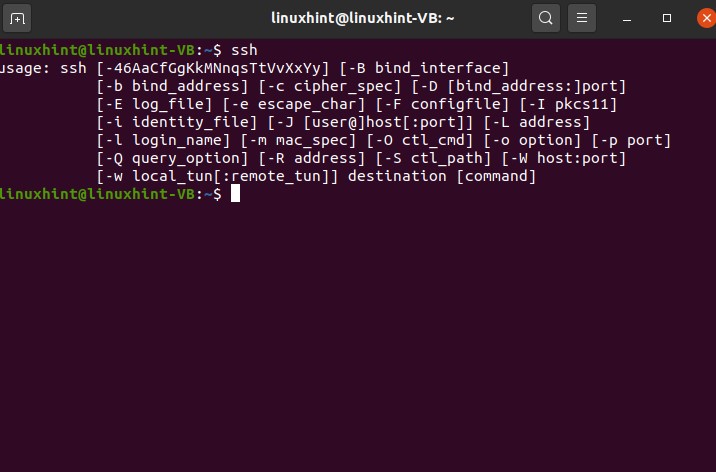
then it means that you are an SSH client, or your machine is an SSH client.
simply if you want to connect your machine to a remote machine and you want to use it like any server out there which is hundreds of miles away from you, you can do that by writing a command like this
SSH then the username of that server, then the IP address of that server, and then if there is a special port, you can write here.
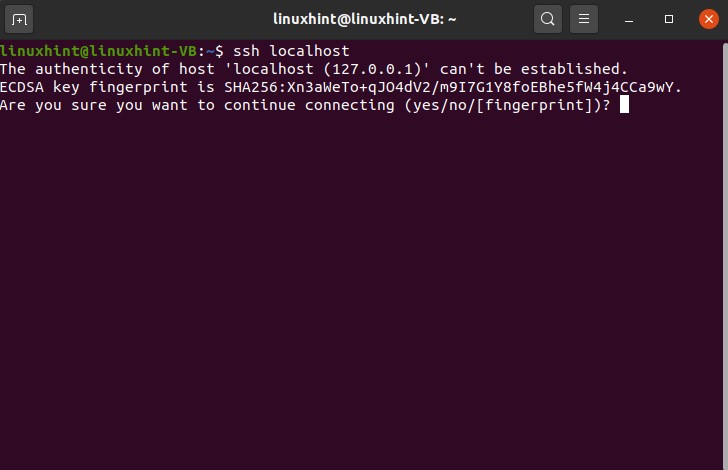
Now you are going to learn going to connect to your localhost. It means that you are going to connect to our machine and use your operating system. First of all, check whether SSH is enabled in your system or not.
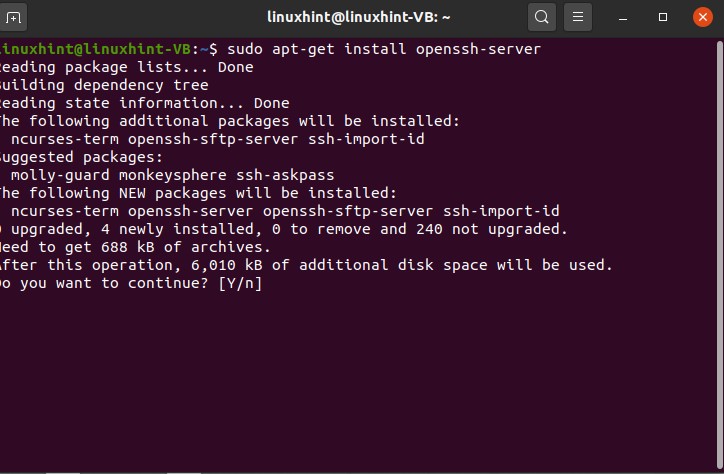
After this step, install the open shh server on your system


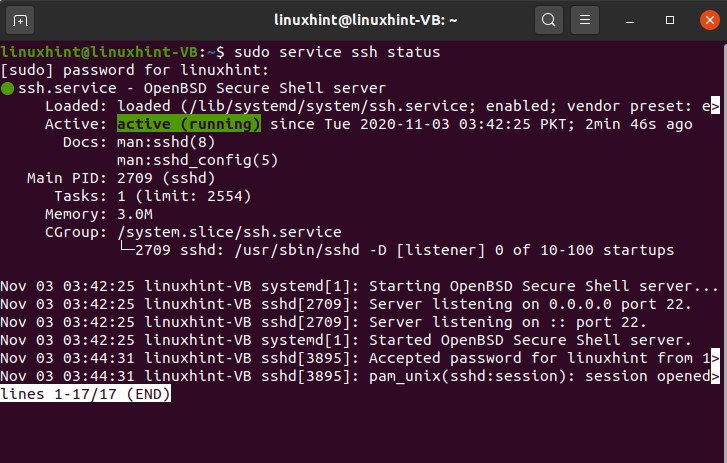
Now check the status of the SSH service by using the following command.
You can also make a different kind of changes in this whole procedure. You can edit the file for that.

43. Netcat
Netcat is a popular network security tool. It was introduced in 1995. Netcat runs as a client to initiate the connections with other computers, and it can also operate as a server or listener in some specific settings. Some common usages of Netcat are using it as a chat or messaging service or file transfers. Netcat is also used for port scanning purposes.
To know that your system has netcat or not, type the command given below in your terminal.
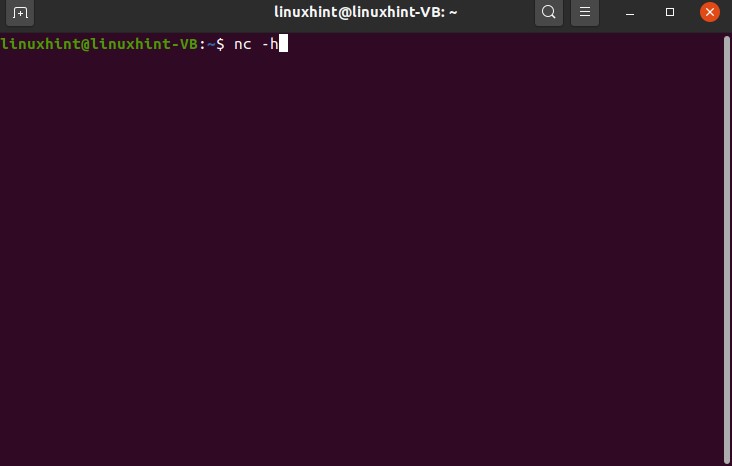

Next, you are going to learn how to create a chat service using Netcat on a terminal.
For this, you have to open two windows of the terminal. One is then considered ad server and the other window as a client. Use the following command in the server terminal for the establishment of a connection.
Here 23 is the port number. At the client-side, execute the following command.
And here we are with our chat service.


44. Installing Apache, MySQL, Php
First of all, we are going to install Apache, but before that, update your repository

After updating the repository, install apache2 on your system.
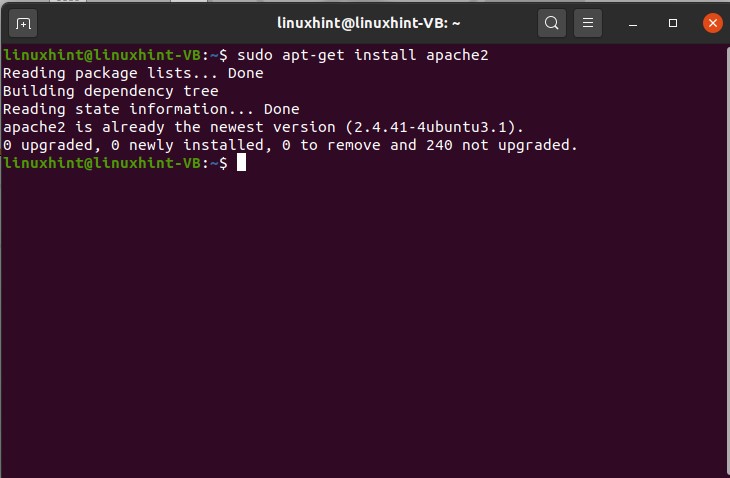
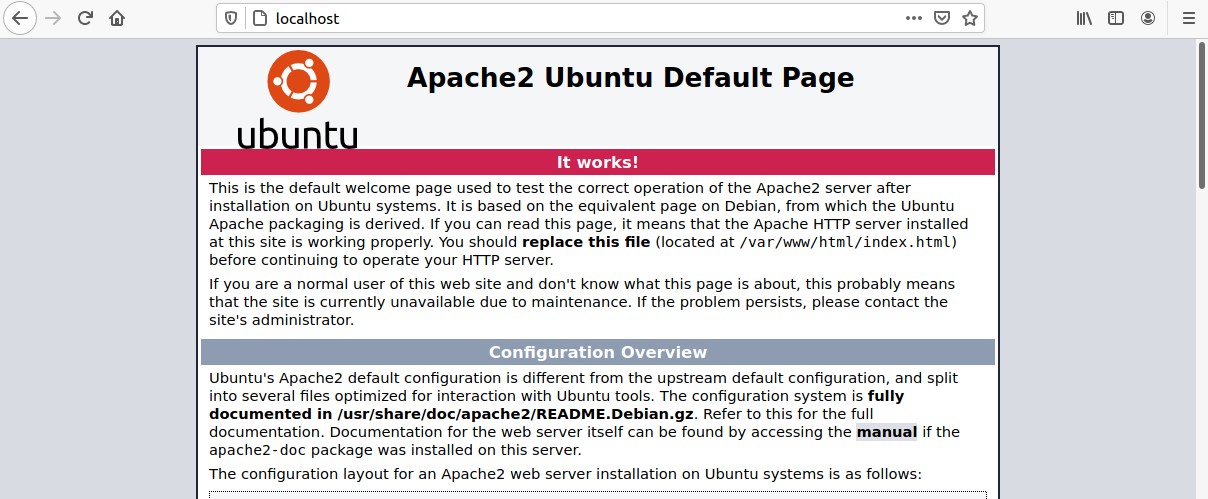
You can confirm its existence by checking the system services and by typing localhost in your web browser.
The next package is the PHP, so you have to write the following command on your terminal.
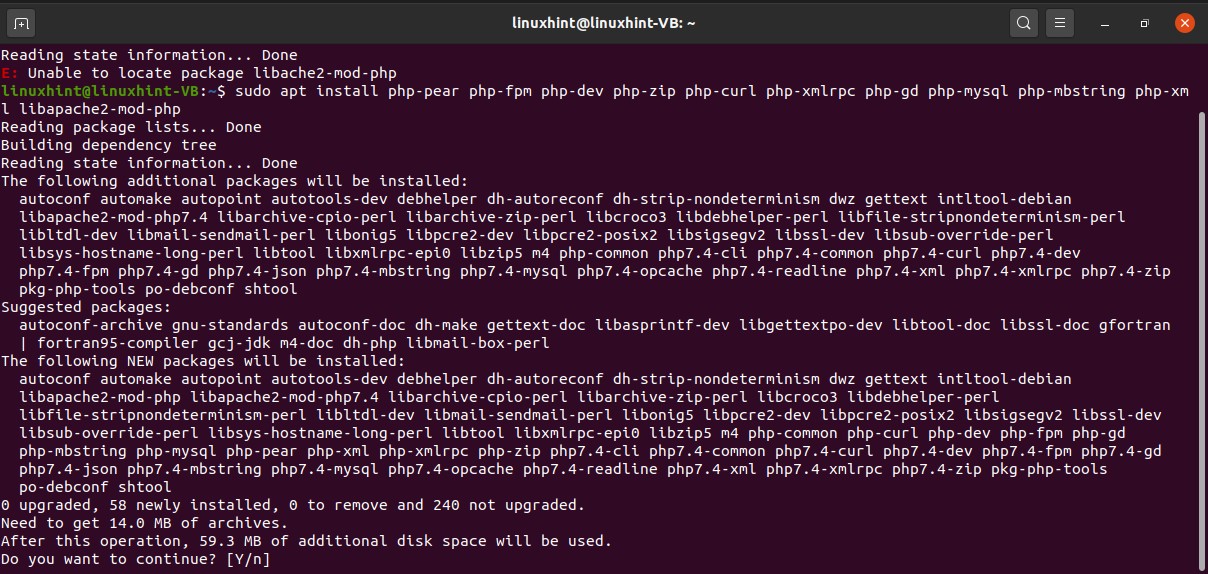
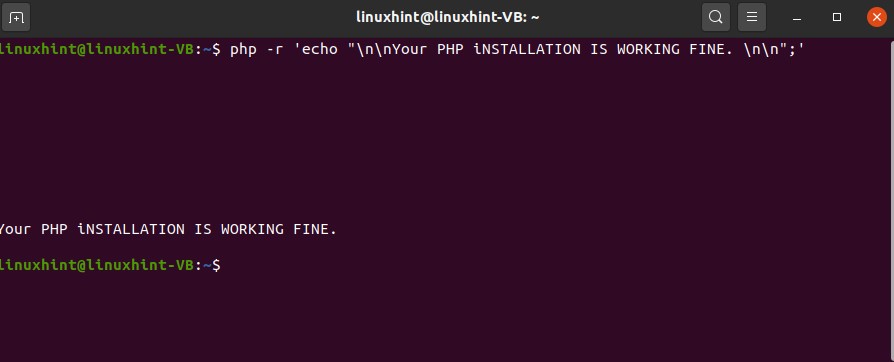
Now, test the terminal by executing the following command.

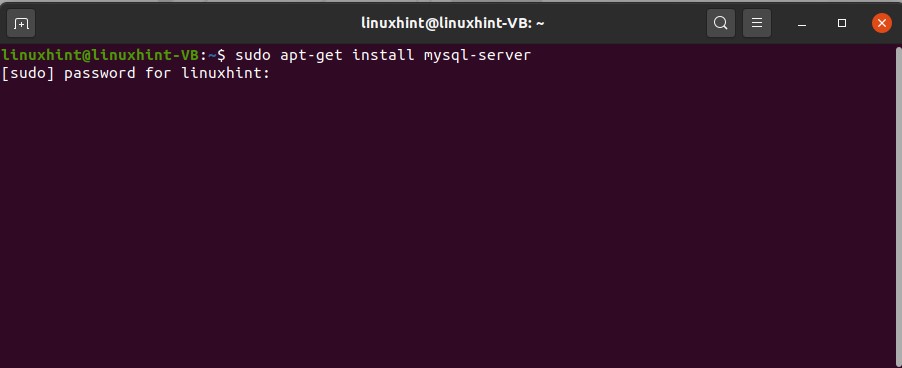
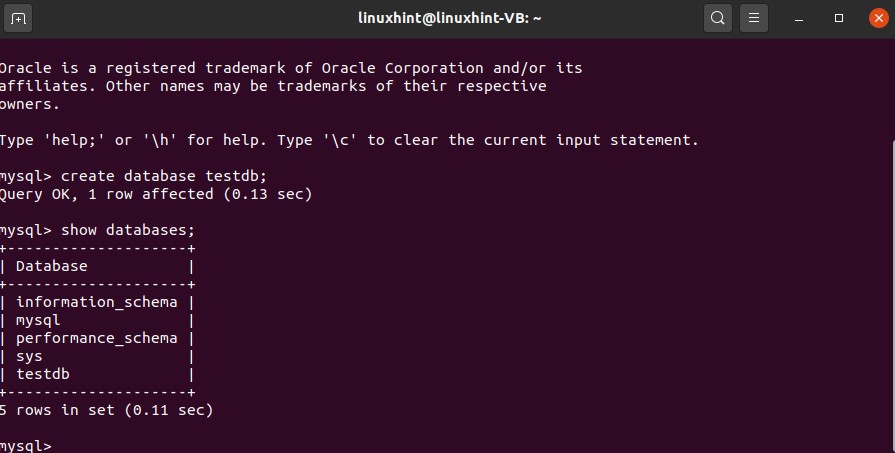
Execute the following command for the installation of MySQL.
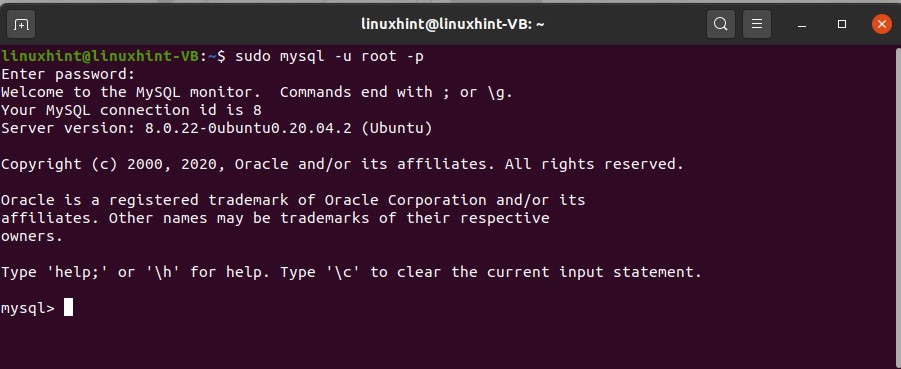
After that, run some test commands on this MySQL terminal for testing.
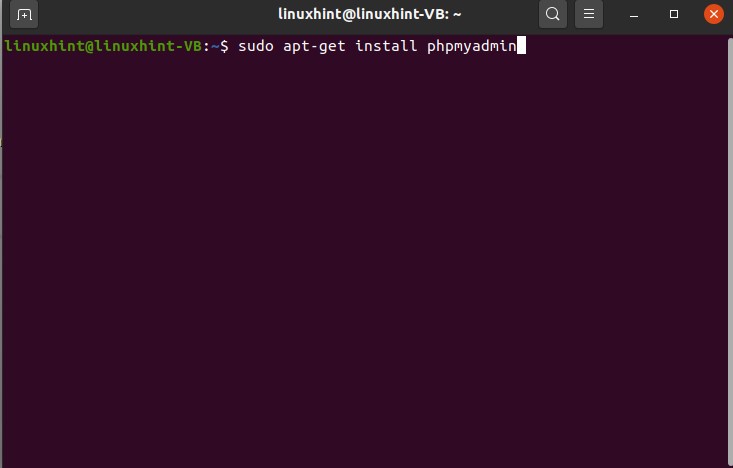
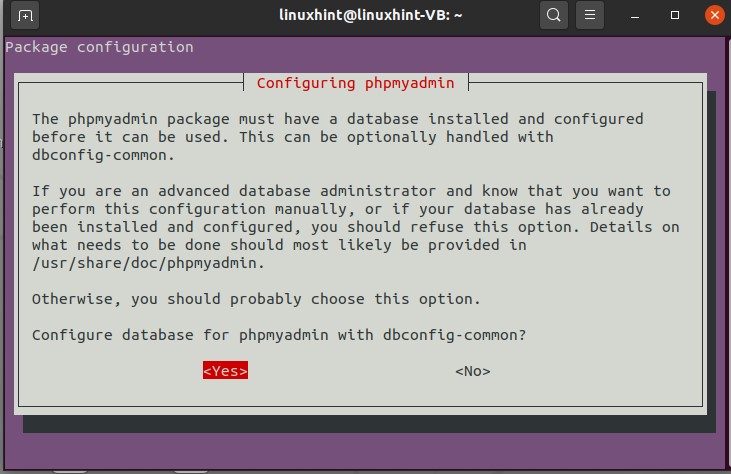
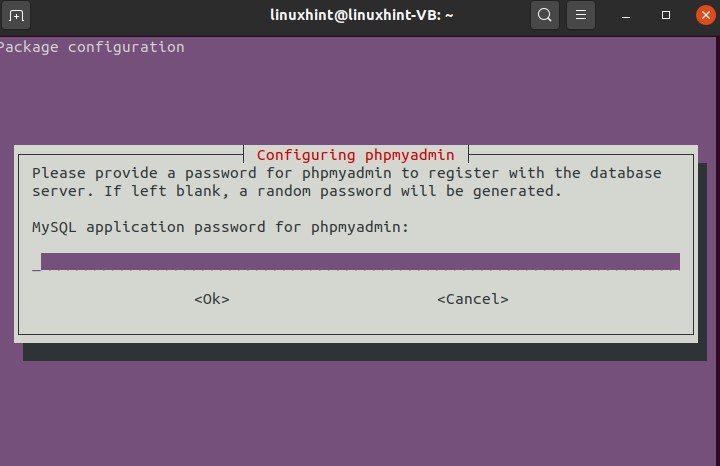
To install PHPMyAdmin, follow these steps:


45. Best youtube editors
We have plenty of editors that we can install, which are best. The first one that we are going to recommend is ‘Sublime text’; then, we have ‘brackets,’ and the one you are going to install on Ubuntu is named ‘Atom’.

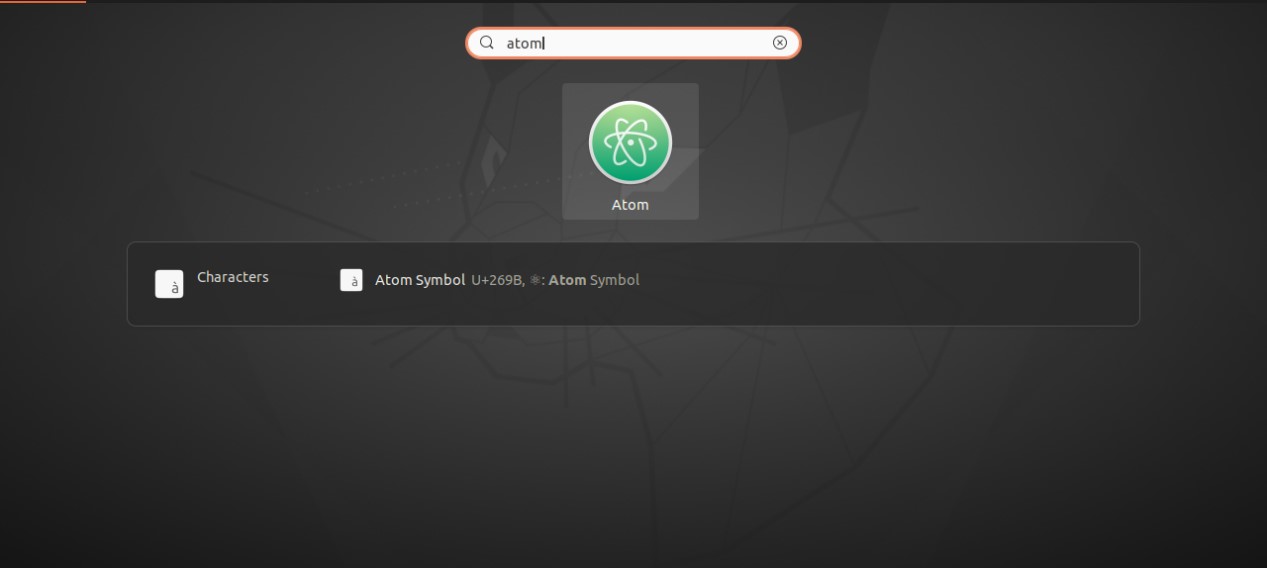
You can open it up, and then you can open all sorts of reading web files JS files, HTML files, CSS, or PHP files, whatever files related to the web development sort of thing.
46. Bash script
Open up your terminal by pressing ‘CTRL+ALT+T’. In this window, you can write and execute commands, and you will also get the instant output for that too. Below is a simple example is given for a better understanding of a bash script.
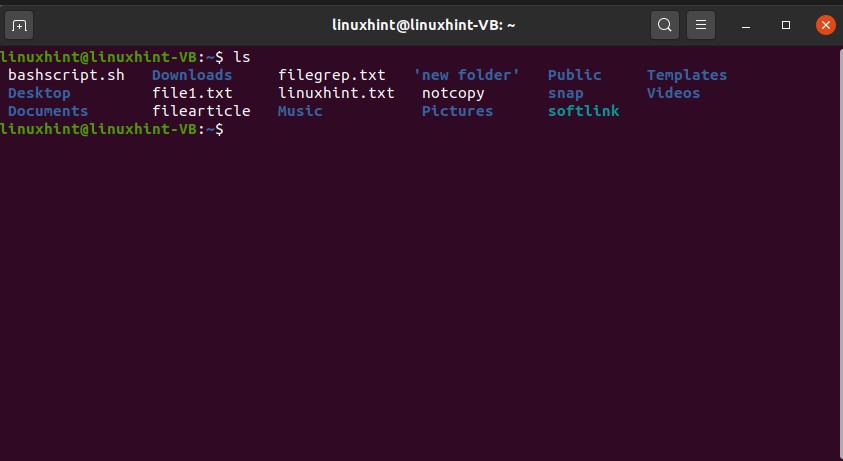
In step 1, you can view the list of files in your current working directory. Execute the ‘ls’ command for this purpose.
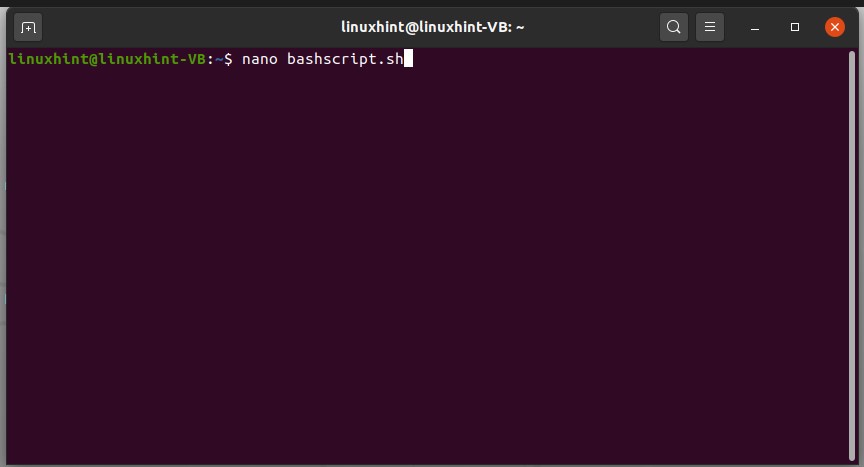
Now, let’s create and edit a bash script file through the terminal. For that, write the following ‘nano’ command in your terminal.

touch bashtextfile.txt
chmod 777 bashtextfile.txt
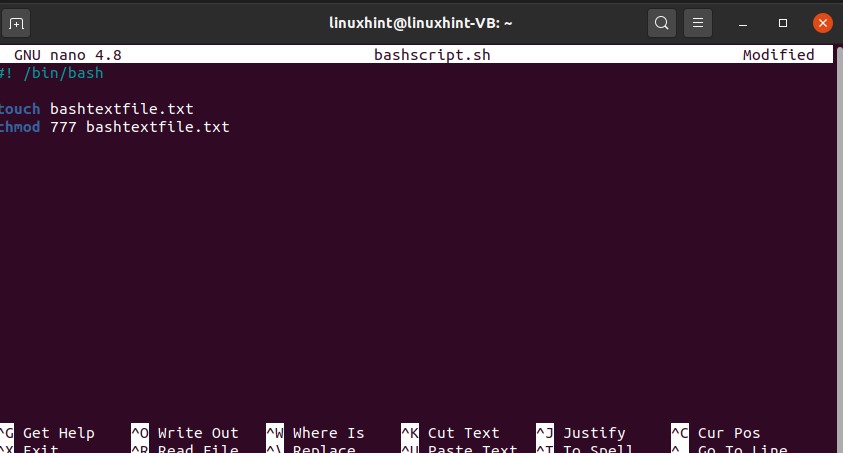
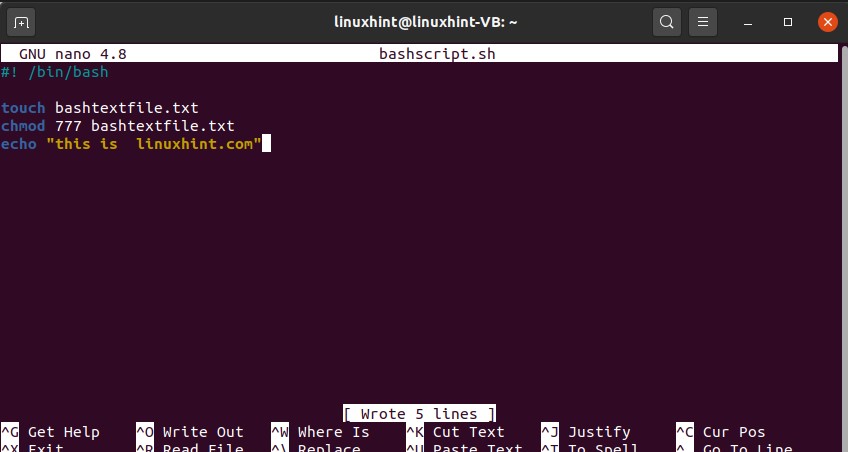
Now let’s create another file using this bash script. You can use the ‘touch’ command for creating the file and ‘chmod’ for changing the file privileges.
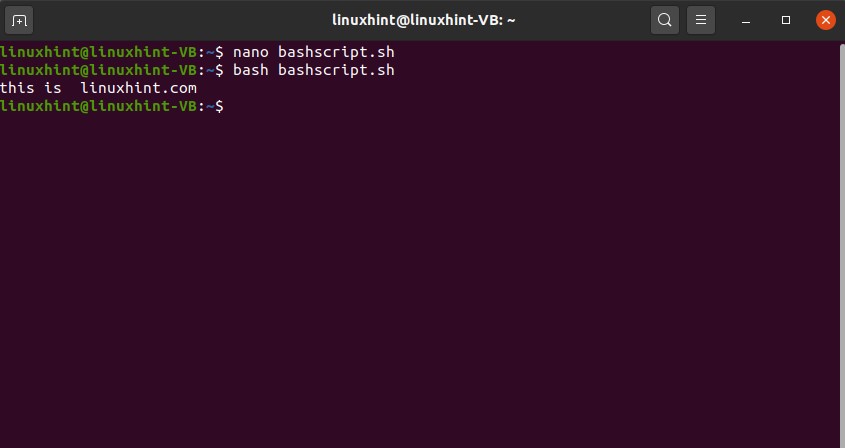
Write out the content using ‘ctrl+o’ and exit this window. Now execute ‘bashscript.sh’ and list the files to see if the ‘bashtextfile.txt’ is created or not.

The ‘bashscript.sh’ is not executable yet. Change the file permissions of this file by the ‘chmod’ command.
‘775’ is the file privileges given to the owner, groups, and public. File privileges are already well explained in the previous topic.

You can also write some statements using the ‘echo’ command.
touch bashtextfile.txt
chmod 777 bashtextfile.txt
echo “this is linuxhint.com”
47. Python scripts
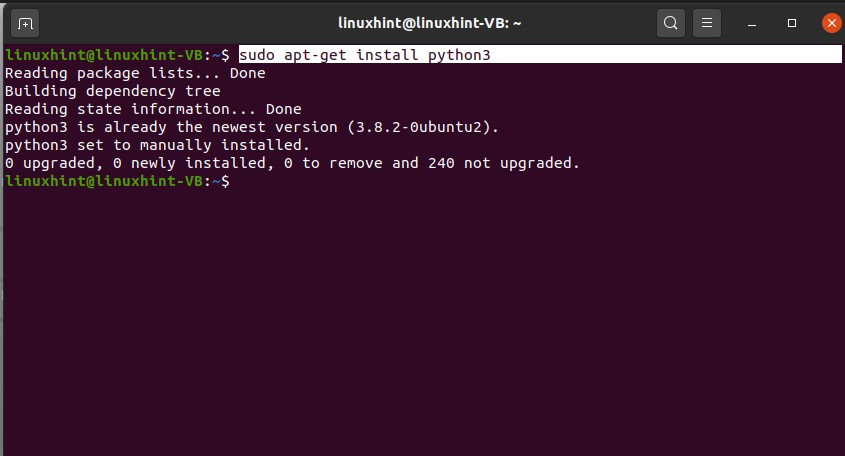
To work with python scripts, First of all, install python3 in your system using the terminal.
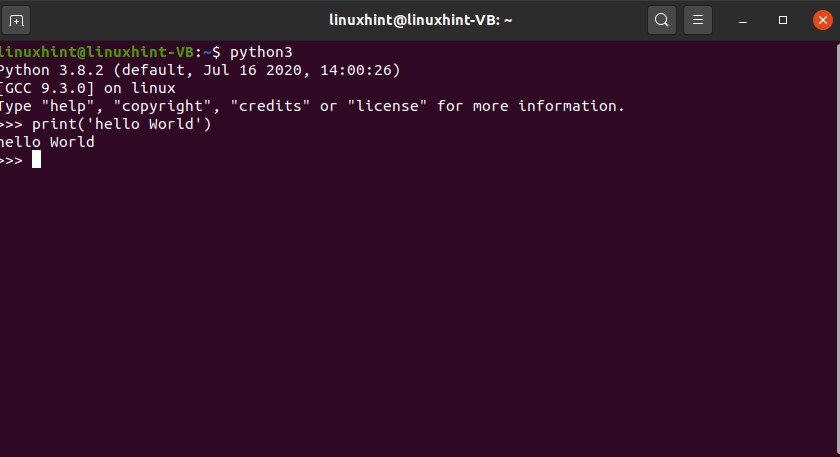
Follow the installation procedure and install it. After the successful installation of python, test it on the terminal
Write some python commands to see the results.

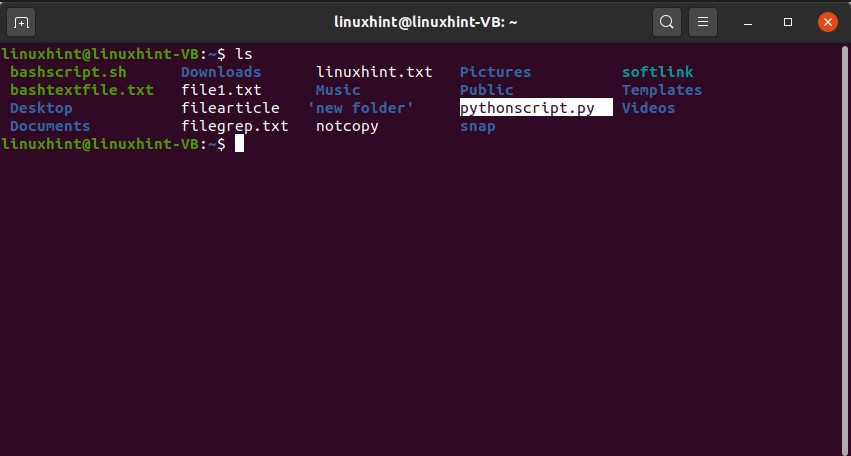
There are other methods of running python using the terminal, which is considered to be the conventional one. First, create a file using the ‘.py’ extension and write all of your python code you want to execute and save the file. To execute this file, simply write the following command in the terminal, and you will get your desired results in seconds.


48. C programs
To work with ‘C programs’ using terminal, first of all, you should know whether ‘gcc’ is installed on your system or not and what is the version of ‘gcc’. To know this thing, write the following command in the terminal.

Now install the ‘build-essential’ package in your system.

Create a ‘c’ file using the touch command.
List the files to check its existence.

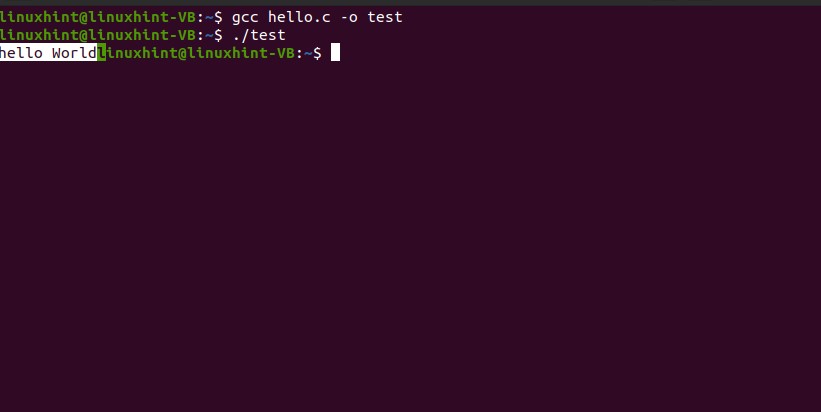
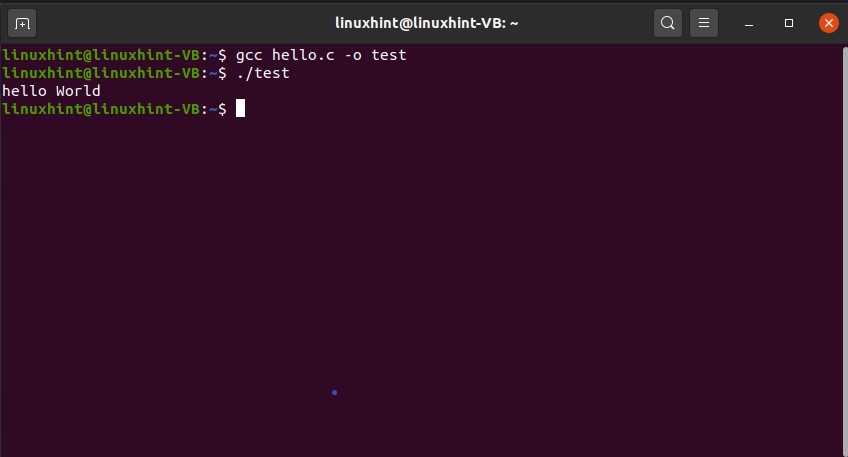
Write the program in this ‘hello.c’ file for which you want to get the output.
int main()
{
printf(“hello World”);
return 0;
}

After that, execute the file on the terminal, using the following command.
Now see the desired result.
Watch FULL VIDEO Course of 4 HOURS: