How Bacula Enterprise Deduplication Works:
Bacula Enterprise calculates specific hashes (MD5 or SHA1) of the files in the directory that you want to backup. Then, it checks whether these hashes are already available in the Bacula Enterprise backup server. If they are, Bacula Enterprise excludes that file from the new backup. Instead of keeping duplicate copies of the same file, Bacula Enterprise adds a link to the file in the backup. Bacula Enterprise Deduplication removes redundant data and stores only the first unique copy of the file in the backup.
Installing Bacula Enterprise Client on Windows 10:
In this section, I will show you how to install Bacula Enterprise client software on Windows 10 correctly. You can also install Bacula Enterprise client software on Windows Server versions as well.
First, visit https://www.baculasystems.com from any web browser to download the Bacula Enterprise Windows client installer. Your browser should prompt you to save the file. Click on Save File.
Bacula Enterprise Windows client installer should be downloaded.
Before you install it, you should disable Windows firewall or add necessary exceptions to Windows firewall as required.
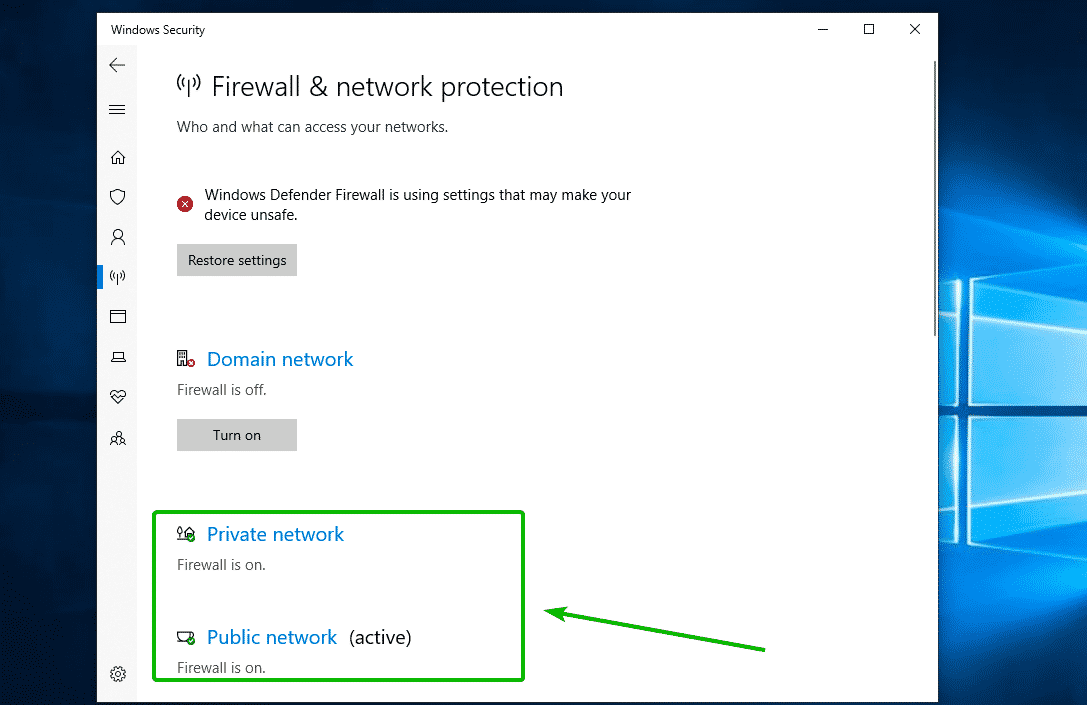
On Windows 10, you can disable Windows firewall from the Windows Security Center App. Open Windows Security Center and click on Firewall & network protection.
Now, click on either one of the network as marked in the screenshot below.
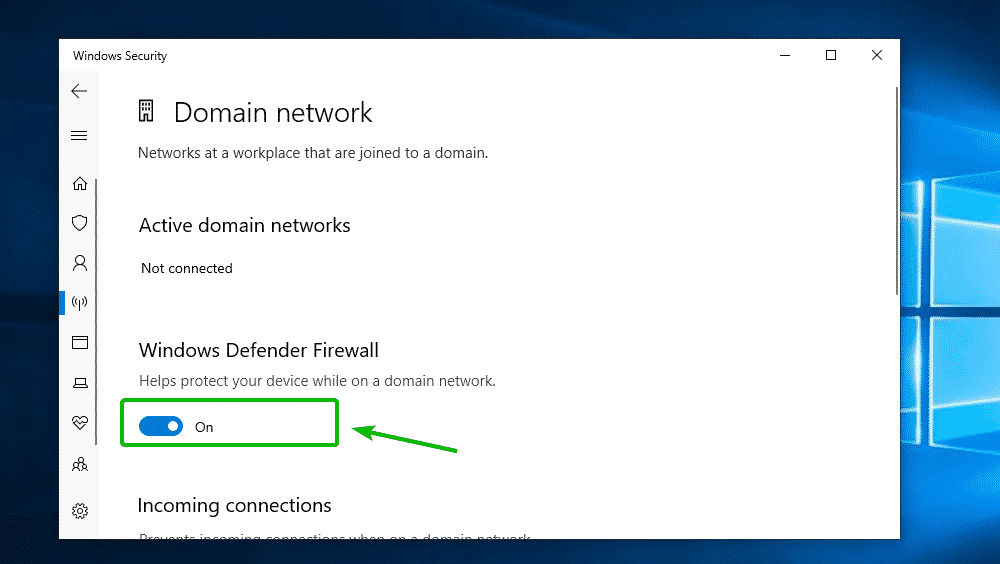
Then, click on the marked toggle switch.
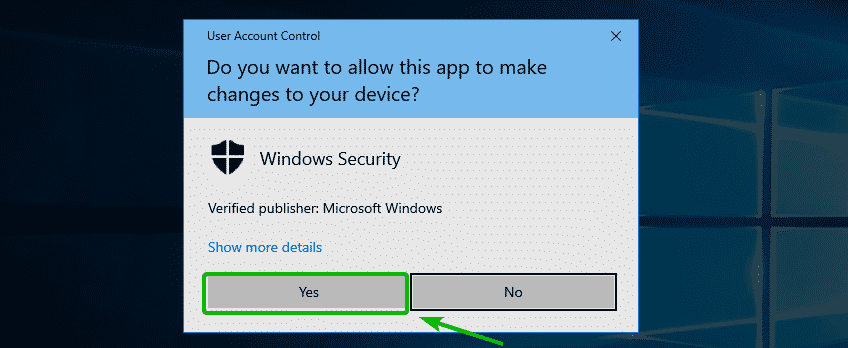
Now, click on Yes.
Windows firewall should be disabled for that network.
Now, do the same for all the other networks.
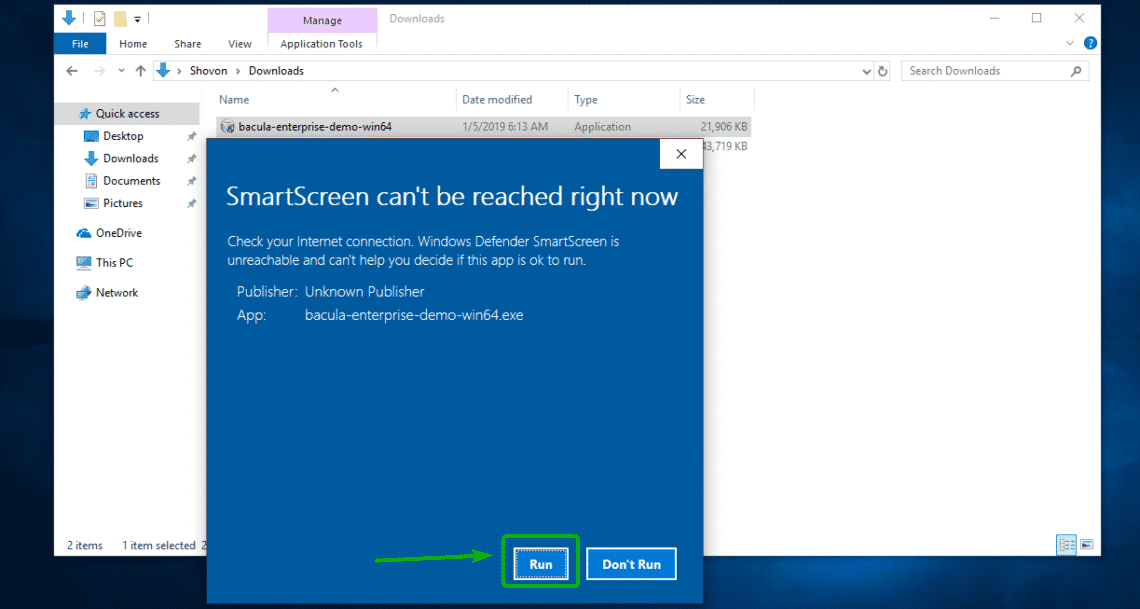
Now, run the Bacula Enterprise Windows installer that you just downloaded. Then, click on Run.
Now, click on Yes.
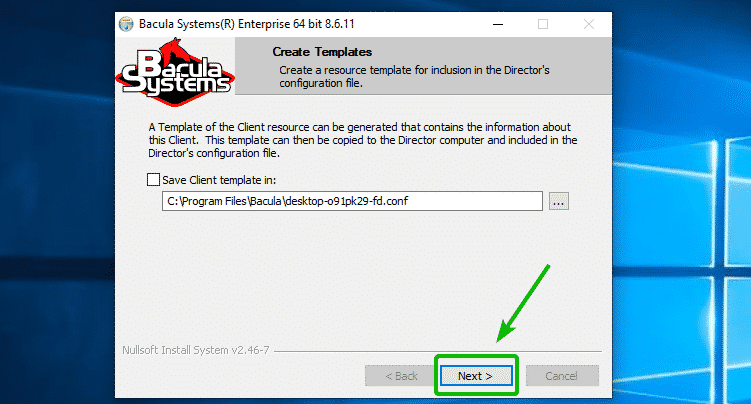
Now, click on Next.
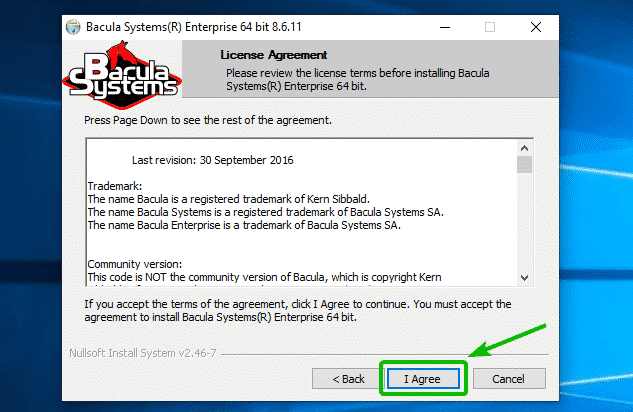
Click on I Agree.
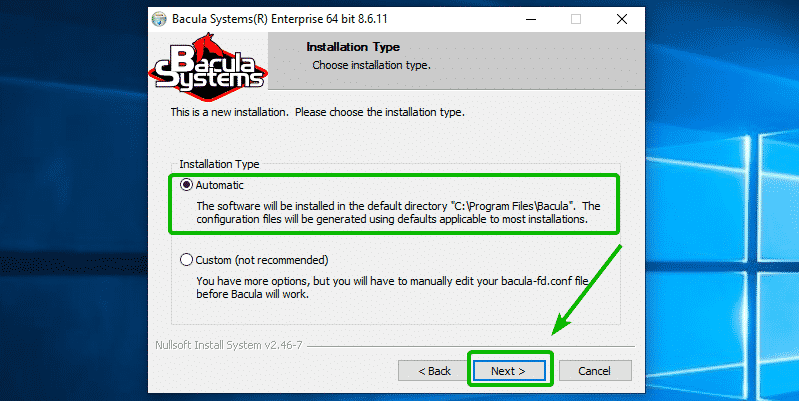
Select Automatic and click on Next.
Now, make sure only Client and Plugins are checked as marked in the screenshot below. Then click on Next.
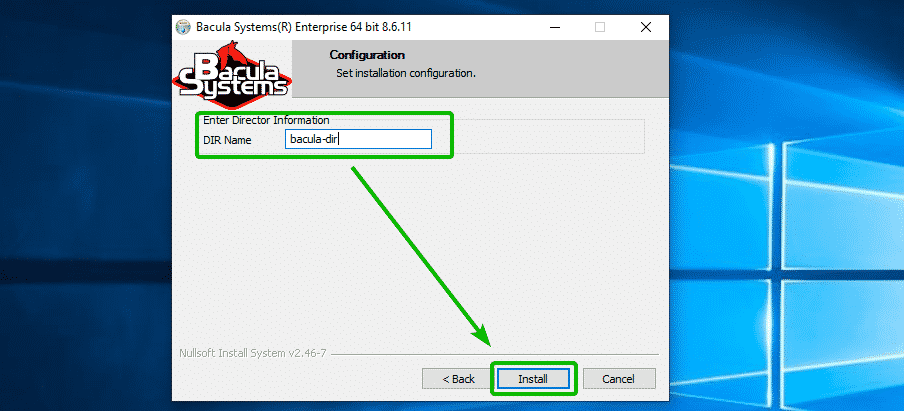
Now, type in the Director name of your Bacula Enterprise Server.
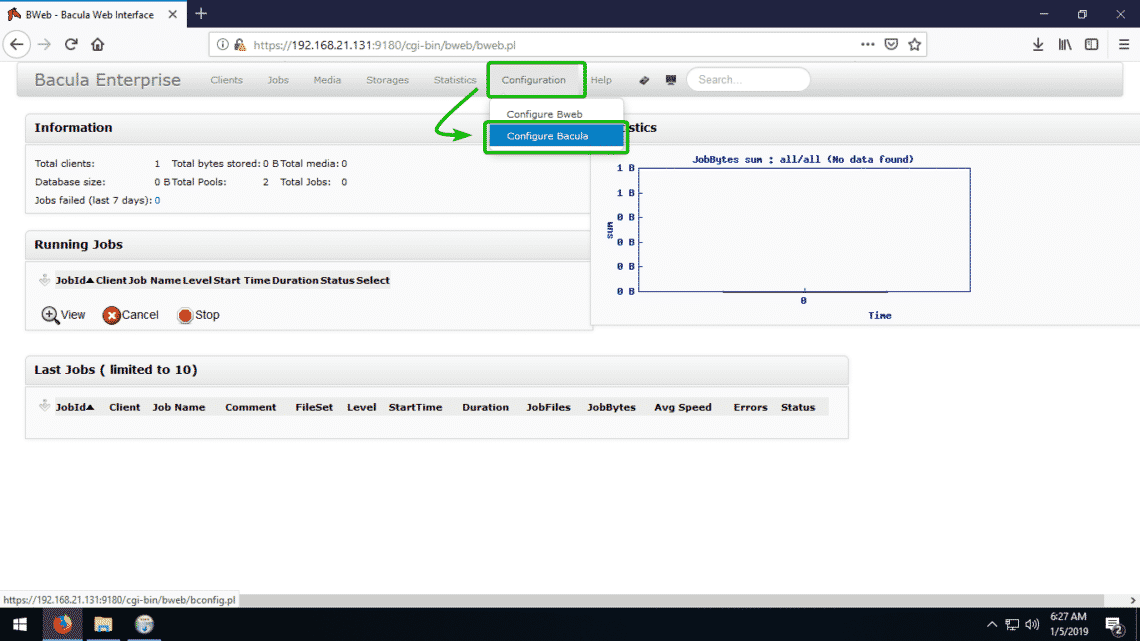
To find the DIR Name or Director Name, visit BWeb (Web Based Management interface of Bacula Enterprise) and go to Configuration > Configure Bacula.
Now, click on Directors.
Right now, I have only one director bacula-dir configured.
Once you’re done, click on Install.
Click on Next.
Bacula Enterprise client software should be installed on your Windows Client. Now, click on Finish.
Adding Your Windows 10 Client to Bacula Enterprise Server:
In this section, I will show you how to add the Windows client that you want to backup using Bacula Enterprise server from Bacula Enterprise Configuration web interface.
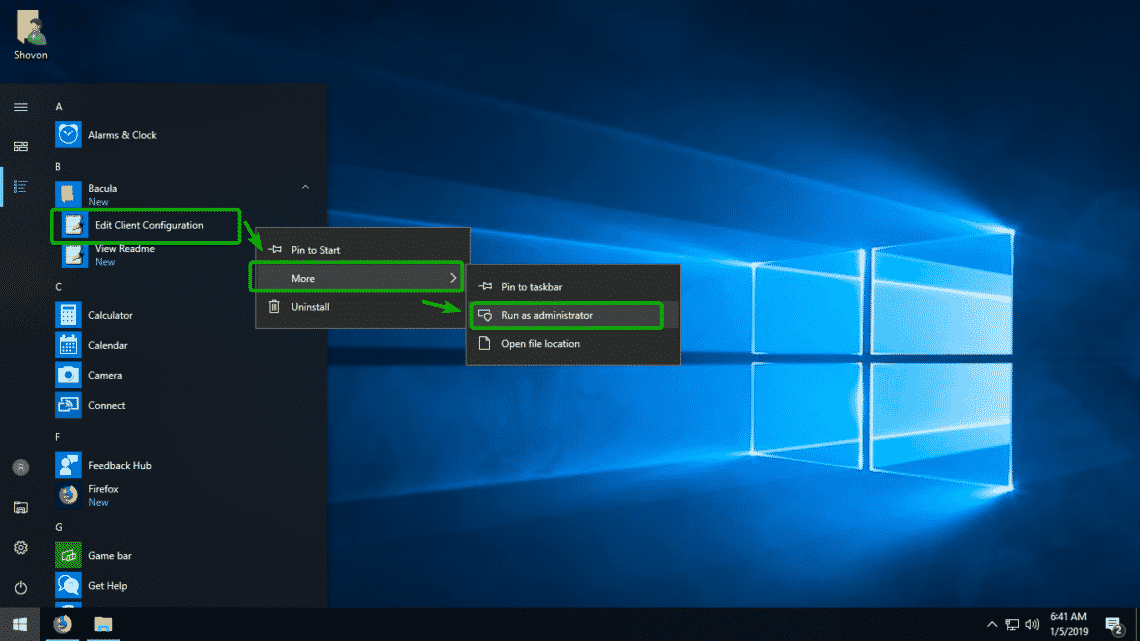
First, run Bacula > Edit Client Configuration as Administrator from the Start Menu.
Click on Yes.
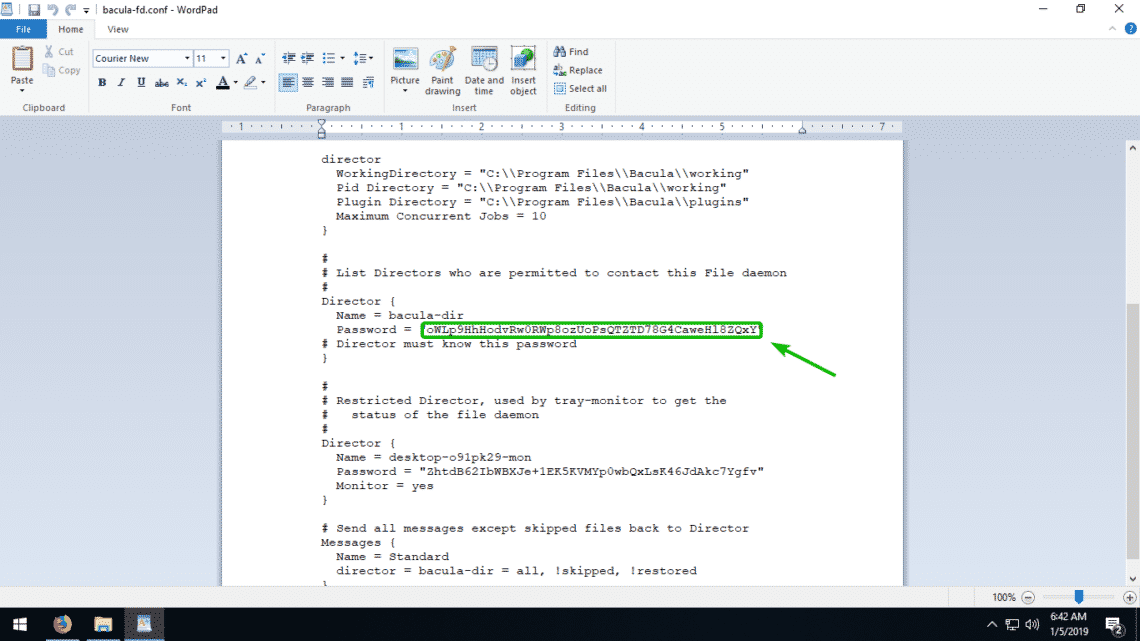
Now, select and copy the password of the director that you set when you installed the client on Windows. In my case it is the bacula-dir directory.
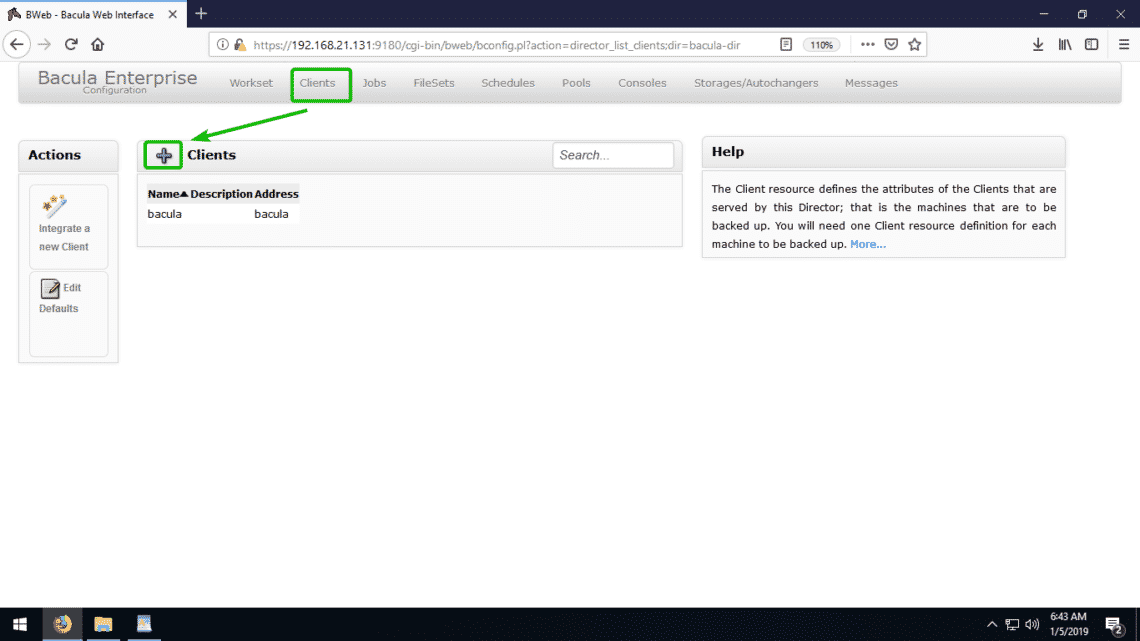
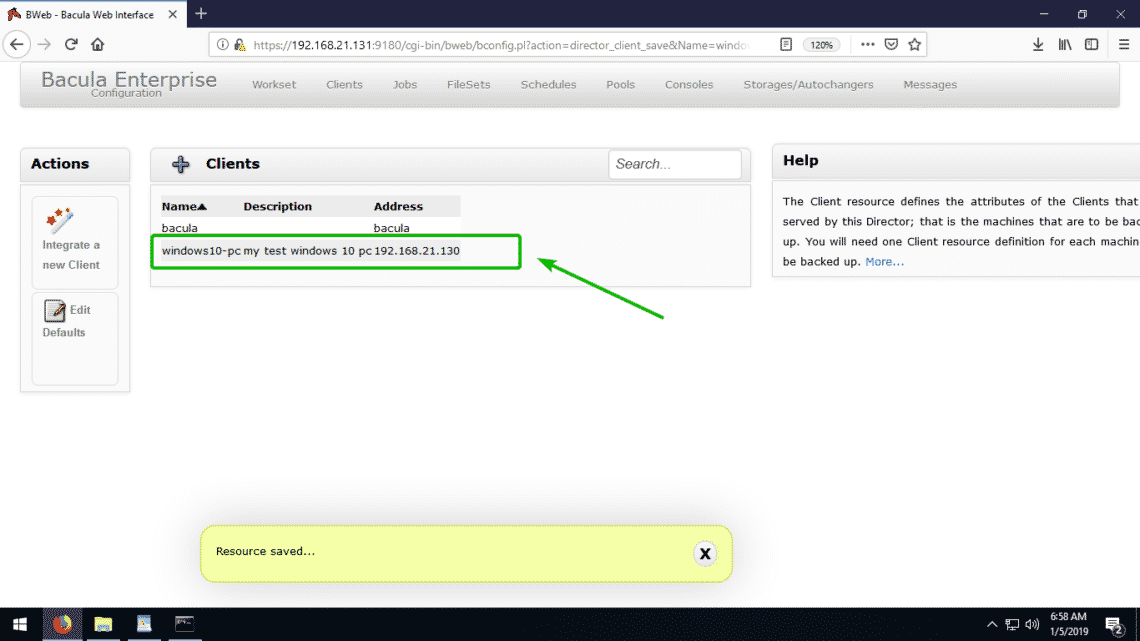
Now, from the Bacula Enterprise Configuration web interface, go to the Clients tab and click on the + button as marked in the screenshot below.
Now, fill in the details as required. The Client Name and Description (Optional) can be anything you want. They are used to identify the client machine that you want to backup. The IP Address is the IP address of the Windows client that you want to backup. The Password is the password that you just copied from the Bacula Configuration file. Once you’re done, click on Add.
You can find the IP address of the Windows client machine that you want to backup with the following command:
The client should be added.
Telling Bacula Enterprise Server What to Backup:
To tell Bacula Enterprise server what to backup from a certain client, you have to create a FileSet.
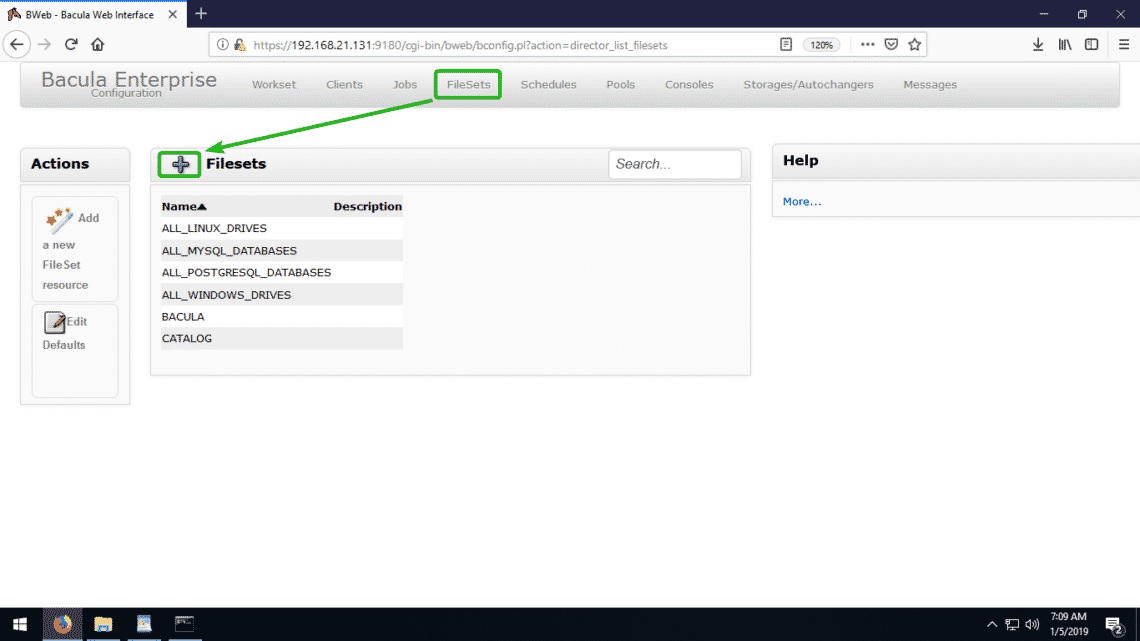
To create a FileSet, from the Bacula Enterprise Configuration web interface, go to FileSets tab and click on the + icon as marked in the screenshot below.
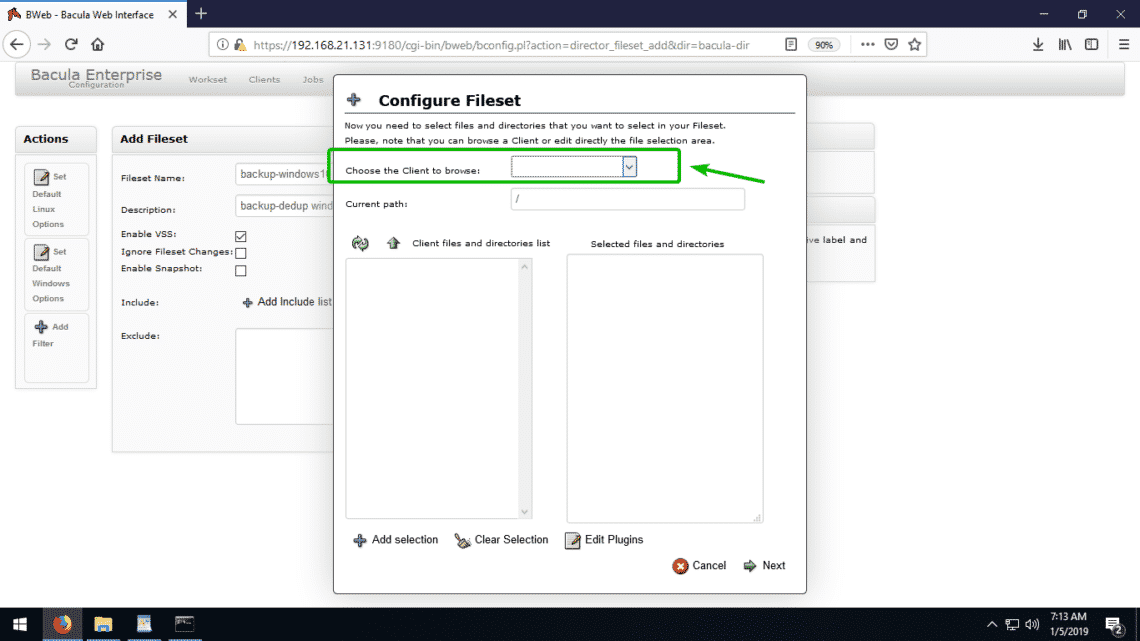
Now, type in a descriptive Fileset Name and a Description (Optional). Then, click on Add Include list.
Now, click on the marked dropdown menu.
Now, select the client that you want to backup.
Click on OK.
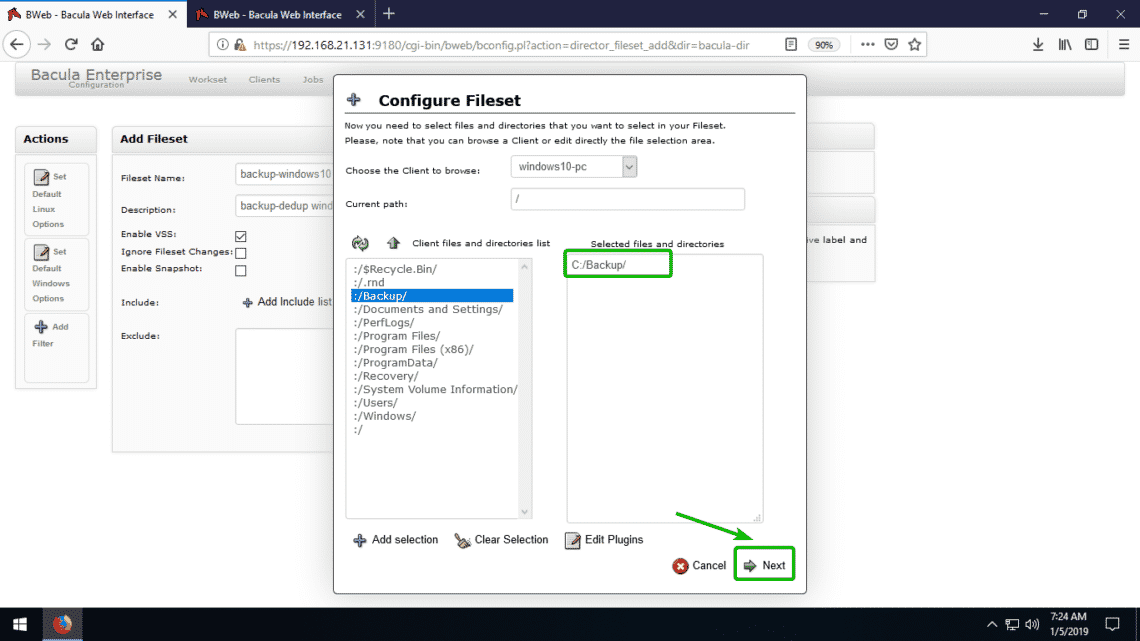
All the directories of your Windows client should be listed. Now, select a directory that you want to backup and click on Add selection.
As you can see, I added the C:/Backup directory. You can select multiple directories if you need. Once you’re done, click on Next.
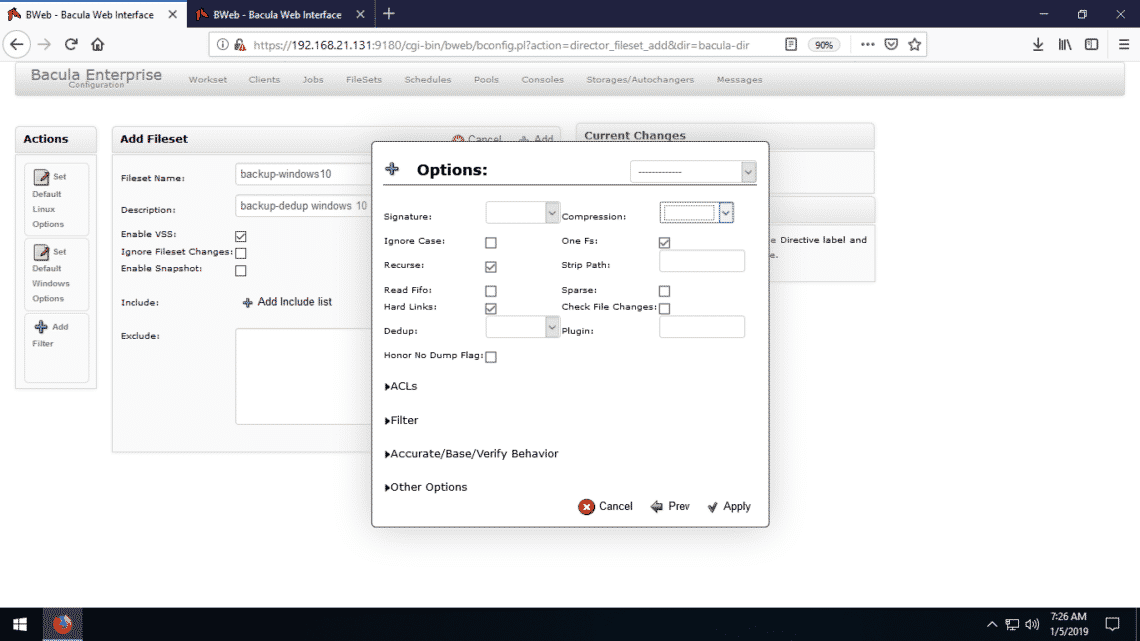
Now, you should see the following options.
Select either the MD5 or SHA1 from the Signature dropdown menu.
Now, select a compression scheme from the Compression dropdown menu.
Once you’re done, click on Apply.
Now, click on Add.
The FileSet should be added.
Creating a New Backup Job:
In this section, I will show you how to create a new Backup Job from the Bacula Enterprise Configuration web interface. In order to backup data from your configured Windows client machine using the Bacula Deduplication engine, you must create at least one backup job.
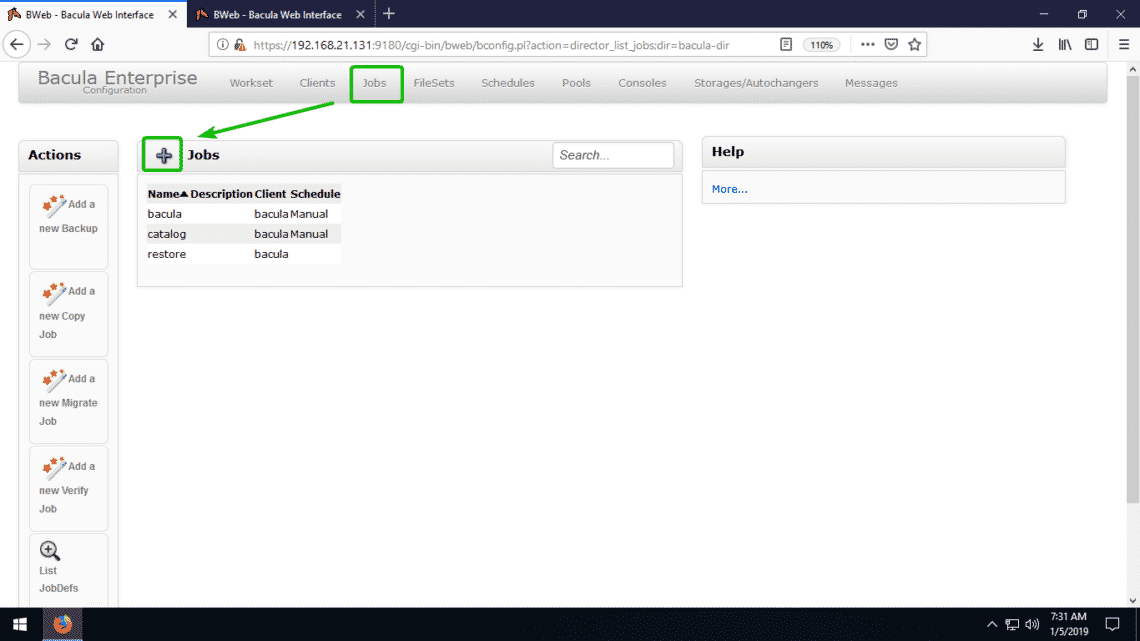
To create a new job, go to Jobs tab and click on the + icon as marked in the screenshot below.
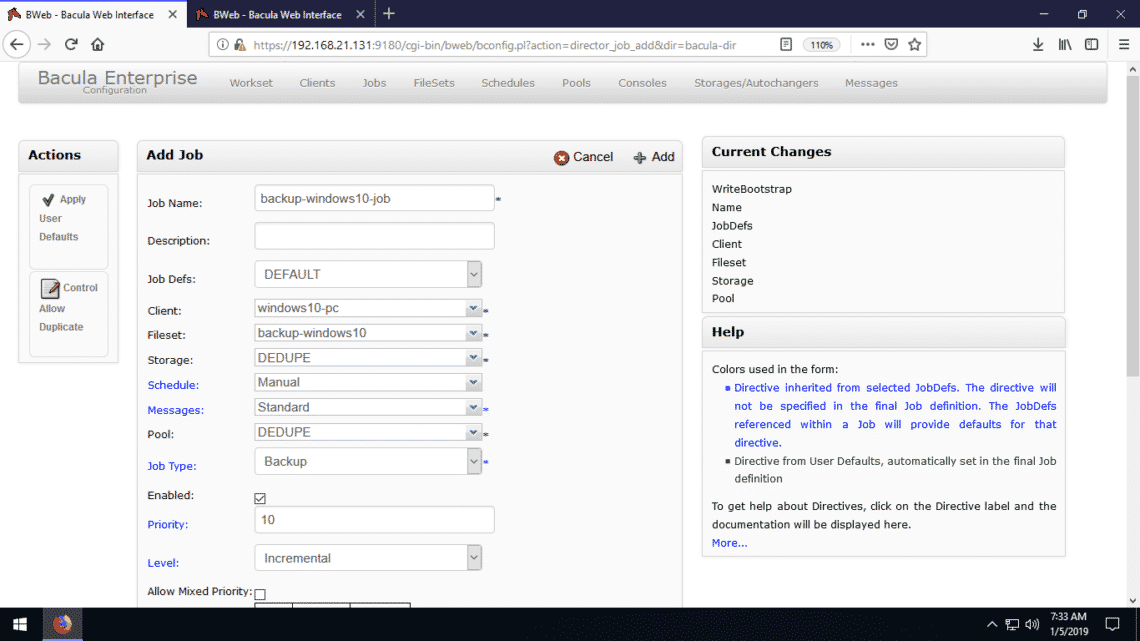
Now, fill in the details as shown in the screenshot below.
Here, the Job Name and Description (Optional) are for identifying the job.
Job Defs should be DEFAULT.
Client should be the client that you want to backup data from.
Fileset should define the files that you want to backup from the Client.
Storage should be DEDUPE as you want to use the Bacula Enterprise Deduplication engine.
Schedule can be Manual, Automatic, Daily, Monthly, Weekly. It defines how often you want to backup.
Pool should be DEDUPE.
Job Type should be Backup as we are trying to backup data from our Windows client.
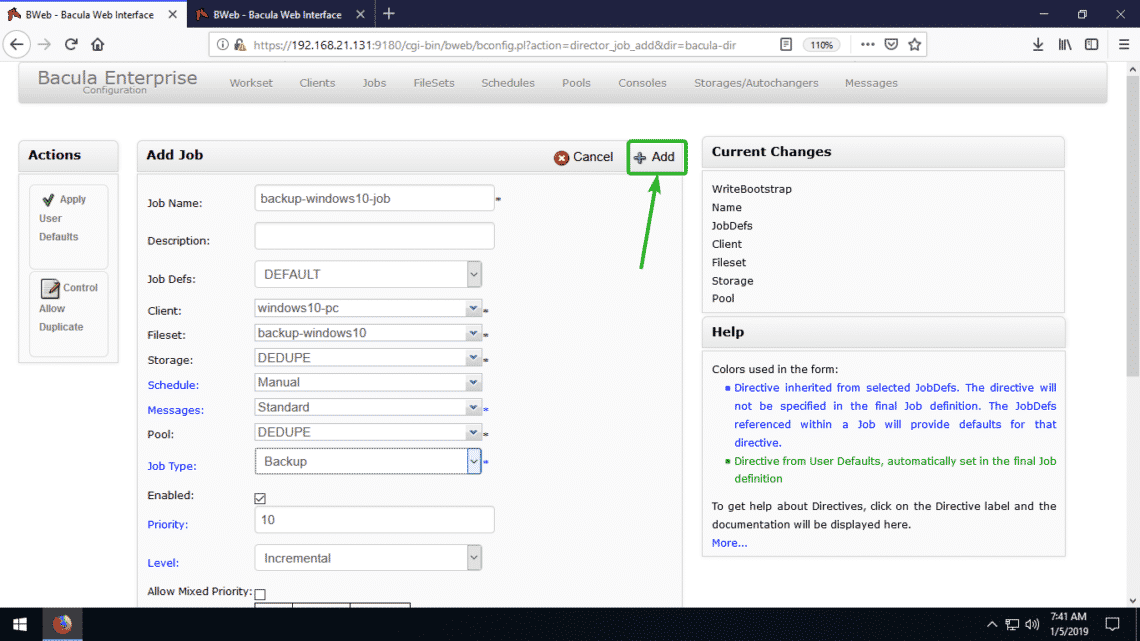
Once you’re done, click on Add to add the Backup job.
The job should be added as you can see in the screenshot below.
Now, from the Workset tab, click on Commit All Worksets.
Now, check Reload checkbox and click on Restart/Reload.
Backing Up Data Using Bacula Deduplication Engine:
In this section, I will show you how to run the backup job we’ve created earlier to backup data from our Windows client.
To do that, from the BWeb interface, go to Jobs > Defined Jobs.
Now, select the backup job you’ve created from the dropdown menu.
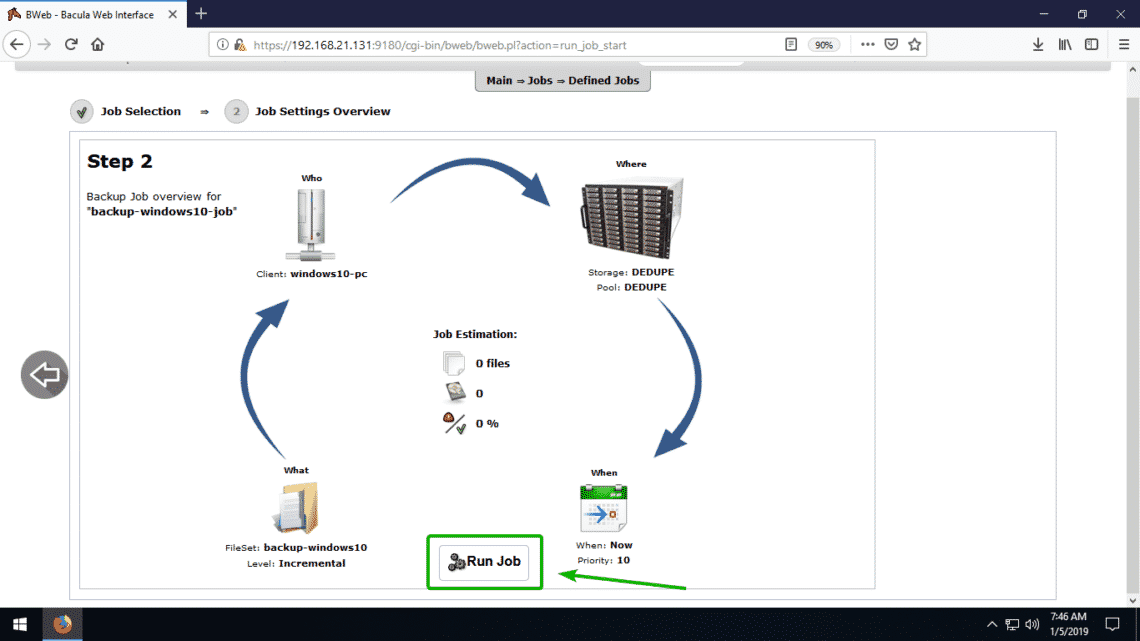
Now, click on Run Job.
Your backup job should start.
Once the backup is complete, it should show you how much disk space the backup consumed. In this case, it took about 64.1 MB of disk space.
As you can see, it’s the same as the files I have in the C:/Backup directory.
Now, to demonstrate the true magic of Bacula Enterprise Deduplication feature, I made a few copies of the same files in the C:/Backup directory. It’s about 576MB of duplicated files.
Then, I started the backup job again.
As you can see, it took only 296 bytes of disk space for the new backup. But there are about 512 MB of new (duplicated) files in C:/Backup. Bacula Enterprise knows about the duplicated files and it discarded them. It stored only a single copy (unique) of these files, saving a huge amount of disk space in the process.
So, that’s how you backup all of your important data efficiently with Bacula Enterprise Deduplication feature. This feature makes Bacula Enterprise one of the best backup solutions out there. Thanks for reading this article.


