You can access AWS CLI using the command line on your local system. You just have to configure it with your AWS credentials and access key. Visit the following article to learn how to set up the AWS CLI credentials on Windows, Linux, or Mac.
https://linuxhint.com/configure-aws-cli-credentials/
This article will discuss the following operations that can be performed on EC2 using the AWS command line interface.
- Create EBS volume
- Attach EBS volume to an Existing Instance
- Create EBS volume Snapshot
- Copy EBS Snapshot to another region
- Create AMI from the instance
- Copy AMI to another region
Create EBS Volume
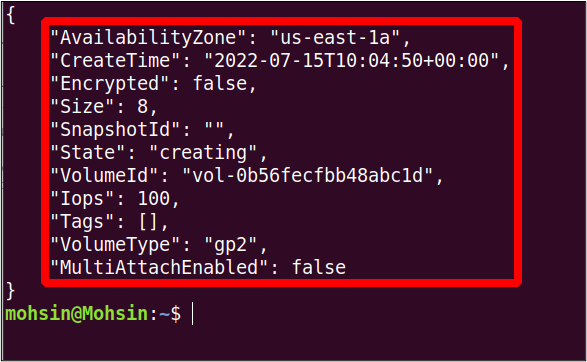
The AWS command line interface can also be used to create the EBS volumes in EC2. The create-volume command can create a specific EBS volume by specifying the volume type and size. See the following command for EBS volume creation.
--volume-type <Volume Type> \
--size <Size in GBs> \
--availability-zone <AZ where you want to launch volume>

The above command will create an EBS volume of type gp2 with 8 GB in size. The availability zone in which this instance will be created is us-east-1a. In the output, you will view the details as shown below.
Attach EBS Volume to an Existing Instance
In the last section, we created an EBS volume, but this volume is not attached to any EC2 instance yet. So in this section, we will see how to attach an EBS volume with an existing EC2 instance with the AWS command line interface.
First, we need the volume-id of the EBS volume we will attach. To get the details of all the EBS volumes available, you can use the following command.
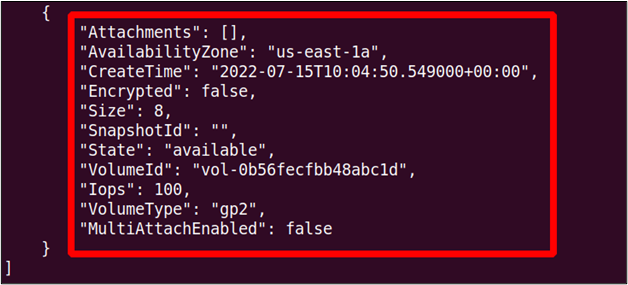
You can observe that the state of volume is available at present, which means it is not attached to an EC2 instance yet.
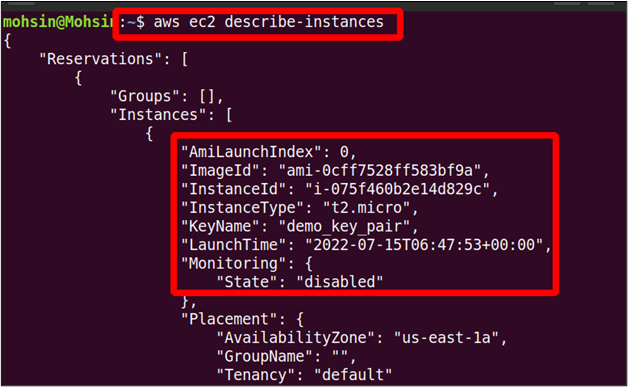
Next, we will look for the instance-id of the instance to which we want to attach the EBS volume. Use the following command to list all the instances using AWS CLI.
After getting the EBS volume ID and EC2 instance ID now, we can attach the EBS volume to the instance using the following command.
--volume-id <ID of EBS Volume> \
--instance-id <ID of EC2 Instance> \
--device <device path and name>
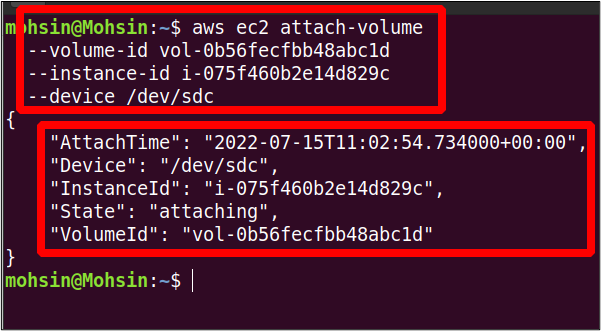
So our volume is successfully attached to the EC2 instance. Now you can again check the state of the EBS volume by using the following command.
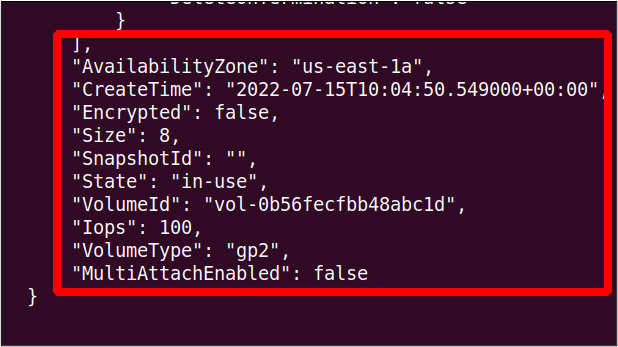
You can see that the state of the volume is changed to in-use, which previously was available.
Create EBS Volume Snapshot
When we launch an EC2 instance, a new storage volume is created and attached to it as the root volume containing the AMI of that instance. By default, it is an EBS (Elastic Block Store) volume where all the information is stored. We can backup this volume for disaster recovery or to launch a new instance from the same EBS volume. To back up the EBS volume, a snapshot of that volume is created. This section will show how to create the EBS volume snapshot using the AWS CLI.
First, we have to find the ID of the EC2 instance for which we want to create the EBS snapshot. The following command is used to view the details of all the instances.
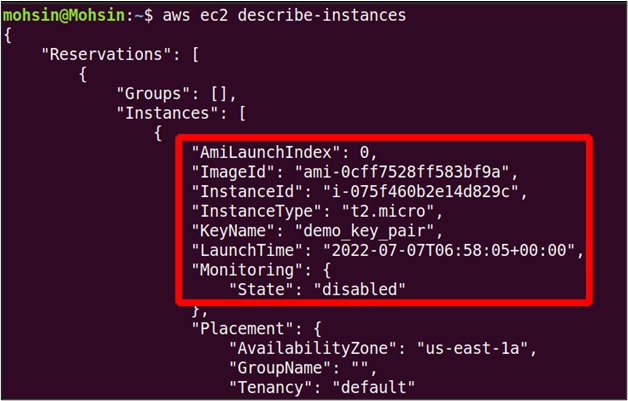
So from here, we got the instance ID, which can be used to view the volume ID of the EBS volume associated with this EC2 instance.
--filters Name=attachment.instance-id,Values=<Instance ID>
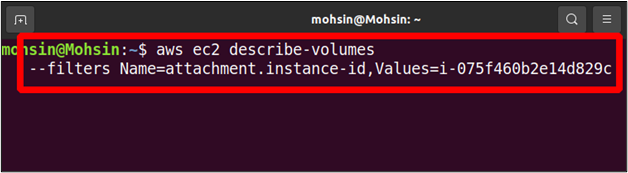
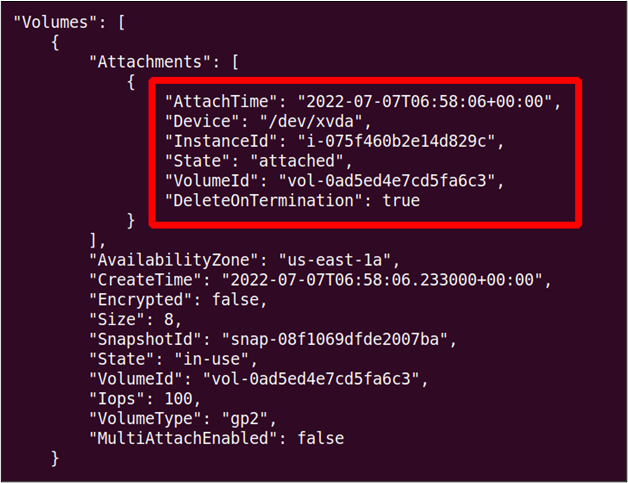
In the output, you will find details of all the volumes attached with this instance, including the volume ID that we need to create the snapshot of this volume. In our case, only one EBS volume is attached to the EC2 instance, but there can be more than one volume.
So now, we can create the snapshot of this volume using the following command on AWS CLI.
--description "<Snapshot Description>" \
--volume-id <Volume ID>
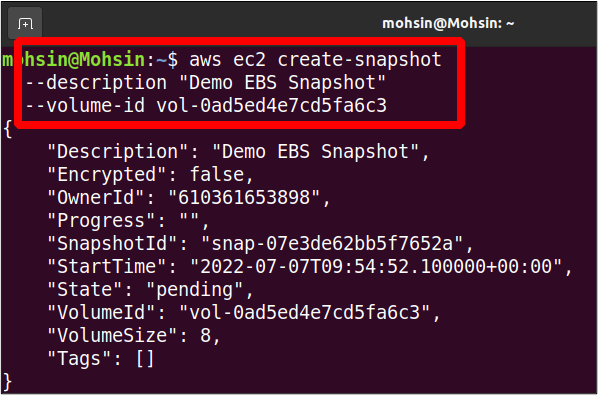
So our snapshot is ready; we can further utilize it for backup purposes and can also copy this snapshot to some other region.
Copy EBS Snapshot to Another Region
Previously we have seen how to create an EBS snapshot with the AWS command line interface. This EBS snapshot can be copied to another region within the same AWS account for backup.
This section will see how we can copy the EBS snapshot to another region within the same AWS accounts. So first, we will view all the snapshots in our AWS account.
--owner-ids self
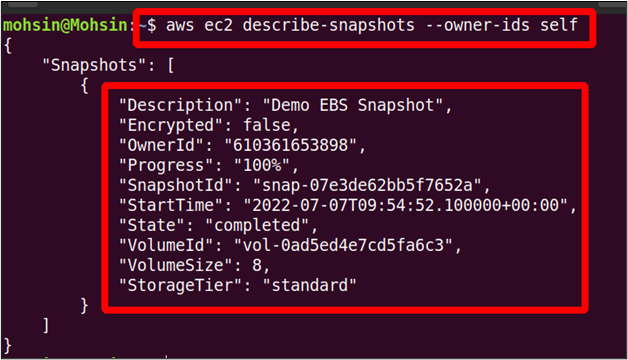
The above command will list all the EBS snapshots owned by your AWS account, and any one of these snapshots can be copied to another AWS region in the same AWS account.
You can use the following command to copy the snapshot in your AWS account from one AWS region to another.
--region <Present Snapshot Region> \
--source-region <Snapshot Destination Region> \
--source-snapshot-id <Snapshot ID> \
--description "Snapshot Description"
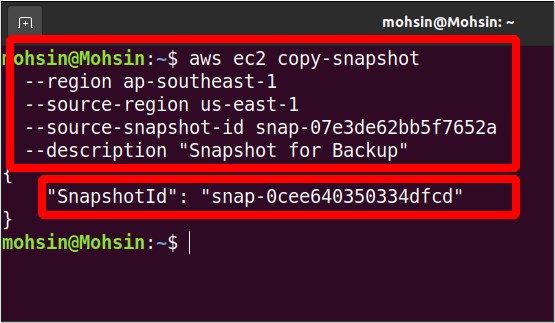
So our snapshot is now copied from the us-east-1 region to the ap-southeast-1 region. Now we can view the snapshots in the destination region using the following command.
--owner-ids self \
--region ap-southeast-1
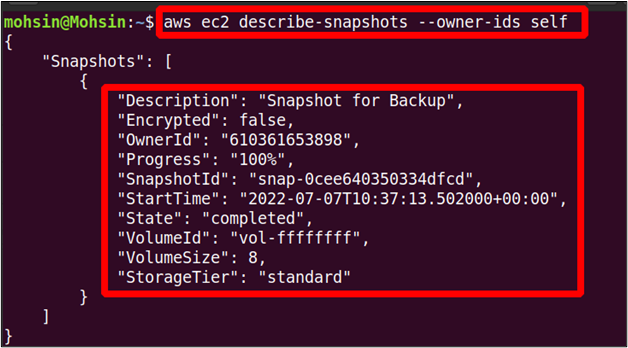
The above command will list all the snapshots available in the ap-southeast-1 region, and you can find the copied snapshot here.
Create AMI From the Instance
An AMI (Amazon Machine Image) contains all the information required to launch the instance. Suppose you are running a Linux instance and have made some changes like installing new packages in it or configuring the system according to your requirement. After some time, you want a new instance similar to the one running before, but you don’t want to perform all the configurations on the new instance again. Creating a new AMI from the running instance is very helpful because it will have all configurations and installations the same as the previous instance.
This section will show how we can create the AMI from an instance using the AWS command line interface. First, you must select the instance from which you want to create the new AMI. The command below can be used to list all the EC2 instances.
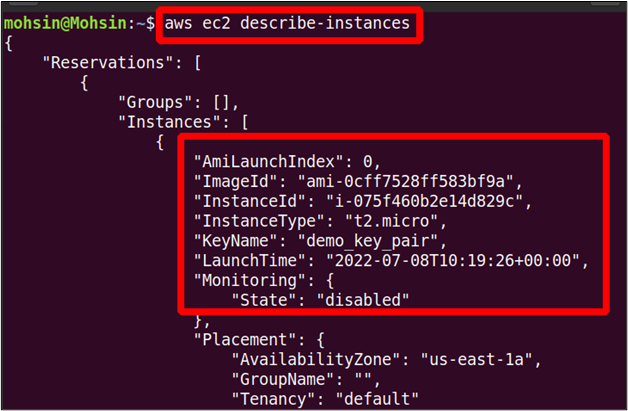
You can get the ID of the instance from which you want to create the AMI, and this ID can be used to create the AMI using the following command.
--instance-id <ID of the Instance> \
--name "Image Name" --description "AMI Description"
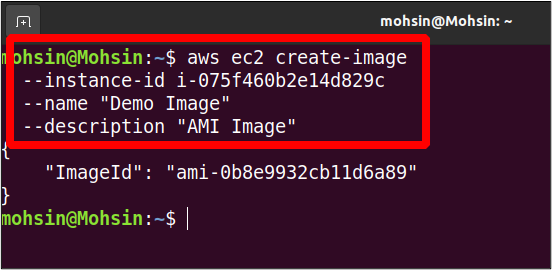
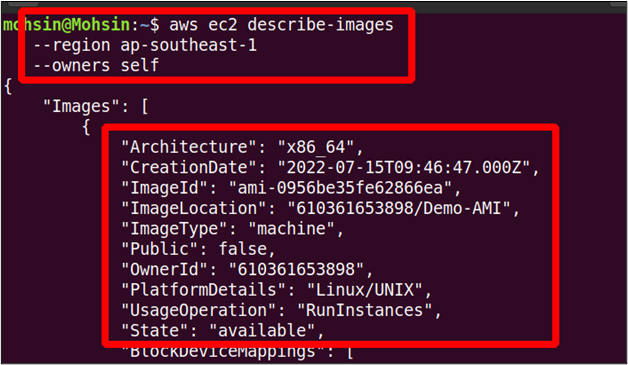
The above command will create the new AMI; in the output, you will only get the image ID of the newly created AMI. You can list all the AMIs using the following command.
--owners self \
--region <AWS Region>
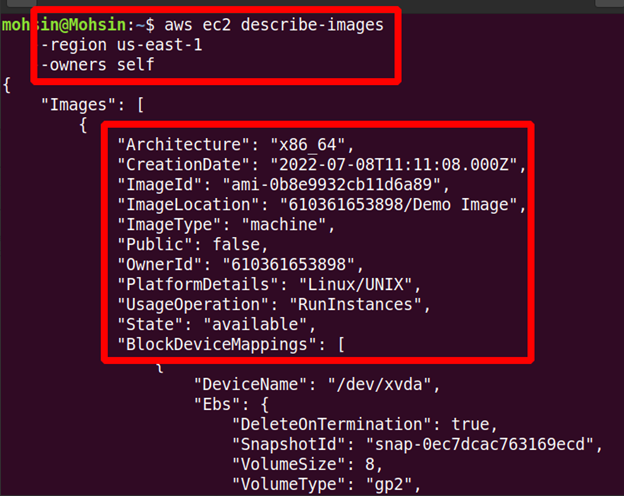
So our new AMI has been created, and you can view the details in the output.
Copy AMI to Another Region
The custom AMIs created by you can also be copied from one AWS region to another. Take a case where you want to launch a new EC2 instance using a custom AMI present in a different region. For this, first, you will have to copy the machine image to the region where you want to launch your new instance. In the previous section, we have created our AMI already; now, we need to copy it to the new region.
The following command can copy the AMI from one AWS region to a different region within the same AWS account.
--region <destination region> \
--name <Name of AMI> \
--source-region <source region> \
--source-image-id <AMI ID> \
--description <“Machine Image Description”>
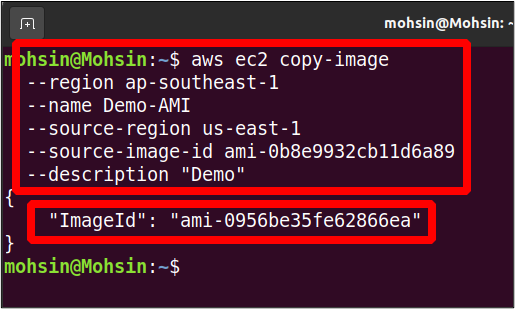
So your AMI has been moved to another AWS region, and you can list the available AMIs in the destination region using the following command.
--owners self \
--region <destination region>
Conclusion
This article shows how to manage your EBS volumes and AMIs using the AWS command-line interface. You can create snapshots of the EBS volumes attached to running instances and even copy them to other regions for backup and recovery. Then you can also create AMIs from your older instances and move these machine images to different regions. You can also launch new instances from these images, which will have the same configurations as the previous ones. We have also seen how to create new EBS volumes from scratch and then attach them to your existing instance, which can help solve your storage issues.