“AWS allows you to manage all services and resources using the command line interface. Although you do not get a fancy graphical user interface, it is still considered more professional and handy. There are even a few options you cannot utilize using the GUI console, for example, enabling “MFA delete” on the S3 bucket and generating pre-signed URLs for an S3 object. Before you start managing your instances using the AWS CLI, you must configure it on your system. Please visit the following article to learn how you can set up the AWS CLI credentials on Windows, Linux, or Mac.”
https://linuxhint.com/configure-aws-cli-credentials/
This article will discuss the following operations that can be performed on EC2 using the AWS command line interface.
- Creating SSH key pair
- Creating Instance Security Group
- Creating EC2 instance
Creating SSH Key Pair
Before creating an EC2 instance on AWS, we need to create an SSH key that will be configured with the EC2 instance to access it via SSH. Use the following commands on your AWS CLI to generate the SSH key pair before you launch an EC2 instance.
--key-name <Key Pair Name> \
--key-format <Format Name>
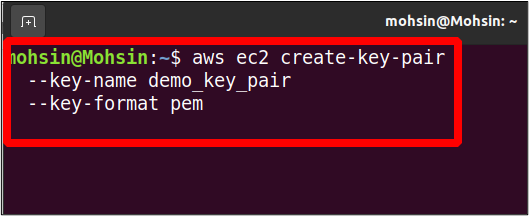
Here we have just provided the name for our key pair and the key format. For the key format, you can either go for pem or ppk, depending upon the operating system. The pem format is mostly used to access the Linux OS via SSH, while the ppk format is used to access the Windows machine via RDP.
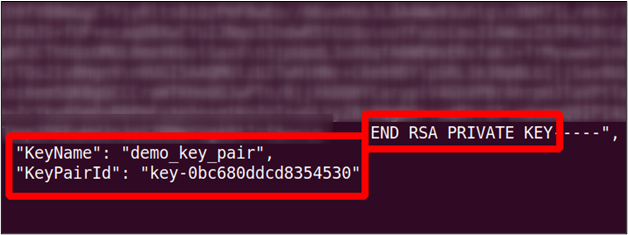
The above command will generate the private key in the output; you need to save it immediately as you can never see it again. You must save this output in a file with the .pem extension, and it will be used to SSH in the instance it is associated with.
Creating Instance Security Group
Security groups help improve the network security of your EC2 instance by allowing you to define inbound and outbound traffic for your instance. The security group acts as a virtual firewall in front of your EC2 instance and can be used to protect your instance from being hijacked. You can specify IP ranges and other security groups as sources and can allow traffic on specific ports from these sources.
Security groups have a limitation: you can only create the allow rules, and the deny rules can not be created. Moreover, the security groups are stateful, meaning if you set an inbound rule for an IP, it will automatically attain the outbound capability.
To create a security group using the AWS command line interface, use the following command in the terminal.
--group-name <Name> \
--description <“Security Group Description”>
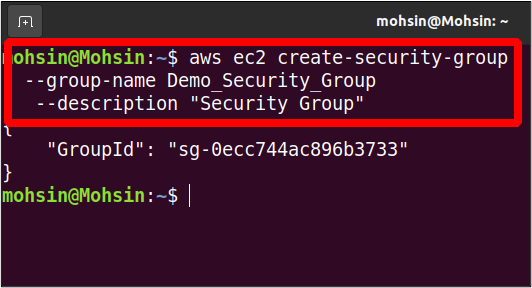
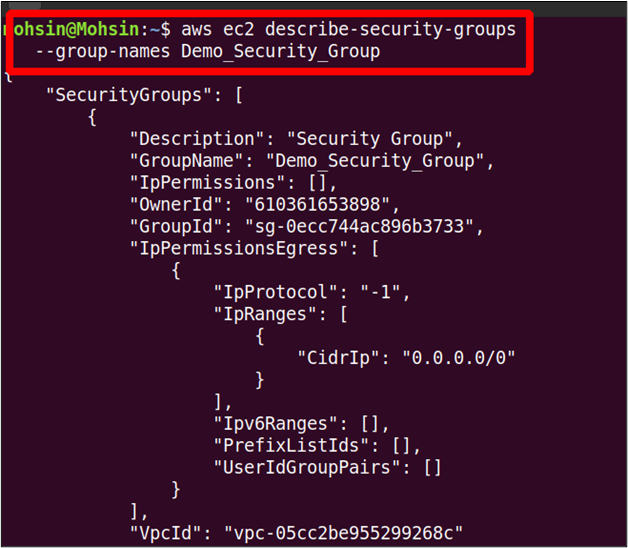
In the output, you only get the security group ID. The newly created group, by default, has no inbound permissions and all outbound permissions. You can view your security group details as described below.
--group-names <Group Name>
Now to add an inbound rule to the security group, the following command can be used.
--port 22 \
--protocol tcp \
--group-id <security group id> \
--cidr 0.0.0.0/0
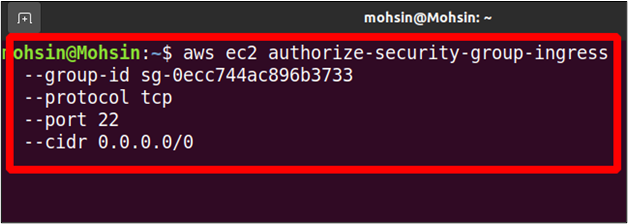
In this command, you authorize your security group to allow network traffic from any IP on port 22. The command will generate the following output.

Now, if we again run the describe-security-group command, you will see the newly added inbound rule there.

Creating EC2 Instance
Creating an EC2 instance from the CLI is a simple task; there are a large number of options you can specify while creating the EC2 instance, which you will see one by one in detail.
Let’s start with creating the instance using AWS CLI with minimal options. The following command can be used on the terminal to create the EC2 instance with minimal options.
--image-id <Image ID> \
--count <No. Of instances> \
--instance-type <Instance Type> \
--key-name <Key Pair Name> \
--security-group-ids <Security Group ID>
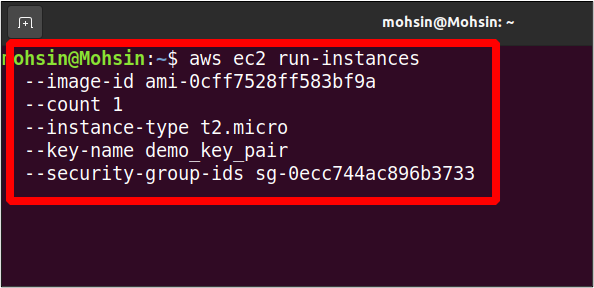
When you run this command, you will get a detailed output of the newly created instance.
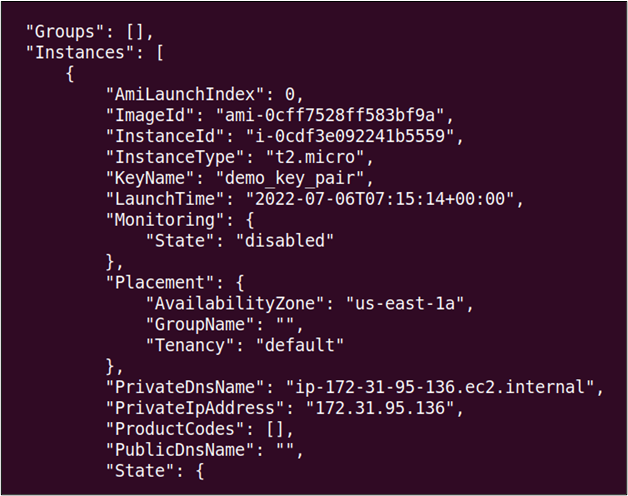
As you can see, there are multiple parameters specified in the command to create the EC2 instance, and the following is a detailed description of each parameter.
The image-id is the ID of the Amazon machine image or the operating system you want to use on your instance. There is a long list of available machine images in AWS, and you can also create your own image and sell it in the community marketplace.
The count option can be used to specify the number of EC2 instances you want to create using the AWS command line interface with the same configurations.
The instance-type option is used to specify the resource allocation like CPU and memory to your EC2 instance. AWS provides various instance types, and you can view all these instance types by visiting the following link.
https://aws.amazon.com/ec2/instance-types/
The key-name option specifies the name of the SSH key pair we need to attach to our instance. This SSH key pair can then be used to access the EC2 instance remotely. In the previous section, we have discussed how we can create an SSH key pair using the AWS command line interface.
The security-group option is used to specify a list of security groups that will be attached to the EC2 instance launched. AWS will attach the default security group with the EC2 instance if not specified.
Additional EC2 Parameters
We already have explained many instance parameters, but still, there are many other parameters available. This section will discuss more detailed parameters that help us configure the newly created EC2 instance according to our requirements. These parameters are defined with EC2 instance creation but are optional and not required to specify all the time.
Availability Zone
Each AWS region has one or more availability zones that are geographically separated data centers. They help increase the availability of the AWS service in a region; if one availability zone in a region goes down, the other availability zones will still operate.
When an EC2 instance is created, AWS automatically assigns an availability zone to it, but you can also specify it according to your infrastructure requirement. The availability zone can be specified using the following parameter while creating the EC2 instance using the AWS command line interface.
--count <Number of Instances> \
--instance-type <Type> \
--placement AvailabilityZone=<Name of Availability Zone>
--image-id <Image ID> \
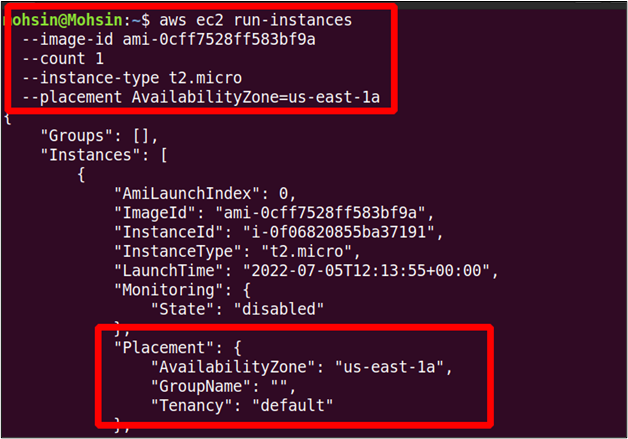
You can see in the output that the instance is launched in our desired availability zone.
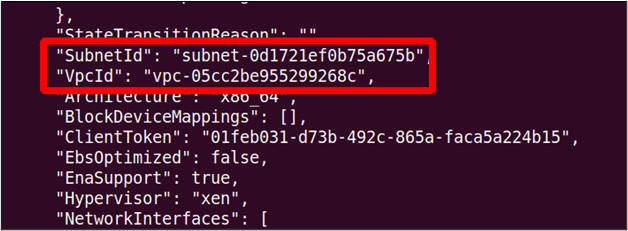
VPC and Subnet
Usually, we create a separate VPC ( virtual private cloud) and subnets for each new application we launch in our AWS account. This ensures a high level of security and allows all the resources to communicate without accessing the public network. If you do not specify a VPC, all the instances are launched in the random subnet of the default VPC.
While creating the EC2 instance using the AWS command line interface, you can specify the subnet by using the –subnet-id option.
--instance-type t2.micro \
--subnet-id subnet-0d1721ef0b75a675b \
--image-id ami-0cff7528ff583bf9a \
--count 1
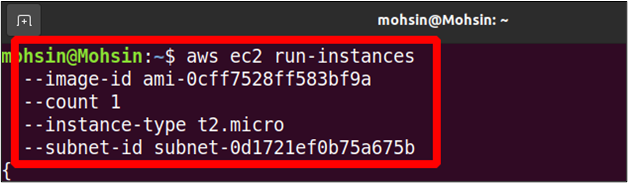
While creating the EC2 instance, we only need to specify the subnet ID, and the EC2 instance is automatically created in the VPC the subnet belongs to.
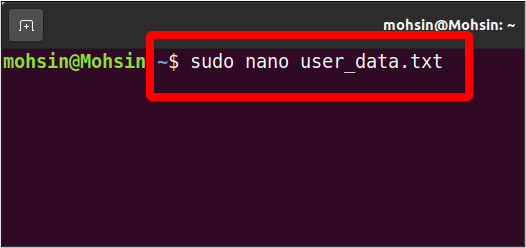
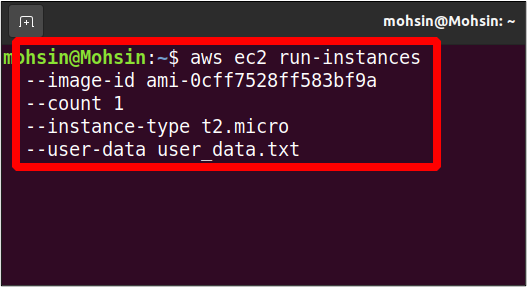
EC2 User Data
When we create a new instance, you can specify some script or commands you want to run at the startup, like updating the system or installing software packages. This is just an optional thing to do and not required all the time, but it can be very helpful in some cases. To provide the user data, you need to create a bash script which will be given as a parameter while initializing the EC2 instance.
So open your terminal and create a simple text file in it.
Let’s write a script to install and start an apache web server on our instance.
sudo yum install httpd -y
sudo systemctl start httpd
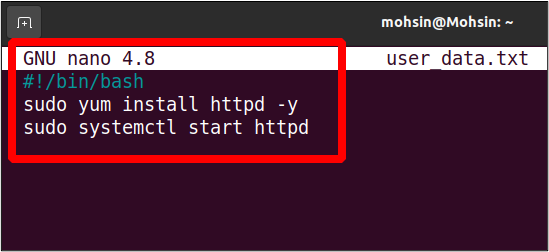
Now we can use this user data script to run a new instance; this instance will have the apache server pre-installed and running.
Use the public IP of your newly launched EC2 instance to access port 80 on your browser, and it will show the default apache web server page.
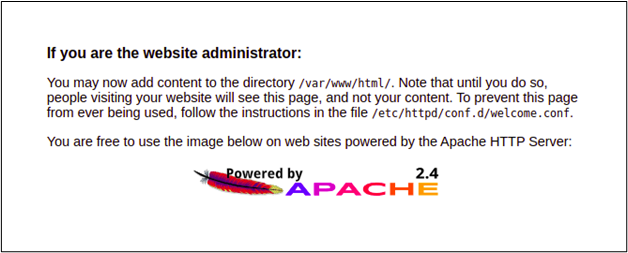
This is how you can use the user data to install or configure something during instance startup.
Conclusion
AWS provides the command line utility to programmatically manage and create the EC2 instances. This also allows you to create resources like ssh keys, security groups and storage volumes. You can manage EC2 user data, availability zones, and subsets with the help of CLI. Most professionals in the IT industry prefer using the CLI over the GUI console because you don’t have to switch between tabs and web pages. Moreover, the GUI keeps updating, making it tough to manage all the parameters and options.