Effective data management is essential in the digital era; occasionally, this involves clearing out unnecessary clutter. This comprehensive guide explores the world of batch file operations which are designed to quickly and securely delete the folders altogether. Whether we are clearing our computer’s storage, erasing obsolete project files, or optimizing a server space, mastering the batch file deletion techniques is essential.
How to Automate the Folder Deletion Using Batch Scripts
In today’s digital world, managing and maintaining our computer’s files and folders is essential for efficiency and organization. We could end up with an enormous number of folders that we don’t need over time, using up important storage space. Deleting them manually can be time-consuming and prone to errors, especially when dealing with a large number of folders. This is where batch scripts come to the rescue. In this guide, we’ll explore how to automate the process of deleting folders using batch scripts, step by step. By the end, we will have a solid understanding of batch scripting and will know how to smoothen our folder management tasks.
Understanding the Batch Scripts
Batch scripting is a method of automating tasks in Windows operating systems. These scripts contain a series of commands that are executed in sequence, making them powerful tools for various purposes, including folder deletion.
Creating a Batch Script
To get started, open a text editor like Notepad and create a new text file. Batch scripts typically have a “.bat” or “.cmd” file extension. These files contain a list of commands that the computer will execute when the script runs.
Setting Up the Target Folder
Before writing our batch script, we need to identify the target folder or folders that we want to delete. Ensure that we have the right to delete these folders.
Writing the Batch Script
In the batch script, we use the “rmdir” (remove directory) command to delete the folders. Here’s an example of a simple batch script to delete a single folder:
rmdir /s /q "C:\Users\FakeUser\Documents\SampleFolder"
The “@echo off” command is employed to turn off echoing, making the script cleaner. The “rmdir” command is followed by “/s” to remove all subdirectories and /q to do it quietly without prompts. We can customize the path to our folder accordingly.
Testing the Batch Script
Save the batch script with the “.bat” file extension and run it. Ensure that it successfully deletes the target folder without any error. Be careful when testing, especially on important data, and make sure that we have backups.
To run the example batch script to delete a folder, follow these steps:
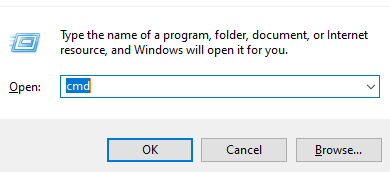
Open a text editor like Notepad. We can do this by searching for “Notepad” in the Windows “Start” menu or by pressing Win + R, typing Notepad, and pressing “Enter”.
Copy the batch script example that we want to run from the guide and paste it into the Notepad window. For instance, we can copy the following script:
rmdir /s /q "C:\Users\FakeUser\Documents\SampleFolder"
Modifying the Folder Path
Replace “C:\Path\To\Your\Folder” with the actual path of the folder that we want to delete. Make sure that we have the right rights to remove this folder.
Script Saving
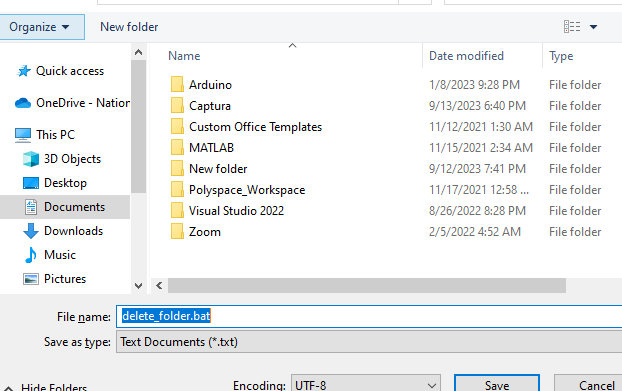
From the Notepad menu, click on “File” and then “Save As”. Decide where to keep the script file. Make sure to select “All Files” as the “Save as type” and give our script a “.bat” extension such as “delete_folder.bat”.
Run the script, locate the saved “.bat” script file in Windows File Explorer, and double-click on it. The script will execute and attempt to delete the specified folder based on the path that we provided.
Monitoring the Output
If the folder deletion is successful, we won’t see any output in the command prompt because of the “@echo off” command. However, we might see error messages if there’s an issue (e.g., the folder doesn’t exist or we don’t have the necessary permissions).
Handling Multiple Folders
If we need to delete multiple folders at once, we can modify our batch script to include multiple “rmdir” commands, each targeting a different folder. For example:
rmdir /s /q "C:\Users\FakeUser\Documents\Folder1"
rmdir /s /q "D:\Backup\Folder2"
This deletes “Folder1” and “Folder2” when the script runs.
Adding Error Handling
To enhance our batch script, consider adding error handling to deal with cases where the folder might not exist or there are permission issues. We can use conditional statements like “if exist” to check if a folder exists before attempting to delete it.
if exist "E:\NonExistentFolder" (
rmdir /s /q "E:\NonExistentFolder"
) else (
echo The folder does not exist.
)
This prevents the script from trying to delete a non-existent folder.
We can use variables to represent the folder paths in our batch script for more flexibility. This makes it straightforward to run and modify the paths if needed.
set folderPath="F:\Data\ImportantFolder"
if exist %folderPath% (
rmdir /s /q %folderPath%
) else (
echo The folder does not exist.
)
Executing the Batch Script
To execute our batch script, just double-click on the “.bat” file that we created. The script will execute, deleting the specified folders based on our commands.
We can further automate the folder deletion tasks by scheduling our batch script to run at specific intervals using the Windows Task Scheduler. This is useful to regularly clean up the folders or manage the backups. While batch scripts can be powerful, especially if they contain essential, powerful ways when deleting the folders, double-check our script and make backups before running it.
Automating the folder deletion using batch scripts can save time and simplify our file management tasks. By following the steps that are outlined in this guide and customizing our scripts as needed, we can efficiently clean up our computer and maintain a well-organized file system. With practice, we will become proficient in batch scripting, opening up the possibilities to automate the other tasks as well.
Conclusion
This comprehensive guide taught us how to automate the folder deletion using batch scripts. We explored the fundamental concepts of batch scripting, guiding us through the process of creating, testing, and enhancing our scripts. We covered everything from the single-folder removal to handling multiple directories and implementing error handling. We learned how to use the variables for flexibility and even explored the automation through scheduling. We also emphasized the significance of safety measures throughout this guide to protect our data.


