Read this guide to learn how to auto-update your custom plugins in Oh My Zsh on Mac.
How to Auto Update Custom Plugins in Oh My Zsh?
You can easily auto-update custom plugins in Oh My Zsh by following the below-given steps:
Step 1: Install Homebrew on Mac
Ensure you have Homebrew on your Mac system and if it’s not, you can use the guide here to install it on your system.
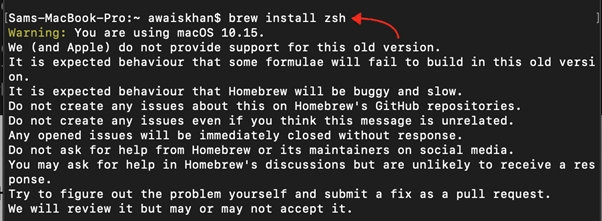
Step 2: Install Zsh on Mac from Homebrew
Now, use the below-given command to successfully install Zsh on your Mac system.
Step 3: Install Oh My Zsh on Mac
Follow the guide here to successfully install Oh My Zsh on your Mac system.
After successfully installing Oh My Zsh, you will see the Oh My Zsh prompt on the terminal.

Step 4: Create an Auto Update Directory
Now create an autoupdate directory and clone the Oh My Zsh auto-update source file from the GitHub website into the directory. The whole process can be completed from the following command:
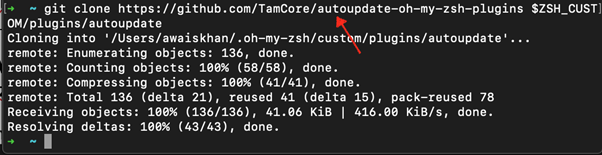
Note: The directory must be named as autoupdate besides that Zsh won’t be able to recognize it and throws an error.
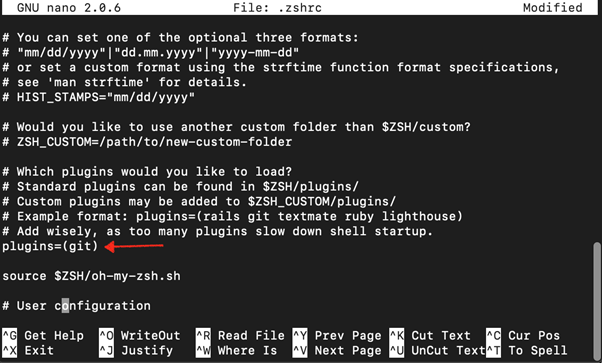
Step 5: Open zshrc Configuration File
Then open the .zshrc configuration file from the following command:
Step 6: Add the Auto Update Line
Inside the .zshrc configuration file, search for the line starting with the plugins using Ctrl+W.
Add the autoupdate line inside the brackets.
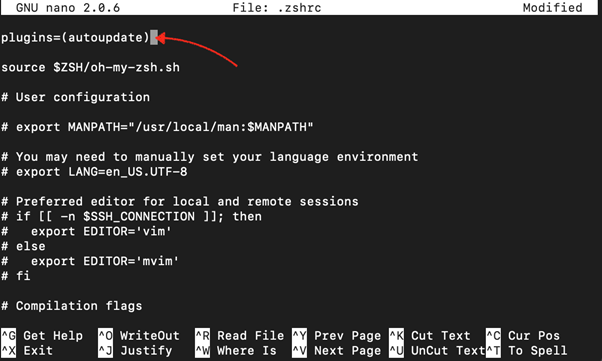
Step 7: Save and Reload the Changes
You must save the file after the changes by using Ctrl+X, press Y, and then Enter. Use the following command to reload the changes.
![]()
Note: Ensure the file loads without throwing an error. If the file successfully reloads without an error, your changes will be made and the auto update plugin process will be enabled for Oh My Zsh.
How to Check for Daily Plugins Updates in Oh My Zsh?
To keep yourself updated with the daily updates, you can add the following lines inside the .zshrc file.
export UPDATE_ZSH_DAYS=1
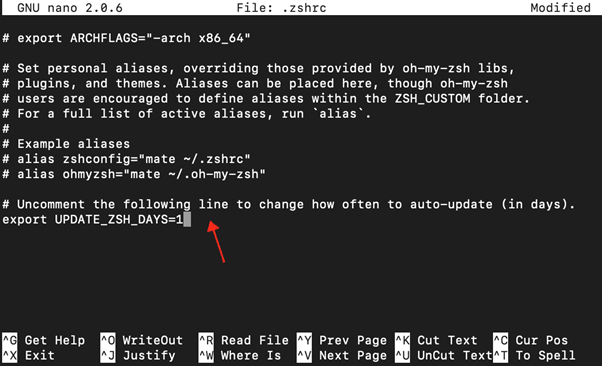
Note: You can change the day according to your choice. Once done, you must save the file and reload it using the source command.
How to Turn Off Upgrade Custom Plugins on Oh My Zsh?
You can turn off the upgrade custom plugin on Oh My Zsh, you can add the following line inside the .zshrc file.
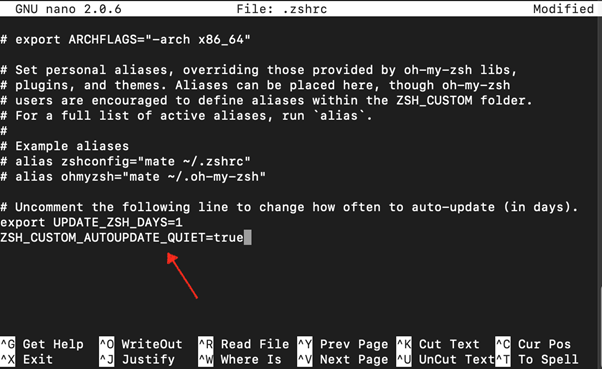
Save the file then reload the changes using the source command to turn off the auto-update process.
Conclusion
Auto Update custom plugins in Oh My Zsh are useful since they can significantly enhance your terminal experience. You can enable the auto-update plugin by first installing Brew, Zsh, and Oh My Zsh on your Mac terminal. Then you have to clone the auto-update source file from the GitHub website and put the files inside the autoupdate directory. Then you can open the .zshrc configuration file and add the autoupdate line in front of the plugins option. After reloading the changes using the source command, you can successfully enable the Auto Update custom plugins in Oh My Zsh.