In this article, we will learn how to fix the missing dependencies and broken packages using the apt-get command. Note that, we have run the commands and procedure mentioned in this article on a Debian 10 system. The same procedure can be followed in Ubuntu and older Debian versions.
We will use the command-line Terminal for trying the solutions and fixing the problem. To open the Terminal application in Debian, hit the super key on the keyboard and search for it using the search bar that appears. When the search result appears, click on the Terminal icon to open it.
Using apt-get to fix missing and broken packages
Apt-get is a Terminal based package management tool used for installing, upgrading, and removing packages. Along with these features, it also has flags that can be used for fixing missing dependencies and broken packages.
Method 1
Use the “fix-missing” option with “apt-get update” to run the updates and ensure the packages are up to date and there is no new version available for the packages.
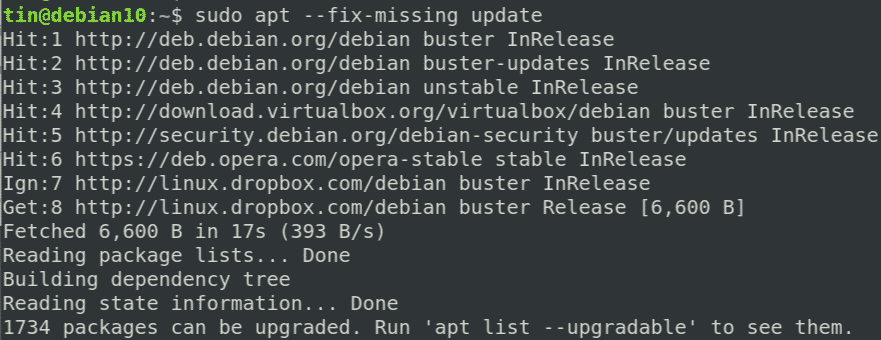
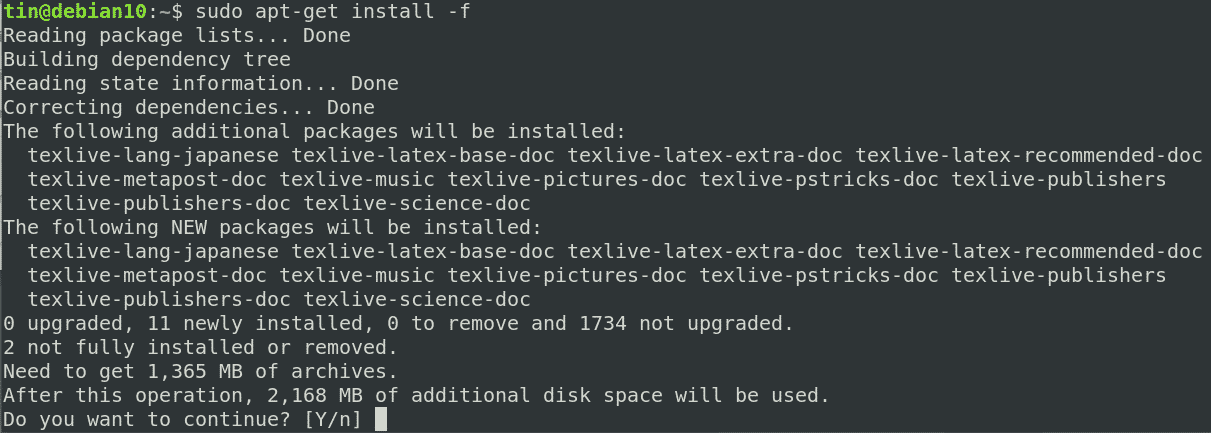
Once you are done with the update, execute the below command in order to force the package manager to find any missing dependencies or broken packages and install them.
Another approach to solving the broken package issue via apt-get is to edit the “/etc/apt/sources/list” file and adding sites with newer versions of packages available. Then running the “apt-get update” command to update the repository list.
If the above method does not fix the issue of broken dependencies and broken packages and still you are receiving the error, then try the following methods.
Other methods
Method 1:
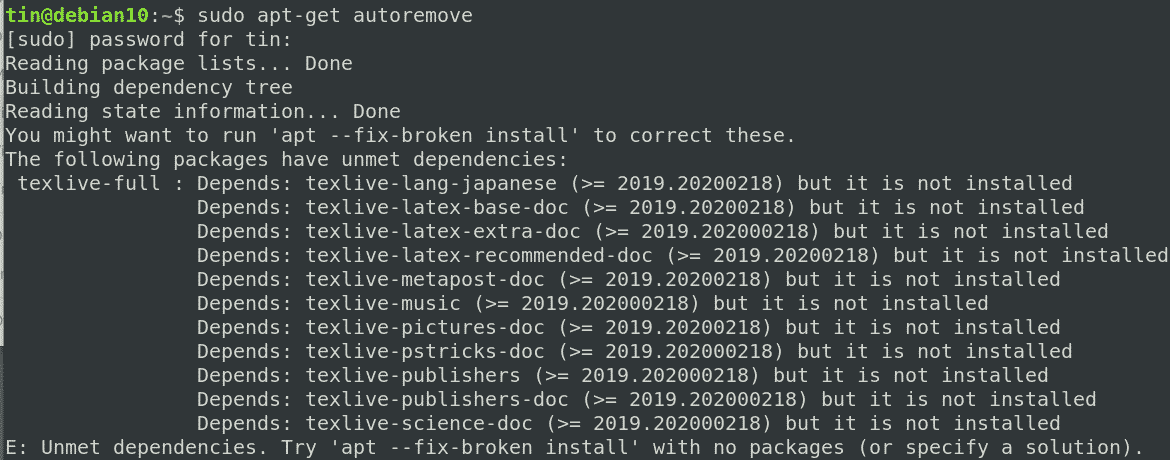
In this method, we will use the “apt-get autoremove” and the “dpkg” in order to fix missing dependencies and broken packages.
1. Update the repository index by executing the below command in Terminal:
2. Next, execute the below command to clean out the local repository:
3. Execute the below command to remove all the unnecessary packages that are no longer needed:
The above command will display the unmet dependencies or broken package’s name.
4. Then try executing the below command in Terminal to force remove the broken package:
Method 2:
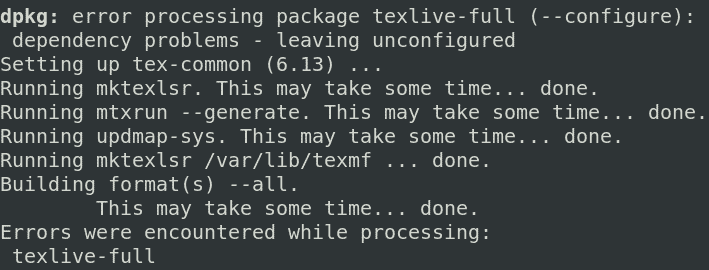
In the following method, we will use the “dpkg—configure” command in order to fix missing dependencies and broken packages.
Dpkg is a package management tool that can be used to install, remove and manage packages. Similar to apt-get, it can also help to fix broken packages and missing dependencies. If you receive some errors while installing or updating the packages, try the following solution with dpkg:
1. Execute the below command in the Terminal to reconfigure all the partially installed packages.
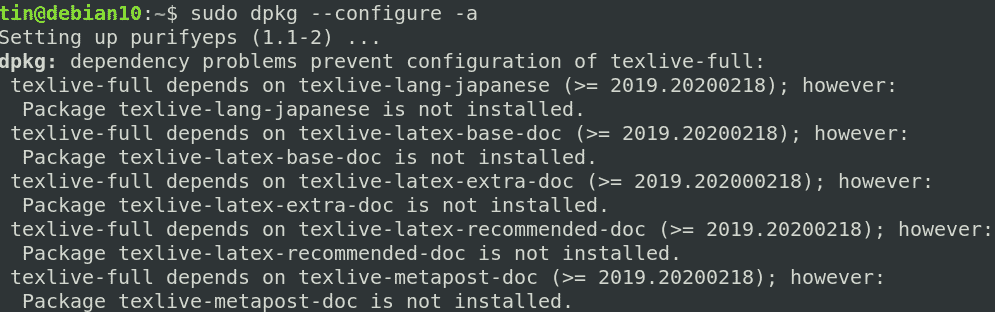
If the above command does not work, like in our case and you see similar results displaying the erroneous package, then try removing the package.
2. Execute the below command in Terminal in order to remove the erroneous package.
3. Then use the below command to clean out the local repository:
After trying any one of the above solutions, run the update command to ensure the dependencies are resolved and broken packages are fixed or removed.
Fixing the dependency and broken packages errors and then returning the system to the normal state may take hours. Sometimes it gets so complicated that when you finally fix it, you feel so lucky. We have presented some solutions regarding this error, so please give them a try. If you know some of the possible solutions we did not mention, please let us know in the comments.