
The Linux system consists of many built-in tools in it that are used to perform many specified tasks. One of those tools is “Apt” i.e., “Advanced Package Tool”. This tool consists of group utilities to perform installation, update, deletion, and other management activities for Linux software on different Linux operating systems. We can make use of this “apt” package tool on any of the Ubuntu, Debian, and Linux Mint operating systems. Therefore, we have been using this article to explain the use of the “Apt” package in the Ubuntu 20.04 system to list all the installed packages, software, and tools. Let’s take a new start from the terminal shell opening of the Ubuntu 20.04 system via the “Ctrl+Alt+T” shortcut.
Let’s get started with the system update first. So, we need to update our Ubuntu 20.04 Linux operating system using the Advanced package tool on the terminal. This command must be executed on the shell using the “sudo” rights along with the keyword “update”. On execution, the system asked for the sudo password before processing. We have added our sudo password and pressed the key “Enter”. The system has started updating itself as shown below.

After the update, we have to upgrade our Ubuntu 20.04 system. For this, the same apt package will be used with the sudo privileges and the keyword “upgrade”. The system starts upgrading itself as shown below.

Within the installation, it will pause itself for a while and ask you to affirm your action to upgrade it. It shows that the “86.0” MB of the disk will be used from your available memory. You have to tap “y” to continue this update process as we did beneath in the image.
![]()
List All Installed Packages with Apt
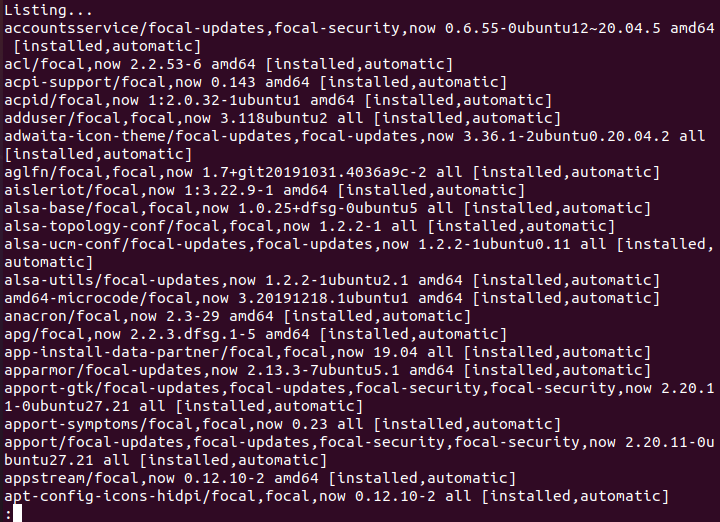
Let’s start using the “apt” tool to list all the packages that have already been installed on our Ubuntu 20.04 system in our terminal shell. For that, you need to use the list command with the “installed” flag on the shell preceded by the “apt” tool in the command. After running this query, the system will display that the list is going to be shown i.e., “Listing… Done” as below. The Ubuntu 20.04 system has started displaying the list of all the installed tools, packages, and software on the shell screen in alphabetical order.
You can see that the installed packages have been listed starting from the alphabet “a”. The output is affixed in the below image.

You will see a long, multi-numbered list of installed packages on the terminal shell screen. These packages include all the system configuration tools, some language support packages like Python, web browser tools, system utilities, and so on. You can see that the Python installed packages have been listed. For convenience, we have listed a shortlist through the image but the list will be a little long.
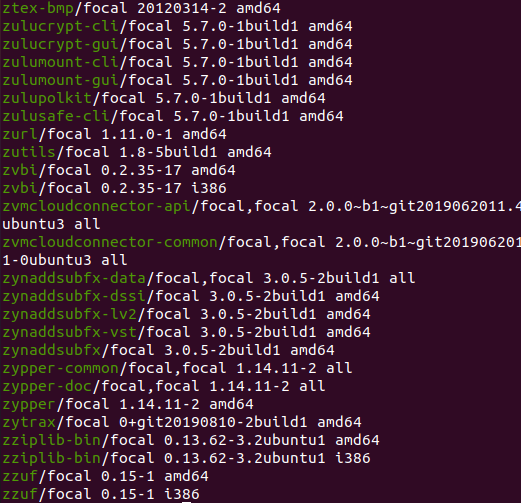
At the last lines of this list, we have got the installed packages of our system started from the alphabet “z” as shown in the attached photo below.
You can also use the “apt” utility to list all the installed packages of the Ubuntu 20.04 system with another command. This command is said to be a simple list command with the flag “more” to list all the other packages along with the important ones. So, we have been using the “apt” list command separated by the “|” sign from the keyword “more” and execute it. It lists all the installed software packages and utilities on the screen. The output is affixed in the below image.

If you want fewer installed packages to be listed on your terminal screen, you have to use the “apt” package list command with the keyword “less” after the “|” character as we did in the below image. Make sure to use this command with sudo rights and make use of the flag “-installed” to list only the installed ones. The output is affixed in the below image.
![]()
The less number of installed packages will be listed on the terminal screen. You can press Enter to see more and more.
List Specific Installed Packages with “Apt”
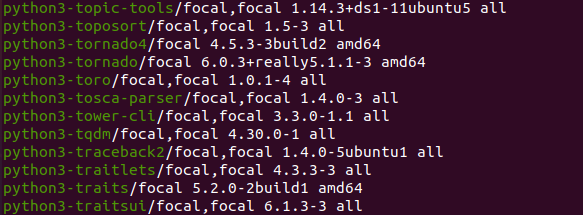
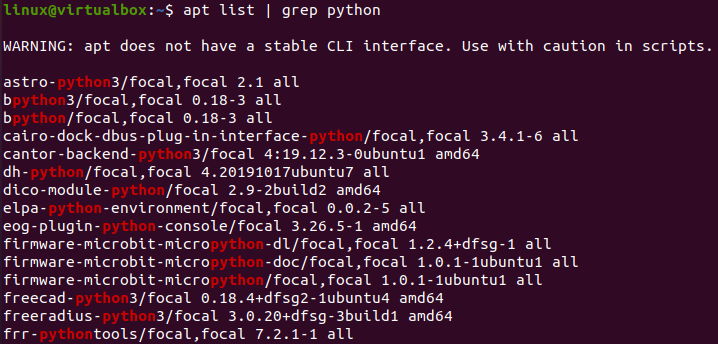
Now, we will be listing all the installed packages for a specific single software or tool using the “apt” utility on the shell. This way we can find out which utilities or packages are required for a specific tool installation. So, we have been starting from the listing of Python installed packages along with its other utilities. We have executed the apt list command and specified the keyword “python” using the “grep” package. It has listed all the packages for Python that have been installed on our system along with other utilities that are utilizing it. The output is affixed in the below image.
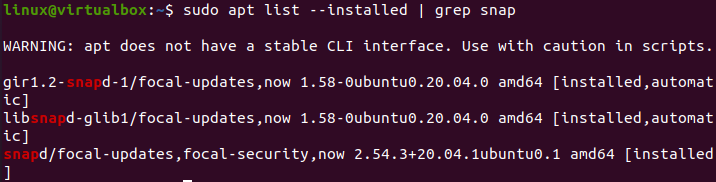
Ubuntu 20.04 also provides us with the “snap” package utility to perform many installations on it. Let’s say what packages of the “snap” tool have been installed using the “apt list” command with the “—installed” flag. We have specified the “snap” named with the keyword “grep” and found 3 records. This is how you can do it for other utilities as well. The output is affixed in the below image.
Conclusion
Finally! We have implemented listing the installed packages in the Ubuntu 20.04 system using the “Apt” tool. We have discussed the use of the “apt” command to list all the installed packages, fewer and more installed packages, and listing the single software installed packages with the “grep” keyword. We have used simple and easy to execute commands on the shell to achieve our goal. This is all about the apt list command and we are sure you will understand it.