One great feature of RDS Proxy is that it is fully managed. Unlike traditional proxy servers, you do not need to keep the headache of deploying, managing, and patching them with the new updates. It is a serverless application and scales automatically to adjust to your needs.
Amazon RDS Proxy can be used for applications based on serverless architecture and those running in containers on ECS or EC2.
How does RDS Proxy work?
With this feature, applications can pool and share their database connections. Instead of connecting your application directly to the RDS database, we connect it to the RDS proxy. Amazon RDS Proxy acts as a connection mediator between your application code and the RDS DB instance. It reserves a pool of established connections to the database, which can be reused and shared with other clients. In this way, only a few connections are established to the database, thereby reducing the new connection load on the database.
In case of a database failover, the RDS proxy re-routes the requests directly to the new DB instance. Another major benefit is that we can configure IAM authentication for database security without the need to put the database credentials directly into the application code. It also has the provision to use AWS Secrets Manager for centrally managing database credentials.
Experimental Setup
To demonstrate how AWS RDS Proxy works, we will set up a working environment with the following networking resources:
- An AWS VPC contains an RDS DB instance and an EC2 instance. (We are using the default VPC provided by AWS).
- Minimum two subnets and an internet gateway
- At least two subnets in different Availability Zones.
For making this guide compact, we will not describe how to set up an EC2 and an RDS instance as they are relatively simple. We have also set up an IAM user with the AdministratorAccess policy. The significant steps of this guide are outlined here:
- Creating security groups and checking database connectivity.
- Using AWS Secret Manager to handle database credentials.
- Creating an IAM role and defining a policy for allowing RDS Proxy to access secrets created with AWS Secret Manager.
- Creating and configuring RDS Proxy.
- Connecting to the RDS DB instance via RDS Proxy.
Getting Started with RDS Proxy
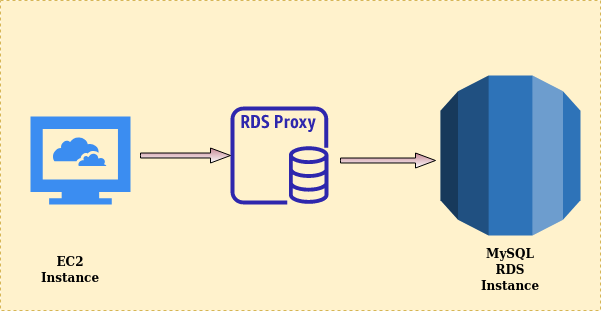
I think the overall scenario should now be cleared to the reader. The below image shows the overview of this guide:
1. Creating security groups and checking database connectivity.
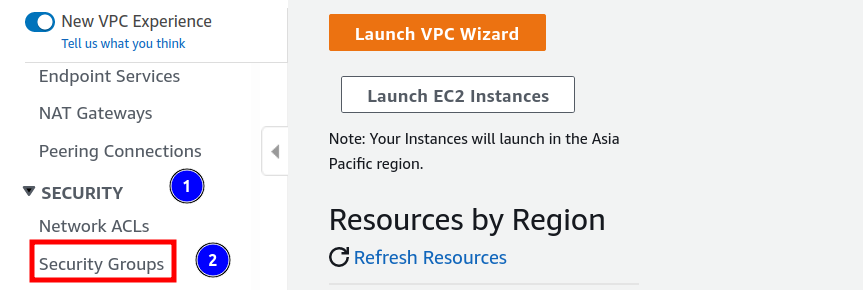
Step 1. Navigate to the AWS VPC section, and under the ‘Security’ column, select Security Groups from the navigation pane on the left side:
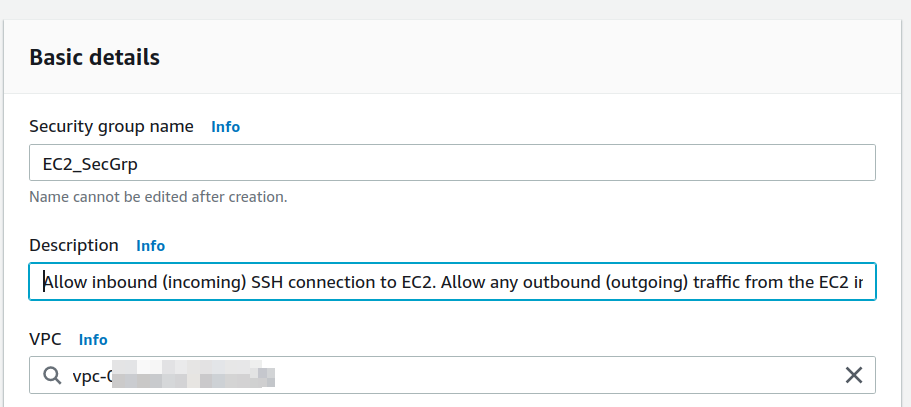
Step 2. Now click on the ‘Create security group’ button and add a security group(here ‘EC2_SecGrp’) for the EC2 instance. Enter the basic details as per your choice:
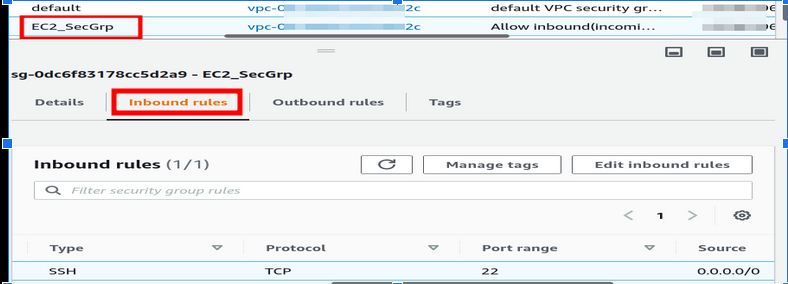
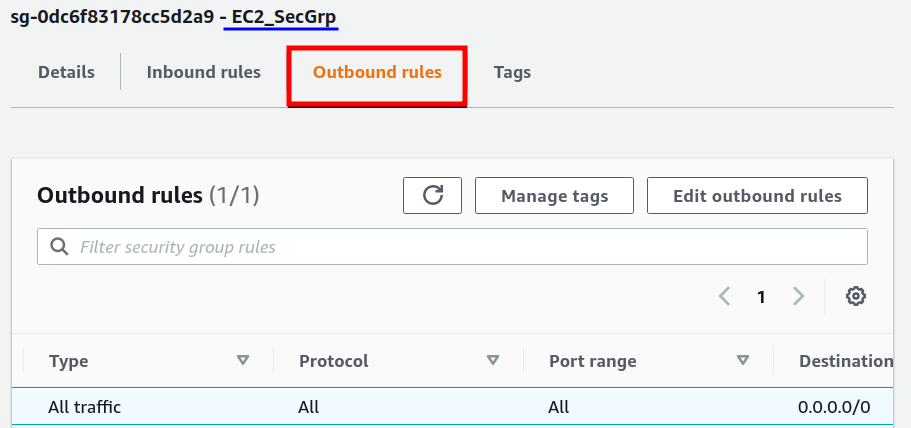
Add an inbound rule to allow inbound (incoming) SSH connection to EC2. Add an outbound rule to allow any outbound (outgoing) traffic from the EC2 instance.


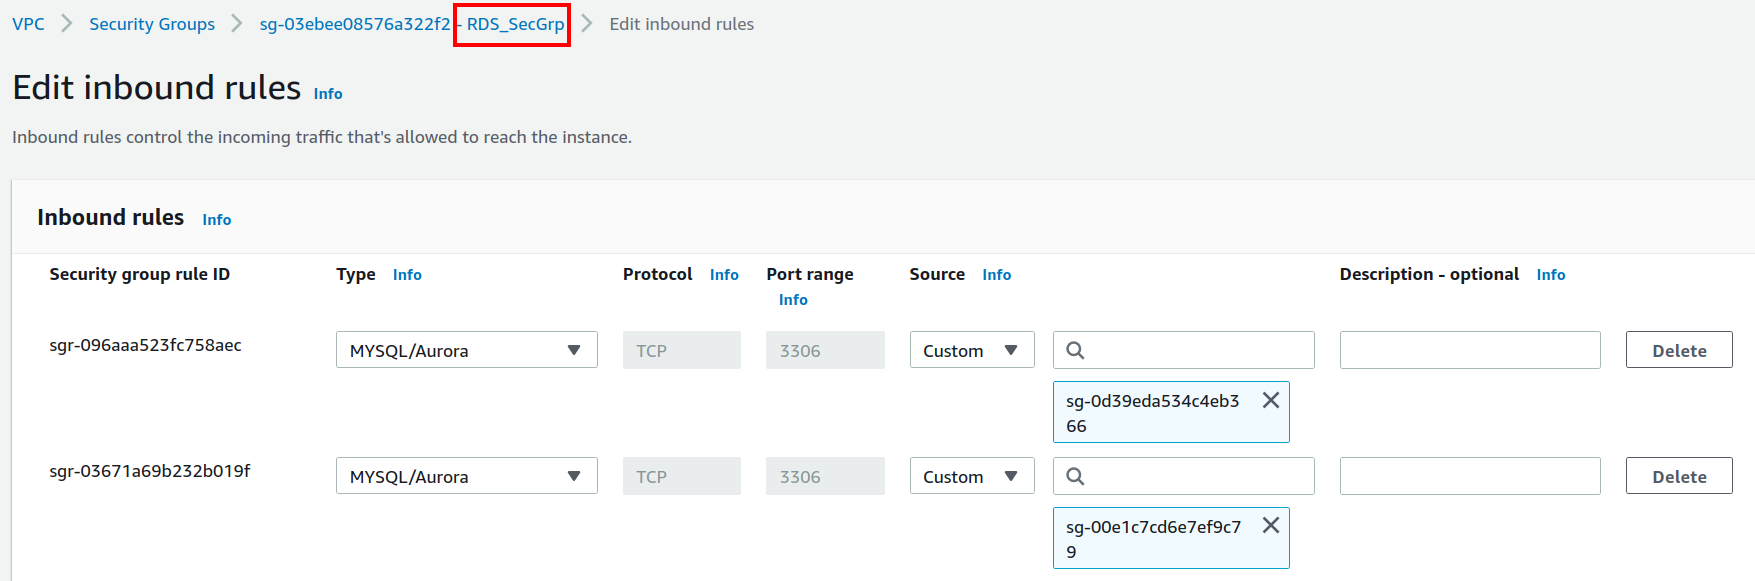
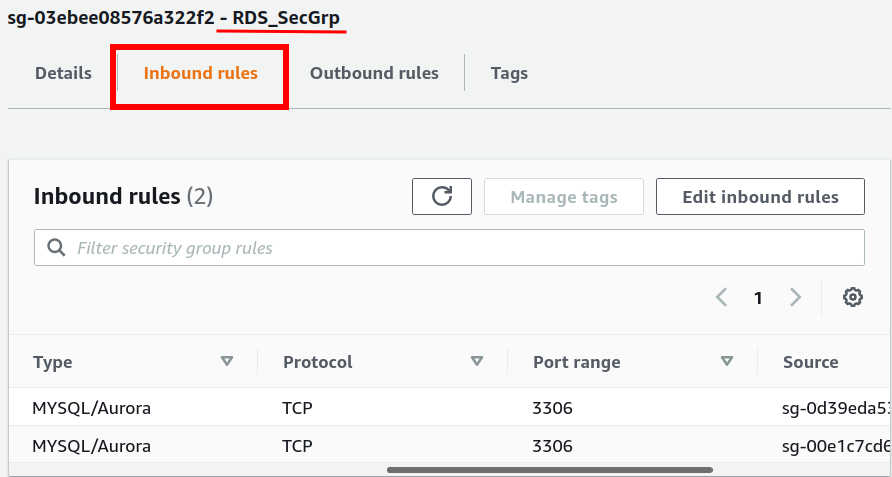
Add another security group(here ‘RDS_SecGrp’) for the RDS instance and enter the basic details:

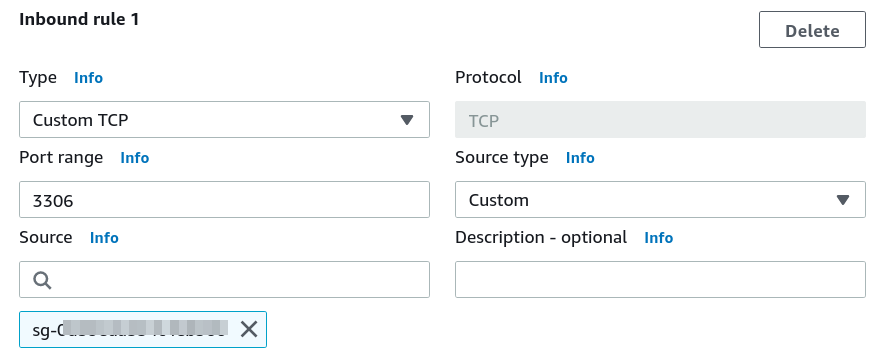
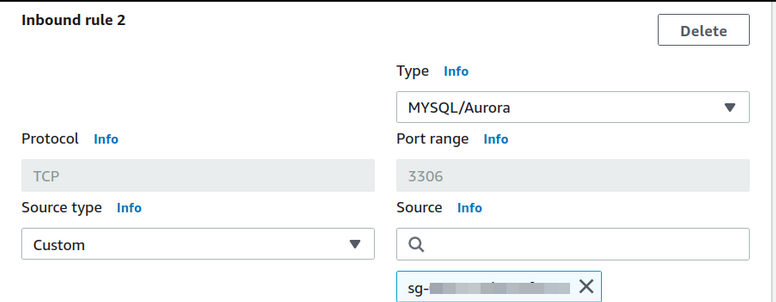
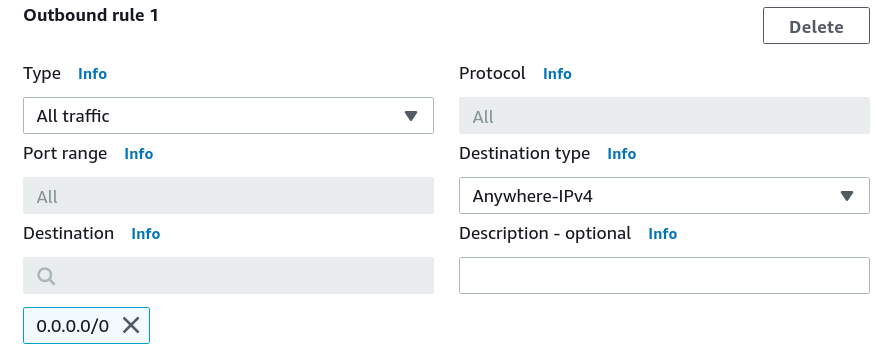
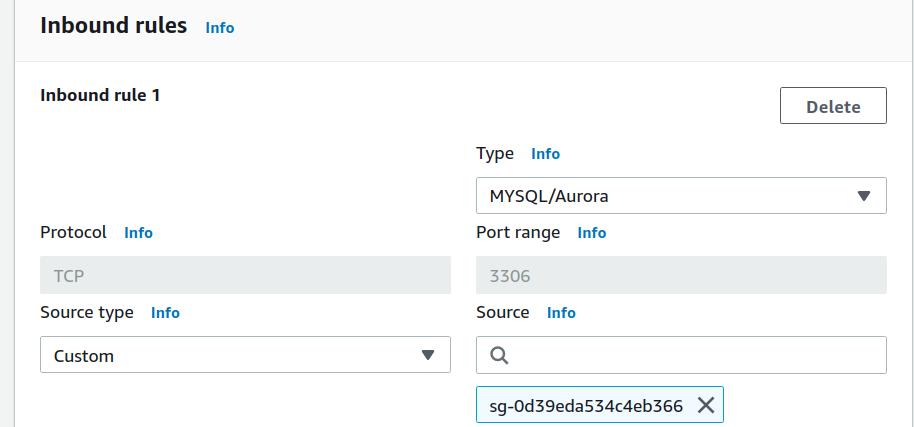
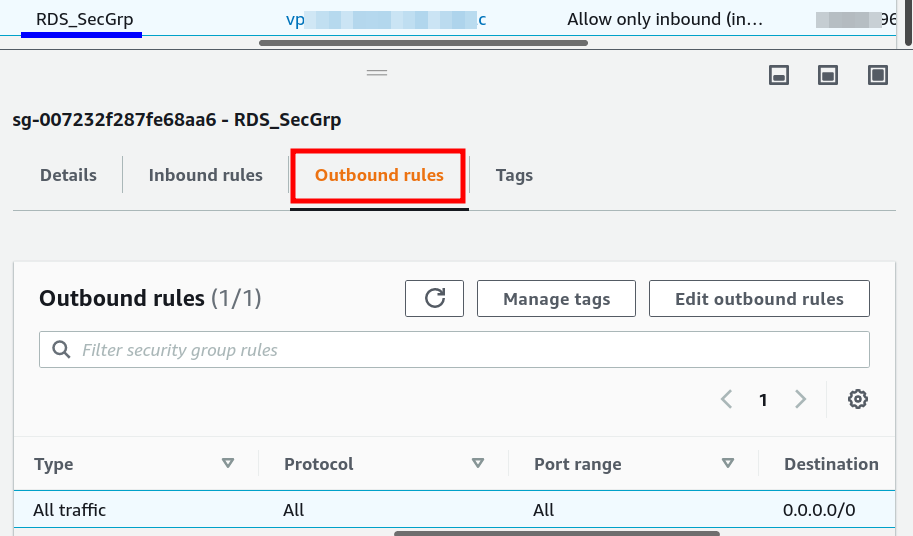
Add an inbound rule to allow only TCP connection on the RDS DB instance (on port 3306) from the EC2 instance(Specify EC2_SecGrp in the source). Add another inbound rule to allow only TCP connection on the RDS DB instance (on port 3306) from the Proxy(Specify Proxy_SecGrp in the source). Add the outbound rule to allow any outbound (outgoing) traffic from the RDS instance.
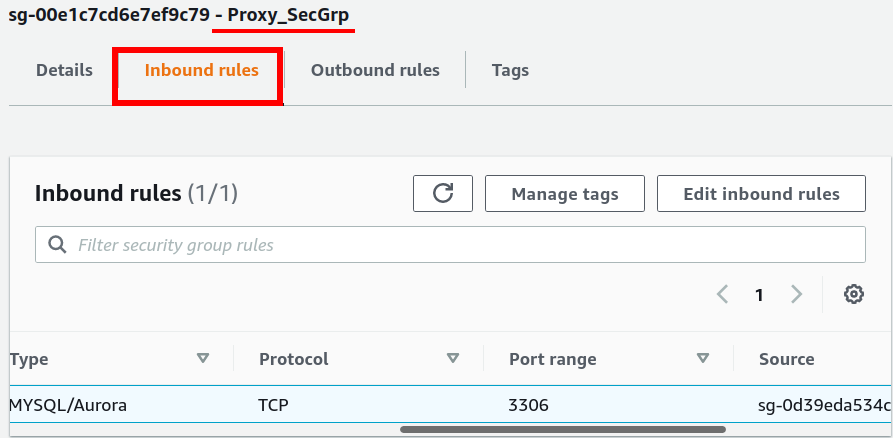
Similarly, add one more security group for Proxy(Proxy_SecGrp) and enter the basic details:
The three security groups we created are now available:
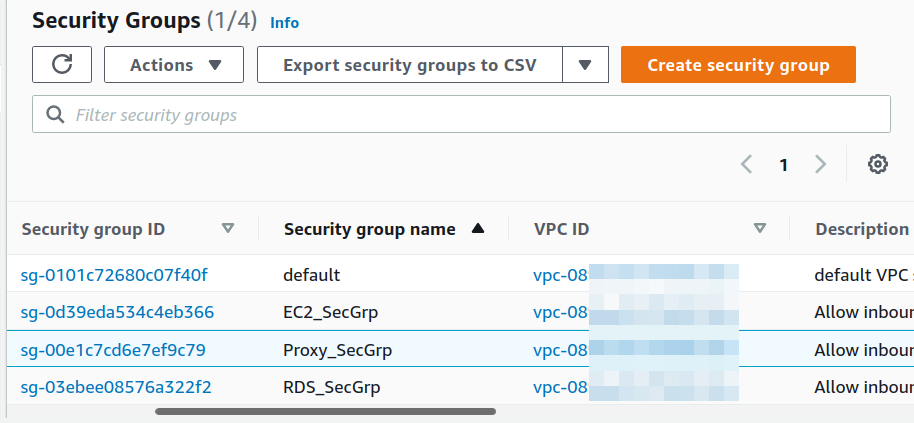
By selecting any security group, you can see its details:
1) EC2_SecGrp: Attached with the EC2 instance.
2) RDS_SecGrp: Attached with the RDS instance.
3) Proxy_SecGrp: Attached with the Proxy.
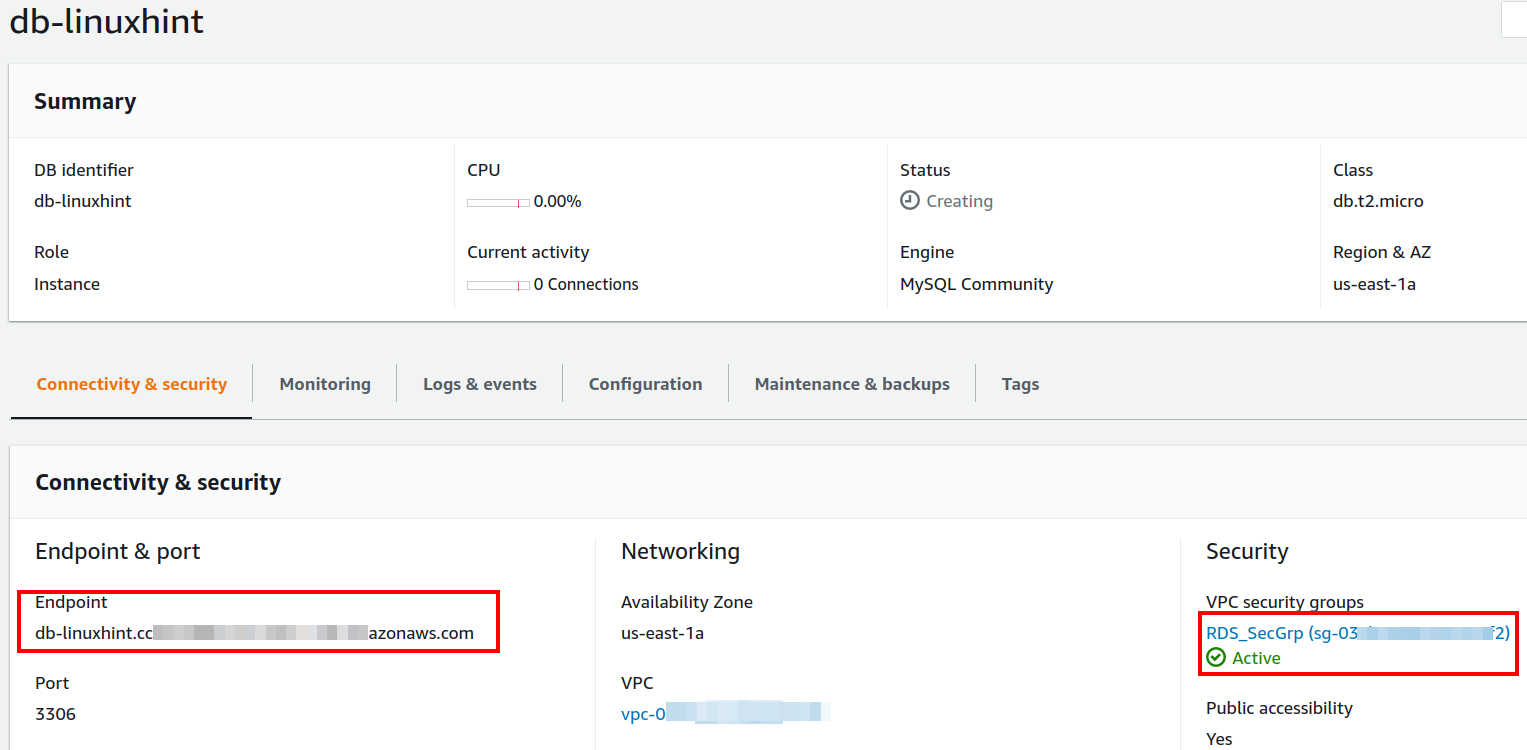
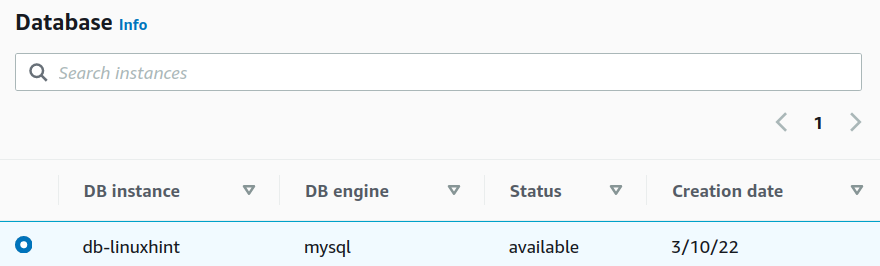
Step 3. Now head to the RDS dashboard and select your target RDS DB instance(here ‘db-linuxhint’). Under the ‘Connectivity & security’ tab, find the endpoint for the DB instance and copy it to somewhere as we will use it connecting from the EC2 instance in the coming steps.
Step 4. Go to the EC2 dashboard and select the EC2 instance from which you want to connect to the RDS DB instance. Select the ‘Connect’ option:

Step 5. On the ‘Connect to instance’ wizard, choose the option ‘EC2 Instance Connect’, which is a browser-based SSH connection:

A new browser window will open up when you select the ‘Connect’ button, as shown here:
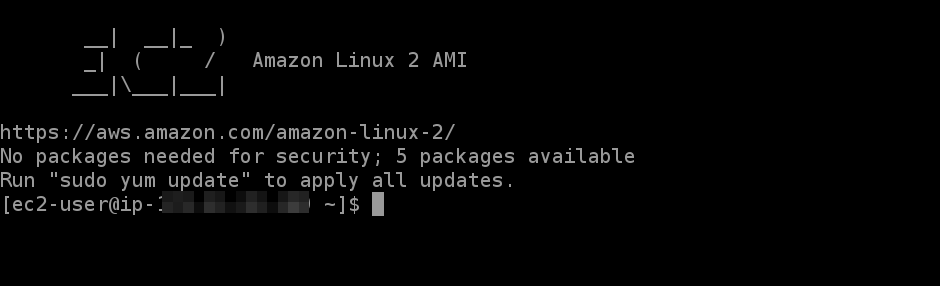
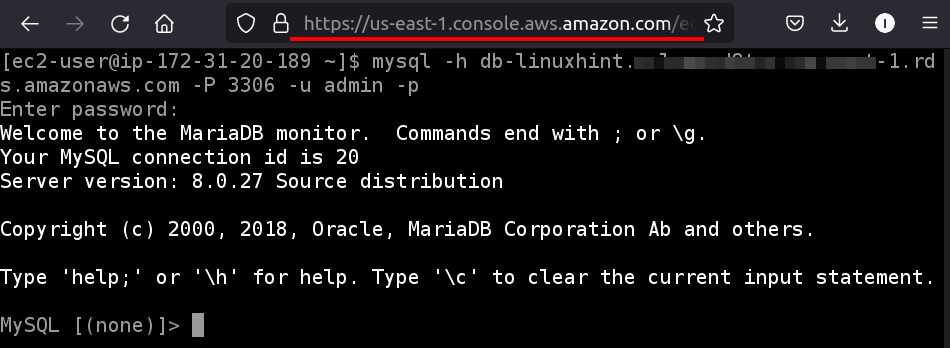
Step 6. From this CLI window, use the below command format to test the EC2 connectivity with the RDS DB instance:
Use your RDS DB instance endpoint in place of ‘RDS DB endpoint’ and the name of the DB user in place of ‘username’ (‘admin’ in our case). Enter the DB password when asked. When the authentication is successful, you will see the MySQL prompt on the CLI:
2. Using AWS Secret Manager to handle database credentials.
For the RDS Proxy to be able to connect to the DB user, the DB user needs a secret in AWS Secrets Manager. These secrets are used by the RDS Proxy to handle a database connection pool.
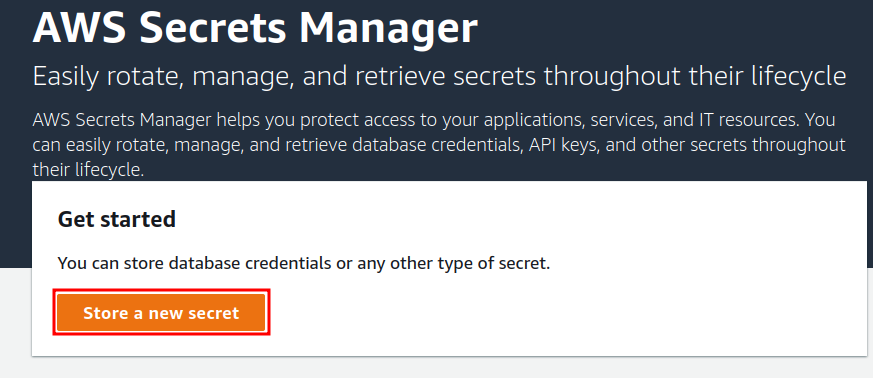
Step 1. Head to the ‘Secrets Manager’ section from the AWS console and select ‘Store a new secret’:
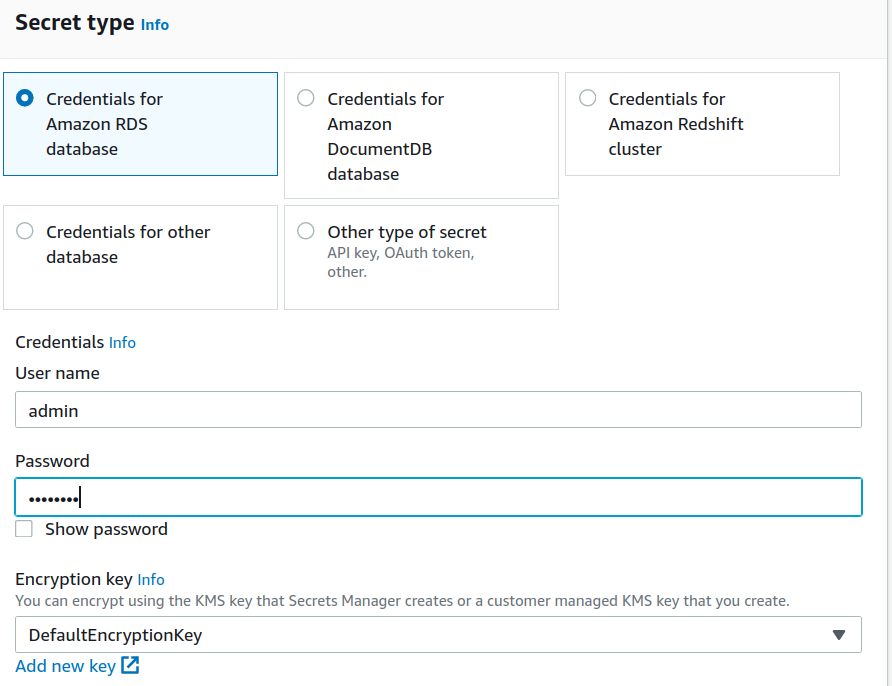
Step 2. From the ‘Choose secret type’ window, select the option ‘Credentials for RDS database.’ In the subsection below, enter the user name and password for your database user:
Step 3. Next, under the ‘Select the encryption key’ drop-down menu, choose ‘DefaultEncryptionKey’ and then select the target RDS DB for which you are configuring the secret for accessing. Click Next.
Step 4. Now give a suitable name to your secret and a brief description for it (Optional).
Step 5. We are skipping the Tags and automatic secret rotation options; for now, click next:

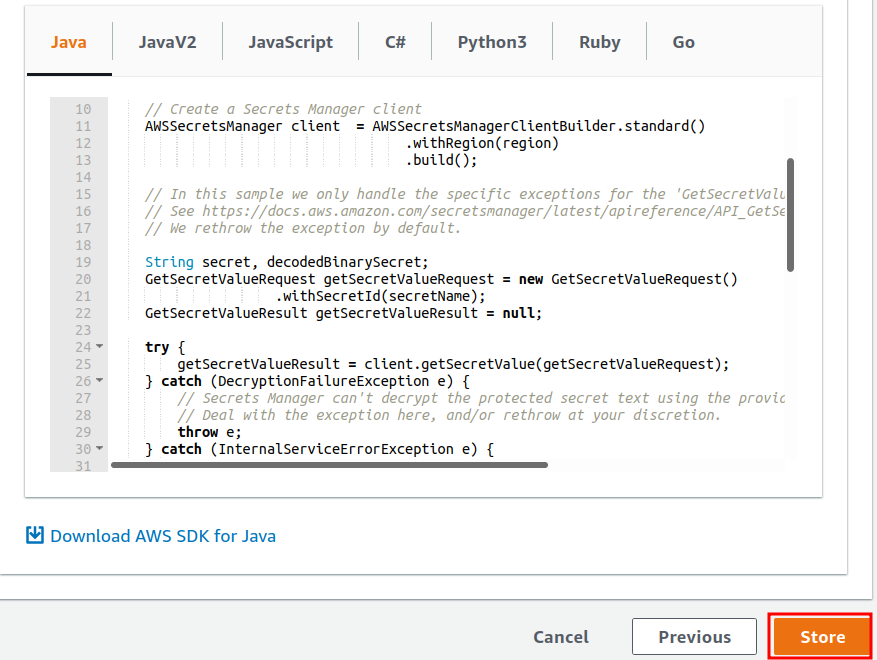
Step 6. You can see some configuration settings related to the secret and some sample code. Just skip them and continue to save your secret by hitting the ‘store’ button:
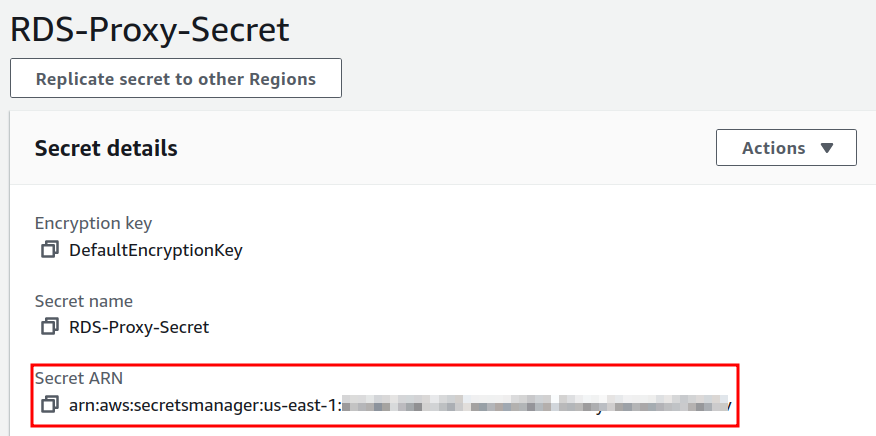
When the above steps are done, your secret name will appear on the Secrets Manager page. From the Secret details, copy the ARN of your secret, which we will need later.
3. Creating an IAM role and defining a policy for allowing RDS Proxy to access secrets created with AWS Secret Manager.
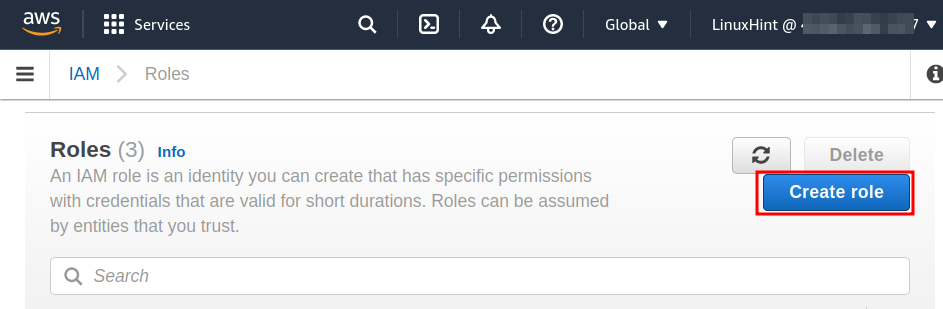
Step 1. Head to the IAM dashboard, and from the left panel, choose ‘Roles’ and then select ‘Create Role’:
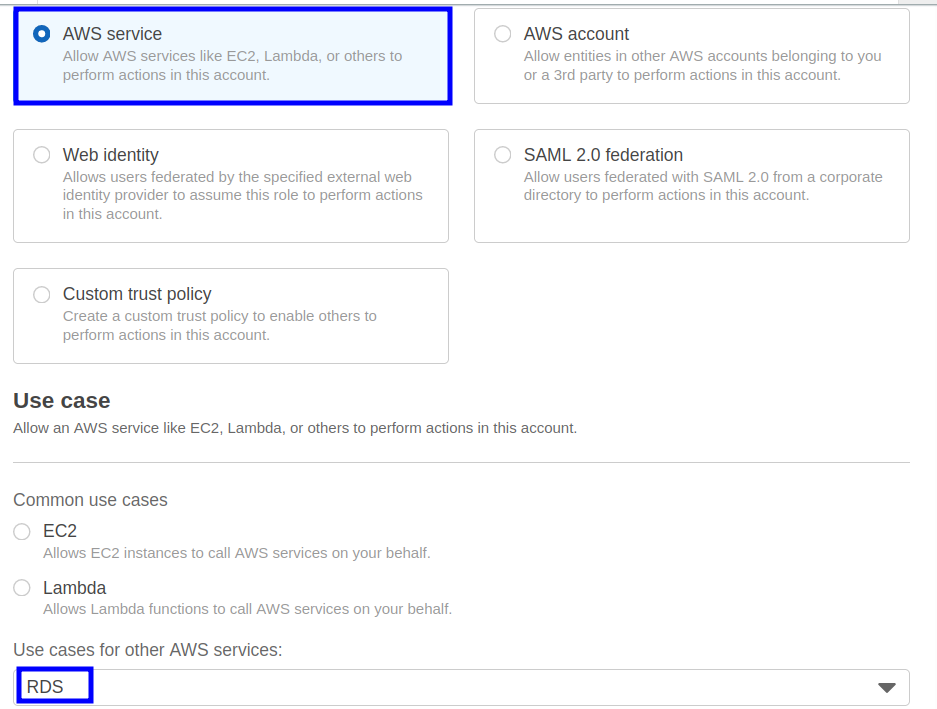
Step 3. From the multiple options under the ‘RDS’ heading, select ‘RDS – Add Role to Database’:
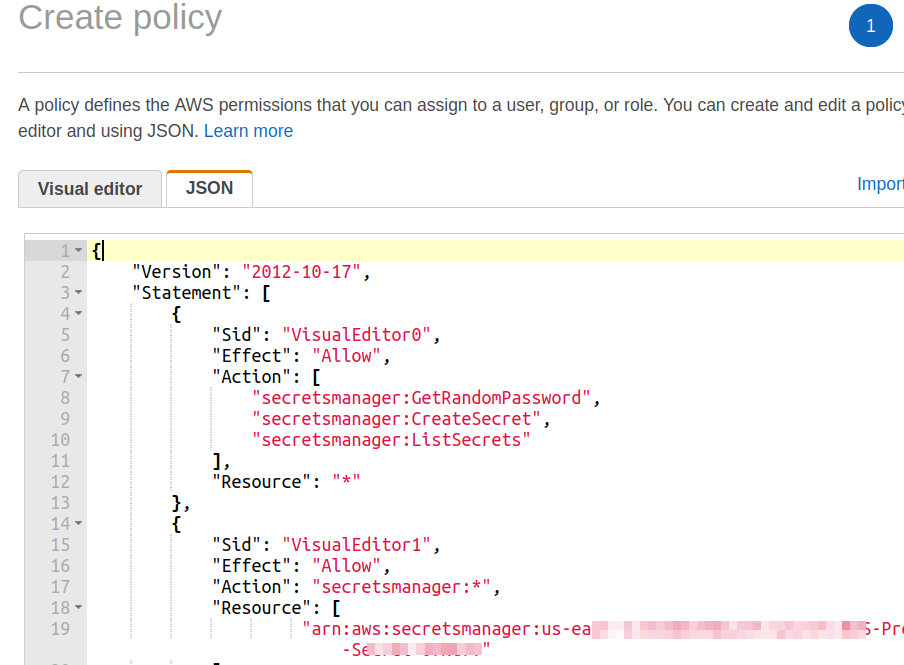
Step 4. Now choose ‘Next’ and enter the ‘Create Policy’ button. A new browser will open here; select the JSON tab and replace the already policy statements with the following one:
"Version": "2012-10-17",
"Statement": [
{
"Sid": "VisualEditor0",
"Effect": "Allow",
"Action": [
"secretsmanager:GetRandomPassword",
"secretsmanager:CreateSecret",
"secretsmanager:ListSecrets"
],
"Resource": "*"
},
{
"Sid": "VisualEditor1",
"Effect": "Allow",
"Action": "secretsmanager:*",
"Resource": [
"Put_your_secret_ARN_here"
]
}
]
}
Just replace the ‘Put_your_secret_ARN_here’ label with the secret ARN value in your case. Add tags (Optional) and continue by selecting ‘Review policy’ and give a name (‘RDS-Proxy-Policy’ in our case) to your policy and hit the ‘Create policy’ button.
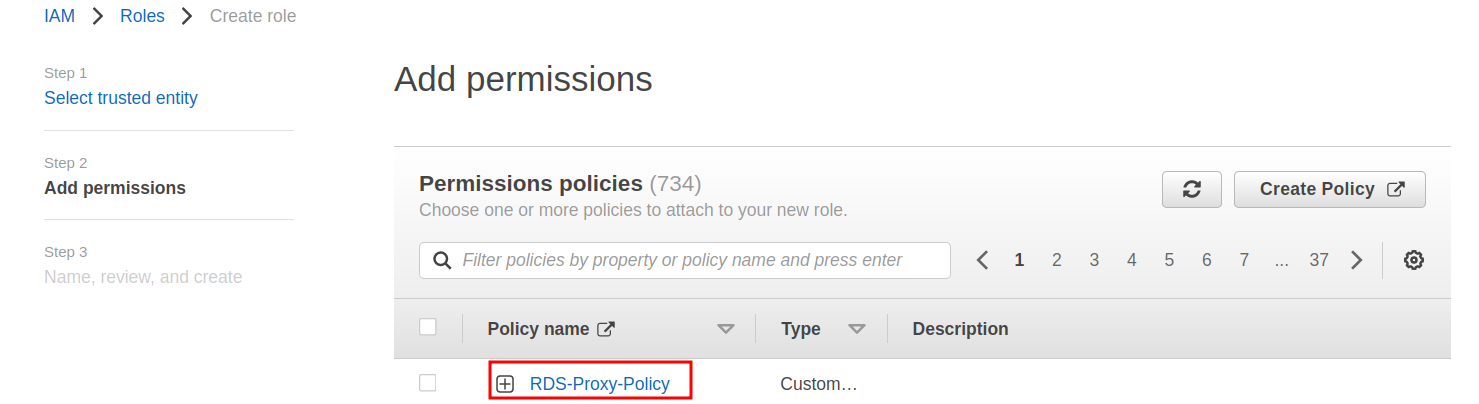
Step 5. After configuring your policy, return to the ‘Roles’ window on the browser and choose the ‘Refresh’ button and search and select the policy you just created:
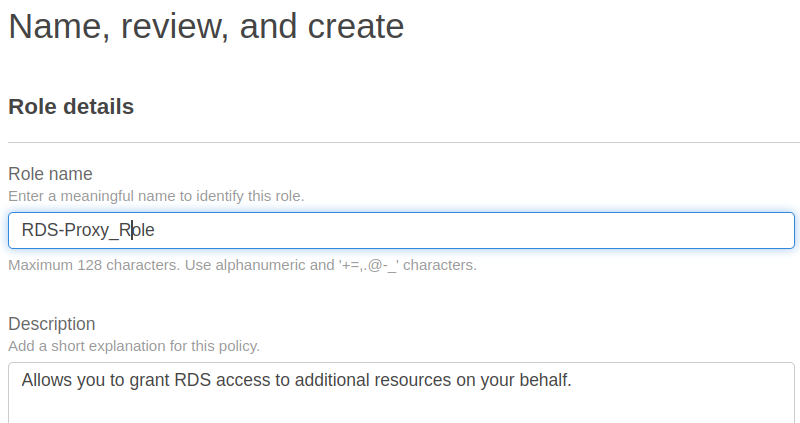
Step 6. Now give a name to your role and a brief description, and optionally you can add the tags here. Continue by selecting ‘Next:Review’ and finally select ‘Create role.’ Your role is now created:
4. Creating and configuring RDS Proxy.
It’s now time to create and configure RDS Proxy, which will ultimately utilize our security group RDS_SecGrp, the secret, and the role we created above.
Step 1. Go to the RDS dashboard and select ‘Proxies’ and then select ‘Create Proxy’:

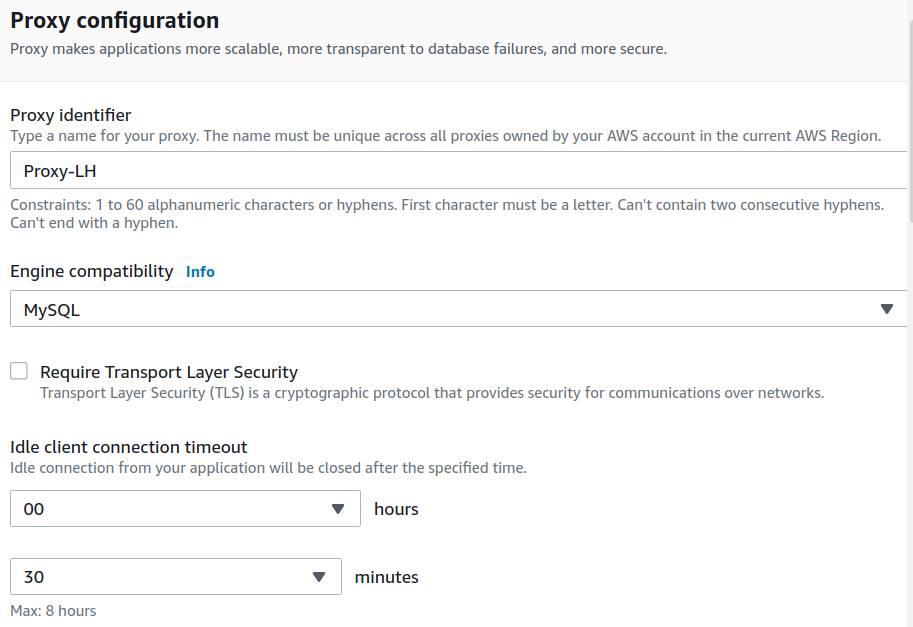
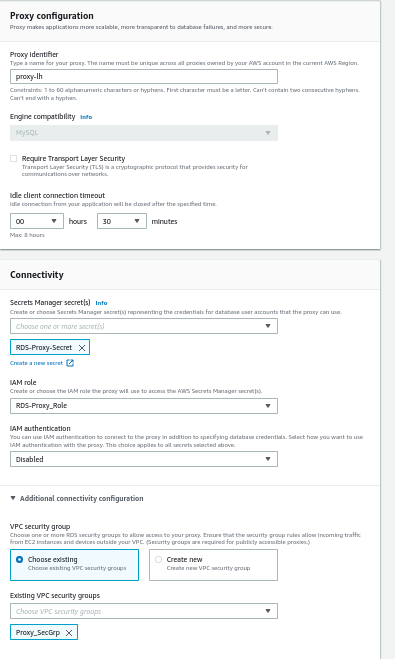
Step 2. Inside the ‘Create proxy’ wizard, we first need to give a name or identifier to the Proxy, which is ‘Proxy-LH’ in our case.
Step 3. Uncheck the box corresponding to ‘Require Transport Layer Security.’
Step 4. Keep the ‘Idle client connection timeout’ value to the default value of 30 minutes.
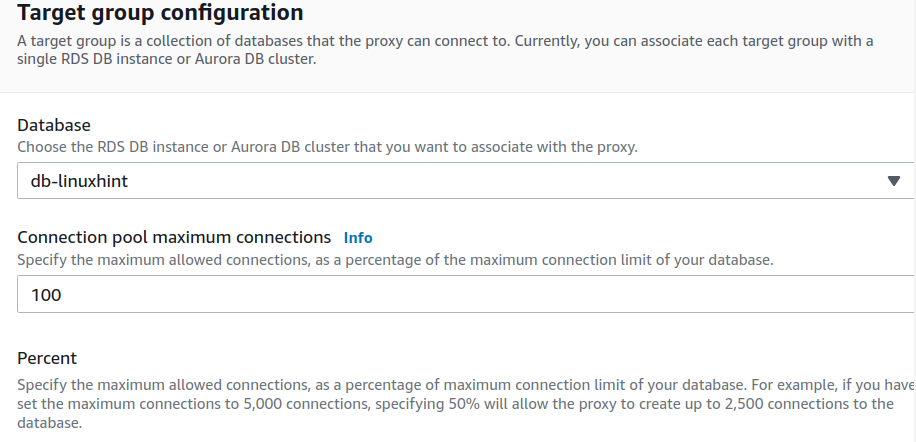
Step 5. Under ‘Target group configuration,’ select your target RDS DB instance from the Database drop-down menu.
Step 6. Keep the ‘Connection pool maximum connections’ value to the default value of ‘100’:
Step 7. Under the Connectivity section, there are several fields:
- Secrets Manager secret: Here, select the secret we created earlier in this guide(Heading 1).
- IAM Role: Choose the Role we created earlier (Heading 2).
- IAM Authentication: Disabled for now.
- Subnets: Select at least two subnets in different Availability Zones.
- Additional connectivity configuration (VPC Security Group): Here, use the ‘Proxy_SecGrp’ security group.
Step 8. Under the ‘Advanced Configuration,’ check the ‘Enable Enhanced logging’ and finally select ‘Create proxy.’
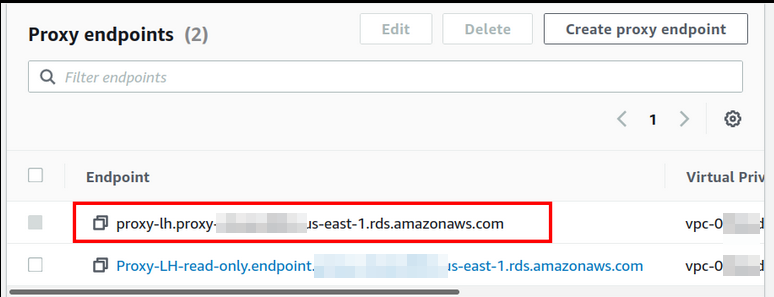
Now, wait for the Proxy to become available, and when it is done, copy the Proxy endpoint for testing the connectivity from EC2.
5. Connecting to the RDS DB instance via RDS Proxy.
Now we will check the connectivity of our RDS DB instance from the EC2.
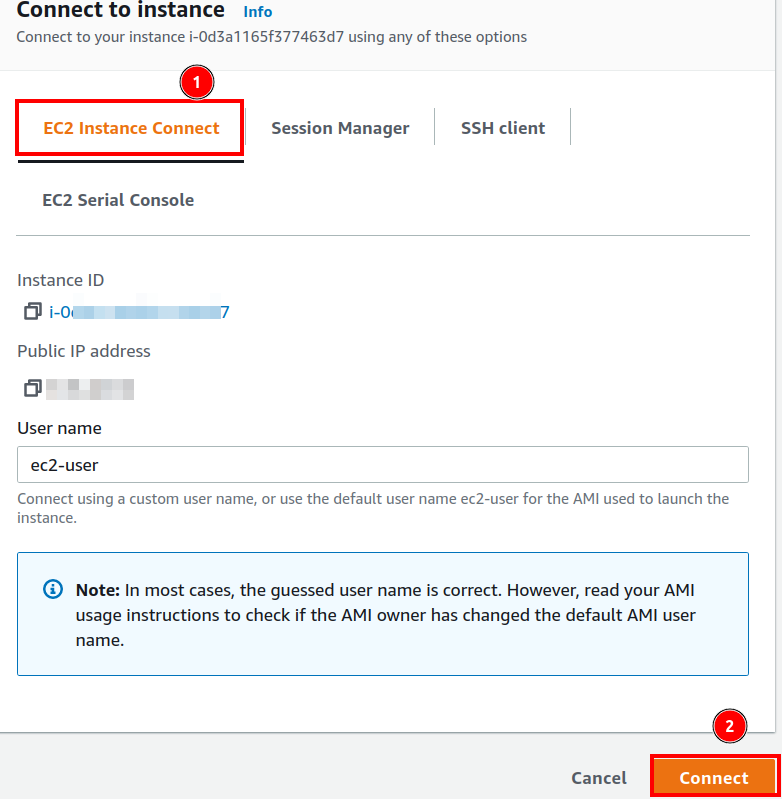
Step 1. Go to the EC2 management dashboard, select instances, and select your target EC2 instance from where we will connect to the RDS DB instance. Choose ‘Connect.’

Step 2. On the ‘Connect to instance’ wizard, choose the option ‘EC2 Instance Connect’, which is a browser-based SSH connection:
A new browser window will open up when you select the ‘Connect’ button as earlier in this tutorial.
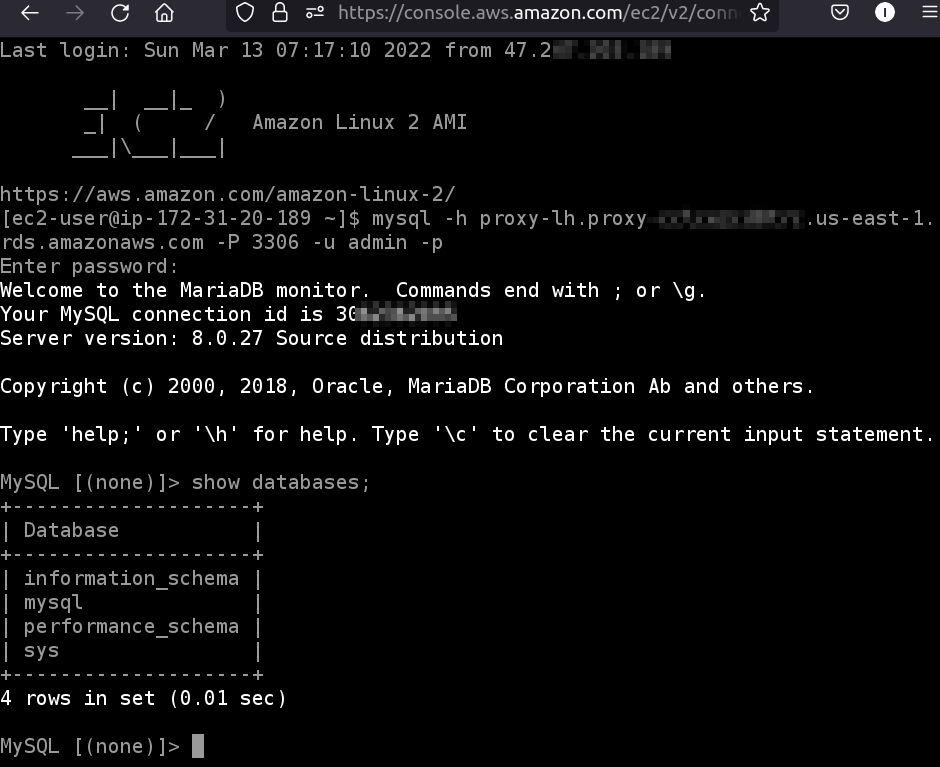
Step 3. From this CLI window, use the below command format to test the EC2 connectivity with the RDS DB instance via the RDS Proxy endpoint:
Use your RDS Proxy endpoint in place of ‘proxy endpoint’ and the name of the DB user in place of ‘username.’ Enter the DB password when asked. When the authentication is successful, you will see the MySQL prompt on the CLI:
Conclusion
In this guide, we have learned about setting up an RDS proxy on AWS. It is very beneficial for large applications, including serverless, that have many open connections. It significantly reduces the failover time for Aurora and RDS databases. It can be easily used for many applications without the need to change the code.