Install UFW on Ubuntu 20.04
UFW is available on Ubuntu-based distributions, but in case you deleted it by mistake, you can install it again. Follow the steps below to do so.
Step 1: Update APT
As always, first, update your APT. Do so by entering the following command:

Step 2: Upgrade APT
Now, upgrade your APT. To do so, enter the command below:

Step 3: Download and Install UFW
Enter the following command to download and install UFW onto your Ubuntu machine:

You will be prompted with a yes/no condition. Select “y” to continue the installation.
Step 4: Enable/Disable UFW
You can enable/disable the UFW service every time the system boots up via the following command:


Check the current status of UFW using the terminal command below:
Step 5: Block Incoming and Allow Outgoing Data Traffic
To block any incoming and allow outgoing data traffic, which is the default configuration in the UFW policy, enter one of the following two commands (the first is for outgoing, the second is for incoming):
Command: $ sudo ufw default deny incoming
Step 6: Add, Modify, and Delete Firewall Rules
You can add, modify, and delete firewall rules using two different methods, port number or service name. Enter either of the following commands to do so:


Filter the data packets using different protocols.

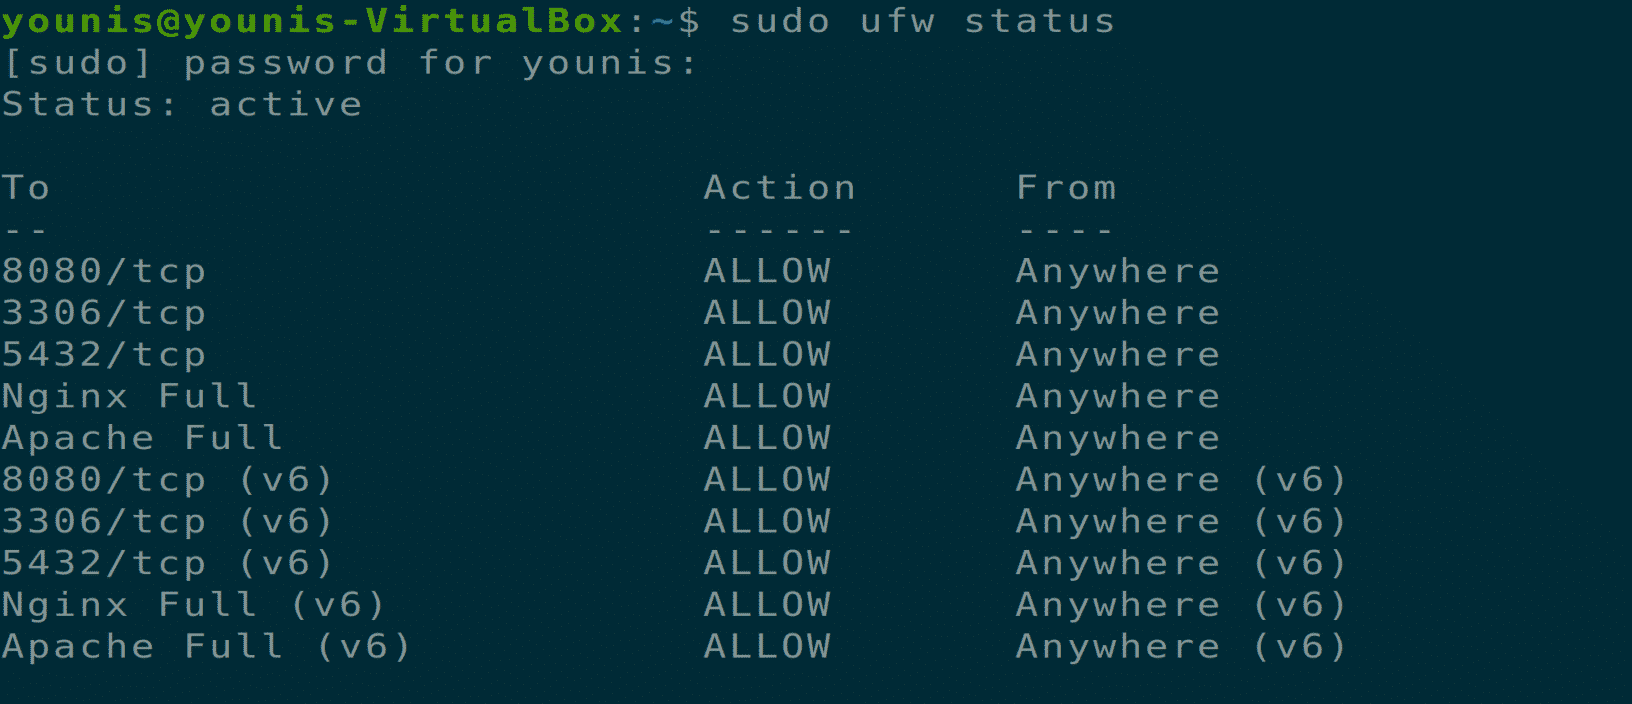
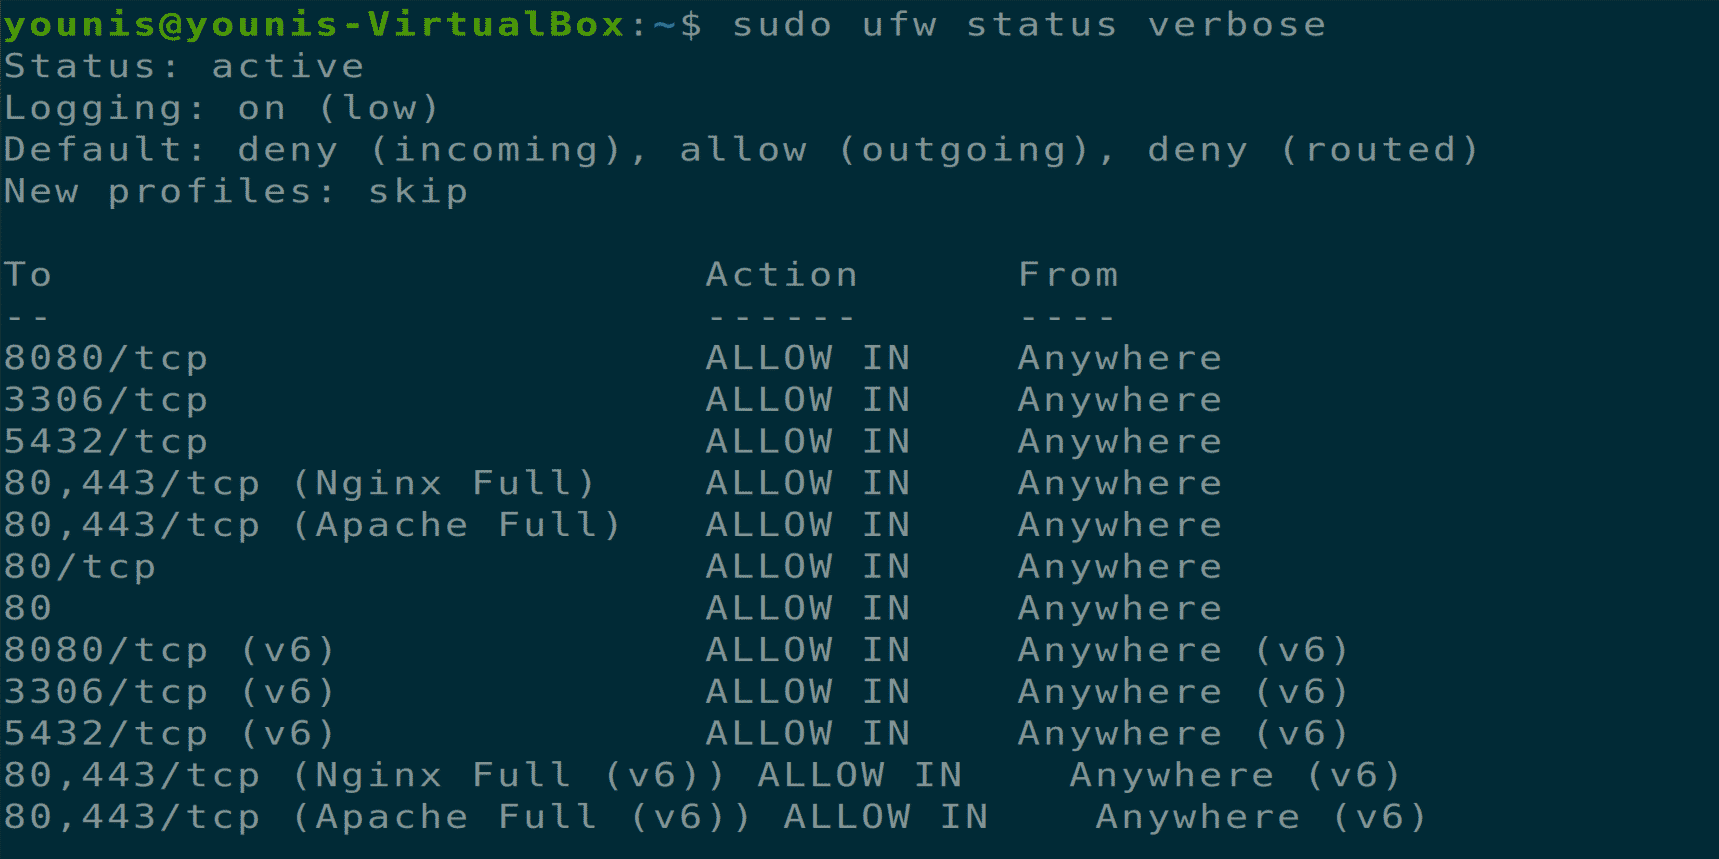
Step 7: Check Status of Updated Rules
You can check the status of the updated rules with the terminal command given below:
Using Advanced UFW Rules
You can allow a specific IP address to gain or deny access. Execute the following command to allow the IP address to gain access to the services:


Authorize an IP address to gain access to a TCP port using the terminal command given below:

You can specify ranges for a specific port. To do so, execute the following command:

You can also deny a specific IP to gain access to a port while allowing other IP addresses to access that port. To do so, enter the command given below:


Allow specific protocol traffic on an ethernet interface by entering the following:

UFW allows all ping requests; you can change this option using your favorite text editor in the configuration file.
Now, remove the lines given below:
-A ufw-before-input -p icmp --icmp-type source-quench -j ACCEPT
-A ufw-before-input -p icmp --icmp-type time-exceeded -j ACCEPT
-A ufw-before-input -p icmp --icmp-type parameter-problem -j ACCEPT
-A ufw-before-input -p icmp --icmp-type echo-request -j ACCEPT
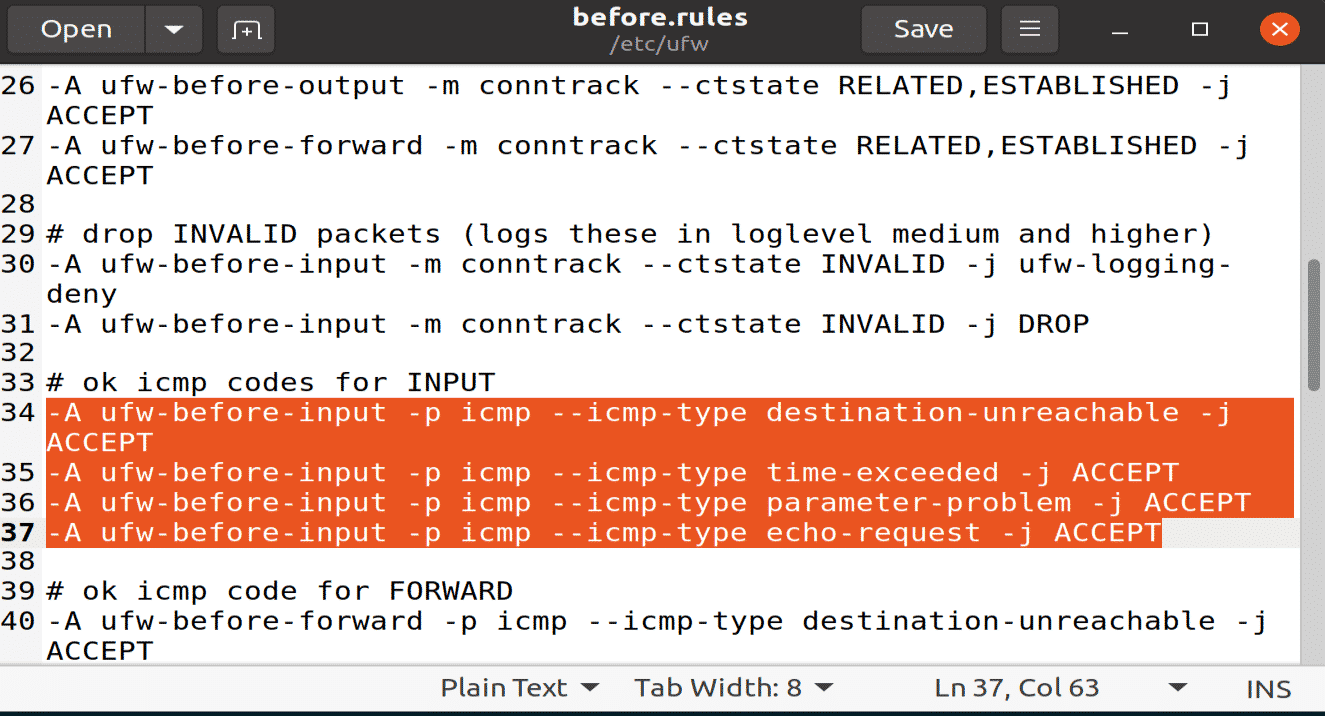
Save this file and close it.
To reset all the rules in UFW, execute the following terminal command:

Conclusion
That is all about UFW, using the UFW firewall rules, and using the UFW advanced firewall rules.