It is recommended to use sudo command carefully, as it has all admin rights so any misuse of this command may lead to several system’s problems. Debian is a well-known Linux distro and the latest release of this distro is Debian 11. The sudo user’s information resides in sudoers file, this file is in directory “/etc/sudoers”; the users included in sudoers file can perform all the tasks that a root can do.
In this article, we will demonstrate the possible ways to add any user to sudoers file to assign sudo privileges to that user.
We have listed down the possible ways to add users to sudoers in Debian 11:
Method 1: How to add user to sudoers using terminal in Debian 11
Method 2: How to add user to sudoers using GUI in Debian 11
Let’s dig into these methods one by one:
Method 1: How to add user to sudoers using terminal in Debian 11
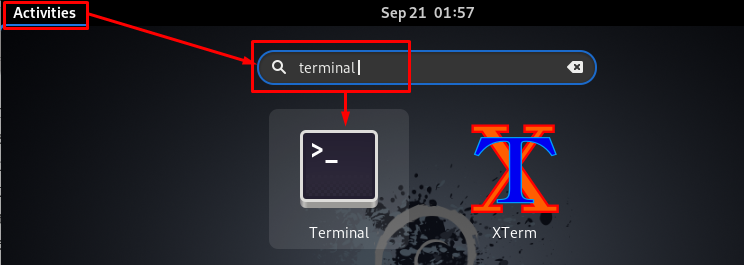
Open the terminal in Debian 11 by clicking on “Activities” and then search for terminal as shown in the image below:
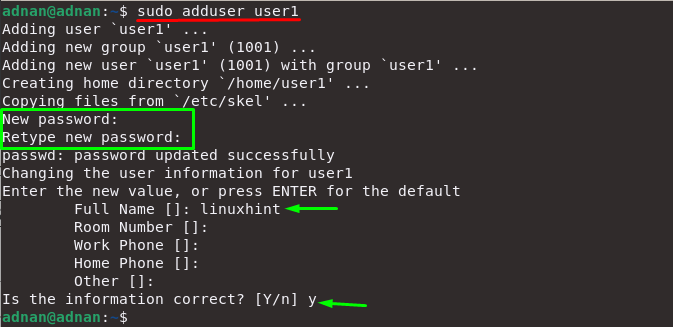
Once the terminal is opened, you have to add the user first by issuing the following command:
You can switch to this user by using the switch user command as written below: it will ask you to enter the password for “user1” and the user will be switched:
Now if you execute the sudo command as a “user1”; the command will not be executed because the user1 does not exist in sudoers file:
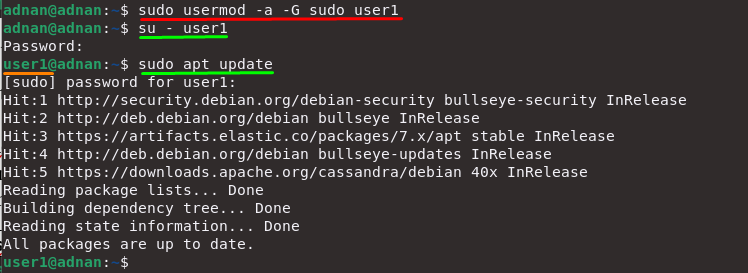
As it is clear that “user1” does not exist in sudoers file, in this case, you can use usermod command with various flags to add any user to grant sudo privileges. Here we will use two flags in usermod command; “-a” flag of usermod helps to append the user to a specific group; and “-G” flag is applied to indicate the group name to which the new user will be added mentioned below to add user “user1” to sudoers file: For instance, the following command will help you to add “user1” to sudo group.
Now you can see that after switching to “user1”; the “sudo apt update” command ran successfully:
Method 2: How to add user to sudoers using GUI in Debian 11
In this method, graphical interface of Debian 11 will be used to add a new user with sudo privileges; so for this you have to follow few steps:
Open the settings by navigating to “Activities” and then search for settings:
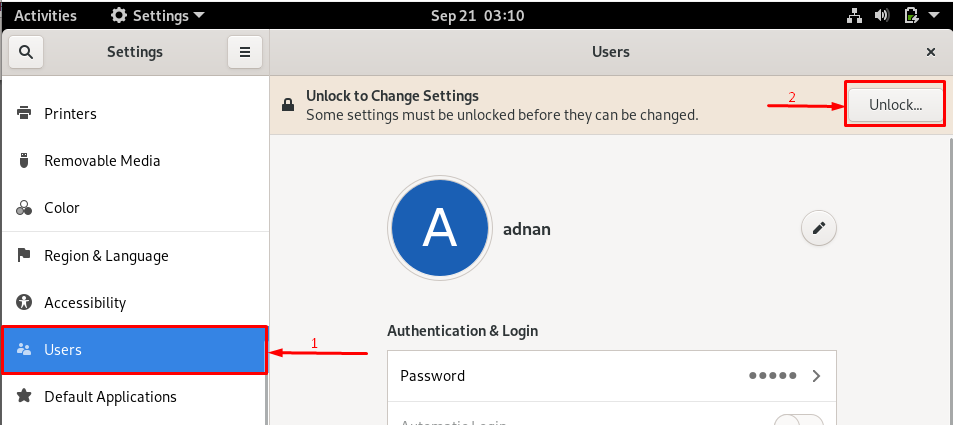
Open the settings, scroll down the left side pan and choose “Users” here, you will see the existing users on the right-side pan, before adding user you have to click on “Unlock” to make changes:
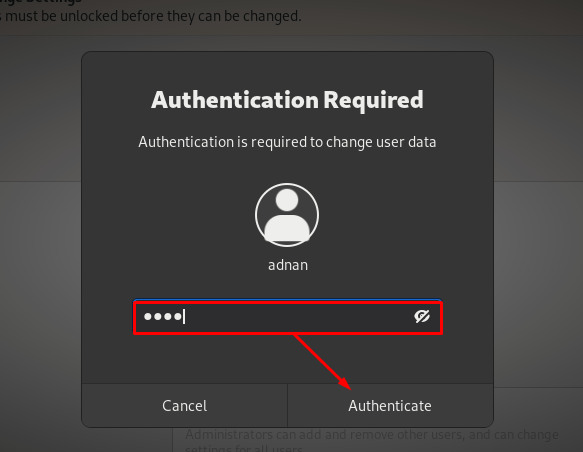
After clicking “Unlock”; it will ask you to enter the user password, type your password and click on “Authenticate”:
After authentication, click on “Add User” button:
Note: This button will only be visible if you have unlocked the users pan:
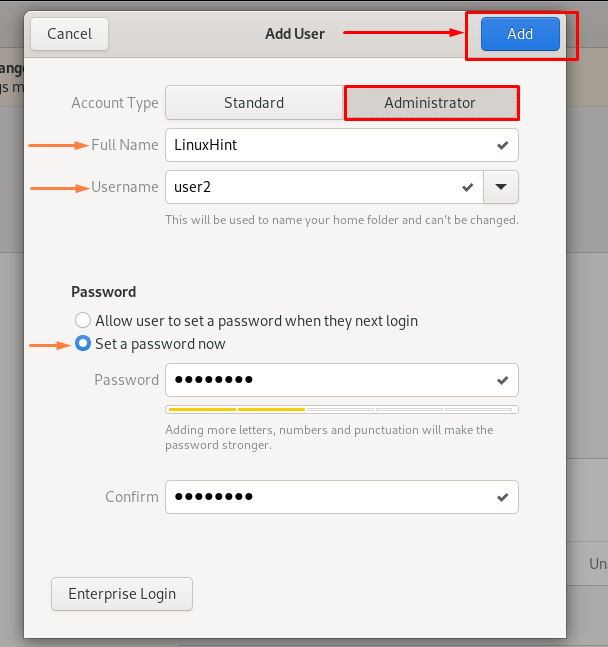
After clicking on “Add User”; a new window will be displayed in which you have to do the following changes:
- Firstly, set the “Account Type” to “Administrator”:
- Enter Full Name and Username; we have used “LinuxHint” as full name of new user and “user2” for username:
- Next opt for “Set Password now” and enter password for “user2”:
Once you have performed these changes, click on “Add” button to add “user2”:
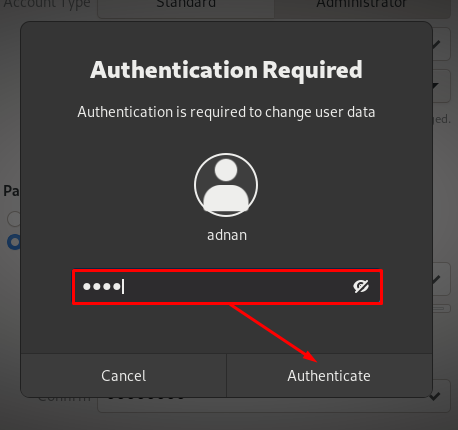
Authenticate the addition of new user by entering the password:
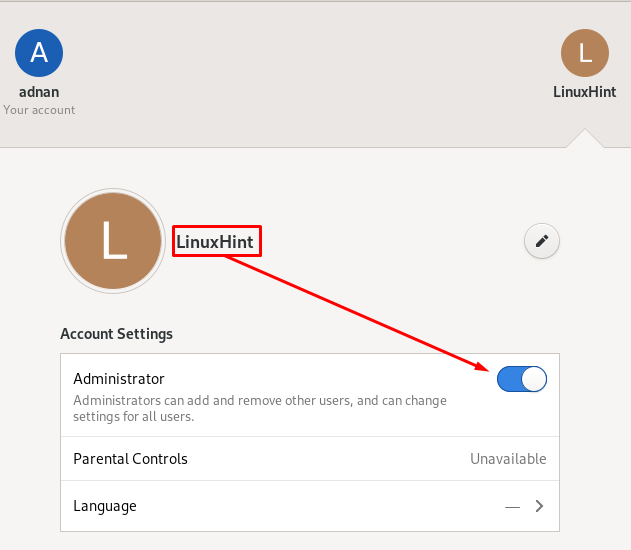
Once the authentication is successful you can check the new user “LinuxHint” has administrator privileges that mean it can perform sudo tasks now:
Conclusion
In computing devices, there are multiple users that might be using a single device; it is observed that only few users can perform maximum tasks. In Linux, a root user has the access to work on the system without any restriction, whereas sudo users also have the same access but for a limited time. In this descriptive post, we have demonstrated the ways to add new users and add them to sudoers; for this we have primarily mentioned two methods. The first method is for terminal enthusiasts and the second method refers to graphical support of adding users to sudoers. You can adopt any of the methods to do so, but terminal quickly does the process.

