
The network used for this tutorial does not assign IP automatically by using DHCP, we’ll assign everything manually. In this tutorial I assume your Linux device is a Debian or Ubuntu based distribution, it may be useful for other distributions too but some commands may be different, for example when restarting services like Samba.
The first step is to remove all previous data belonging to old connections or networks by executing the command “dhclient -r”
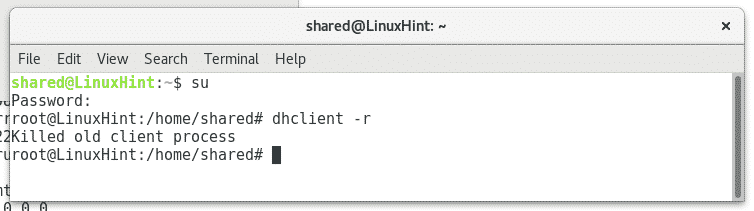
Where “dhclient” makes mention to the dhcp client and “-r” is similar to the “release” used in Windows (ipconfig /release) .
Next we need to learn what network device will interact with the network by running “ifconfig”, similar to the Windows command “ipconfig”, in this case the wired network device is “enp2s0” as shown in the screenshot below.

Then we’ll check information on the network from a Windows workstation by running the equivalent command “ipconfig” to see the IP range and gateway address.
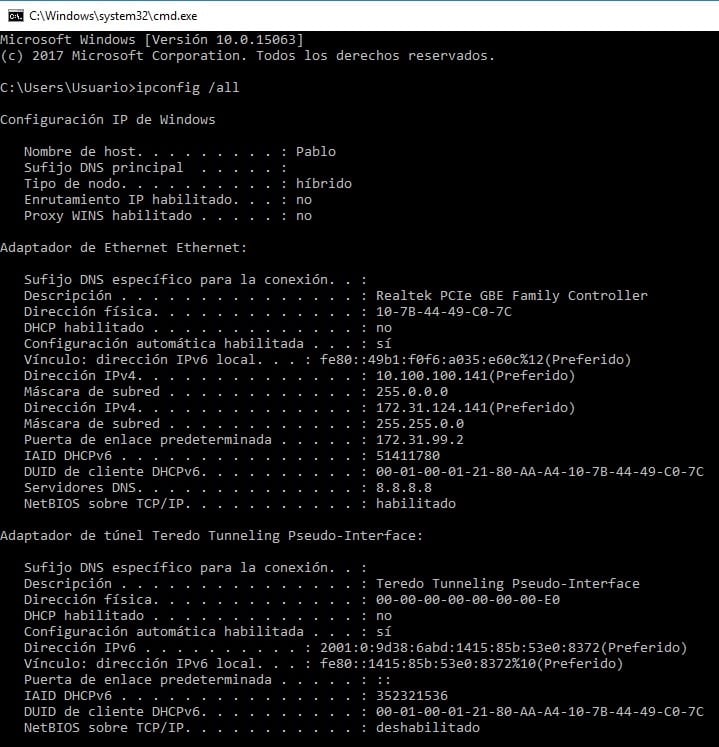
We can see the network device has assigned two IP addressed, in this case I know one IP address (10.100.100.141) is limited by a switch to a little portion of the network without internet access while the second (172.31.124.141) has total access. I apologize but the network belongs to a Latin American company and all workstation are in Spanish. Where “Direcciòn” means “address” and “Puerta de enlace determinada” means “gateway”.
From the Windows workstation we’ll ping IP addresses belonging to the same range in order to get an unassigned, or free IP to assign our device (remember within a network IP addresses can’t be repeated, and each device must an unique address). In this case I did ping to the IP 172.31.124.142 and it was unresponsive, therefore it was free.
The next step is to assign to our Linux device it’s own IP and enroute it through the proper gateway by executing “ifconfig enp2s0 X.X.X.X” to assign the IP address and “route add default gw X.X.X.X¨ to determine the gateway.
Remember to replace “X.X.X.X” for the proper addresses according to your Windows network information as shown in the following image.

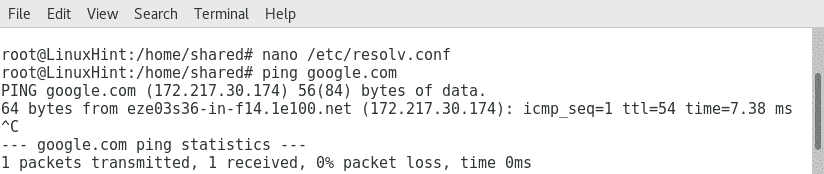
Then we need to edit the file /etc/resolv.conf which stores the DNS addresses (Domain Name Server) to add Domain Name Servers capable to translate domain names like www.linuxhint.com to IP address. To edit the file we’ll use the text editor Nano by running “nano /etc/resolv.conf”

We’ll use Google’s Domain Name Server 8.8.8.8, you can use the same DNS for your network if you are looking for Internet access too.
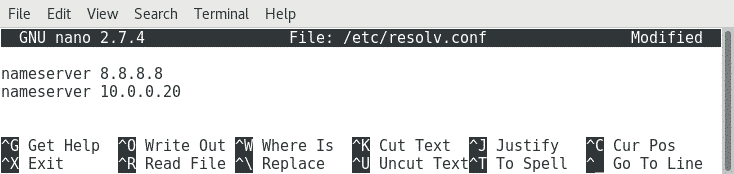
After editing the file we’ll save it by pressing CTRL+X and confirm by pressing Y.
Next we’ll test our internet access by pinging an internet address like google.com
If we want more than internet access and need to interact with other devices within the same network we need to install Samba, a service which allows us to interact with Windows services.
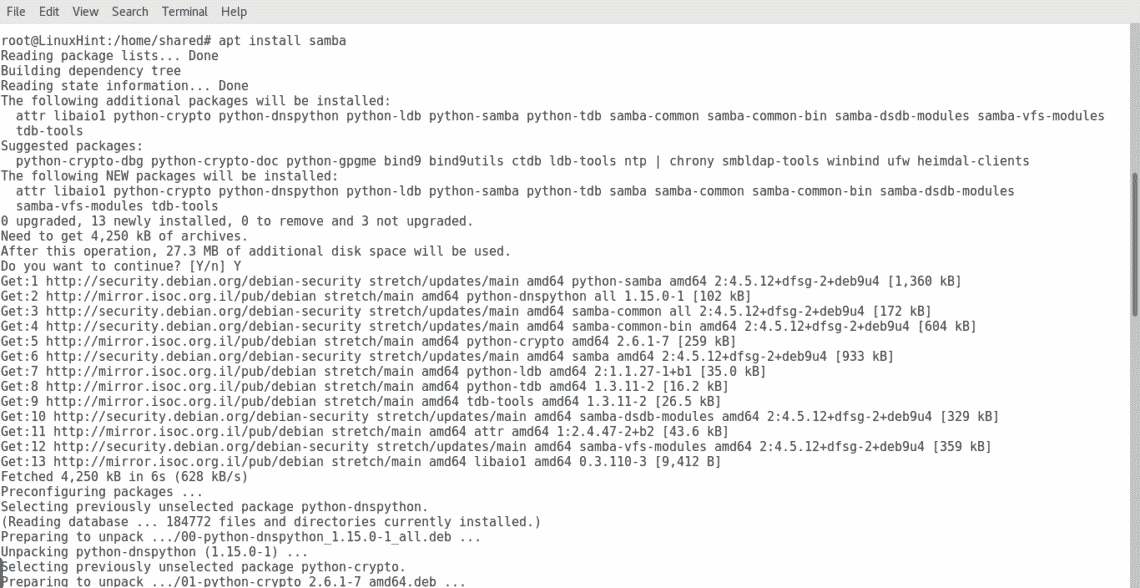
After Samba was installed we’ll need to add the Workgroup, in this tutorial I assume you know to use Windows graphically, you can check the Workgroup by pressing on “This Computer” with a right click and then checking the Properties. In this case the Workgroup is “Modernizacion”, we’ll edit our Samba configuration file stored at /etc/samba by using Nano again:
We’ll see the same file shown below, and among the first uncommented lines the parameter “workgroup”, the one we need to edit in order to add our device to the Windows workgroup.
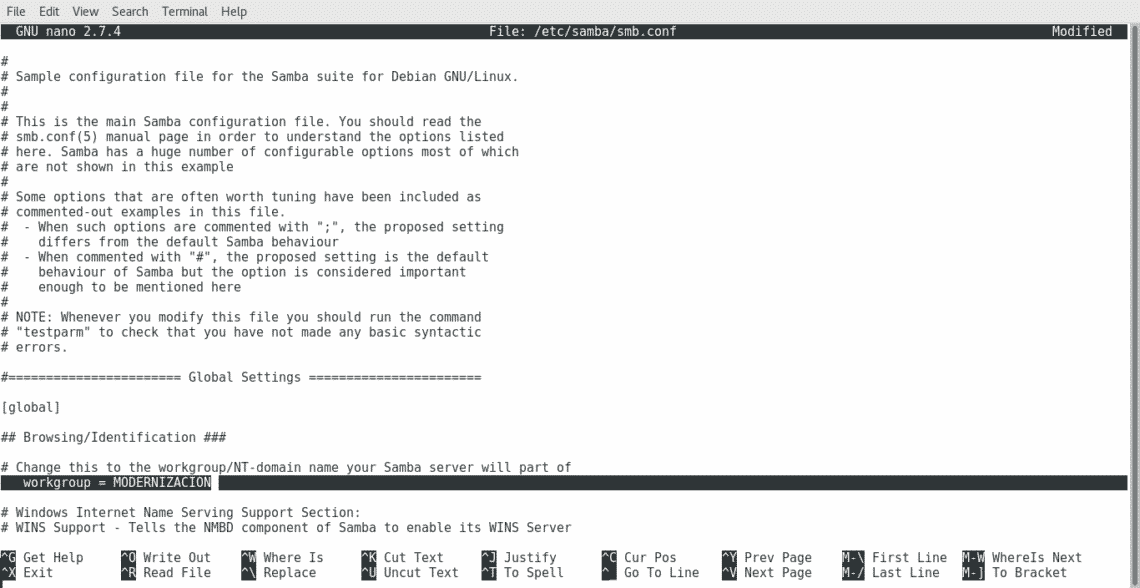
Again to save the file press CTRL+X and then Y when asked if you want to save it.
After making changes on samba´s configuration file we’ll need to restart the service to apply the changes by running “/etc/init.d/smbd restart”

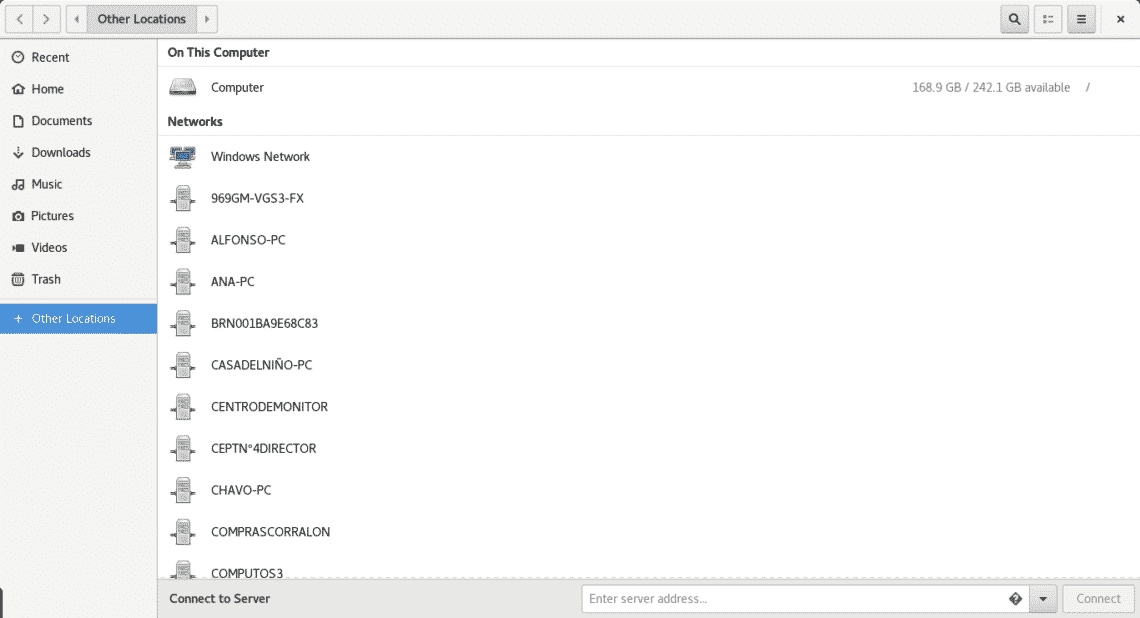
Now we can check with our file manager new locations and printers belonging to the network.
Adding a Linux device to a Windows network is really easy, it may even be easier than in this tutorial if the network assigned IP addresses automatically with the DHCP server.
I hope this tutorial was helpful. Have a great day and keep enjoying by reading LinuxHint.