
Git permits its users to access the remote branches to the local repository and send the local commits, modifications, and branches to the remote.
This tutorial will elaborate on how to add remote branches in Git.
How to Add Remote Branches in Git?
To add remote branches in Git, first, open the Git repository, and add the remote repository in Git using the “git remote add” command. After that, access all the remote branches using the “git fetch <remote-name>” command.
For practical demonstration, take a look at the provided procedure.
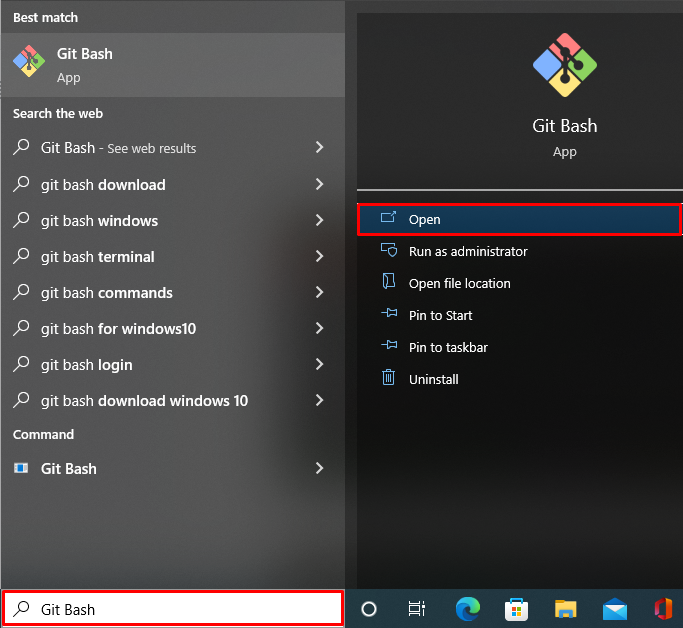
Step 1: Open Git Terminal
Launch the Git terminal from the Windows Start menu:
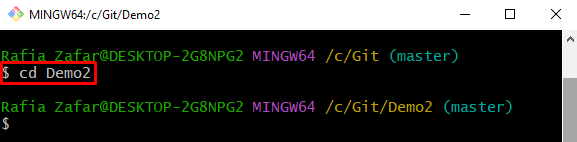
Step 2: Open Git Repository
Use the “cd” command and move to the desired Git repository:

Step 3: Create New Repository
Make a new repository with the help of the “mkdir” command:
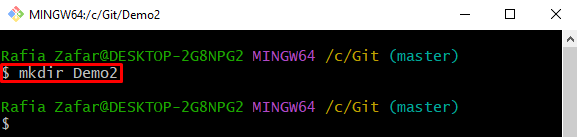
After that, again, use the “cd” command to move to the new working repository:
Step 4: Initialize Git Repository
Initialize the new Git repository using the “git init” command:

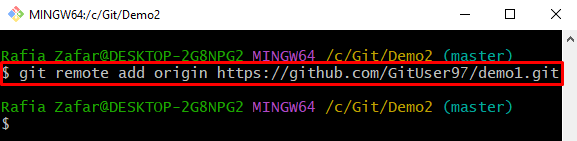
Step 5: Add Remote Repository
Next, add the remote repository to the Git repository with the help of the “git remote add <remote-name> <repository-URL>” command:
In the above command, specify the URL of the remote repository you want to add:
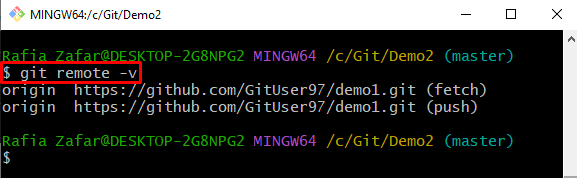
Verify if the remote is added to the Git repository or not:
The below output shows that we have successfully added the remote repository to Git local repository:
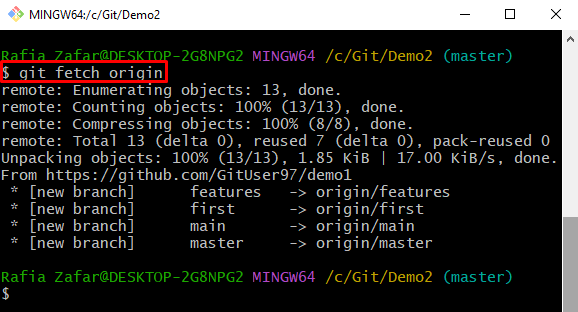
Step 6: Add Remote Branches
Now, fetch and add all remote branches into the local Git repository using the “git fetch <remote-name>” command:
The output indicates that we have successfully performed the required operation:
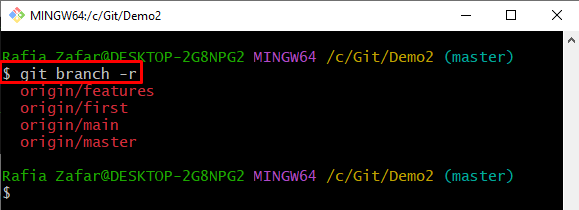
Step 7: View All Remote Branches
Access and view all remote branches in Git local repository using the provided command. Here, the “-r” flag shows only remote branches:
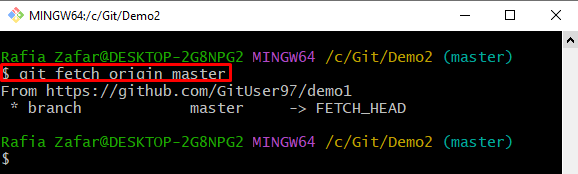
Bonus Tip: Access Specific Remote Branch
Git users can access only specific branches using the mentioned command. For instance, we have access to the remote “master” branch:
We have demonstrated the method for adding remote branches in Git.
Conclusion
To add remote branches in Git, first, open the Git repository. Add the remote repository into the Git repository by utilizing the “git remote add <remote-name> <Repository URL>” command. Next, in fetch and add all remote branches in the Git repository, utilize the “git fetch <remote-name>” command. To fetch a single or specific remote branch, utilize the “git fetch <remote name> <branch-name>” command. This article has illustrated how to add remote branches in Git.