In this article, our focus will be on adding the L1 Regularization in PyTorch models.
What is the L1 Regularization in PyTorch?
Major points of the “L1 Regularization” Technique are listed below:
- The primary use of the “L1 Regularization” technique is to prevent the overfitting of data in a model.
- “Overfitting” occurs when the model data is impressively trained but it cannot perform inferences on new input data as well as possible.
- The model is repeatedly run on the same original data and cannot generalize the learned parameters to fit new inputs.
- The result is the inability to observe and learn patterns and waste valuable hardware resources running processes that do not have any particular objective.
- Overfitting results in a lot of noise capture that can potentially make the results incredibly difficult to interpret or draw any valuable inferences.
How to Use the L1 Regularization Technique in PyTorch Models?
The mode of operation of the L1 Regularization technique within PyTorch is that it reduces the risk of overfitting by reducing the weights of model layers. It adds a negative term to the weight of a layer to reduce it close to zero to prevent overfitting.
Follow the steps given below to learn how to use the L1 Regularization Technique in PyTorch:
Step 1: Start a New Notebook in Colab
The Google Colaboratory IDE is ideal for PyTorch development. Go to their website and open a “New Notebook” to begin working:

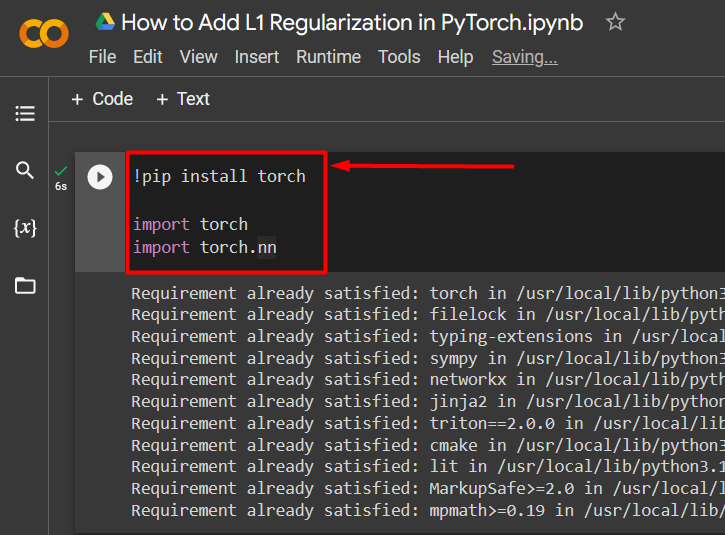
Step 2: Install and Import Libraries
The next step is to install and import the necessary libraries to begin working on the PyTorch project:
import torch
import torch.nn
The above code works as follows:
- The “pip” installation package from Python is used to install the “torch” library.
- The “import” command adds the libraries to the Colab project.
- “Torch.nn” library brings the functionality of neural network models in PyTorch:
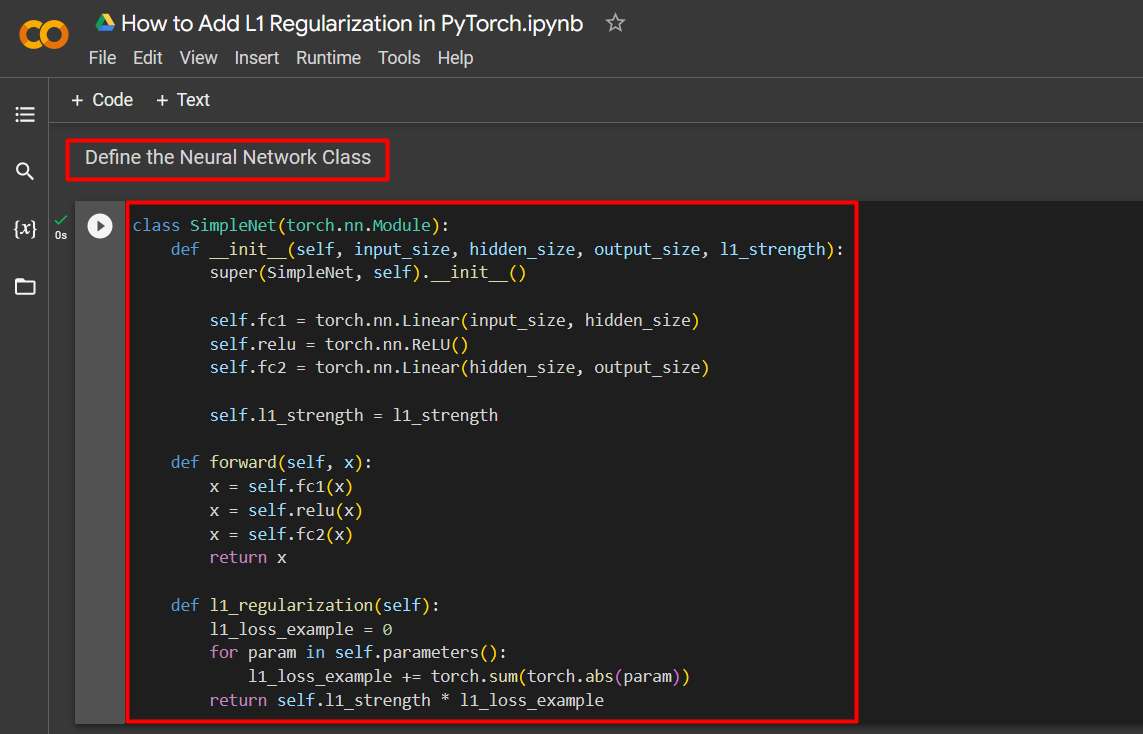
Step 3: Define a Neural Network Class
The neural network class is defined using the “torch.nn.Module” method:
def __init__(self, input_size, hidden_size, output_size, l1_strength):
super(SimpleNet, self).__init__()
self.fc1 = torch.nn.Linear(input_size, hidden_size)
self.relu = torch.nn.ReLU()
self.fc2 = torch.nn.Linear(hidden_size, output_size)
self.l1_strength = l1_strength
def forward(self, x):
x = self.fc1(x)
x = self.relu(x)
x = self.fc2(x)
return x
def l1_regularization(self):
l1_loss_example = 0
for param in self.parameters():
l1_loss_example += torch.sum(torch.abs(param))
return self.l1_strength * l1_loss_example
The above code works as follows:
- The “torch.nn.Module” method is used to define the neural network class.
- The “__init__” method is used to define the input size, output size, and the L1 regularization parameter as shown.
- The neural network uses the ”self()” module to define the iterations that are to be made with each cycle of the model.
- Next, the forward pass of the neural network is defined with the “self()” module once again.
- Lastly, the “L1 regularization parameter” is added to the neural network class with a “for” loop to handle its iterations for the weights of each layer in the model:
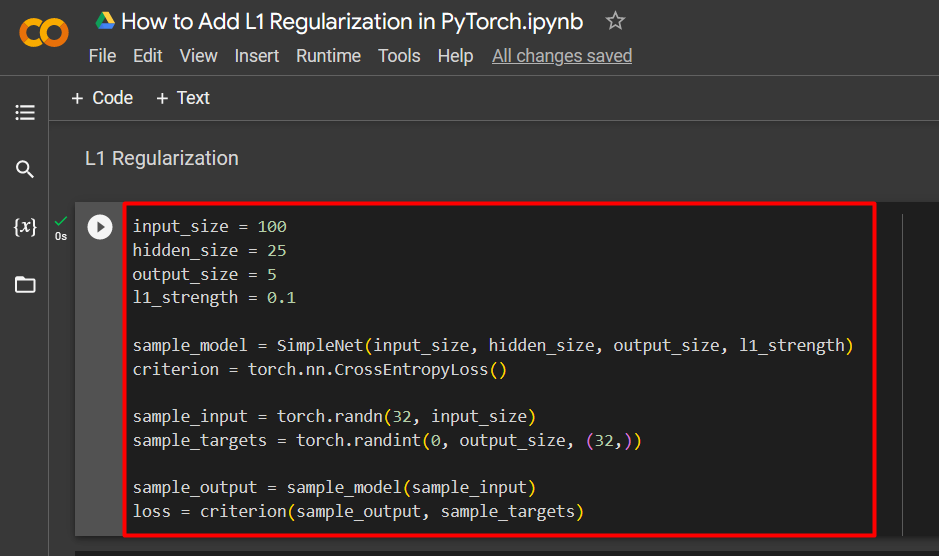
Step 4: Implement the L1 Regularization Parameter
The next step is to implement the “L1 Regularization Parameter” to monitor the loss and reduce the risk of overfitting the input data during model training:
hidden_size = 25
output_size = 5
l1_strength = 0.1
sample_model = SimpleNet(input_size, hidden_size, output_size, l1_strength)
criterion = torch.nn.CrossEntropyLoss()
sample_input = torch.randn(32, input_size)
sample_targets = torch.randint(0, output_size, (32,))
sample_output = sample_model(sample_input)
loss = criterion(sample_output, sample_targets)
The code mentioned above works as follows:
- The input size and output size are given custom values to start.
- Next, the previously defined convoluted neural network is assigned to the “sample_model” variable.
- The Cross Entropy Loss function from the “torch.nn” library is utilized here to give the loss criterion for the model.
- Then, the “torch.randn()” method is used to input random numbers into the input channel.
- The “torch.randint()” method is used to input random integer values into the “sample_targets” variable.
- Lastly, the “sample_input” variable is added as the argument of “sample_model” which is then assigned to the “sample_output” variable as shown in the screenshot below:
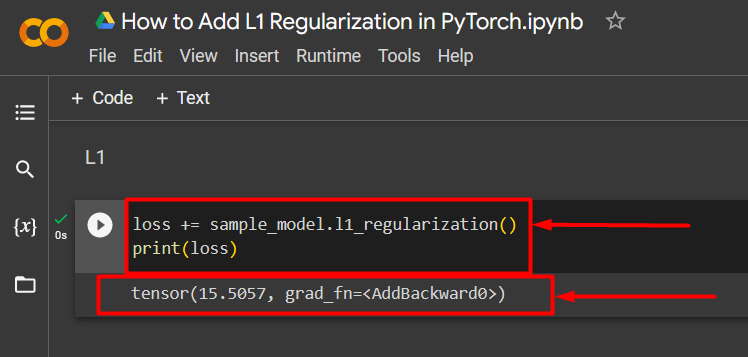
Step 5: Compute and Print L1 Loss
The last step is to compute the “L1 loss” and use the “print()” method to showcase the output:
print(loss)
The below output shows the L1 loss:
Note: You can access our Google Colab notebook at this link.
Pro-Tip
The L1 Regularization Parameter is complementary to the “Optimizer” used in neural network models. They both work to reduce the loss which is the difference between the predicted and the achieved results. It is important for the developers to make the right choice of Optimizer and Regulator in the model so that they both can work together to reduce loss.
Success! We have just shown how to add the L1 Regularization Parameter in a model in PyTorch.
Conclusion
Add the L1 Regularization by first setting up a neural network. Then, implement the regularization parameter to minimize loss and compute and print results. The regularization helps to align the model results with the predicted results and avoids overfitting. Consequently, this improves the ability of the model to make accurate inferences from new input data. In this blog, we have demonstrated how to add the L1 regularization in a Neural Network model in PyTorch.