This study will illustrate how to add Git to PATH on Windows.
How to Add Git to PATH on Windows?
Follow the below instructions to add Git to the PATH environment variable on Windows.
Step 1: Edit Environment Variables
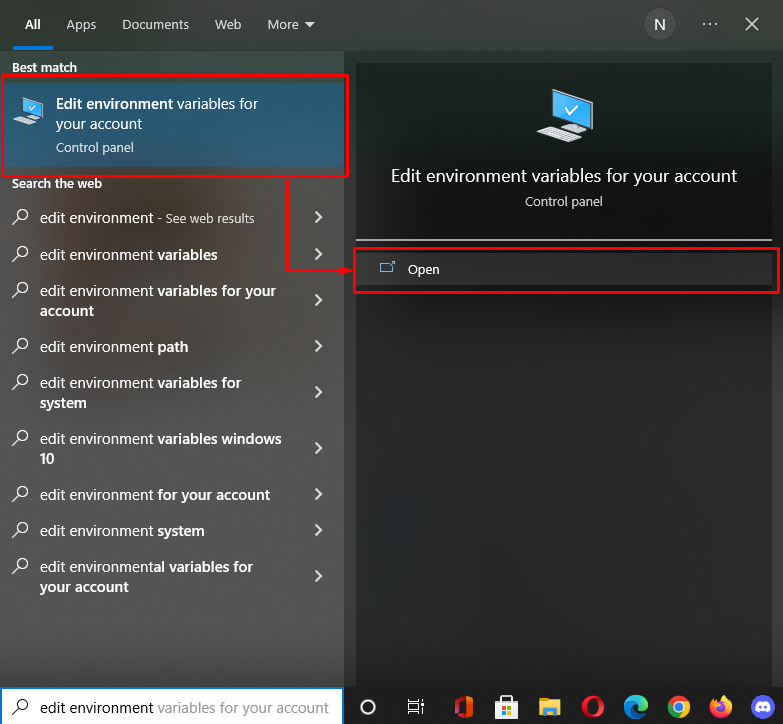
First, search for the “Edit Environment Variables” using the “Startup” menu and open it:
Step 2: Edit Path
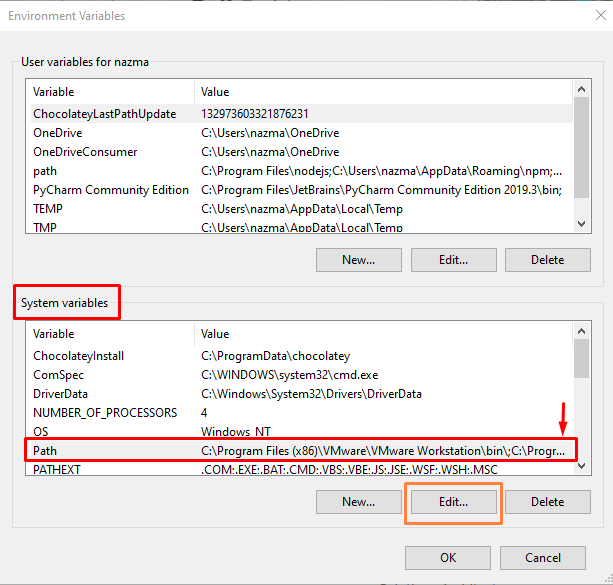
Select the “Path” underneath the “System variables” section and press the “Edit…” button:
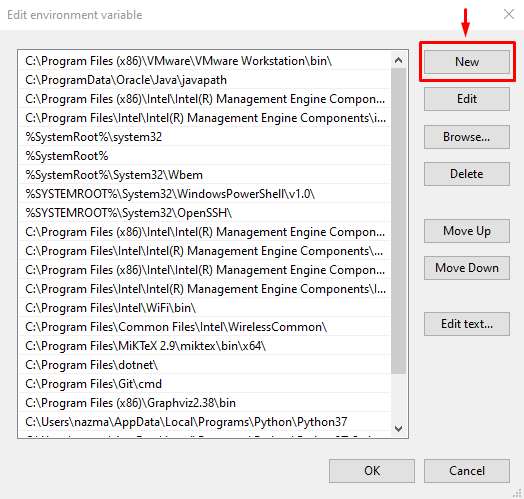
Next, click on the “New” button:
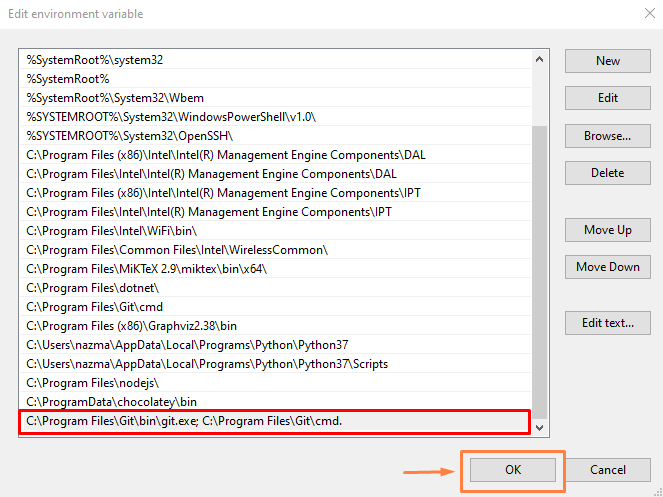
Now, add the path of git.exe and cmd files where they are located in your system. For instance, we have added the “C:\Program Files\Git\bin\git.exe; C:\Program Files\Git\bin\cmd” path and click on the “OK” button.
Note: On your Windows system, check the path where Git is installed and add it accordingly.
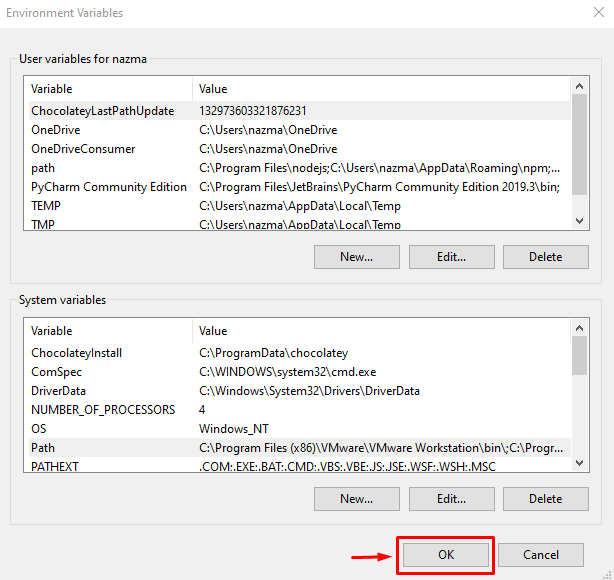
Again, hit the “OK” button to save all added changes:
Step 3: Open Git Bash
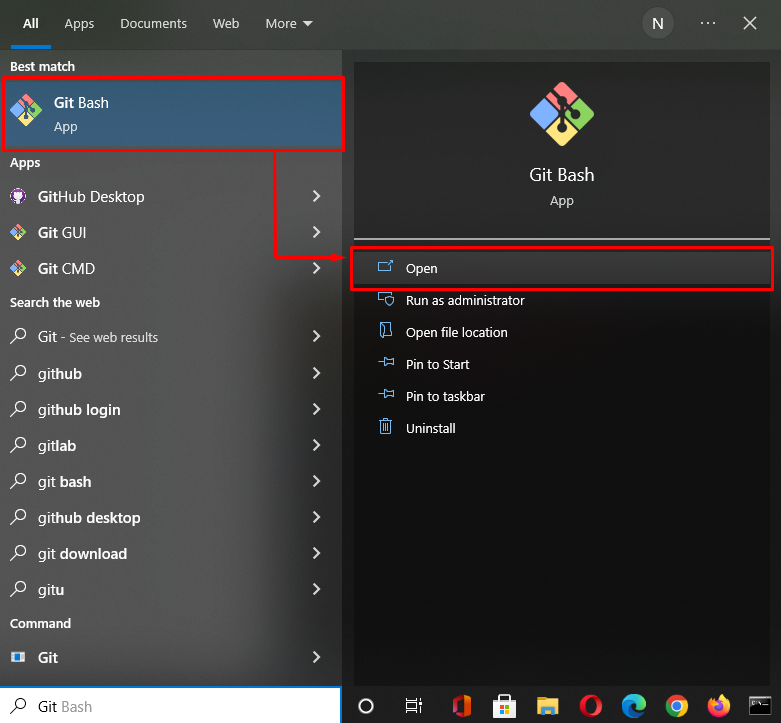
Now, open up “Git Bash” with the help of the “Startup” menu:
Step 4: Check Git Version
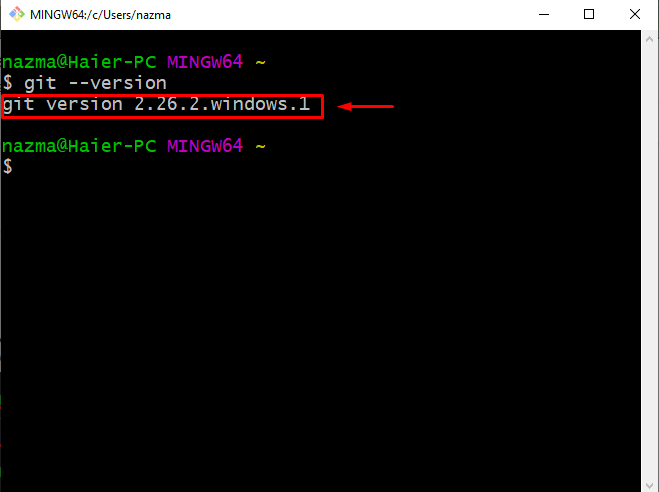
Run the provided command to verify if Git is working properly on Windows:
The given output indicates that we have successfully added the PATH environment variable and Git is ready to use on our Windows system:
That’s all! We have briefly explained the procedure of adding Git to PATH on Windows.
Conclusion
To add Git to the PATH environment variable on Windows, open up the “Edit Environment Variable” app, choose the “Path” option underneath the “System variables” section, and hit the “Edit” button. Next, add the Git installed folder path, and save the changes. Now, open “Git Bash” and run the “$ git –version” command to verify that the Git is added to the PATH environment variable. This study explained the method of adding Git to PATH on Windows.

