MySQL Database System is a highly scalable database service for creating cloud-native applications. Therefore we have to perform different operations while working on it. The ALTER TABLE declaration is being cast-off to add, remove, or alter columns while working on an already existing table in any schema of MySQL. We’ll teach you exactly how to declare a column to an existing table utilizing the MySQL ADD COLUMN expression in this guide.
Syntax:
Here is the detail of this query:
- Table_name: is the existing table you wish to amend or add a new column.
- New_column_name: is the title for a new column to be added.
- Column_definition: It is the data type of a new column and its definition, e.g., Null, Not Null.
- FIRST | AFTER column_name: This clause specifies the location of a new column in the table. It is optional; that’s why if not used, the column will be implanted at the last of a table.
Add Column via MySQL Workbench
Open your newly installed MySQL workbench from the start button of your desktop. Make sure to connect your workbench with the database.
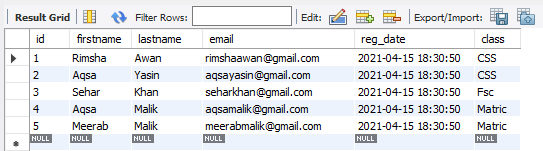
In the Navigation bar of the workbench under the schema, you can find the already created databases. We have created a database ‘data’ and added a table ‘student’ into it. The table ‘student’ has the following columns and records in it.
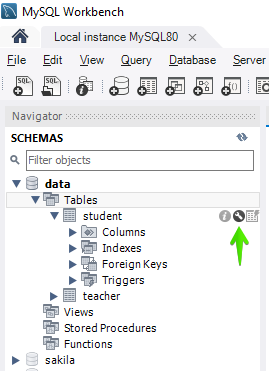
To add a new column in the existing table ‘student’, you have to navigate towards the Schemas under the Navigator. Within the database ‘data’, we have a list of tables, e.g., student and teacher. You have to expand the table, student. While hovering over it, you will find an icon of the setting, as highlighted below. Click on it to continue.
The below window will be opened in MySQL workbench. You can view a list of columns and their definitions. You can add a new column at the last of all the columns by double tapping at the last space and, after that, writing a column name on it.

It is clear from the below image that we have added the new column ‘age’ at the last of all columns, with its definition defined.

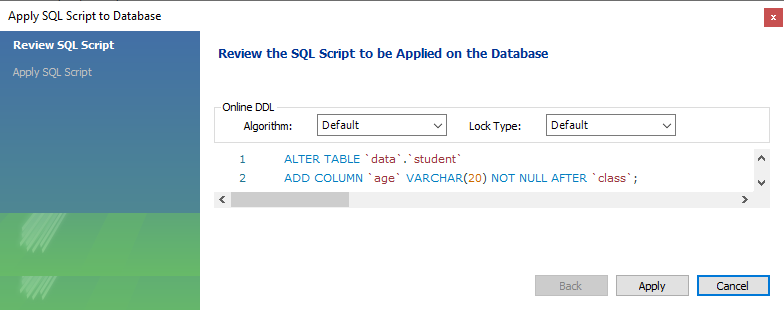
You will find a new window having a query listed to add a new column as below. Click on Apply button to proceed.
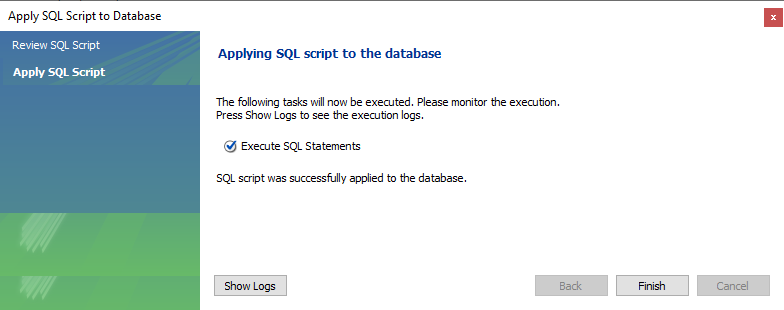
The window will be opened. Hit on Finish to see changes.
Now, the restructured table is appended below.
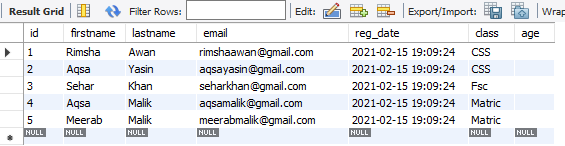
After adding values, it will look like as underneath. You can also add the Alter query in the space above this table and under the navigation bar to add a column in a table.

Add Column via Command-Line Shell
To add a new column in an existing table while using the command-line, you have to open the MySQL command-line client from the taskbar. Enter your MySQL password when asked and press Enter.

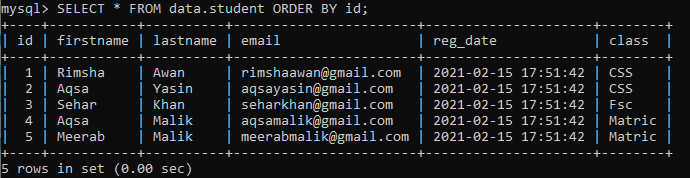
Upon checking, we have found the below-given record in the table ‘student’. Let’s add a new column, ‘age’, at the end of the table.
Example 01: Add Single Column
If you want to add a single column to an existing table, then this example is meant for you. Now, we will add a new column named ‘age’ at the last place of the table, ‘student’. To add a new column ‘age’ after the column ‘class’, try the below query in the MySQL command-line shell.

On checking the table, you will see that the table has created a new empty column ‘age’ at the last place, as shown in the image.

We will be updating a table while adding values to a newly created column ‘age’. We have tried the below three UPDATE queries to add values into a column ‘age’.


Let’s check the updated table ‘student’ using the below SELECT query in the shell as:
Now we have a full-fledge newly updated table as given below.

Example 02: Add More than One Columns
You can also add more than one column at different places of an existing table using ALTER query. Let’s try the below query to add two new columns, e.g., gender and city, at the last of all the table ‘student’ columns. We have used two ADD clauses in this query to add two columns.

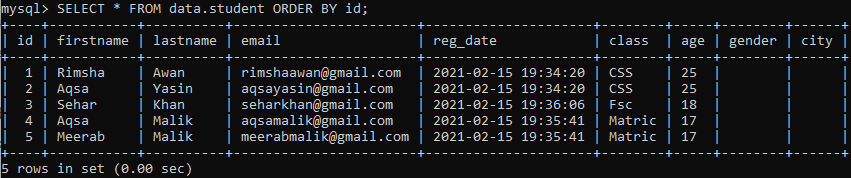
You will find the below-updated table upon checking it with the SELECT query in the shell. You will find that the table has created two new columns with no values in them at all.
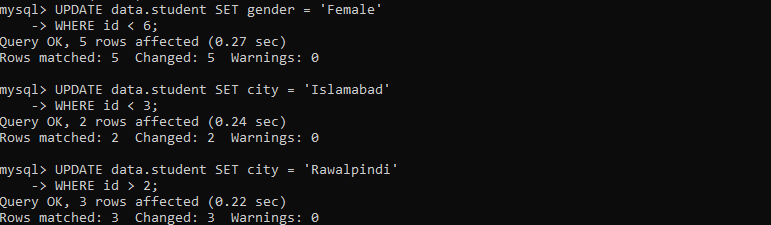
To avoid the emptiness of newly created columns, we will be adding values to new columns, e.g., gender and city. We have tried the below three UPDATE queries to add values into the columns’ gender’ and ‘city’. First of all, we have updated the column ‘gender’ using the below query as:
After that, we have updated the column ‘city’ by using the below two UPDATE commands:
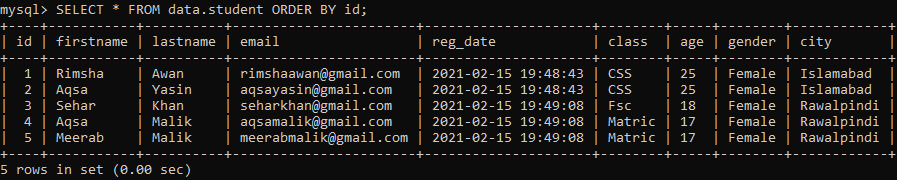
Let’s check the updated table ‘student’ using the beneath SELECT query in the command line shell as:
Finally, we have got a newly restructured table as given below.
Conclusion
Perfect! We have efficiently tried all the queries to add a single column or more than one column in an existing table while working in MySQL workbench and Command-line client shell.