Access Control Lists (ACL)
Access control lists (ACL) allow us to fine-tune access control. In other words, suppose that the user SARA needs access to a single folder owned by KALYANI. Technically, we could assign SARA to KALYANI’s group, but that would mean that SARA would have access to more than she needs, and suppose further that KALYANI has sensitive files that she doesn’t want SARA to read, write or execute. This is where Access Control Lists or ACLs come into the picture. We can, in theory, mess with permissions, but ACLs allow us to give different accesses to different users as well as give access without having to mess with the actual base permissions of the file or the folder.
Viewing current permissions
We use the getfacl (get file access control list) command to view the current ACL permissions.
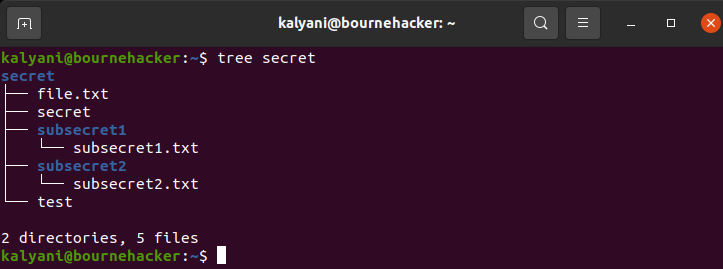
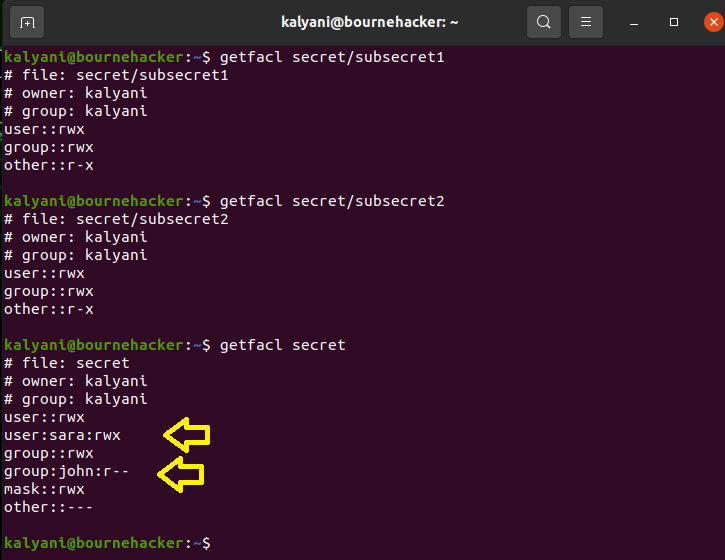
Let’s suppose that I create a folder called secret with two subdirectories and 5 files. Suppose further that I want to view the ACL permissions on the secret folder.

This means that the owner of the files and folder, kalyani, belonging to the group kalyani, has read, write, and execute permissions. Everyone else, however, has no permission whatsoever.
Assigning user fine-tuned permissions
Fine-tuning the permissions with ACL is carried out using the setfacl command. The -m switch, in particular, is used to modify permissions.
The u denotes that the change is for a user and not a group. After the colon, one would write the username for whom the permission is granted as well as the permission granted. The permissions are the same as those available for chmod: read, write, and execute. Lastly, we write the filename for which the permission is applied.
For instance, suppose that I wish to grant her full access to this secret folder to user SARA, then I would write:
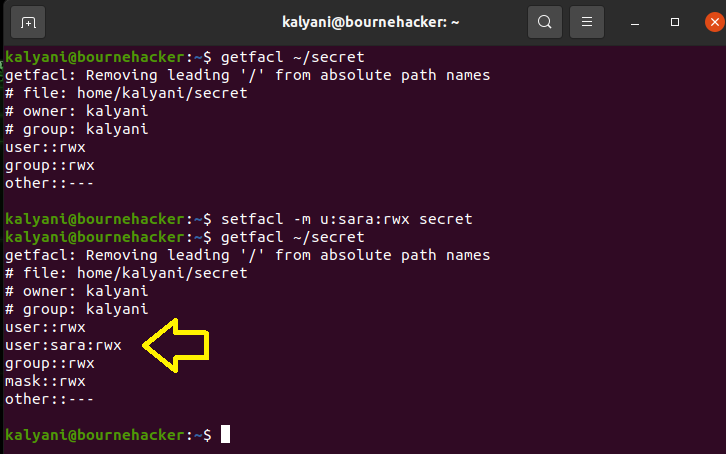
Now, if we log in as SARA, we would have read, write, and execute access to the folder “secret”. Now, mind you, I set a 770 permission to the initial directory. This permission was kept, but an exception to the rule was added using access control lists. If I had another folder called “kali” with permission 770 owned by kalyani, the user SARA would not be able to touch it. In fact, it would say “Permission denied”.
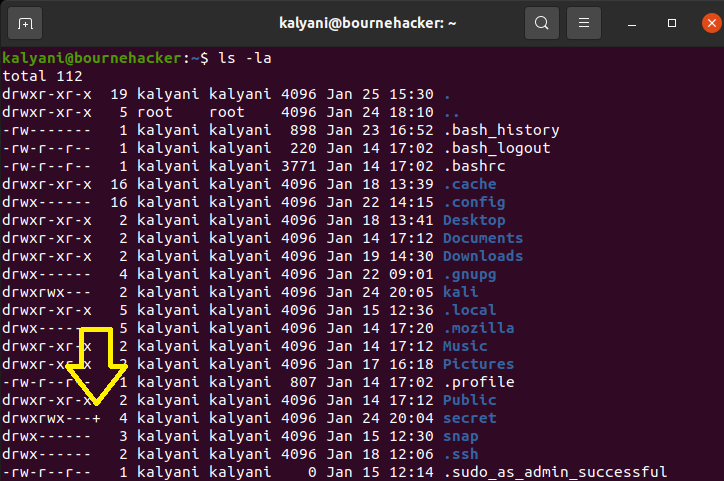
Further, a point to note is that once the file is modified as an ACL, there’s a plus sign next to it when you list it. In this case, as you can see, it says drwxrwx—+ for the folder called secret. The plus sign implies that it has been modified with ACLs.
Once you set ACLs, a mask is also created. The mask is the maximum permission an ACL user or group can potentially have on a directory or a file.
Assigning groups fine-tuned permissions
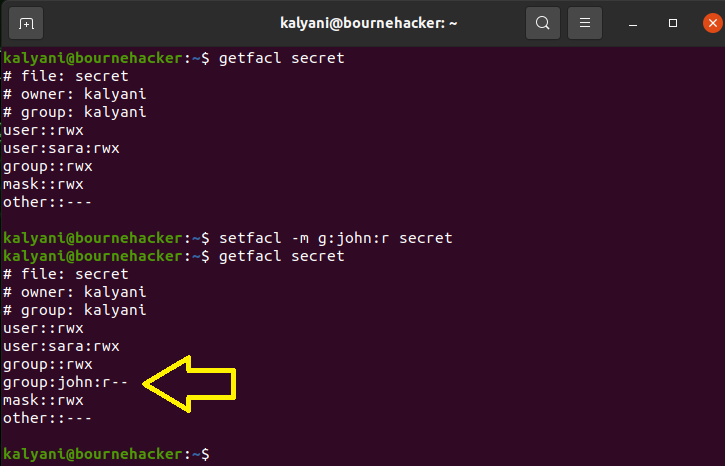
Much like assigning users special permission, we can assign groups special permission as well. What this means is that we can keep our base permissions as is and assign a particular group additional permission using ACL.
Ex:
In this case, we are giving the group JOHN read permission to the secret folder. This means that all members of the group JOHN will have read permission to the secret folder and ONLY the secret folder. Everything else will be under lock and key.
Recursive assignment
The secret folder was designed with 3 files directly in it and 2 sub-directories, each with a single file in it.
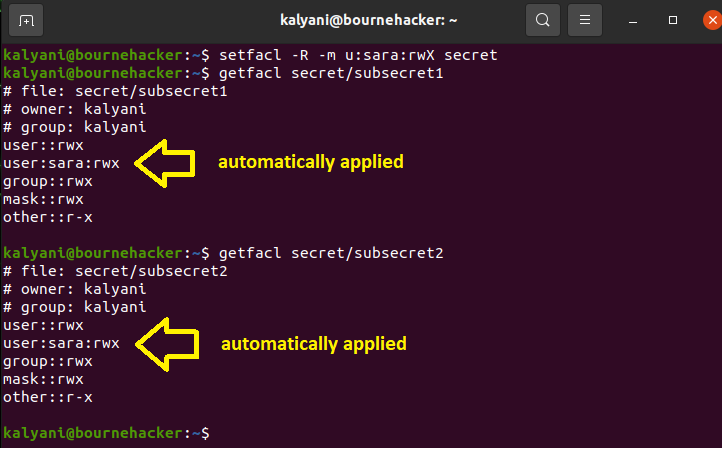
When we assigned the permissions for the user SARA and group JOHN, we didn’t do it recursively, so let’s check the ACL permissions of the sub-directories currently (after having assigned permissions to the secret directory).
As you can see, the ACL permissions only applied to the secret directory and not the sub-directories. What this means is that the user SARA and the group JOHN don’t have the given permissions on the sub-directories! In this case, if we want to give permissions to the entire directory (including the sub-directories), we have to do a recursive assignment. We use the -R switch to do this.
Ex:
Deleting fine-tuned permissions
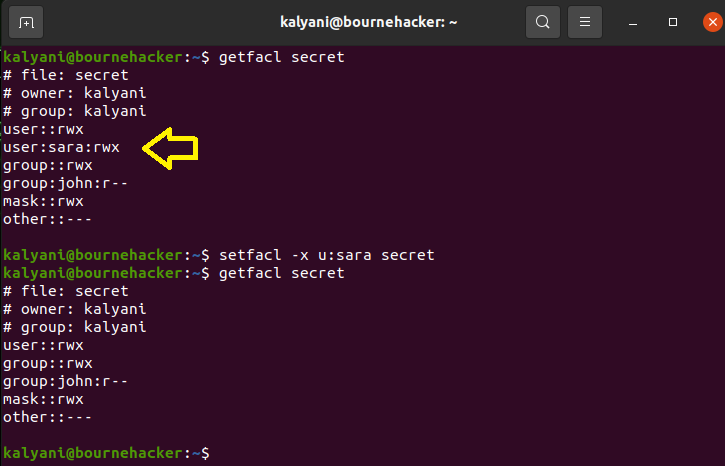
You may also wish to revoke the permissions given, and that is just as easy to do as giving them. You use the -x switch instead of the -m switch to revoke the permissions.
To remove a specific entry:
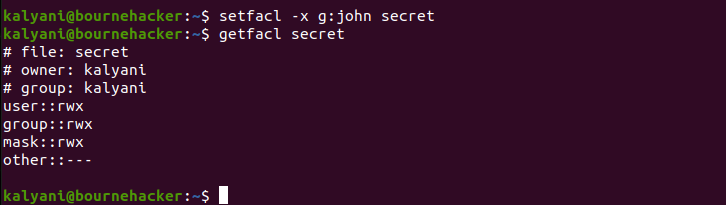
setfacl -x g:group_name filename
In this case, I would have written:
To remove all the entries in one shot:
For example:
This, however, doesn’t remove the rights on the sub-directories. In order to remove the rights from the sub-directories, you must use recursion.
Summary
Everything we learned boils down to this:
To view ACL permissions:
To set ACL permissions:
Options:
-m, –modify modify ACL
-x, –remove remove ACL entry
-b, –remove-all remove all ACL entries
-R recursive assignment
Entry:
u:username:permissions for users
g:group_name:permissions for groups
Although chmod exists to grant permissions for files and folders, it isn’t selective. It cannot grant different privileges to different users. Further, there are times when one doesn’t want to add random people to groups either. ACL or Access Control Lists was invented just for this sort of occasion. It can give specific users or groups access to specific files and/or folders. In this tutorial, we learned how to give users and groups special permissions, recursively assign permissions, and revoke the said permissions. So go forth and fine-tune permissions on files and folders from here on forth!
Happy Coding!