In this guide, check out how to use fdisk to format a partition.
Format partition using fdisk
The fdisk tool will come pre-installed on almost all the Linux distros. This guide will demonstrate the usage of fdisk on an Ubuntu system.
To confirm that fdisk exists in the system, launch a terminal, and run the following commands.

An interesting feature fdisk offers the interactive mode. It offers far more control and safety over the partition formatting operation. That’s why this will be the primary method demonstrated in this guide.
Using fdisk to format partition
Listing disks
For the interactive mode, fdisk requires the device label in the system. In the case of the Linux filesystem, devices are labeled as “/dev/sd*” or “/dev/hd*” where the asterisk (*) is replaced by an alphabet.
For example, a device labeled as “/dev/sda” will have partitions labeled as “/dev/sda1”, “/dev/sda5” etc.
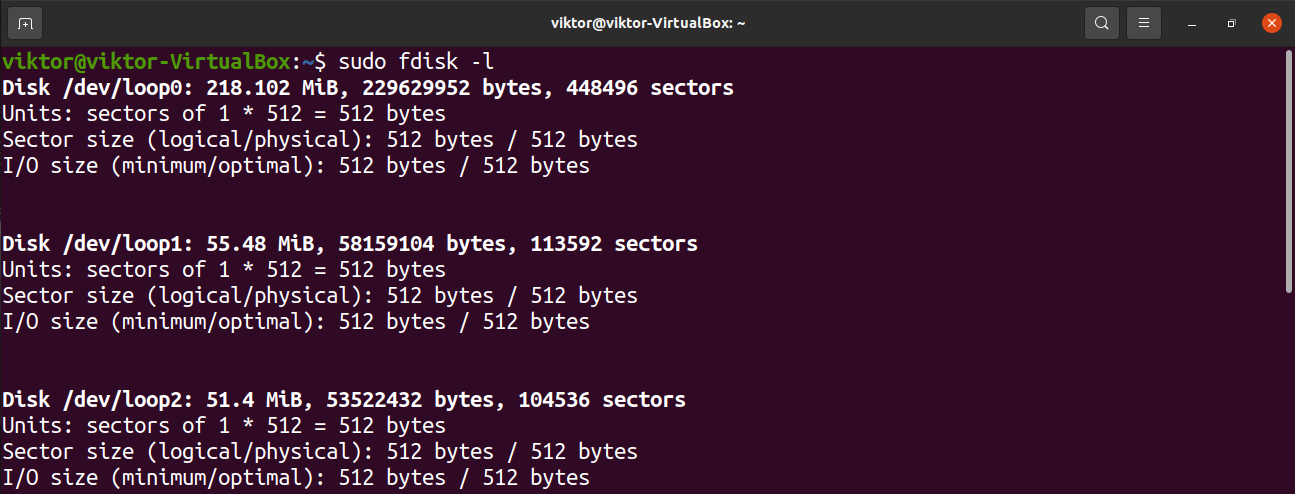
To list all the disks and their respective partitions, run the following command.
The fdisk tool can also list disks and partitions with a more in-depth report.
To check the partitions of a specific disk, use the following structure.
Launching fdisk interactive mode
Now that we’ve determined the target device, label launch fdisk in the interactive mode.
Any changes made will remain in the memory only. It offers protection from unwanted actions.
To print all the available options, enter “m”.
Creating a partition
It’s an optional step and only applicable if there’s free unpartitioned space on the disk. To verify if there’s any, enter “F”.
To create a partition, enter “n”.
It’s recommended to use the default value for the first sector of the new partition.
The last sector will determine the amount of space the new partition will take. In this step, fdisk accepts various formats of values. For example, if the partition size is to be 2GB, then enter “+2G”. If no unit is specified, then fdisk will use sectors as the unit.
If there were any previous partition in the location, fdisk would prompt the warning that it contains a previous filesystem signature. It’s recommended to remove the signature. Enter “Y” to confirm the action.
Issuing the write command will mark the changes permanent.
Changing partition type
Any partition will have a value assigned for a certain kind of file system. There are various partition types available, for example, FAT12, AIX, SFS, OPUS, BSD/OS, OpenBSD, Linux, etc.
To change the partition type, enter “t”.
Fdisk will ask for the target partition number. If the partition is “/dev/sdb1”, then the partition number is “1”.
In the case of Linux, there’s a big set of supported partition types. To print all the available options, enter “L”. Each partition type has a unique hex code. For this example, we’ll be using “Linux” (hex value 83).
Writing the changes
Assuming everything was configured properly, it’s safe to make the changes permanent. If there’s any issue or you want to discard the current configuration, enter “q”. Fdisk will discard all the changes without writing them to the disk and exit.
Assuming everything was configured properly, enter “w” to write all the changes.
Formatting the partition
There are multiple reasons you may want to format a partition.
- For a new partition, formatting it will make the available storage usable by the operating system.
- If the partition contained any previous data, the formatting would erase the data.
- If a partition is corrupted, then formatting is the way to make it usable again. Of course, the data on the partition will be lost.
- If the partition contains a filesystem that’s not accessible by the operating system, formatting it with a suitable filesystem will allow the operating system access to the storage.
Note that if the partition is mounted, then it’s not possible to perform actions like partition formatting. Unmount the partition using the umount command.
Assuming we have the target partition label, let’s get into formatting it. Unfortunately, the fdisk itself doesn’t incorporate any partition formatting functions. We’ll have to use the mkfs tool for this purpose.
The mkfs tool supports multiple filesystems. For each supported filesystem, mkfs has a different command tool. To list all the supported filesystems and their respective command tools, run the following command.
It’s easy to understand which tool is for what filesystem. For example, “mkfs.ext4” will create an ext4 filesystem on the target partition.
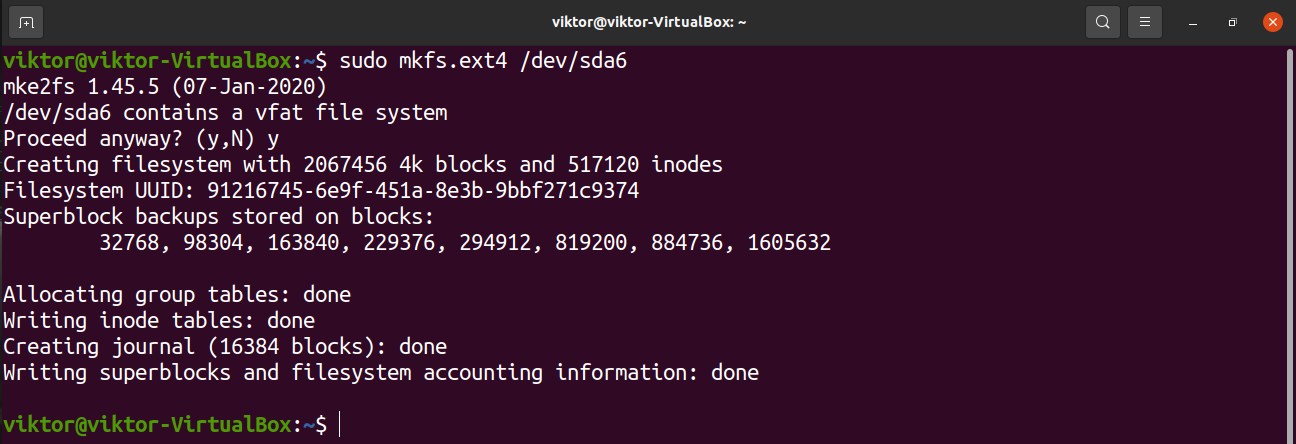
To format the partition in the ext4 format, run the following command.
If there’s already a pre-existing filesystem, mkfs will prompt a warning message. Enter “y” to confirm the action.
Voila! The partition is formatted successfully!
Using the partition
To use a partition, it has to be mounted. Linux comes with a dedicated tool for mounting partitions and disk files. Learn how to mount using the mount command.
In short, mounting a partition requires a mount point where the partition is attached to the operating system. Create a mount point.
To mount the partition on the mount point, run the following command.
Voila! The partition now should be accessible from the mount point.
Final thoughts
Formatting a partition is a simple yet important task. For the command-line interface, fdisk is a great solution.
Not a fan of fdisk? Worry not. There are numerous tools available to manage partitions on Linux. Learn how to format disk partitions.
Happy computing!


