This article will show you how to create and delete Btrfs subvolumes, mount Btrfs subvolumes, and automatically mount Btrfs subvolumes using the /etc/fstab file. So, let’s get started.
Prerequisites
To try out the examples of this article,
- You must have the Btrfs filesystem installed on your computer.
- You need to have a hard disk or SSD with at least 1 free partition (of any size).
I have a 20 GB hard disk sdb on my Ubuntu machine. I have created 2 partitions sdb1 and sdb2 on this hard disk. I will use the partition sdb1 in this article.
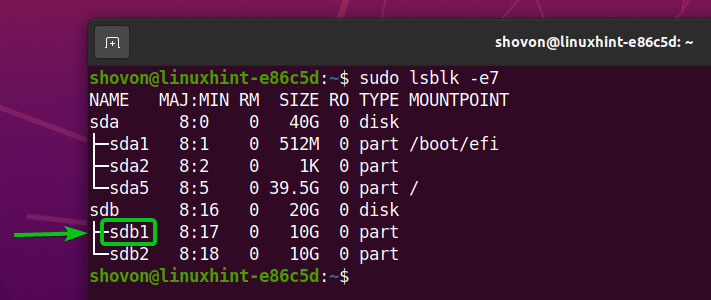
Your hard disk or SSD may have a different name than mine, so will the partitions. So, make sure to replace them with yours from now on.
If you need any assistance on installing the Btrfs filesystem on Ubuntu, check my article Install and Use Btrfs on Ubuntu 20.04 LTS.
If you need any assistance on installing the Btrfs filesystem on Fedora, check my article Install and Use Btrfs on Fedora 33.
Creating a Btrfs Filesystem
To experiment with Btrfs subvolumes, you need to create a Btrfs filesystem.
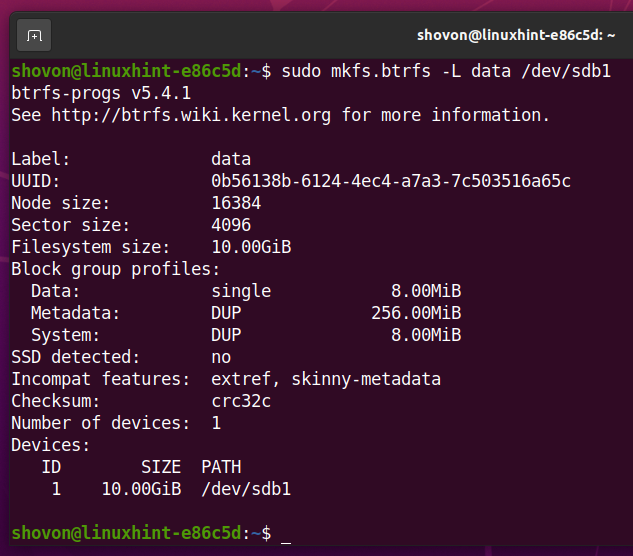
To create a Btrfs filesystem with the label data on the sdb1 partition, run the following command:
A Btrfs filesystem should be created.
Create a directory /data with the following command:
To mount the Btrfs filesystem created on the sdb1 partition in the /data directory, run the following command:
The Btrfs filesystem should be mounted as you can see in the screenshot below.
Creating Btrfs Subvolumes
A Btrfs subvolume is just like a directory in your Btrfs filesystem. So, you need to specify a directory path to create a Btrfs subvolume in that directory path. The path must point to a Btrfs filesystem where you want to create the subvolume.
For example, to create a Btrfs subvolume in the path /data/photos (the Btrfs filesystem is mounted in the /data directory), run the following command:
A Btrfs subvolume /data/photos should be created.
Let’s create some more Btrfs subvolumes.
Create a Btrfs subvolume /data/videos with the following command:
Create a Btrfs subvolume /data/documents with the following command:
Create a Btrfs subvolume /data/projects with the following command:
As you can see, a new directory is automatically created for each of the subvolumes.
You can list all the subvolumes of your Btrfs filesystem (mounted on the /data directory) as follows:
As you can see, all the subvolumes we have created are listed.
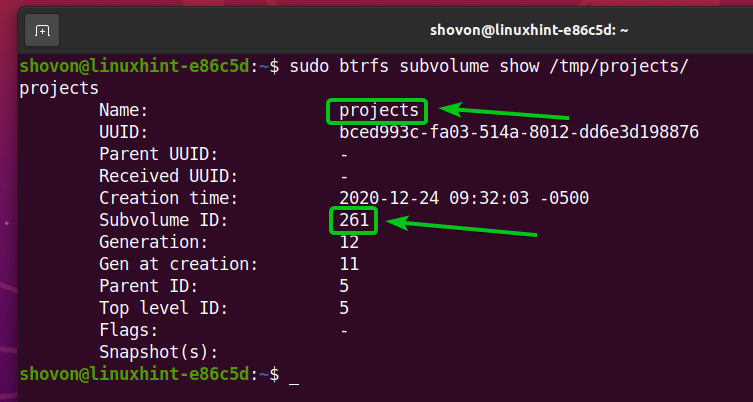
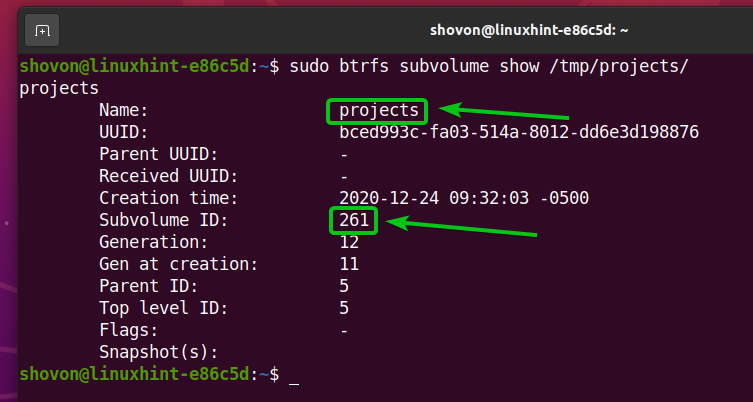
You can find a lot of information about a Btrfs subvolume (let’s say /data/projects) like the subvolume name, the subvolume UUID, the subvolume ID etc. as follows:
Let’s create some dummy files in each of the Btrfs subvolumes. Once we mount the Btrfs subvolumes separately, the files in each of the subvolumes should be there.
To create some dummy files in the /data/projects subvolume, run the following command:
To create some dummy files in the /data/photos subvolume, run the following command:
To create some dummy files in the /data/videos subvolume, run the following command:
To create some dummy files in the /data/documents subvolume, run the following command:
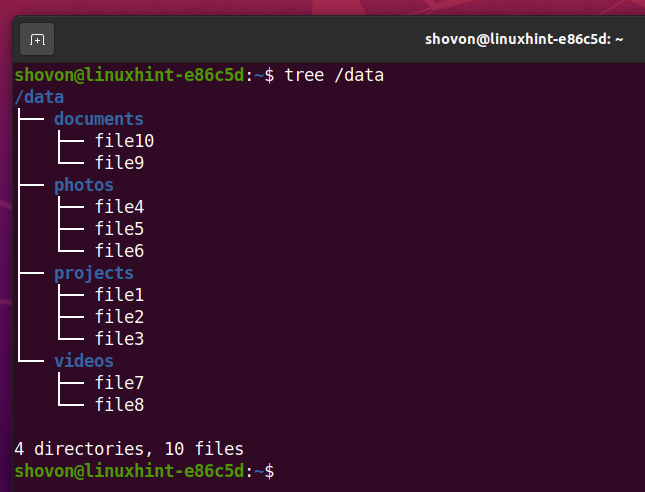
Right now, this is how the Btrfs filesystem mounted on the /data directory looks like.
Mounting Btrfs Subvolumes
To mount a Btrfs subvolume, you need to know either its name or its ID.
You can find the name or the ID of all the Btrfs subvolumes created on the Btrfs filesystem mounted on the /data directory as follows:
Let’s mount the projects Btrfs subvolume. The projects Btrfs subvolume has the ID 261.
I will mount the Btrfs subvolume projects in the /tmp/projects directory to show you how to mount a Btrfs subvolume.
Create a directory /tmp/projects as follows:
You can mount the projects Btrfs subvolume (which is available in the Btrfs filesystem created on the sdb1 partition) using its name projects in the /tmp/projects directory as follows:
The projects subvolume should be mounted on the /tmp/projects directory as you can see in the screenshot below.
You can also see that the Btrfs filesystem (the projects subvolume) is mounted on the /tmp/projects directory.
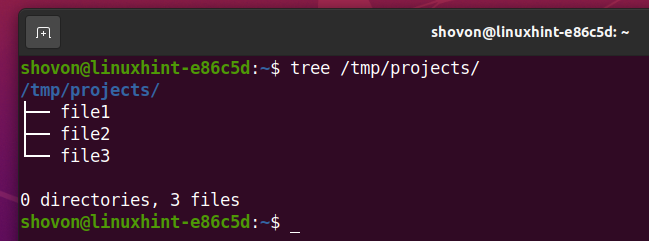
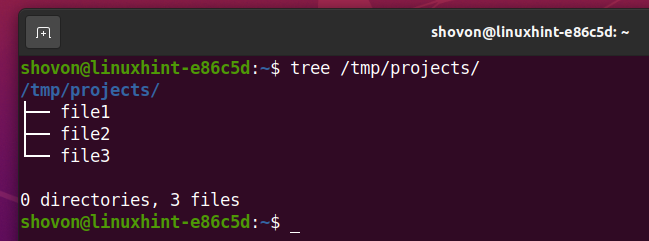
All the files you have created in the projects subvolume are also available in the /tmp/projects directory as you can see in the screenshot below.
Now, let’s see how to mount a Btrfs subvolume using its ID.
Before that, umount the projects subvolume from the /tmp/projects directory as follows:
You can mount the projects Btrfs subvolume (which is available in the Btrfs filesystem created on the sdb1 partition) using its ID 261 in the /tmp/projects directory as follows:
The projects subvolume should be mounted on the /tmp/projects directory as you can see in the screenshot below.
You can also see that the Btrfs filesystem (the projects subvolume) is mounted on the /tmp/projects directory.
All the files you have created in the projects subvolume are also available in the /tmp/projects directory as you can see in the screenshot below.
Removing Btrfs Subvolumes
In this section, I am going to show you how to remove a Btrfs subvolume.
Let’s create a Btrfs subvolume test on the Btrfs filesystem mounted on the /data directory as follows:
As you can see, the test subvolume is created on the Btrfs filesystem mounted on the /data directory.
To remove the test Btrfs subvolume, run the following command:
NOTE: If you delete a Btrfs subvolume, all the files/directories in that subvolume will also be removed.
As you can see, the Btrfs subvolume test is removed.
Automatically Mount Brtfs Subvolumes at Boot Time
In this section, I will show you how to mount the Btrfs subvolumes of the Btrfs filesystem created on the sdb1 partition (mounted on /data directory now).
First, unmount the Btrfs filesystem, which is mounted on the /data directory as follows:
I want to mount the Btrfs subvolumes in their respective directories. Let’s create some directories where we can mount the Btrfs subvolumes.
To create the directories documents, projects, photos, and videos, run the following command:
Find the UUID of the Btrfs filesystem on the sdb1 partition as follows:
As you can see, the UUID of the Btrfs filesystem is 0b56138b-6124-4ec4-a7a3-7c503516a65c.
Now, edit the /etc/fstab file with the nano text editor as follows:
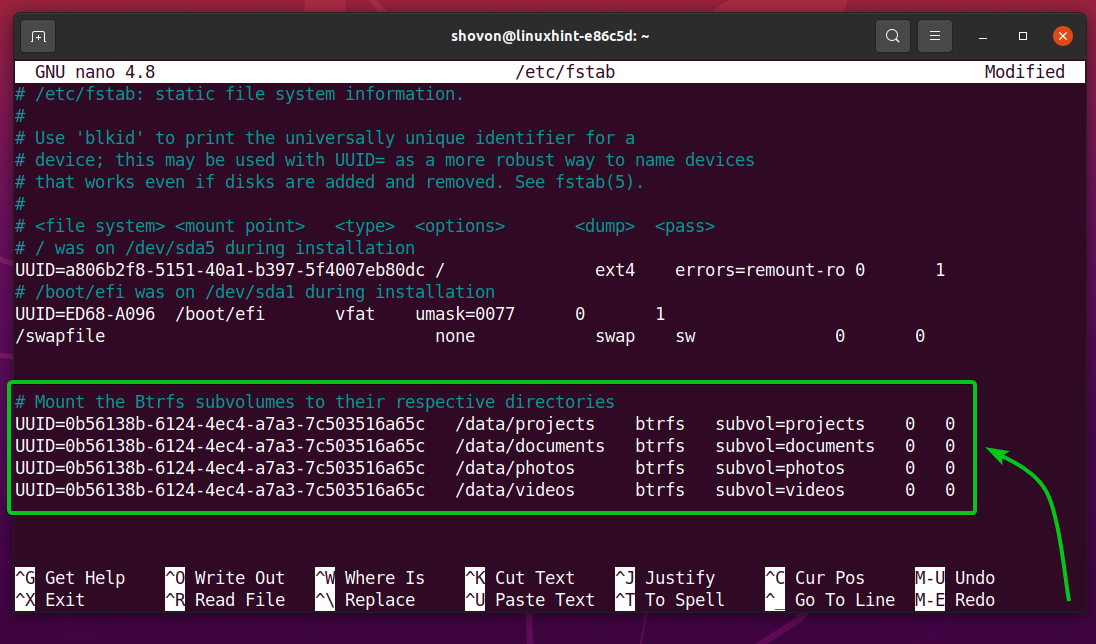
Type in the following lines in the /etc/fstab file:
UUID=0b56138b-6124-4ec4-a7a3-7c503516a65c /data/projects
btrfs subvol=projects 0 0
UUID=0b56138b-6124-4ec4-a7a3-7c503516a65c /data/documents
btrfs subvol=documents 0 0
UUID=0b56138b-6124-4ec4-a7a3-7c503516a65c /data/photos
btrfs subvol=photos 0 0
UUID=0b56138b-6124-4ec4-a7a3-7c503516a65c /data/videos
btrfs subvol=videos 0 0
NOTE: Make changes as required.
Once you’re done, press <Ctrl> + X followed by Y and <Enter> to save the /etc/fstab file.
For the changes to take effect, reboot your computer with the following command:
Once your computer boots, the Btrfs subvolumes should be mounted on their respective directories as you can see in the screenshot below.
Conclusion
In this article, I have shown you how to create and delete Btrfs subvolumes, mount Btrfs subvolumes, and automatically mount Btrfs subvolumes using the /etc/fstab file. This article should help you get started with the subvolume feature of the Btrfs filesystem.


