This guide will discuss how to configure and use iptables rules on an Ubuntu system to secure your network. Whether you are a novice Linux user or a seasoned system administrator, from this guide, and in one way or another, you will learn something useful about iptables.
Iptables come pre-installed on Ubuntu and most Debian based distributions. Ubuntu also packages GUFW firewall, a graphical alternative you can use to work with iptables.
NOTE: To use and configure iptables, you will need sudo privileges on your system. You can learn more about sudo from the following tutorial.
Now that you know what Iptables is, let’s dive right in!
How to Use iptables to Manage IPv4 Traffic?
To use Iptables for IPv4 network and traffic management, you need to understand the following:
The Iptables Command
Iptables offers a selection of options that allow you to customize and tune your iptables rules. Let us discuss some of these parameters and see what they do.
NOTE: You can configure a set of rules that manage a specific subset, known as iptables chains.
Iptables Parameters
Before we begin creating and configuring iptables rules, let us first understand the basics of iptables, such as general syntax and default arguments.
Consider the command below:
The command above tells the iptables to create a rule in the chain. The rule drops all the packets from the IP address 192.168.0.24.
Let us examine the command, line by line, to understand it better.
- The first command iptables calls the iptables command-line utility.
- Next is -I argument used for insertion. The insertion argument adds a rule at the beginning of the iptables chain and thus gets assigned a higher priority. To add a rule at a specific number in the chain, use the -I argument followed by the number where the rule should get assigned.
- The -s argument helps specify the source. Hence, we use the -s argument followed by the IP address.
- The -j parameter with iptables specifies the jump to a specific target. This option sets the action the Iptables shall perform once there’s a matching packet. Iptables offers four main targets by default, these include: ACCEPT, DROP, LOG, and REJECT.
Iptables offers a selection of parameters that you can use to configure various rules. The various parameters you can use to configure iptables rules include:
| Iptables rule parameter | Description |
|---|---|
| -s –source | Specify the source, which can be an address, hostname, or network name. |
| -p –protocol | Specifies the connection protocol; for example, TCP, UDP, etc. |
| -d –destination | Specifies the destination, which can be an address, network name, or hostname. |
| -j –jump | Sets the action iptables shall carry out after finding a packet. |
| -o –out-interface | Sets the interface through which the iptable sends the packet. |
| -i –in-interface | Sets the interface used to establish network packets. |
| -c –set-counters | Allows the administrator to set the byte and packet counters for a specified rule. |
| -g –goto chain | The parameter specifies that the processing should continue in the user-set chain upon return. |
| -f –fragment | Tells iptables to apply the rule only to the second and following fragments of the fragmented packets. |
Iptables Options
The iptables command supports a wide range of options. Some common ones include:
| Option | Description |
|---|---|
| -A –append | Adds a rule to the end of a specified chain |
| -D –delete | Removes a rule from the specified chain |
| -F –flush | Removes all rules, one at a time |
| -L –list | Shows all the rules in the specified chain |
| -I –insert | Inserts a rule into the specified chain (passed as a number, when there’s no number specified; rule gets added at the top) |
| -C –check | Queries for a rule matching; requirement in a specified rule |
| -v –verbose | Displays more details when used with the -L parameter |
| -N –new-chain <name> | Adds a new user-defined chain |
| -X –delete-chain <name> | Removes a specific user-defined chain |
Iptables Tables
The Linux kernel has default tables that house a set of related rules. These default tables have a set of default chains, but users can customize the rules by adding user-defined rules.
NOTE: The default tables will heavily depend on your Kernel configuration and the modules installed.
Here are the default iptables tables:
1: The Filter Tables
The filter table is a default table that contains chains used for network packet filtering. Some of the default chains in this table include:
| Chain | Description |
|---|---|
| Input | Iptables use this chain for any incoming packets to the system, i.e., packets going to local network sockets. |
| Output | Iptables use the output chain for locally generated packets, i.e., packets going out of the system. |
| Forward | This chain is what the Iptables use for packets routed or forwarded via the system. |
2: The NAT Tables
NAT or Network Address Table is a routing device used to modify the source and target IP-addresses in a network packet. The NAT table’s main use is connecting two networks in a private address range with the public network.
NAT was developed to support masking real IP addresses, allowing private IP address ranges from reaching the outside network. This helps protect details about internal networks from being revealed in public networks.
The NAT table gets employed when a packet initiates a new connection.
Iptables have a default table for NAT addressing. This table has three main chains:
| Chain | Description |
|---|---|
| PREROUTING | Allows the modification of packet information before arriving in the INPUT chain—used for incoming packets |
| OUTPUT | Reserved for packets created locally, i.e., before network routing occurs |
| POSTROUTING | Allows the modification of outgoing packets— Packets leaving the OUTPUT chain |
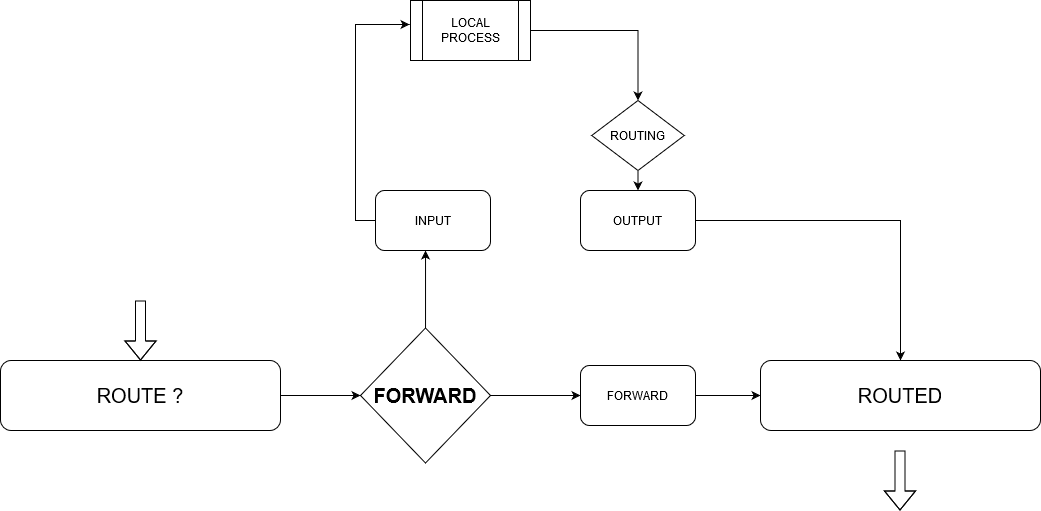
The diagram below shows a high-level overview of this process.
Use the command below to view your NAT Routing tables.
3: The Mangle Tables
The mangle table is mainly used for special modification of packets. In simple terms, it is used to modify the IP headers of a network packet. Modification of packets can include changing a TTL value of packet, changing valid network hops for a packet, etc.
The table contains the following default chains:
| Chain | Description |
|---|---|
| PREROUTING | Reserved for incoming packets |
| POSTROUTING | Used for outbound packets |
| INPUT | Used for packets coming directly into the server |
| OUTPUT | Used for local packets |
| Forward | Reserved for packets routed through the system |
4: The Raw Tables
The raw table’s main purpose is to configure exceptions for packets not intended to be handled by the tracking system. The raw table sets a NOTRACK mark on packets, prompting the conntrack feature to ignore the packet.
Conntrack is a Linux kernel networking feature that allows the Linux kernel to track all network connections, enabling the kernel to identify packets making up a network flow.
The raw table has two main chains:
| Chain | Description |
|---|---|
| PREROUTING | Reserved for packets received by network interfaces |
| OUTPUT | Reserved for packets initiated by local processes |
5: The Security Table
This table’s primary use is setting internal Security Enhancement for Linux (SELinux) security mechanism that marks on packets. The security mark can get applied per connection or packet.
It is used for Mandatory Access Control rules and is the second table accessed after the filter table. It offers the following default chains:
| Chain | Description |
|---|---|
| INPUT | Reserved for incoming packets to the system |
| OUTPUT | Used for locally created packets |
| FORWARD | Used for packets routed through the system |
Having looked at the default Iptables, let’s go a step further and discuss how to work with iptables rules.
How to Work with iptables Rules?
Iptables rules get applied in ascending order. This means that the first rule in a specific set is applied first, followed by the second, then third, and so on, until the last.
Because of this function, iptables prevent you from adding rules in a set using the -A parameter; you must use the -I, followed by the number or by emptying it to add to the top of the list.
Displaying Iptables
To view your iptables, use the command iptables -L -v for IPv4 and ip6tables -L -v for IPv6.
Inserting Rules
To insert rules in a set, you must position them in the exact order, respecting the rules used by the same chain. You can view the list of your iptables rules with the command as discussed above:
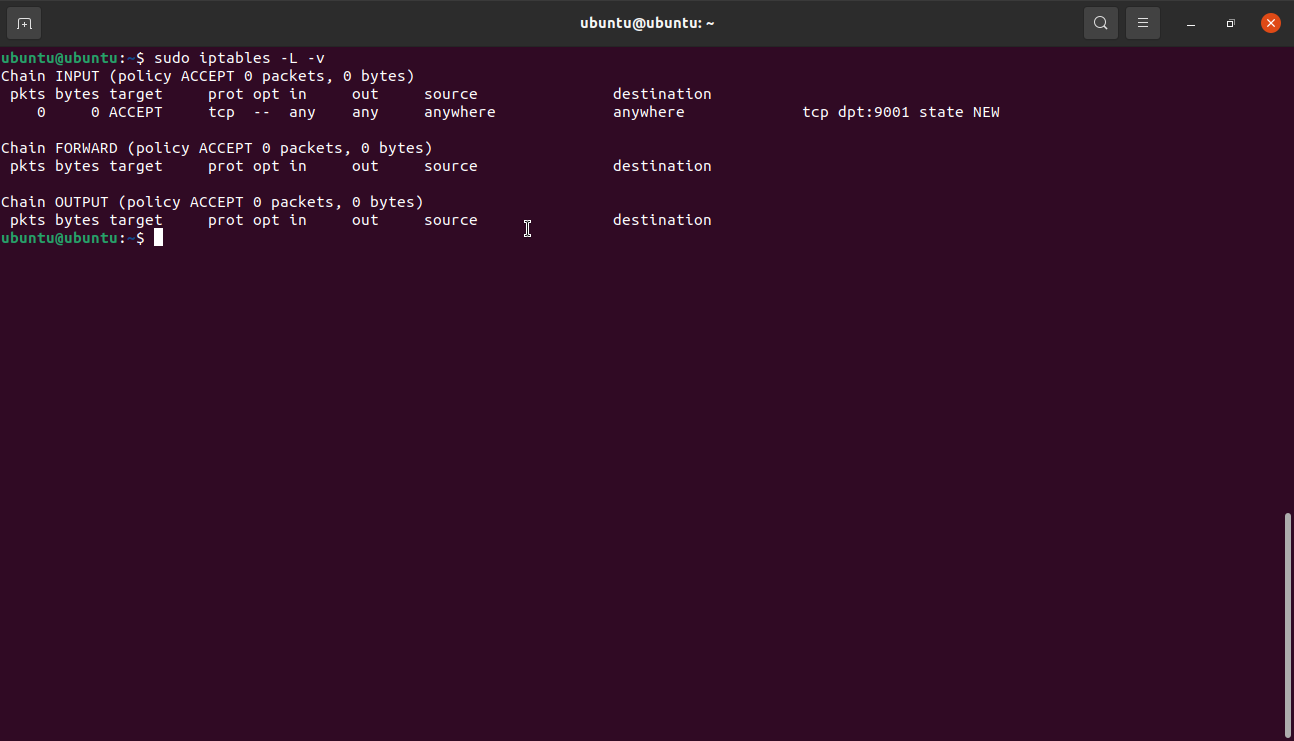
For example, to insert a rule allowing incoming connections to port 9001 over TCP, we need to specify the rule number to the INPUT chain adhering to traffic rules for the web.
Once you view the current iptables, you should see the new rule in the set.
Replacing Rules
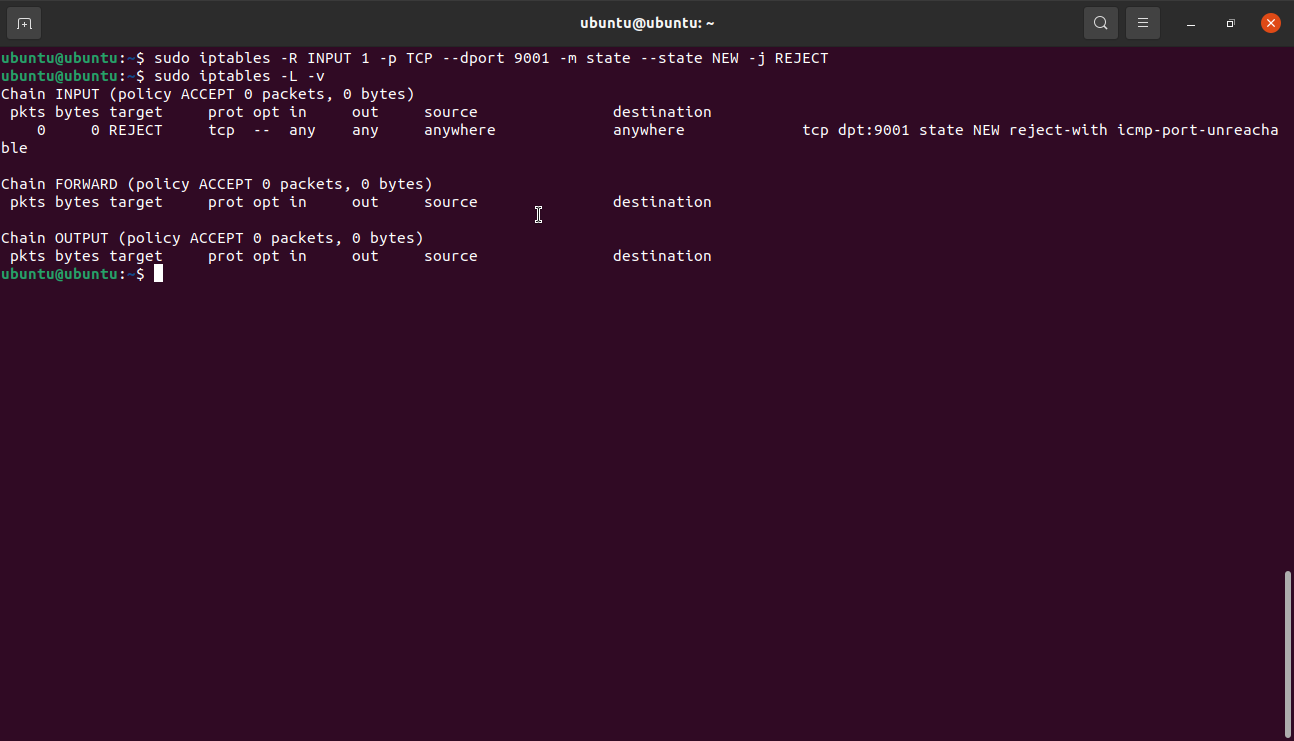
The replace functionality works similarly to insert, however, it uses iptables -R command. For example, to modify the rule above and set port 9001 to deny, we:
Deleting a Rule
To delete a rule, we pass the rule number. For example, to delete the rule above, we can specify as:
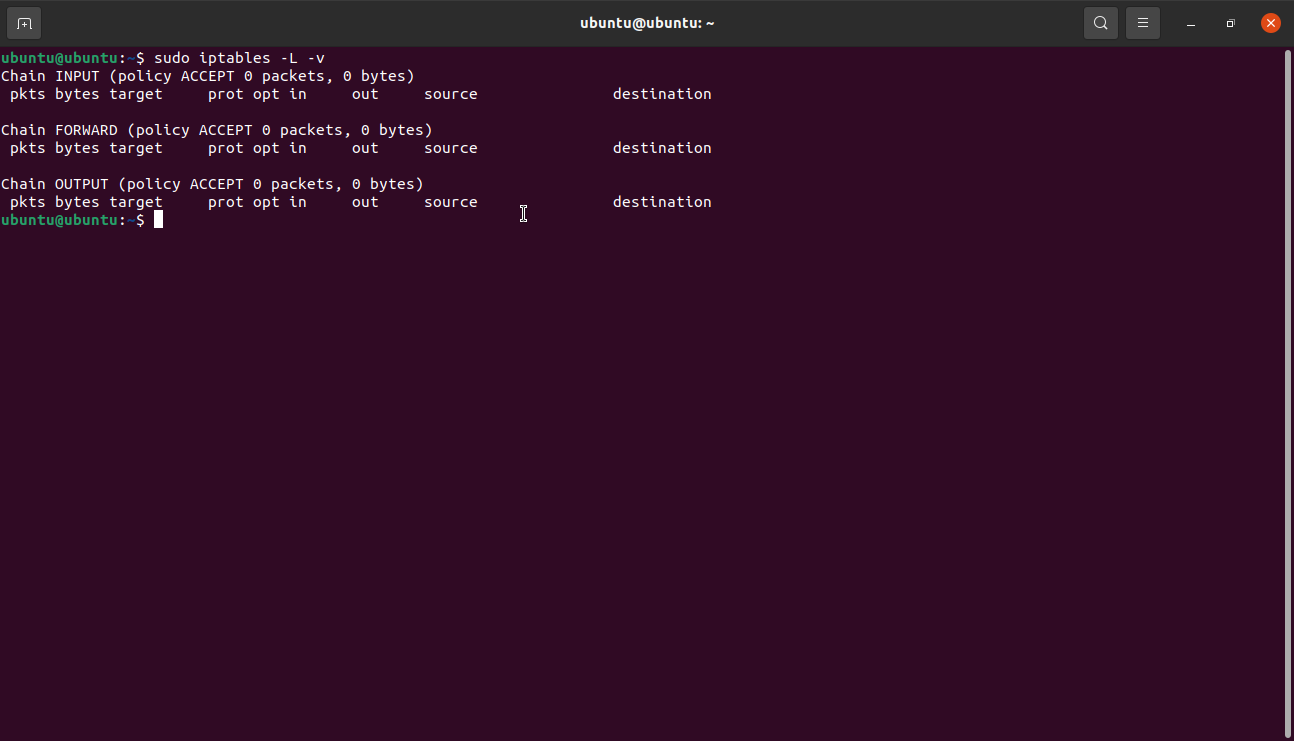
In most Linux distros, iptables are empty for either IPv4 and IPv6. Hence, if you have not added any new rule, you will get an output similar to the one shown below. That is risky because it means the system is allowing all incoming, outgoing, and routed traffic.
Let’s tuck into how to configure iptables:
How to Configure iptables?
There are numerous ways to configure iptables rules. This section uses examples to show you how to set rules using IP addresses and ports.
Blocking and Allowing Traffic by Ports
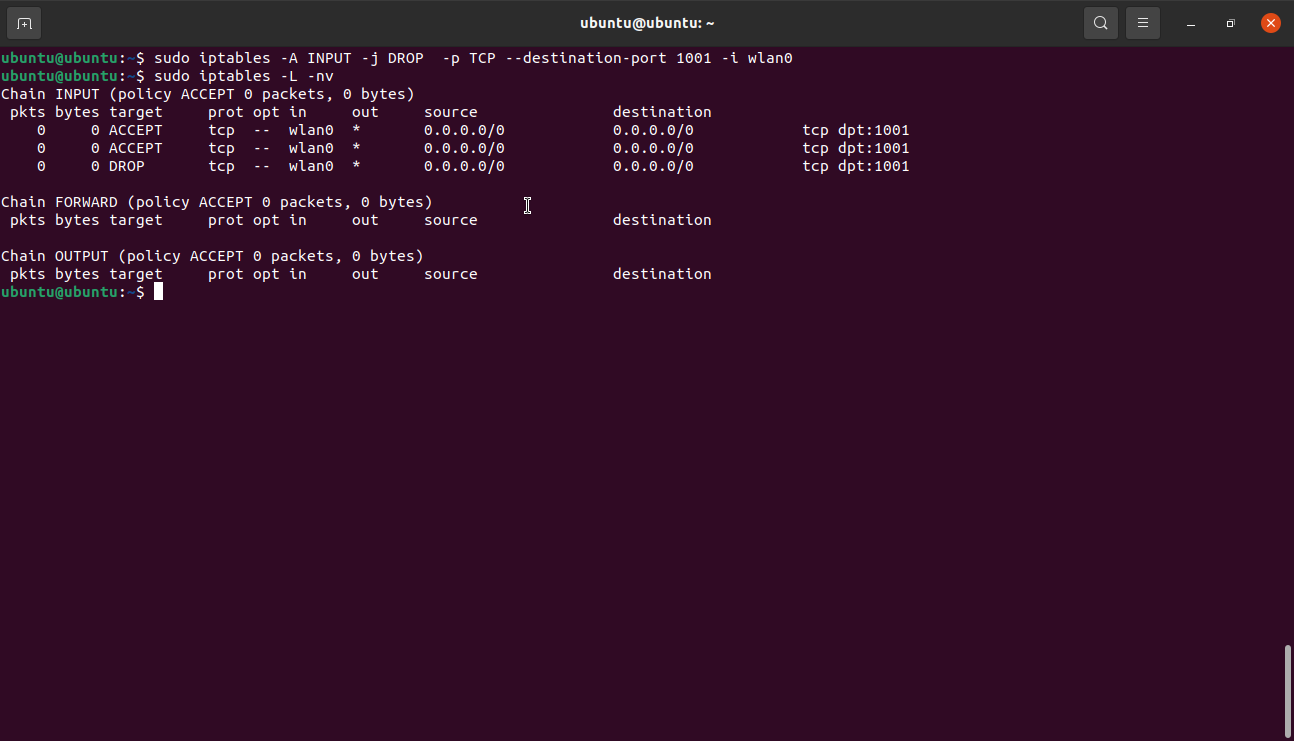
You can use a specific port to block or allow all traffic on a network interface. Consider the following examples:
The above commands allow traffic on port 1001 TCP on the wlan0 interface.
This command does the opposite of the above command as it blocks all the traffic on port 1001 on wlan0.
Here’s a close inspection of the command:
- The first argument (-A) adds a new rule at the end of the table chain.
- The INPUT argument adds the specified rule to the table.
- DROP argument sets the action to be performed as ACCEPT and DROP, respectively. This means that once a packet gets matched, it gets dropped.
- -p specifies the protocol like TCP and allows traffic on other protocols to pass.
- –destination-port sets the rule to accept or drop all traffic destined for port 1001.
- -i <interface name> tells iptables to apply the rule to traffic coming on the wlan0 interface.
NOTE: Iptables do not understand network interface aliases. Thus, in a system with more than one Virtual interface, you will need to define the destination address manually and explicitly.
For example:
Whitelisting & Blacklisting IP addresses
You can create firewall rules using iptables. One example is by stopping all traffic and allowing network traffic from explicit IP addresses only.
Example:
iptables -A INPUT -i lo -m comment --comment "Allow loopback connections" -j ACCEPT
iptables -A INPUT -p icmp -m comment --comment “Allow Ping to work as expected” -j
ACCEPT
iptables -A INPUT -s 192.168.0.0 -j ACCEPT
iptables -P INPUT DROP
iptables -P FORWARD DROP
The first line sets a rule to allow all source IP addresses in the 192.168.0.1/24 subnet. You can also use CIDR or individual IP addresses. In the following command, we set the rule to allow all traffic connected to existing connections. In the final commands, we set a policy for INPUT and FORWARD to drop all.
Using iptables on IPv6
Iptables command only works on IPv4. To use iptables on IPv6, you have to use the ip6tables command. Ip6tables uses raw, filter, security, and mangle tables. The general syntax for ip6tables is similar to iptables, and it also supports matching iptables options such as append, delete, etc.
Consider using the ip6tables manual pages for more information.
Example of iptables Rulesets For Network Security
Creating suitable firewall rules will mainly depend on the service running on a system and the ports in use. However, here are some basic network configuration rules you can use to secure your system:
1: Allow Loopback interface traffic and reject all loopback coming from other interfaces
iptables -A INPUT ! -i lo -s 127.0.0.0 -j REJECT (ip6tables also applicable)
2: Deny all ping requests
3: Allow SSH connections
These are example commands you can use to secure your system. However, the configuration will heavily depend on what or who you want to access various services.
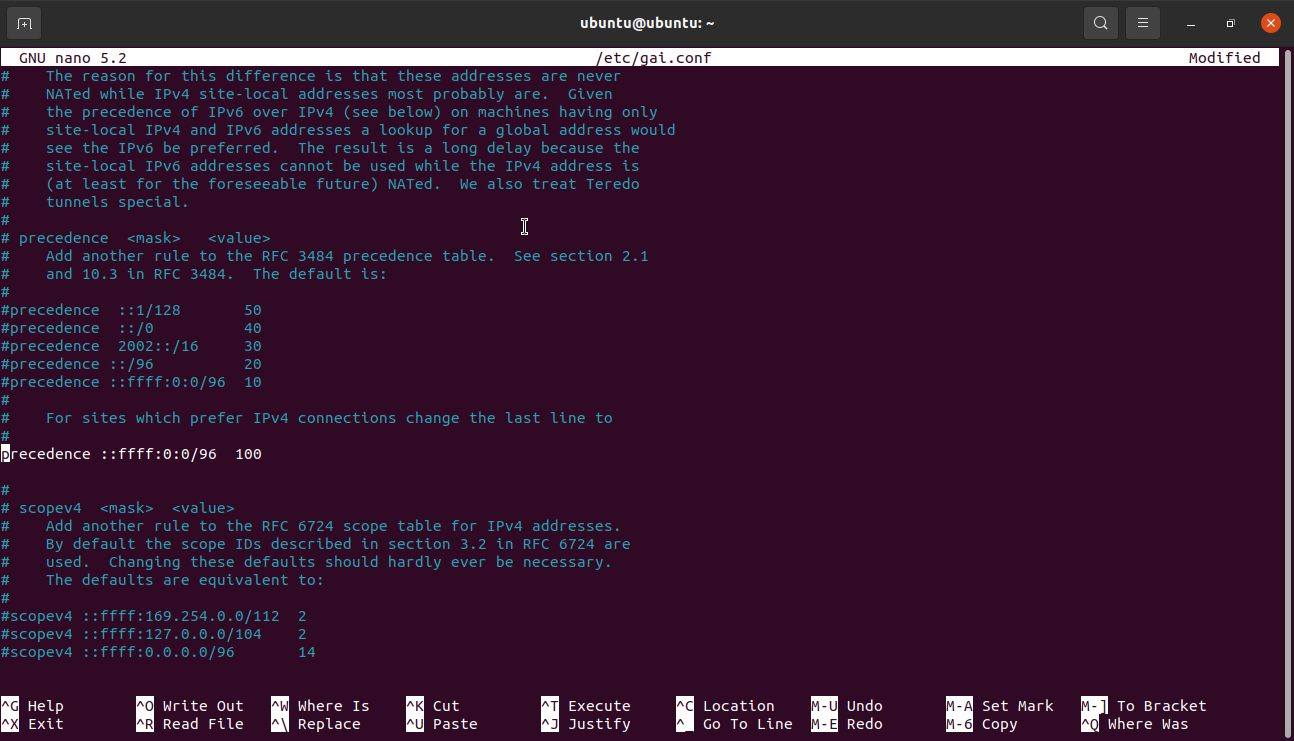
CAUTION: If you prefer to disable IPv6 completely, ensure to uncomment the line as this will slow down the update process:
That’s because the APT package manager resolves the mirror domain in IPv6 due to apt-get update.
How to Deploy iptables Rules?
To deploy your iptables on Ubuntu or other Debian-based systems, start by creating two files, ip4 and ip6, for their respective IP addresses.
In either file, add the rules you wish to enforce in their corresponding files—IPv4 rules to ip4 file and IPv6 rules to ip6 file.
Next, we need to import the rules using the command:
Then, you can verify if the rules have applied using the command:
A Quick iptables-persistent Guide
Ubuntu, and common Debian-based distributions, comes with an iptables-persistent package that allows you to apply your firewall rules easily upon reboot. The package provides files you can use to set rules for IPv4 or IPv6 and can be applied automatically upon boot.
You can also use firewall rules using UFW or GUFW. Consider the following tutorial to learn how to use UFW.
How to Install iptables-persistent?
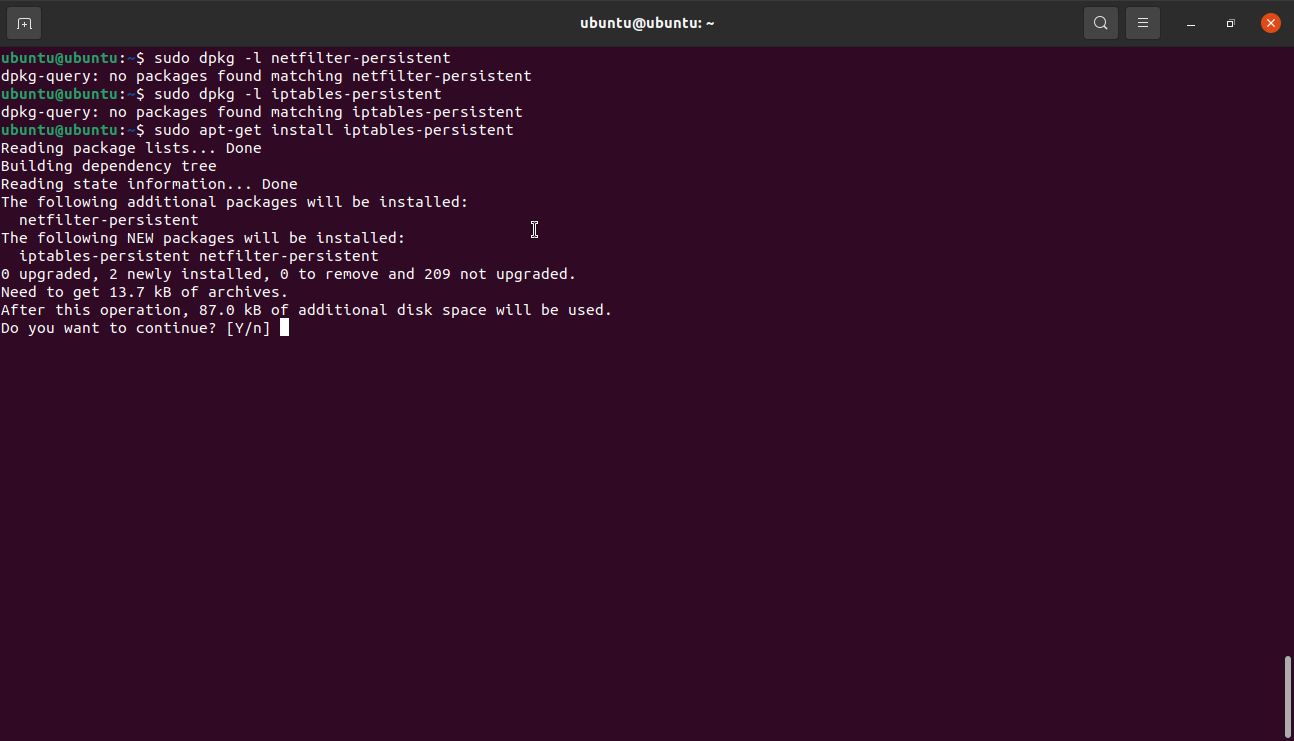
Ensure you have iptables-persistent installed on your system. Use dpkg to check if you have the package installed.
If not, use the following command:
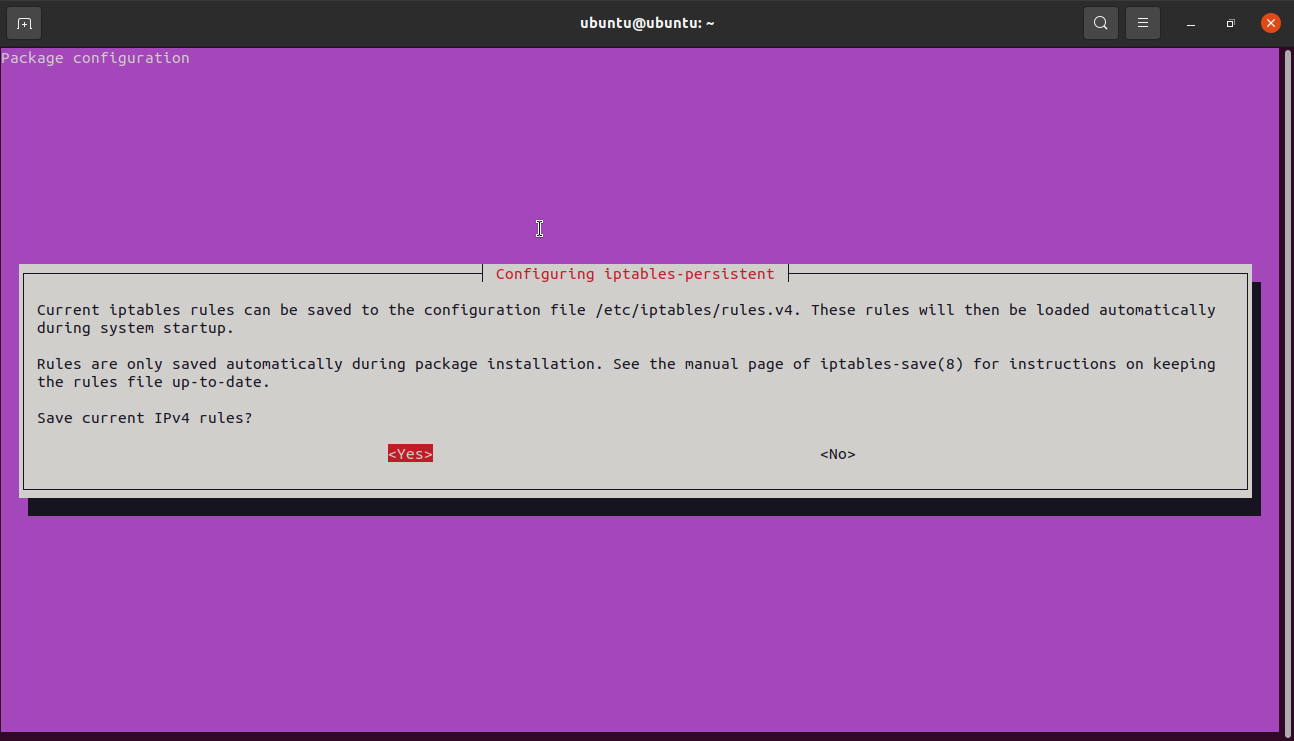
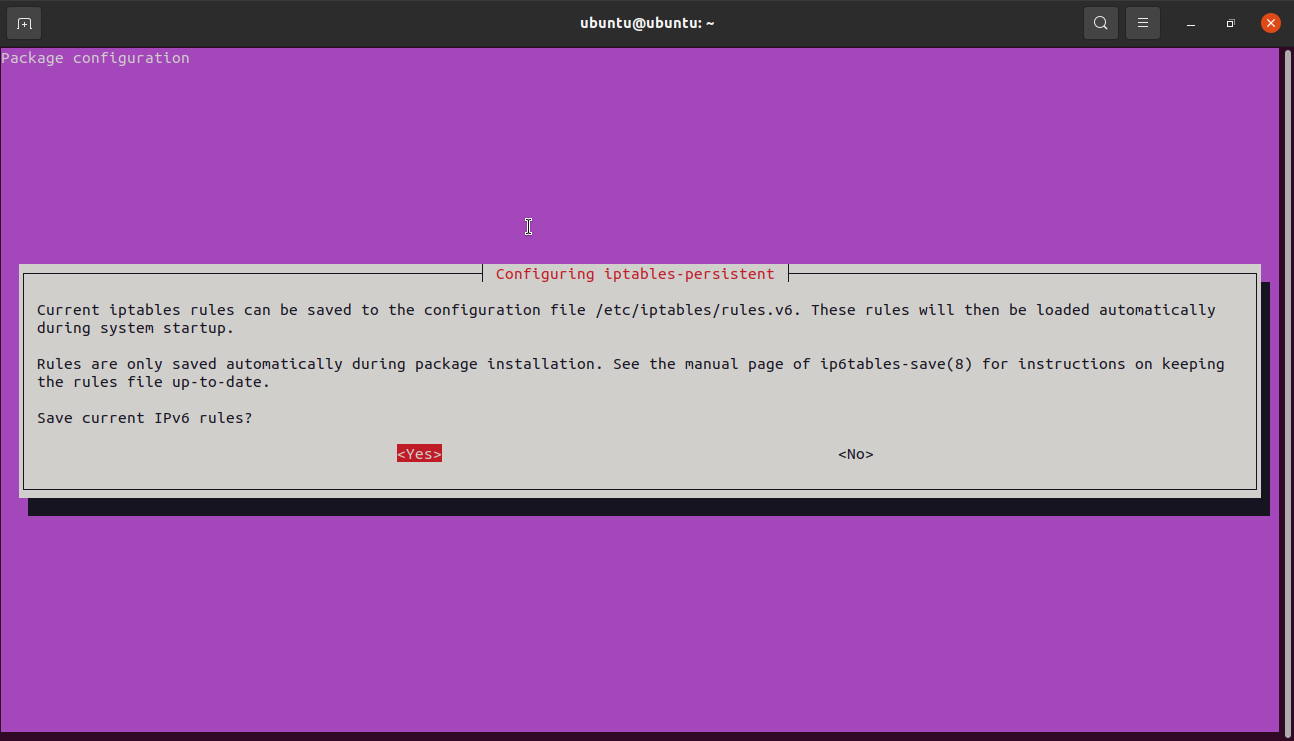
You will get prompted twice to save both your current IPv4 and IPv6 rules. Click on Yes to save both rules.
Click on yes to save IPv6.
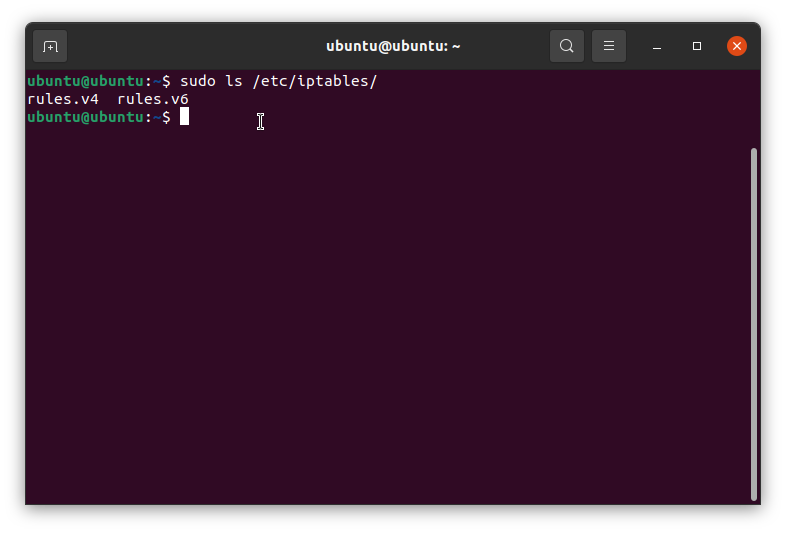
Once the installation is complete, verify that you have the iptables subdirectory, as shown in the image below.
Conclusion
In this tutorial, we have covered the basics of iptables. Starting with working with iptables, basic commands, default iptables tables, and parameters.
From what you’ve learned, you should be in a position to use iptables to create firewall rules that help secure your system.

