Ansible Galaxy hosts Ansible roles and collections created by the community. Instead of rewriting them from scratch, you can install it on your computer using the Ansible Galaxy command-line tool and use them on your playbooks.
You can also write your roles and collections and upload them to Ansible Galaxy. This is out of the scope of this article.
In this article, I am going to show you how to use Ansible Galaxy command-line tool to install Ansible Galaxy roles and collections and use them on your playbook. So, let’s get started.
Prerequisites:
If you want to try out the examples of this article,
1) You must have Ansible installed on your computer.
2) You must have at least 2 Linux hosts ( a Debian 10 and a CentOS 7) configured for Ansible automation.
There are many articles on LinuxHint dedicated to Installing Ansible and configuring hosts for Ansible automation. You may check them out if needed.
Setting Up a Project Directory:
Before we get started, let’s create a project directory so that we can organize our project files.
To create a project directory galaxy-demo/ in your HOME directory, run the following command:
Now, navigate to the galaxy-demo/ directory as follows:
Create an Ansible configuration file ansible.cfg in your project directory as follows:
Type in the following lines your ansible.cfg file.
inventory = hosts
host_key_checking = False
Once you’re done, press <Ctrl> + X followed by Y and <Enter> to save the ansible.cfg configuration file.
Create an Ansible inventory file hosts in your project directory as follows:
Type in the following lines in your host’s inventory file.
vm1.nodekite.com
[web]
vm9.nodekite.com
Here, vm1.nodekite.com is a Debian 10 host, and vm9.nodekite.com is a CentOS 7 host.
Once you’re done, press <Ctrl> + X followed by Y and <Enter> to save the hosts inventory file.
To check whether you can ping the remote Ansible hosts from your computer, run the following command:
As you can see, I can ping my remote Ansible hosts vm1.nodekite.com and vm9.nodekite.com.
Searching for Ansible Galaxy Roles and Collections :
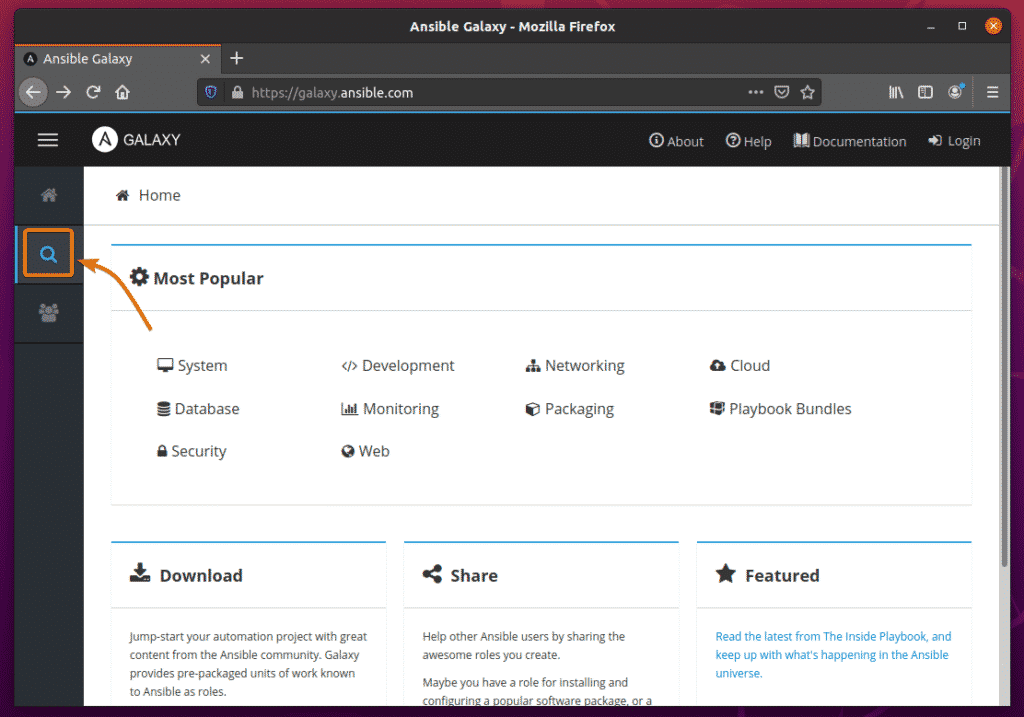
You can search for Ansible Galaxy roles and collections in the official website of Ansible Galaxy.
Once the webpage loads, click on the search icon to search for Ansible Galaxy roles and collections.
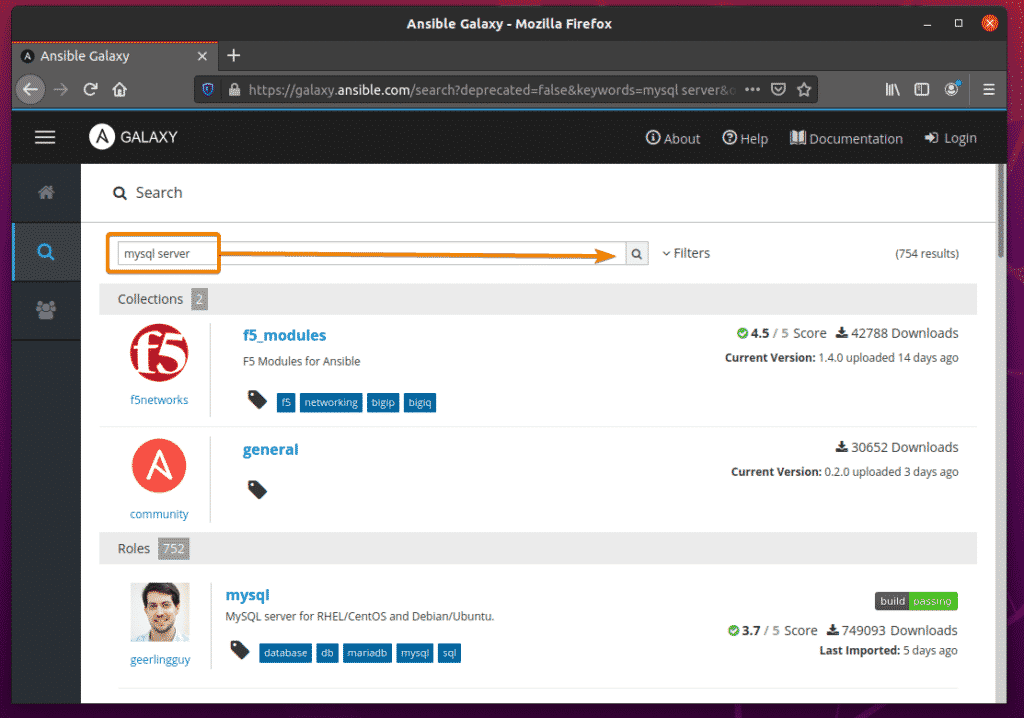
Now, type in what you’re looking for and click on the search icon.
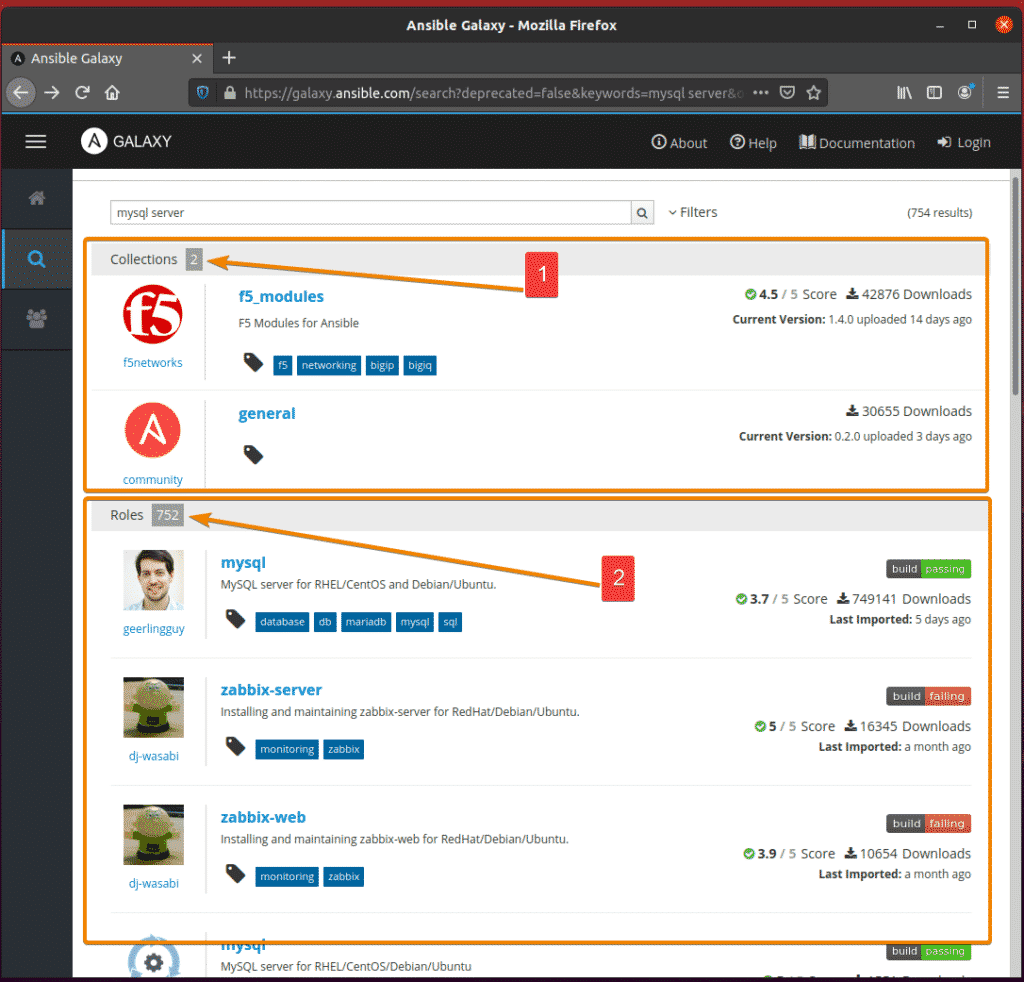
In this example, I have searched for mysql server. As you can see, the search result is displayed.
The search term mysql server returned 2 collections and many roles.
A role is an Ansible module that does specific things. A collection has many roles. That’s the main difference between a role and a collection.
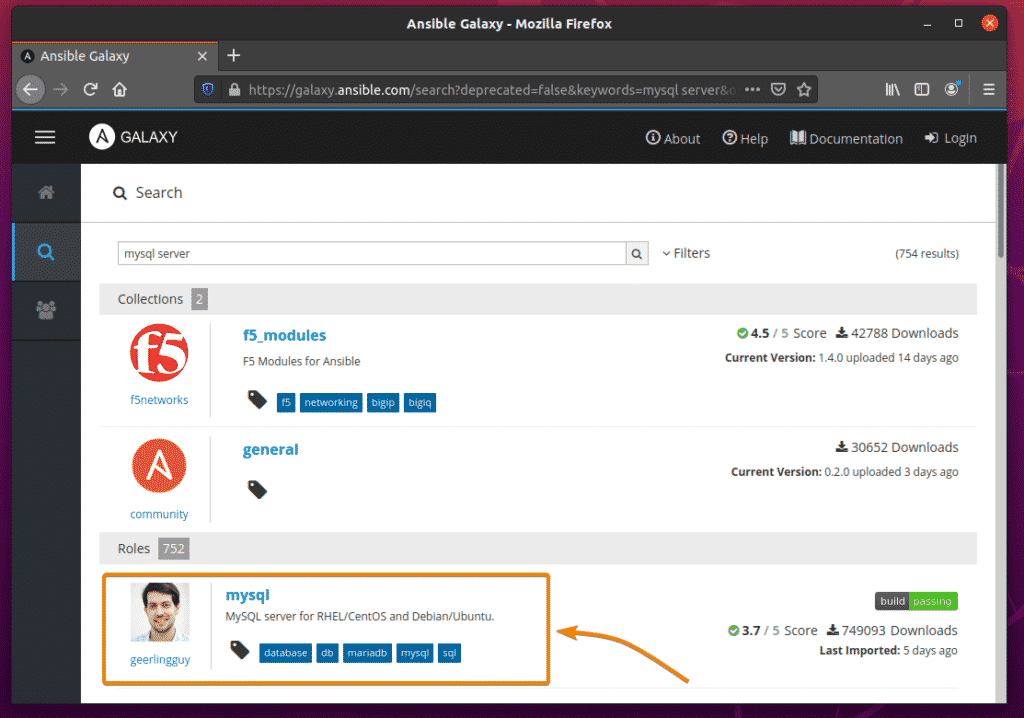
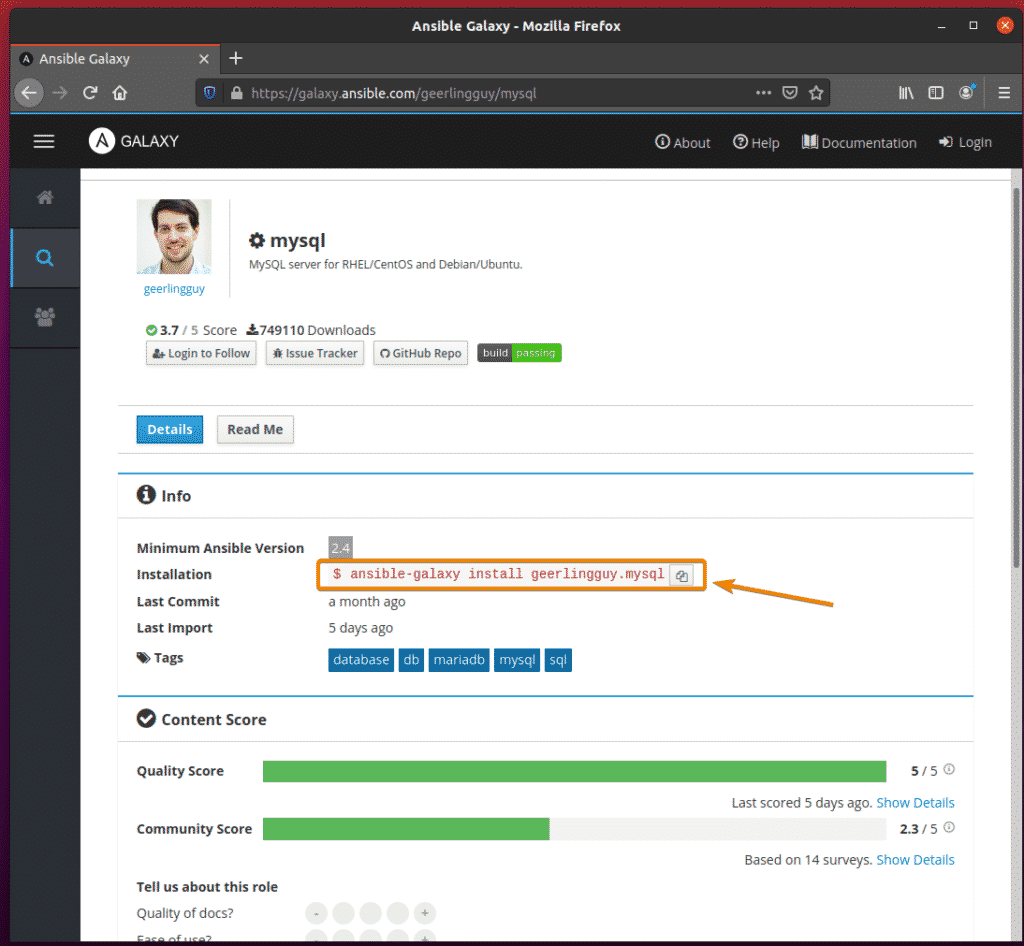
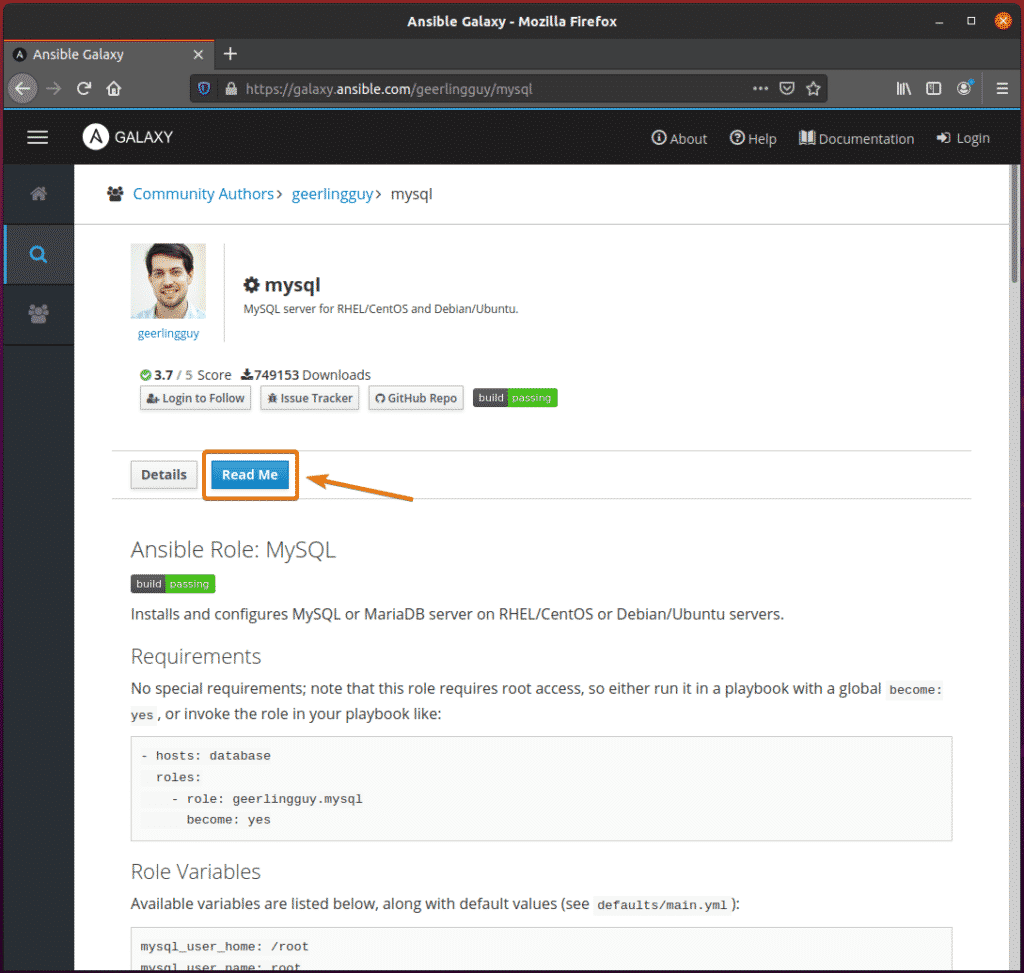
To see more information about a role, click on the role.
The Details tab of a role package will show technical information about the role.
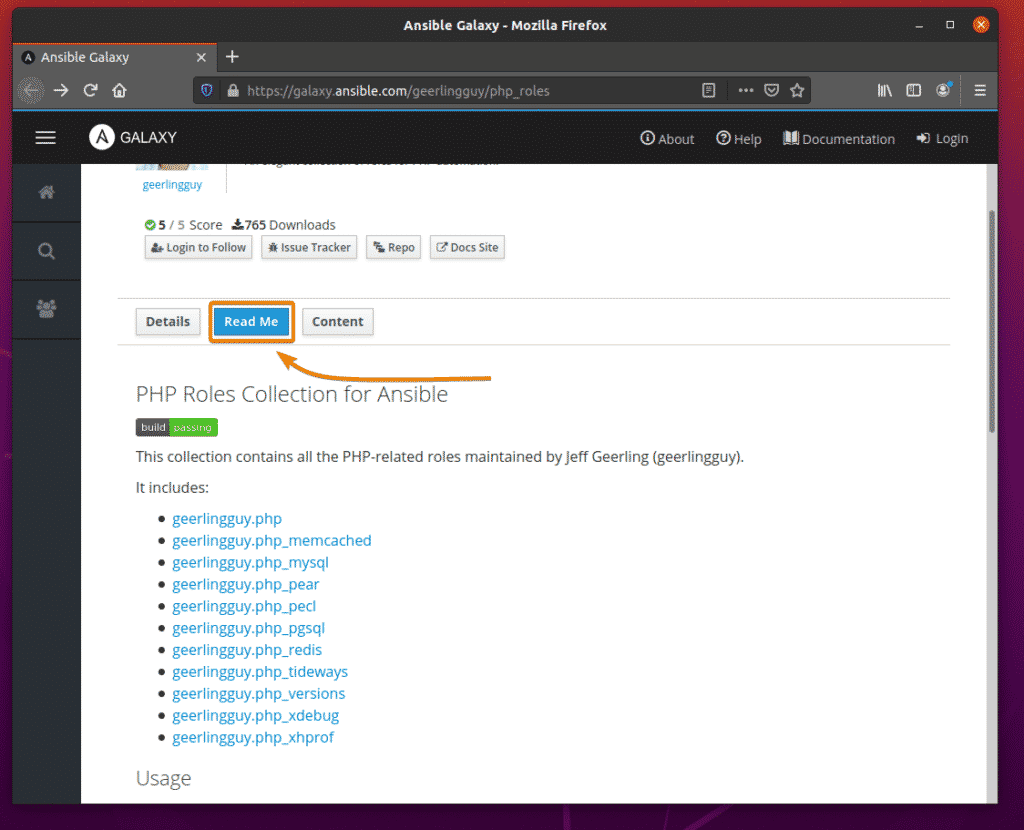
The Read Me tab will display the installation and usage information of the role.
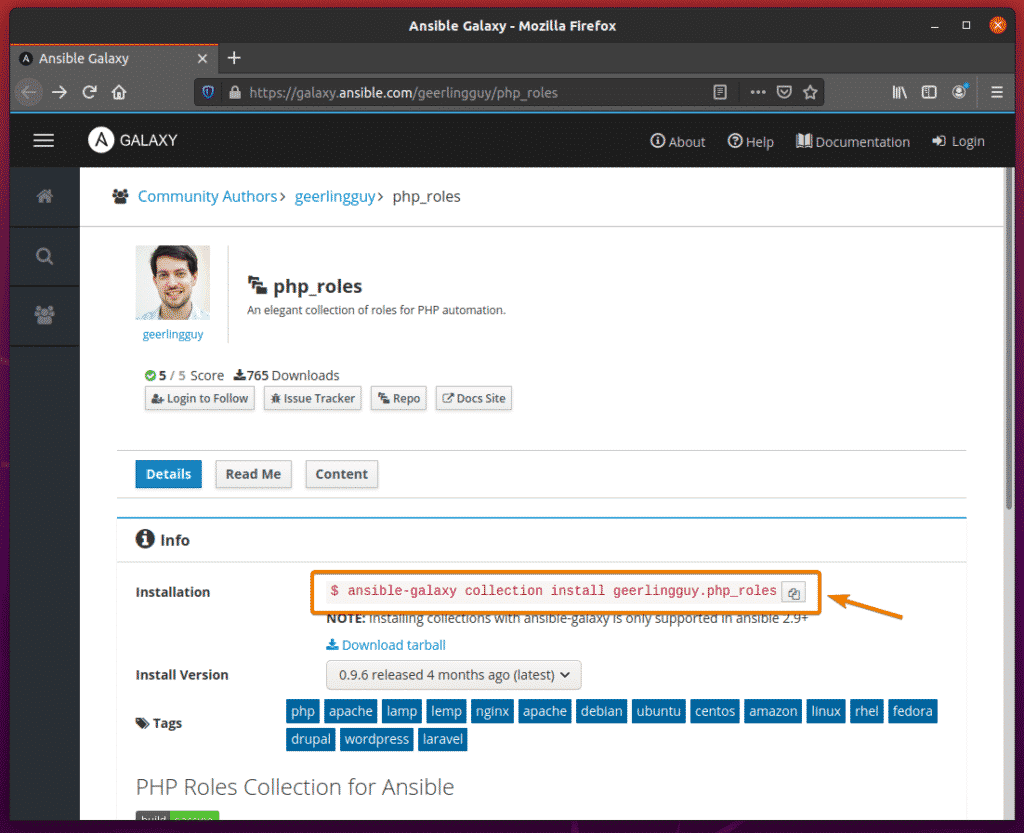
In the same way, a collection package will have installation information on the Details tab.
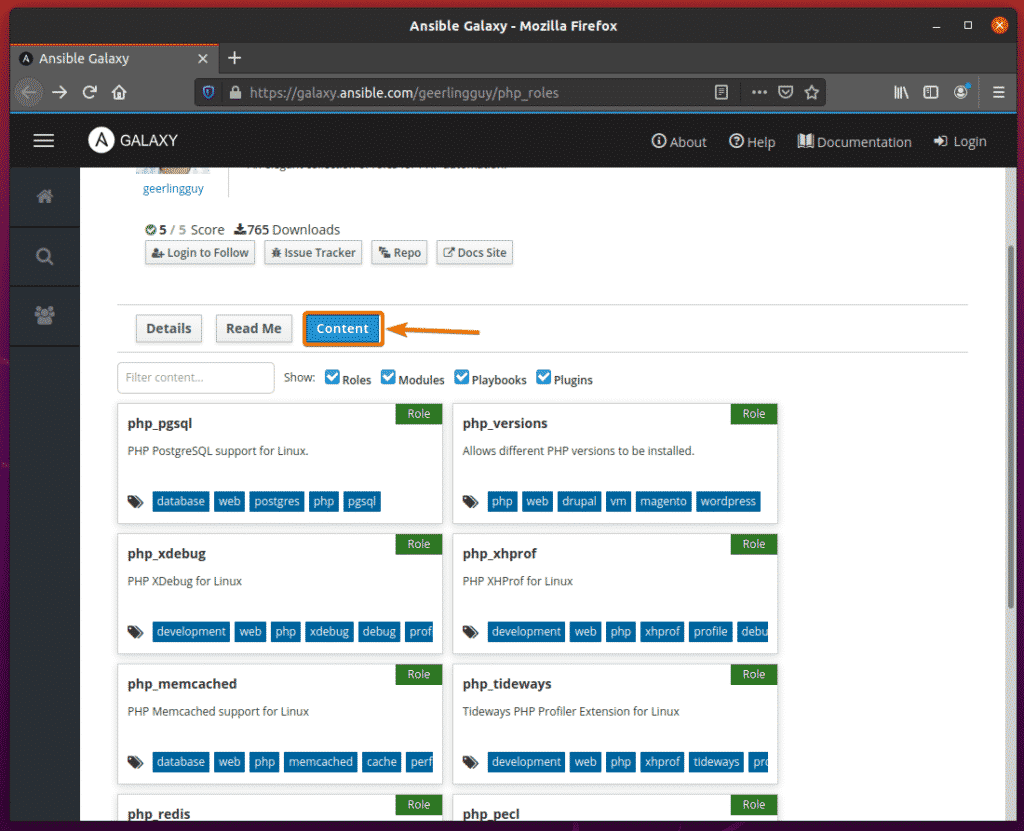
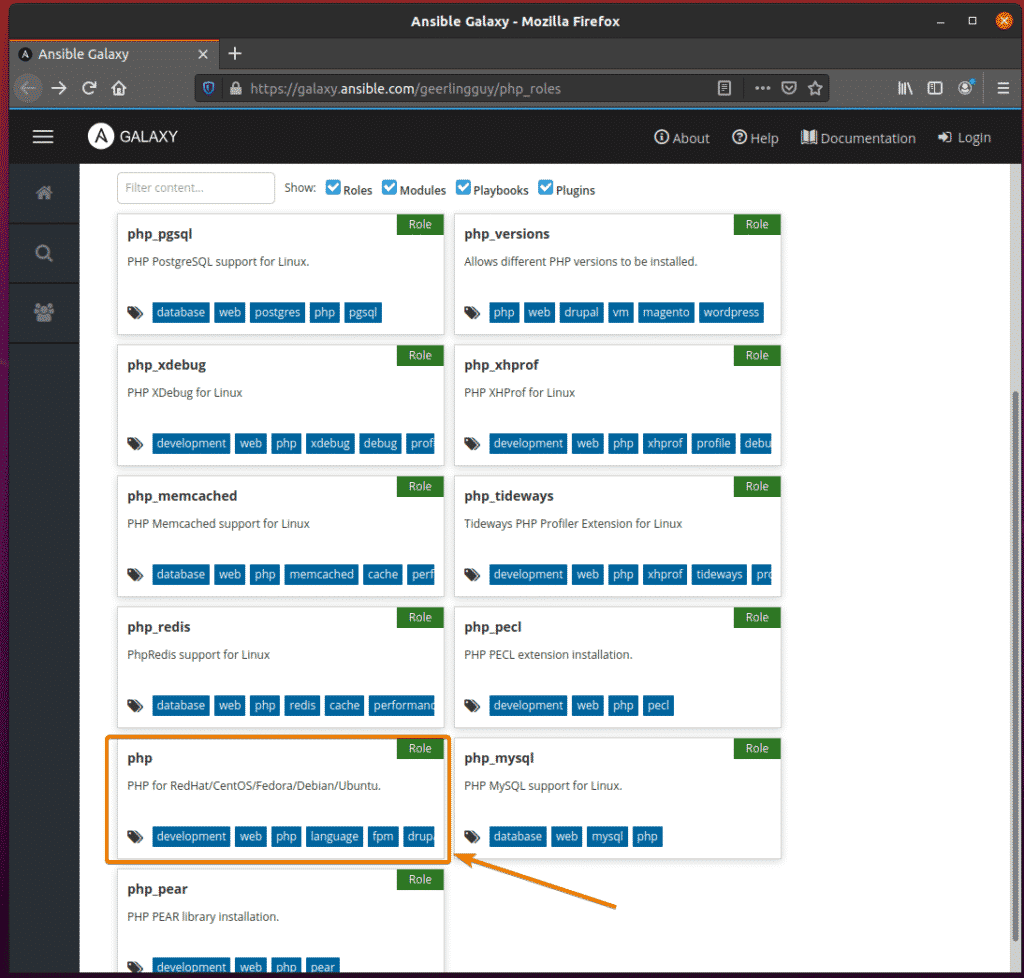
On the Content tab, the roles the collections will install will be displayed.
The Read Me tab will display useful information about the collection.
Installing and Using Ansible Galaxy Roles:
In this section, I am going to show you how to install and use an Ansible Galaxy role. So, let’s get started.
Let’s say; you want to install the Ansible Galaxy role geerlingguy.mysql.
To do that, run the following command:
Ansible Galaxy role geerlingguy.mysql should be installed.
Create a playbook install_database.yaml in the playbooks/ directory for testing the geerlingguy.mysql role as follows:
Then, type in the following lines in the install_database.yaml file.
user: ansible
become: yes
vars_files:
- ../vars/database.yaml
roles:
- role: geerlingguy.mysql
Once you’re done, press <Ctrl> + X followed by Y and <Enter> to save the install_database.yaml file.
Here, the role of geerlingguy.mysql is used in the roles section.
The vars_files section is used to add the required role/playbook variables to the playbook. Here, the variables will be placed in the vars/database.yaml file.
Now, create a database.yaml file in the vars/ directory as follows:
Now, add your desired variables in the database.yaml file. I’ve added the following variables in the database.yaml file.
- name: db01
encoding: utf8mb4
collation: utf8mb4_unicode_ci
mysql_users:
- name: linuxhint
host: "%"
password: secret
priv: "db01.*:ALL"
These variables configure geeringguy.mysql role so that it creates a new user linuxhint, sets the password secret for the linuxhint user, creates a new database db01 and grants linuxhint user full access to the db01 database.
Once you’re done, press <Ctrl> + X followed by Y and <Enter> to save the database.yaml file.
Now, you can run the install_database.yaml playbook as follows:
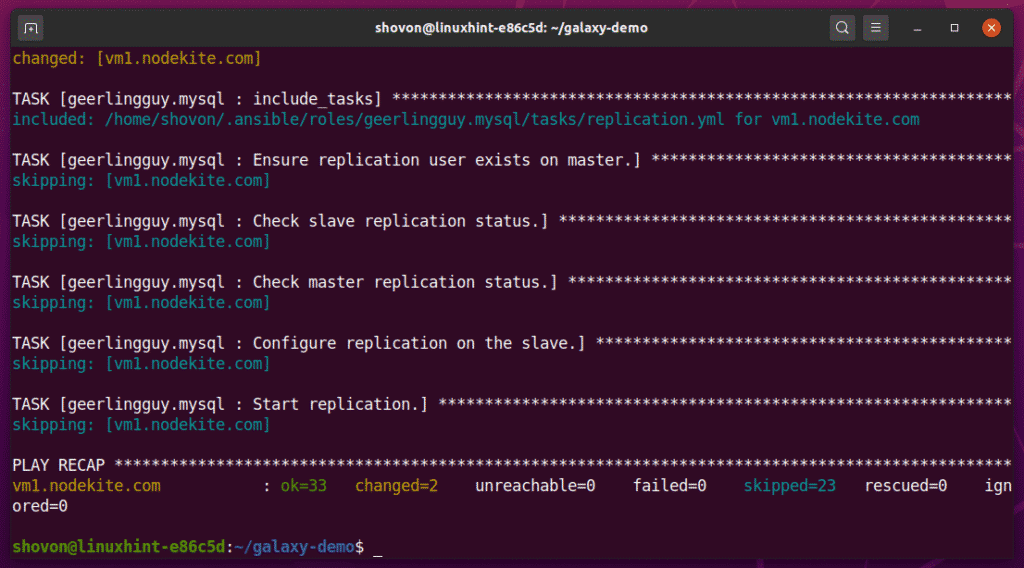
As you can see, the playbook is running the geerlingguy.mysql role. It may take a while to complete.
At this point, the install_mysql.yaml playbook should be completed.
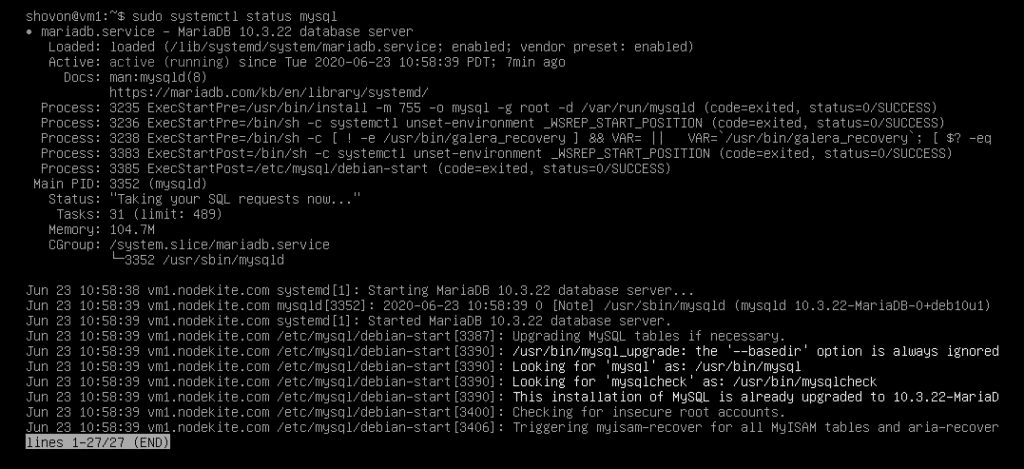
On my vm1.nodekite.com Debian 10 host, the mysql service is running as you can see in the screenshot below,
I can also login to the MySQL database server as linuxhint user.
As you can see, the database db01 is also created.
So, this is how you install and use Ansible Galaxy roles.
Installing and Using Ansible Collections:
In this section, I am going to show you how to install and use an Ansible Galaxy collection. So, let’s get started.
Let’s say; you want to install the Ansible Galaxy collection geerlingguy.php_roles.
To do that, run the following command:
The collection geerlingguy.php_roles should be installed.
To use the collection, create a new playbook install_php.yaml in the playbooks/ directory as follows:
Now, type in the following lines in the install_php.yaml file.
user: ansible
become: yes
collections:
- geerlingguy.php_roles
roles:
- role: php
- role: php_versions
vars:
php_version: '7.3'
Once you’re done, press <Ctrl> + X followed by Y and <Enter> to save the install_php.yaml file.
These lines import the geerlingguy.php_roles collection on your playbook.
In the roles section, you can use the roles you need from your collection. Here, I have added 2 roles (php and php_versions) from the geerlingguy.php_roles collection.
The php role does not have any role-specific variables.
If you want to configure a role using variables, you can add them under the vars section of the role as follows.
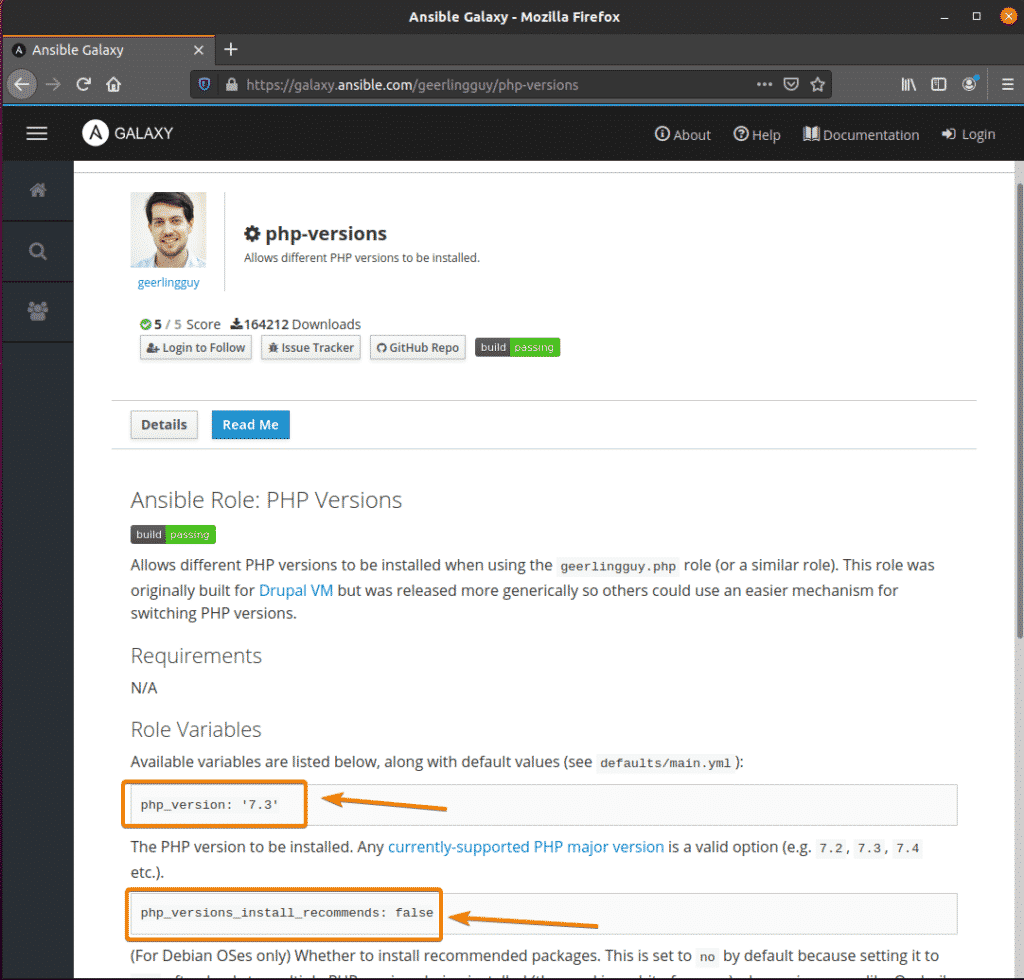
You can find what roles are available for use in the official Ansible Galaxy page of the collection
The official Ansible Galaxy page of the role will have information on what variables you can use to configure the role.
Now, you can run the install_php.yaml playbook as follows:
As you can see, the playbook is running. It may take a while to complete.
At this point, the playbook should be completed.
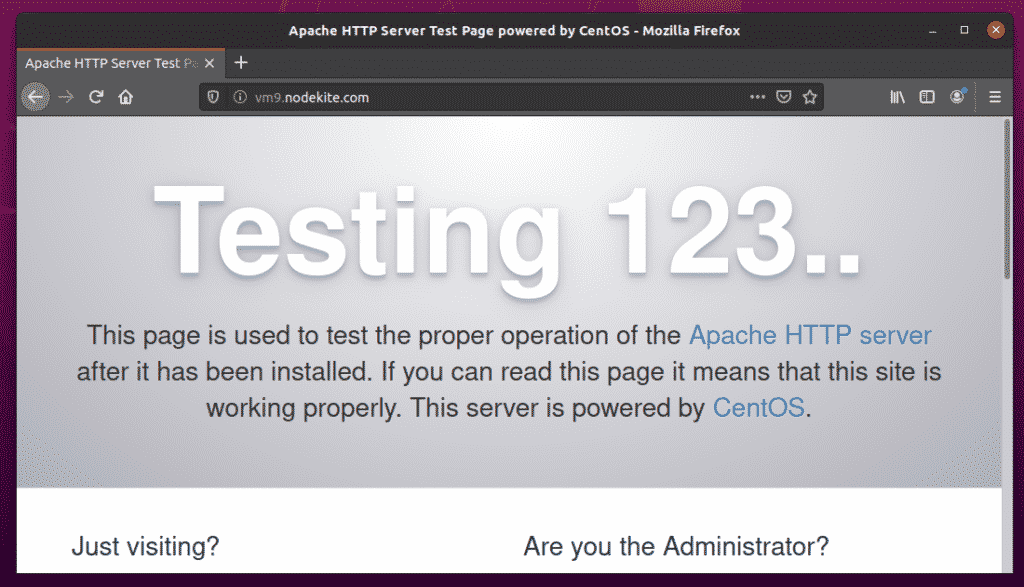
As you can see, I can access the Apache 2 webserver running on my CentOS 7 host vm9.nodekite.com.
I have also created an index.php file in the /var/www/html/ directory of my CentOS 7 host vm9.nodekite.com.
As you can see, the web server can serve index.php page correctly.
So, that’s how you install and use Ansible Galaxy collections.
Conclusion:
In this article, I have explained what Ansible Galaxy is. I have also demonstrated how to install and use roles/collections from Ansible Galaxy. Ansible Galaxy will help you avoid reinventing the wheel, also known as code repetition. You should be able to get your Ansible projects done faster using Ansible Galaxy.


