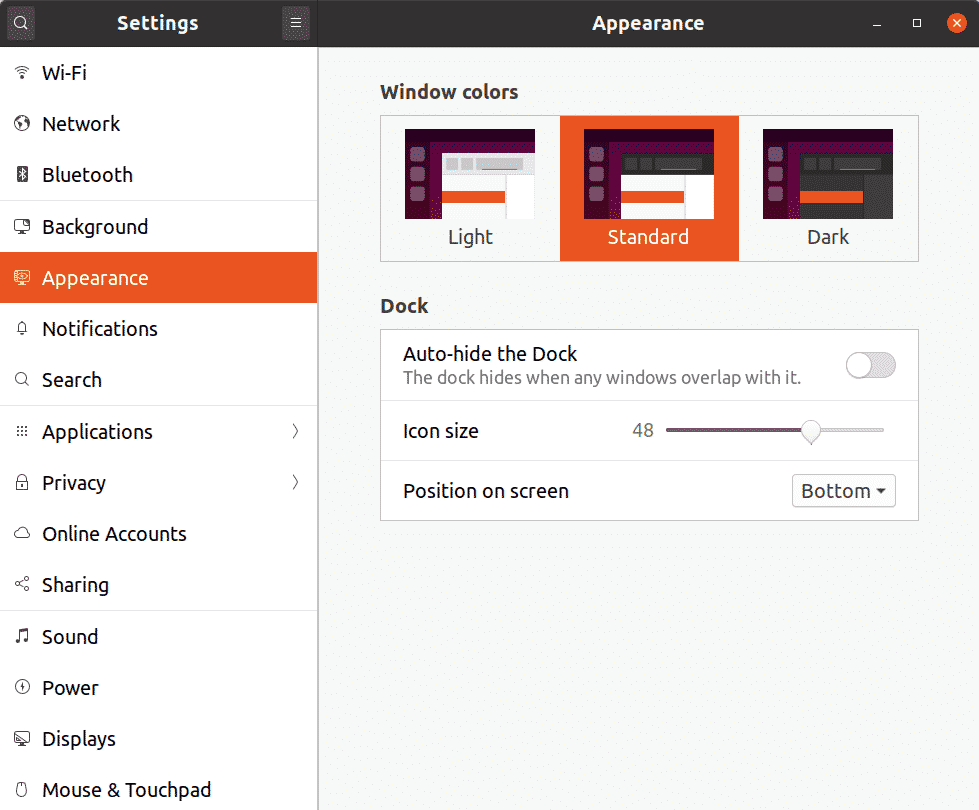
Default Ubuntu Dock Settings
Ubuntu dock settings can be accessed from the “Settings” icon in the application launcher. In the “Appearance” tab, you will see a few settings to customize the dock. Apart from these, no other customization options are available to users by default.
DConf Editor
Dconf editor is a centralized configuration utility that stores shell and app settings in key-value pairs. Almost all default and third party GNOME3 apps use DConf to store options. Dconf Editor is a graphical tool to manage these settings, usually hidden from users. Directly changing settings from DConf Editor is discouraged by developers as a misconfiguration can break your system. However, if you are careful and take a backup before changing settings, Dconf Editor can be used to tweak advanced settings.
To install DConf Editor in Ubuntu, run the command below:
To take a backup of all options available throughout the system and their current state, run the command below:
To load the backup taken above, run the command below:
To reset all system-wide settings, run the command below:
The path for Ubuntu dock in Dconf Editor is:
To take a backup of Ubuntu Dock (or any other specific app), run the command below by supplying the full path:
To load the backup taken above, run the command below:
To reset the Ubuntu dock settings, run the command below:
Now that you know how to take a backup, reset and restore DConf Settings, you can try changing advanced settings of the Ubuntu dock. Open the “DConf Editor” app from the application launcher. Search for “dash-to-dock” to access dock settings. You can also manually navigate to “org > gnome > shell> extensions > dash-to-dock” path to access the settings. All the settings appearing under “dash-to-dock” entry are self-explanatory, and description is provided where needed. These settings mostly consist of toggles, checkboxes, and radio buttons. Just change them according to your needs. Each setting can be individually restored to its default value from the GUI itself.
Dash-to-dock GNOME Shell Extension Settings
You can entirely skip using DConf Editor and install a dash-to-dock extension to change settings of the Ubuntu Dock. Any changes made to dash-to-dock will also apply to the Ubuntu dock, even if you uninstall dash-to-dock later.
To install dash-to-dock in Ubuntu, run the command below to install necessary dependency:
After installing the package above, you can install a dash-to-dock GNOME shell extension from here. You will need to open the link in any Chrome or Chromium-based browser to install the extension. Once you have installed the extension, right-click on the application grid icon on the visible dash-to-dock panel to access the settings.
From the GUI configuration utility, you can change the settings as per your needs.
To reset Ubuntu Dock to its default settings, you have first to remove the dash-to-dock extension and then use the Dconf reset command explained above. For the sake of completion, here is the command you need to run to reset Ubuntu Dock to default settings after removing the dash-to-extension from the download link specified above:
If you can see both Ubuntu Dock and dash-to-dock after following the steps above, log out and re-login to fix the issue. You can also fix this issue by reloading GNOME shell by pressing <ALT+F2> and entering “r” (without quotes) in the popup input box.
Conclusion
Ubuntu Dock settings are intentionally kept minimal to keep things simple. However, if you find them lacking or if you love to customize and theme the dock, you can use methods explained above to tweak the settings. In case of any breakage, you can use the reset command to restore the Ubuntu Dock to its original settings.


