FQDN is actually a subdomain of your domain. The subdomain/FQDN must have an A record (for IPv4) or AAAA record (for IPv6) in your domain name (DNS) server. We will talk more about that in the later section of this article.
Things may seem complicated now. But an example will make things clearer.
Example:
Let’s say, you have a domain name nodekite.com and you have 2 computers on the network, computer A and computer B. Computer A has the IP address 192.168.20.141 and computer B has the IP address 192.168.20.142. Now, let’s say, you want to name computer A cloud1, and computer B cloud2.
In this case, the FQDN hostname of computer A would be cloud1.nodekite.com and computer B would be cloud2.nodekite.com.
You DNS server will also have A records for cloud1.nodekite.com and cloud2.nodekite.com. So that cloud1.nodekite.com will resolve into the IP address of computer A 192.168.20.141 and cloud2.nodekite.com will resolve into the IP address of computer B 192.168.20.142. Now, you can use the FQDNs instead of IP addresses to communicate between computer A and B.
Everything I’ve said is illustrated in the figure below which may help you understand this concept easily.
Fig 1: Working principles of FQDN hostnames
Enough theories for now. Let’s get started with the practical implementations.
Setting Up Static IP Address:
You should set up static IP addresses on your Ubuntu 20.04 LTS machines on which you will be setting up FQDN hostnames. If you need any assistance on setting up static IP addresses on your Ubuntu 20.04 machines, check my article Setting Up Static IP Address on Ubuntu 20.04 LTS at LinuxHint.com.
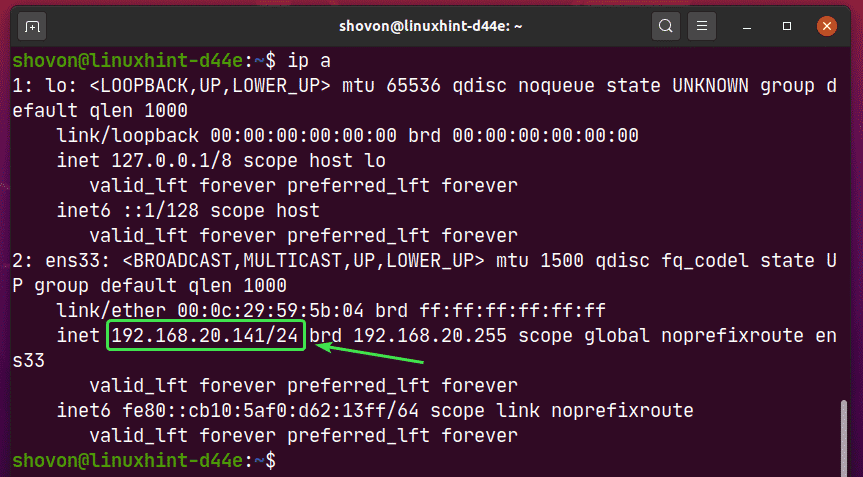
I have set up the static IP address 192.168.20.141 on computer A.
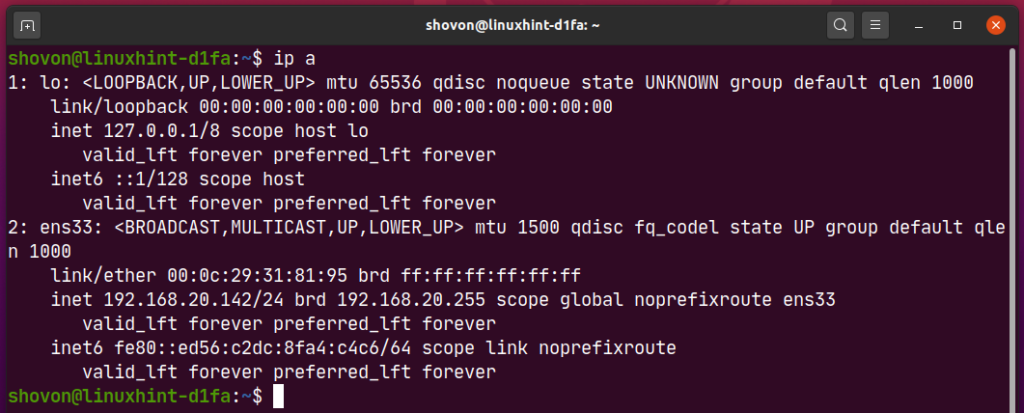
And the static IP address 192.168.20.142 on computer B.
Adding DNS Entries to the DNS Server:
You have to add the required A records (for IPv4) or AAAA records (for IPv6) for the FQDNs in your DNS server.
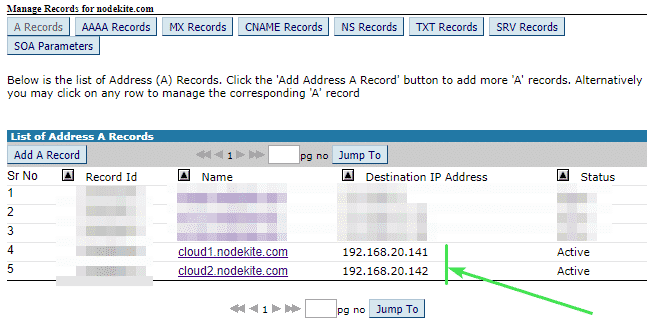
I have added A records for cloud1.nodekite.com and cloud2.nodekite.com in my DNS server as you can see in the screenshot below.
Now, you can check if the DNS name cloud1.nodekite.com to IP address resolution is working with the following command:
NOTE: Here, 8.8.8.8 is the IP address of the Google public DNS server. You can change it to some other DNS server address if required.
As you can see, DNS name resolution is working for cloud1.nodekite.com.
NOTE: DNS name resolution may not work immediately after you have added it to your DNS server. The changes may take a few minutes to a few hours (24 hours at max) to propagate to all the public DNS servers.
The same way, you can check if the DNS name cloud2.nodekite.com to IP address resolution is working.
DNS name resolution is working for cloud2.nodekite.com as well.
Allow Host Name Changes in Ubuntu Server 20.04 LTS:
If you’re using Ubuntu Server 20.04 LTS, then make sure preserve_hostname is set to false in the /etc/cloud/cloud.cfg file. Otherwise, the hostname changes will not persist on reboot.
First, open /etc/cloud/cloud.cfg file with the following command:
Now, make sure preserve_hostname is set to false. Then, save the file by pressing <Ctrl> + X followed by Y and <Enter>.
Note that for Ubuntu Desktop 20.04 LTS, this step is not required.
Setting Host Names:
Now, you can set cloud1.nodekite.com as the hostname of computer A with the following command:
Now, for the changes to take effect, reboot your computer with the following command:
Once your computer boots, run the following command to verify if the hostname of computer A has changed.
As you can see, cloud1.nodekite.com is set as the hostname of computer A.
The same way, set cloud2.nodekite.com as the hostname of computer B.
Now, reboot your computer for the changes to take effect.
Once your computer boots, verify if the hostname has changed with the following command:
As you can see, cloud2.nodekite.com is set as the hostname of computer B.
Checking Connectivity Between Hosts:
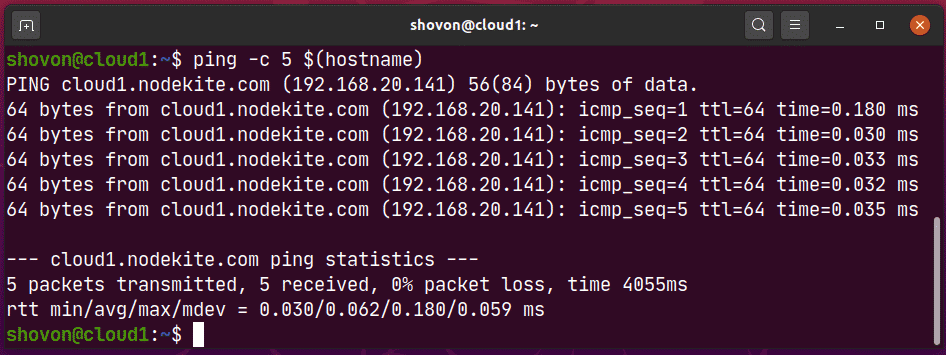
Now, check if computer A can ping itself using the hostname cloud1.nodekite.com as follows:
As you can see, computer A can ping itself using the hostname cloud1.nodekite.com. So, DNS resolution is working correctly for computer A.
Now, check if computer B can ping itself using the hostname cloud2.nodekite.com as follows:
Computer B can also ping itself using the hostname cloud2.nodekite.com. So, DNS resolution is also working correctly for computer B.
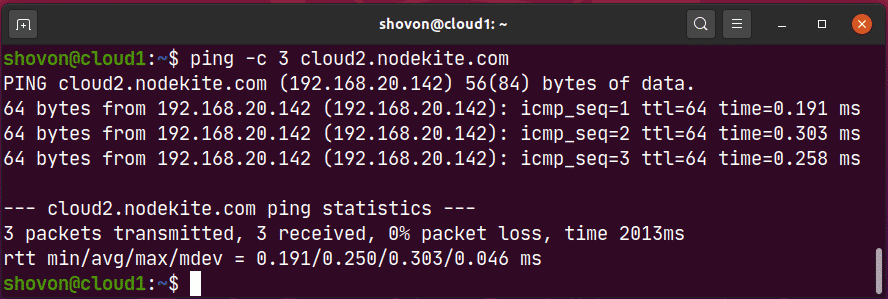
Now, check if computer A can ping computer B using the hostname of computer B as follows:
As you can see, computer A can ping to computer B using the hostname of computer B.
The same way, check if computer B can ping computer A using the hostname of computer A as follows:
As you can see, computer B can ping to computer A using the hostname of computer A.
So, computer A and computer B can communicate with each other using the hostname cloud1.nodekite.com and cloud2.nodekite.com respectively.
So, that’s how you correctly set up hostnames in your Ubuntu Server 20.04 LTS. Thanks for reading this article.


