Working with Cut Command
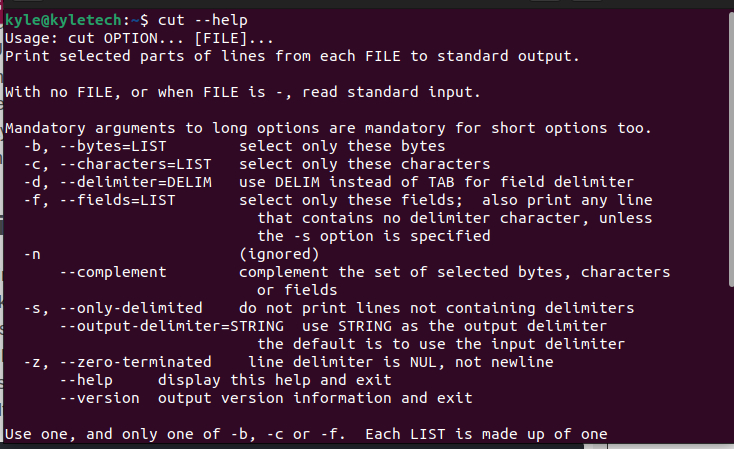
There are various times when you would want to get a substring of a given line on the terminal. In that case, the cut command works perfectly and offers various options to split the strings. You can open the help page to view the various options at your disposal. Furthermore, you can use the cut command directly on the Bash scripts or command line.

Let’s discuss the various cut command options in detail:
- -b: Used when you need to select the bytes only.
- -c: Used when you need to select the characters only.
- -d: Uses the delimiter specified to the select sections of the string.
- -f: Used to define which field to extract.
- -s: Specifies to only extract the lines containing the delimiter.
Now, let’s have some practical examples.
1. Extracting the Bytes Only
The -b flag specifies that cut only selects the specified bytes. You can use it when working with a file or input the string to extract using a command like echo.
For instance, to combine echo with the cut to extract specific characters from the string based on their byte count, we could have an example like the following:
The given command extracts the bytes based on the specified count starting from 1.
Alternatively, you could use the cut command, provided that you add the name of the file that contains the strings. Our file for this example is cutdemo.txt.
We can extract the substrings with the following command:
You can also give a range when working with the -b option. For instance, we could give a range in the previous command and choose to extract the bytes from 1-4 and 6-10. Our new command is as shown:
Note how the extracted string is based on the specified range.
2. Extracting the Characters Only
There are different ways in which you can use the -c option.
You could choose to extract a given character by specifying the character position like in the following example:
Still, you can extract the characters from the specified position backward when you add the negative sign. In the following example, we start from the 4th position for all fields.
Moreover, you can specify to start extracting from a given position or to a given end position.
The following example extracts the string from the 6th position to the end of the string.
3. Working with Delimiters
You can specify a delimiter that helps split the string. For instance, you could choose to split the string based on comma, colon, etc. Delimiters work best when specifying a field.
Specifying the Fields
If we want to specify which fields to include, we could use the -f flag. For instance, when extracting from a given file, you can specify the field one as -f 1. The following example splits the string based on delimiter “ “ and for field 1.
For multiple fields, you specify the field numbers.
You can also specify the output delimiter using the –output-delimiter=$’delimiter’ option. For instance, we can specify the output to use an asterisk (*) as the output delimiter using the following command:
In the previous output, we can note that the last line doesn’t contain the specified delimiter, yet it got printed out. To avoid printing lines that don’t contain the delimiter, use the -s flag. Our new command and output is as shown in the following illustration:
Conclusion
Working with the cut command is easy and gives you the flexibility to achieve more when working with strings. We’ve seen the various ways in which you can use it to split the strings using the various options. Thanks to this guide, you now have an understanding of using the cut bash command.


