This guide is all about Bash “for” loops. We will understand the syntax to follow and give numerous examples of instances and ways to use the Bash “for” loops. Let’s get started!
How to Use the Bash “For” Loops
To use the “for” loops in Bash, you must create your script and define what variables to use for the loop. Ideally, the “for” loop relies on the provided variables and commands to execute as per your expectations.
Let’s create a Bash file that we will use for this tutorial. Here, we use the Nano editor, but you can use the other editors such as Vim. We name our script as “linuxhint.sh”.
To understand the structure of Bash “for” loops, let’s create a script that uses a “for” loop to iterate the provided variables as shown in the following:
In the previous script, let’s dissect each line of code to understand it in detail.
- #!/bin/bash – It is the first line in our script and we add it to symbolize that we are creating a Bash script.
- for x in 1 2 3 – Here, “for” stands for the loop. The “x” is the variable placeholder and the items to iterate are the “1, 2, and 3.”
- do – It is added to symbolize the start of the “for” loop. Below it, that’s where you add the commands that you want to execute for each loop. For instance, we use the “echo” command to output the “Number” and the placeholder for each item that we added.
- done -We add this keyword to stop the loop once all iterations occur.
Now that we have our “for” loop created in our Bash script, save and exit the file. We must first add the executable permission to execute the script.
Next, execute the script as shown in the following. Watch how we get the Bash “for” loop iterating the items in the variable placeholder as expected. That’s how the Bash “for” loop works in its basic form.
Working with Ranges
The “for” loop is mainly used when you want to work with a range in your script. You can define the start and end of the range. For instance, if you want to implement a shorter version of the earlier command to work with a range of 1 to 5, you could change the “for” loop implementation to appear as follows:
The previous implementation works with Bash version 4+. If we run the script, we still get a similar output.
Let’s say you want to automate a “ping” command for your network’s given range of IPs. Having to ping all IPs is time-consuming and an outdated way of doing things. The best option is to create a range for the IPs using the Bash “for” loops.
In the following example, we specify the first set for the range of IPs and define the range using a “for” loop. In the “do” section, we set it to execute the “ping” command for each iteration in the range.
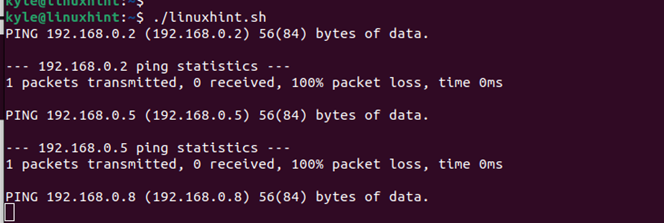
Watch how we use the Bash “for” loops to automate the process and ping each IP in our range.
Working with Range Increments
Defining an increment for your “for” loop when working with a range of items is possible. Let’s say you want an increment of 3 for all the IPs that you wish to ping. For that, you add the increment option as shown in the following:
When you execute the Bash script, you will notice that for each ping, we manage to ping each IP with an increment of 3.
Working with Multiple Commands in Bash “For” Loops
When creating your script, the “for” loop lets you chain numerous commands. There are multiple instances where chaining the commands is handy. With “for” loop, you can chain any number of commands inside the “for” loop. When you execute the script, all the chained commands will run as expected.
Let’s say you want to list all the files in the current directory with the “.txt” extension and then rename them to remove the extension. You can chain the commands with ease.
First, let’s confirm that we have the text files in our directory using the “ls” command.
Next, let’s create our Bash “for” loop that checks the available files on the directory and lists those with the “.txt” extension. In the “do” section, we use the echo command to list the available text files. Then, we chain it with the “mv” command to rename the files to help remove the extension. Finally, we echo that the files have been renamed.
Save and exit the text editor. When we execute the script, notice how we managed to list all the available text files and rename them.
If we try to list all the text files, we get an error. When we change the “ls” command, we can confirm that our earlier files now don’t have the “.txt” extension as we managed to remove it using the Bash “for” loop.
Bash “For” Loops Numerous Expressions
You can create a three-expression Bash “for” loop. The first expression in the “for” loop is the initializer that sets the ground for the loop. The second expression is the condition that ensures that the loop executes, provided that the condition is true. The third expression is the counting expression, mainly an increment or decrement.
The following is the syntax to use:
do
command_1
command_n
done
Let’s have a simple example where we create a Bash “for” loop to print the numbers from 10 to 1. For that, our expression one is 10, and the 1 is the condition. The Bash “for” loop is as follows:
If we run the script, we can confirm that it runs successfully.
Bash “For” Loop Skip and Continue
Even with Bash “for” loops, you can create a skip and continue the “for” loop. Imagine a case where you want to automate the script but you want to verify a given condition. You can skip and continue with the loop if the condition is satisfied.
Once you execute the command, you will notice that when the variable meets “4” while executing, it skips and continues executing the loop. You can apply the same concept to execute any Bash “for” loop to satisfy your agenda.
Bash “For” Loop Break
You can implement a Bash “for” loop that breaks when a given condition is met. For instance, let’s say you want to loop through a list of files and only break when a given condition is met. The Bash “for” loop only breaks if the condition in the “if” statement is met. Otherwise, it keeps looping.
Here’s an example of the Bash “for” loop to break the conditional loop:
The previous Bash “for” loop will run. When “file2” is met, it will break. The following image displays how the loop will execute. Note how the other files are not echoed since the condition in the “if” statement is met.
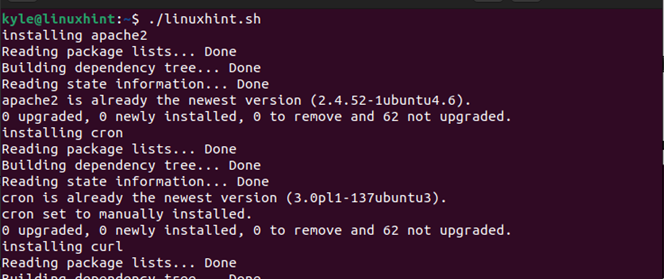
A realistic application of the previous example of looping through strings is when you want to install numerous packages with a single script. For instance, let’s say you want to install three packages. For that, you would have your Bash “for” loop written as follows:
When you execute the script, the added packages will start installing on your system.
This option of using the Bash “for” loops makes it easy to quickly install numerous packages with only one script.
Infinity Bash “For” Loop
In some rare cases, you may want to create an infinite Bash “for” loop. For that, you use the “;;” in the “for” loop and then issue the command to execute infinitely.
When executed, your loop will run forever unless you press “Ctrl + C” to terminate it.
Bash Loop Values
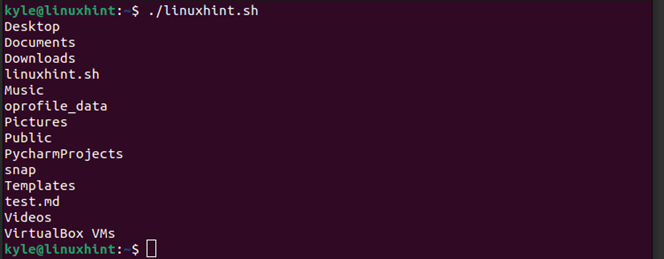
You can execute different commands on your terminal to perform a given task. For instance, the “ls” command lets you list all the files in the current directory. You can execute the same command in your script using the Bash “for” loop. Take a look!
Executing the previous Bash “for” loop, we manage to list all the files in the current directory as shown in the following:
Similarly, let’s say you want to list a given sequence. Instead of using the “seq” command, you can implement the same using the Bash “for” loop as in the following example:
The previous script prints the sequence of numbers from 1 to 8.
Debugging the Bash “For” Loops
Debugging is part of our daily life. You can use the “for” loop option to debug your script when working with a Bash script. You may have an error in your script and don’t want it to display on the terminal. In that case, you can create an output file to contain the debug information using the “for” loop. That way, you will keep a clean interface.
In the previous image, we created a “for” loop to iterate a sequence of IPs with an increment of 3. In the last line, we specified that any debug information or output of the “for” loop should be stored in the “ips-output.txt” file. Let’s execute the script to see what happens:
We noticed that we managed to keep a clean working space since all output got directed to the specified file. To debug the script, open the output file that is created using a text editor or a command like “cat” and see what is contained. In our case, the output file shows what we expected after executing the commands in our Bash “for” loop. If the commands fail to execute, use this output file to debug your script.
Conclusion
Using Bash is handy in many tasks, especially in automation. You can use the “for” loops to achieve different functionalities when creating your Bash script. This post explained how the “for” loop works and provided numerous instances and examples on how to create the Bash “for” loops. Hopefully, you can now write the “for” loops in your Bash script. That’s it!


