Downloading Oracle JDK 11:
Oracle JDK 11 is not available in the official package repository of Arch Linux. But you can easily download Oracle JDK 11 from the official website of Oracle and install it on Arch Linux.
First, visit the official website of Oracle JDK at https://www.oracle.com/technetwork/java/javase/downloads/index.html. Once the page loads, scroll down to the Java SE 11.x.y (LTS) section and click on the DOWNLOAD button as marked in the screenshot below.
Now, scroll down a little bit and click on the Accept License Agreement radio button as marked in the screenshot below.
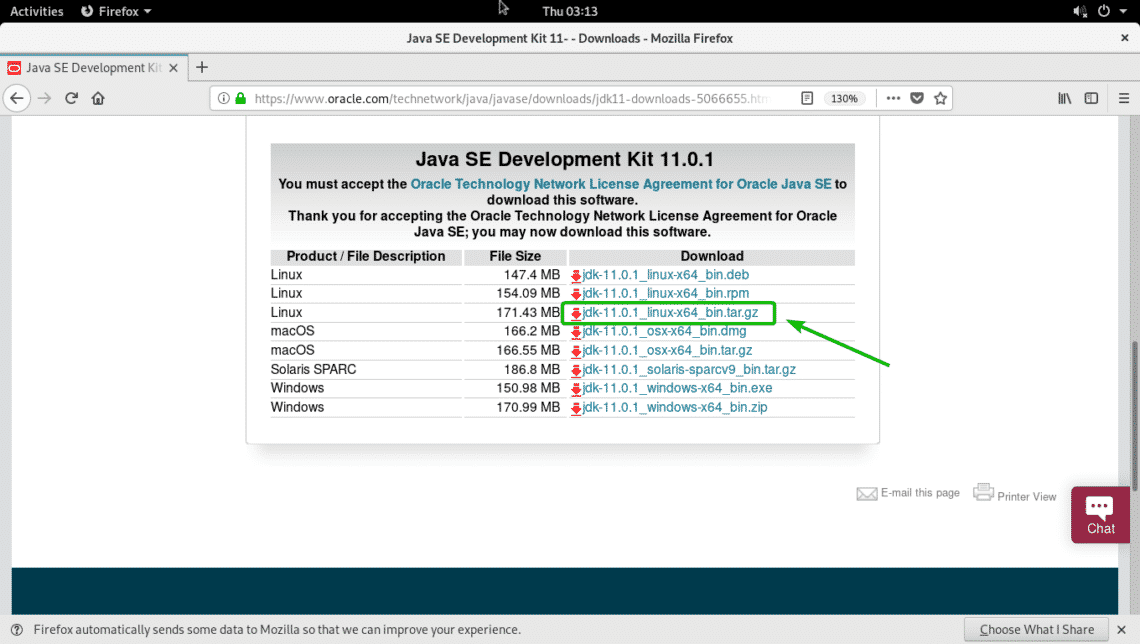
The Oracle Technology Network License Agreement for Oracle Java SE should be accepted. Now, to download Oracle JDK 11, click on the JDK 11 .tar.gz archive link as marked in the screenshot below.
Your browser should prompt you to download the Oracle JDK 11 archive. Now, select Save File and click on OK.
Your browser should start downloading the Oracle JDK 11 archive.
Installing Oracle JDK 11:
Now, navigate to the directory where you downloaded Oracle JDK 11 with the following command:
The file you downloaded should be here as you can see in the screenshot below.
Now, run the following command to install Oracle JDK 11 in the /opt directory:
NOTE: If you want to install Oracle JDK 11 somewhere other than /opt, then replace /opt with the location where you want to install Oracle JDK 11.
Oracle JDK 11 should be installed.
Adding Oracle JDK 11 to the PATH:
Once Oracle JDK 11 is installed, a new directory jdk-11.0.1 should be created in the /opt directory as you can see in the screenshot below. Note the directory name.
Now, create a new file jdk11.sh in the /etc/profile.d directory with the following command:
A new file should be opened with nano text editor. Now, type in the following lines and save the file.
Now, restart your computer with the following command:
Once your computer starts, run the following commands:
$ echo $PATH
As you can see, both of the environment variables are correctly set.
Now, run the following command to see whether JDK 11 is working:
As you can see JDK 11 is working just fine.
Compiling and Running a Simple Java Program with Oracle JDK 11:
In this section, I will show you how to compile a simple Java program with Oracle JDK 11 and run it.
I have written a simple Java hello world program. The Java source file is Hello.java
The contents of the Hello.java Java source file is as follows:
Now, to compile the Hello.java source file, run the following command:
The Hello.java Java source file should be compiled and a new file Hello.class should be generated as you can see in the screenshot below. It’s called a Java class file. The Java source code is converted into Java bytecode and the converted bytecode is saved in a Java class file, which the JVM (Java Virtual Machine) can run.
Now, you can run the compiled Java class file as follows:
NOTE: When you want to run a Java class file, don’t include the .class extension. Otherwise,, you will see an error.
As you can see, the correct output is displayed.
So, that’s how you install Oracle JDK 11 on Arch Linux. Thanks for reading this article.


