Elasticsearch is an open-source and famous analytical search engine and is frequently used in AI and machine learning fields. It usually stores unstructured, semi-structured, and structured data. Many users are required to install and use Elasticsearch in Docker containers to execute it in isolated environments.
However, while executing Elasticsearch in Linux based Docker container, users may face the “Elasticsearch did not exit normally” error due to an unknown reason and suggest you check the “docker-cluster.log” file.
This article will demonstrate the method how to resolve the “Elasticsearch did not exit normally” error while executing the Elasticsearch container in Docker.
How to Resolve “Elasticsearch did not exit normally” Error While Executing Elasticsearch Docker Container?
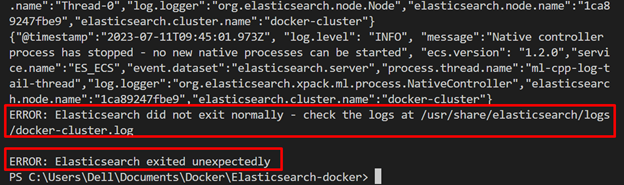
Sometimes, the Elasticsearch container did not execute normally due to it being executed in a Linux container and by default, its virtual memory limit is too low. This can stop the container from executing properly and show the error message “Elasticsearch did not exit normally” as shown below:
To resolve the stated issues, the user can increase the virtual memory’s mmap count for the Linux container using the following steps.
Step 1: Start Docker Desktop Application With WSL
First, start the Docker Desktop with WSL. It enables us to execute and manage Linux containers on Windows:

Step 2: Increase the Virtual Memory
Next, run the below command to increase the Virtual memory limit for Linux containers:
After that, execute the “exit” command to exit the WSL:

Step 3: Create a Network
Now, create a network for the Elasticsearch Docker container. It is optional but can be beneficial for backup purposes for Elasticsearch networks:

Step 4: Run Elasticsearch
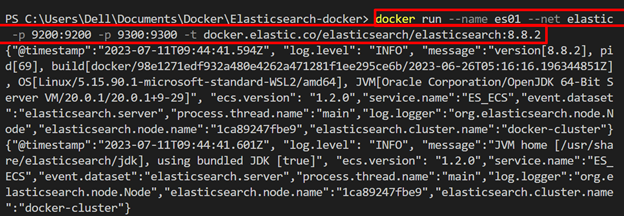
Now, execute the Elasticsearch image to install and run the Elastic search in the container:
In the above-given command:
- “–name” is specifying the Elasticsearch container name.
- “–net” flag is utilized to embed the external network.
- “-p” option is defining the Elasticsearch container’s ports.
- “-t” is used to assign the “TTY-pseudo” terminal to the container:

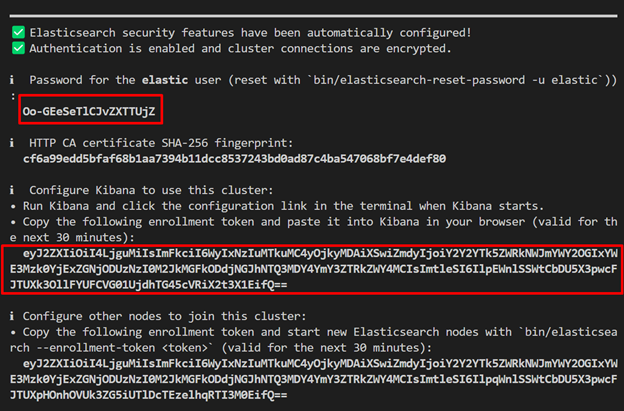
The below output shows that we have successfully executed the Elasticsearch container and resolved the “Elasticsearch did not exit normally” error.
Here, the container will generate the “elastic” user’s password. Using these credentials, the user can access Elasticsearch on the browser. This will also generate the token to configure Kibana:
Step 5: Verification
Navigate to “http://localhost:9200” in your browser and verify that, whether the container is executed on the specified port or not:
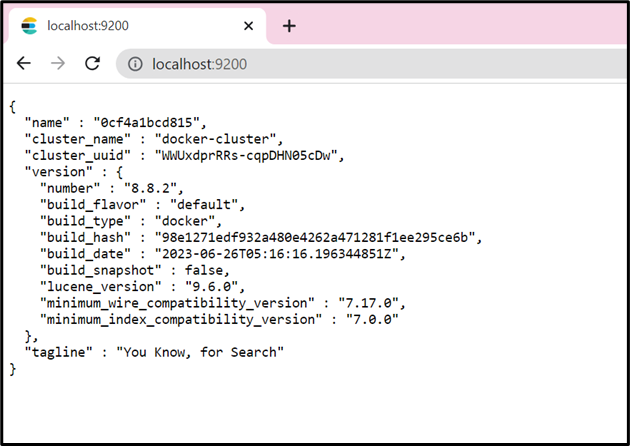
The above output indicates that we have successfully executed the container on port “9200” and resolved the “Elasticsearch did not exit normally” error.
Conclusion
To resolve the “Elasticsearch did not exit normally” error, users are required to increase the Virtual memory limit for the Linux container. To do so, first start the Docker desktop with WSL using “wsl -d docker-desktop” command. After that, increase the virtual memory limit using the “sysctl -w vm.max_map_count=262144” command. Then, again run the image to create and start the Elasticsearch container. This post has illustrated the method to fix the “Elasticsearch did not exit normally” error.