This post will elaborate on the use of the “Get-HotFix” cmdlet in PowerShell.
How to Use the PowerShell’s Get-HotFix Cmdlet?
As described above, the “Get-Hotfix” cmdlet is used for installing hotfixes on remote or local systems. To get the hotfixes, first, use the “Get-HotFix” cmdlet along with the computer name and other required parameters.
Syntax
The general syntax of the “Get-HotFix” cmdlet is stated below:
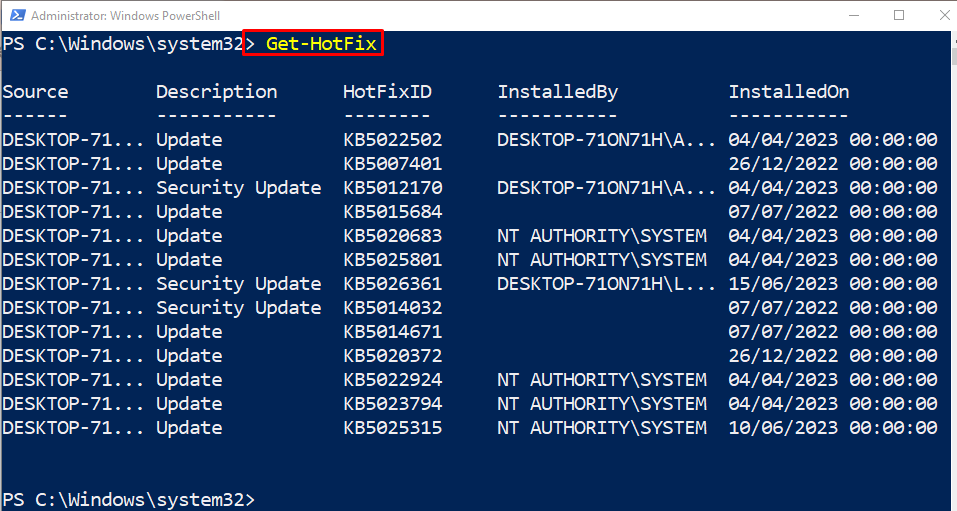
Example 1: Use the “Get-HotFix” Cmdlet to Get All Hotfixes on the Local Computer
To retrieve all the hotfixes on the local computer, simply execute the following command:
Example 2: Use the “Get-HotFix” Cmdlet to Get All Hotfixes on the Specified Local Computer
First, use the “Get-HotFix” cmdlet, along with the “-Description” parameter, and assign the stated values. After that, use the “-ComputerName” parameter and specify the local computer name:
Example 3: Use the “Get-HotFix” Cmdlet to Get the Recent Hotfix on the Computer
Run the provided command to get the recent hotfix on the system:
That’s it! You have learned the usage of the “Get-Hotfix” cmdlet in PowerShell.
Conclusion
In PowerShell, the “Get-Hotfix” cmdlet is used to retrieve the hotfixes installed on the local and remote systems. Hotfix is a system update file that is applied to the system to resolve any issues. This article has explained the usage of the “Get-Hotfix” cmdlet with the help of several examples.


