This guide will provide a procedure to export aliases using the “Export-Alias” cmdlet.
How to Use the Export-Alias (Microsoft.PowerShell.Utility) Cmdlet in PowerShell?
To export alias information into a file, first, use the cmdlet “Export-Alias”. Then, add the “-Path” parameter and specify the target file path.
To know further about the “Export-Alias” cmdlet, simply, head over to the examples section.
Example 1: Use the “Export-Alias” Cmdlet to Export Current Session’s Alias Information
To export alias information of the current session, first, use the “Export-Alias” cmdlet. Then, add the “-Path” and assign it the target file path where you want to export the alias information:
Let’s verify whether the alias information has been exported or not by executing the given command:
Example 2: Use the “Export-Alias” Cmdlet to Export Alias Information Unless the Export File Already Exists
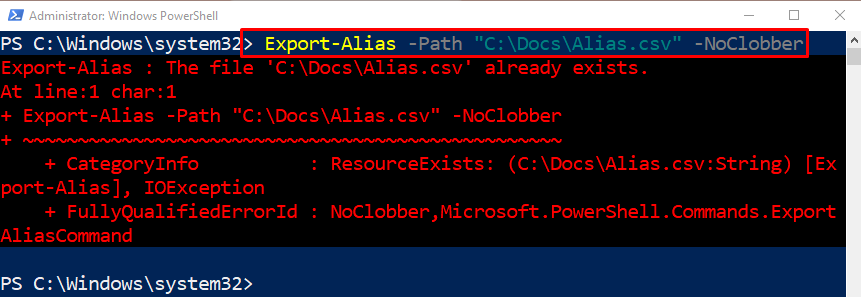
Using the “-NoClobber” parameter along with the “Export-Alias” and the file path will not export the alias information if the file already exists in the provided directory:
Example 3: Use the “Export-Alias” Cmdlet to Append Aliases to a Specified File
Use the “-Append” parameter along with the “Export-Alias” cmdlet to append an existing file. Moreover, use the “-Force” parameter to override the already existing data in a particular file:
Example 4: Use the “Export-Alias” Cmdlet to Export Alias Information to a Text File Formatted as a series of Set-Alias Commands as Script
To export the alias information as a script, simply, use the “-as” parameter and assign it a “Script” value:
That’s it! You have learned the usage of the “Export-Alias” cmdlet in PowerShell.
Conclusion
In PowerShell, the cmdlet “Export-Alias” exports the aliases of the current session into a file. Its standard alias is the “epal”. It is useful when a user wants to save the aliases for later use. This guide provided in-depth details about the “Export-Alias” cmdlet in PowerShell.


