This tutorial will explain the method for changing the Git password in Windows.
How to Change Git Password in Windows
To change the Git password in Windows, check out the below stated steps:
- Open the setting of your system.
- Go toward the “Control Panel” setting.
- Open the “User Accounts” setting.
- Then, go with “Credential Manager” and select “Windows Credential” to open.
- Open the drop-down menu of Git and hit on “Edit” for changing the password.
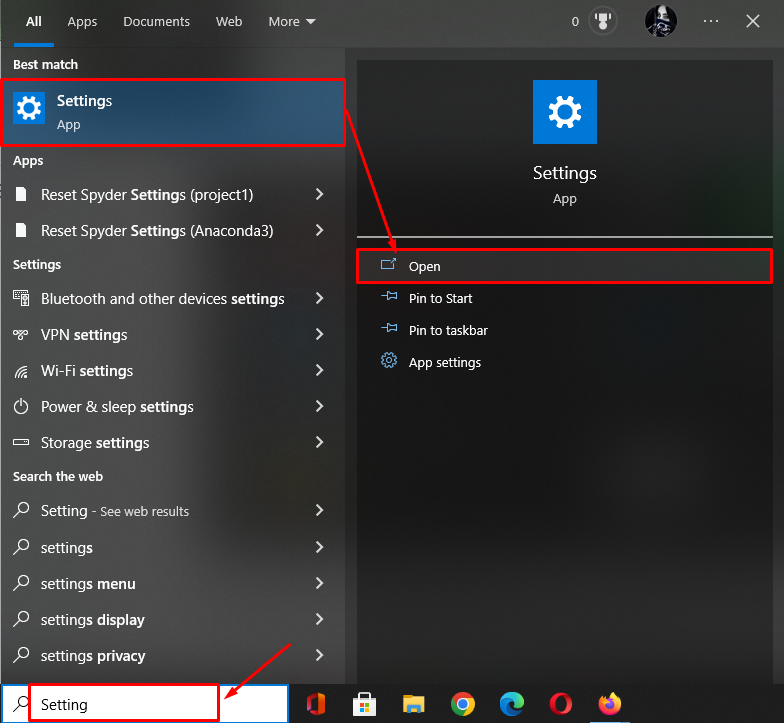
Step 1: Launch Settings
First, launch the Windows settings with the help of the “Startup” menu:
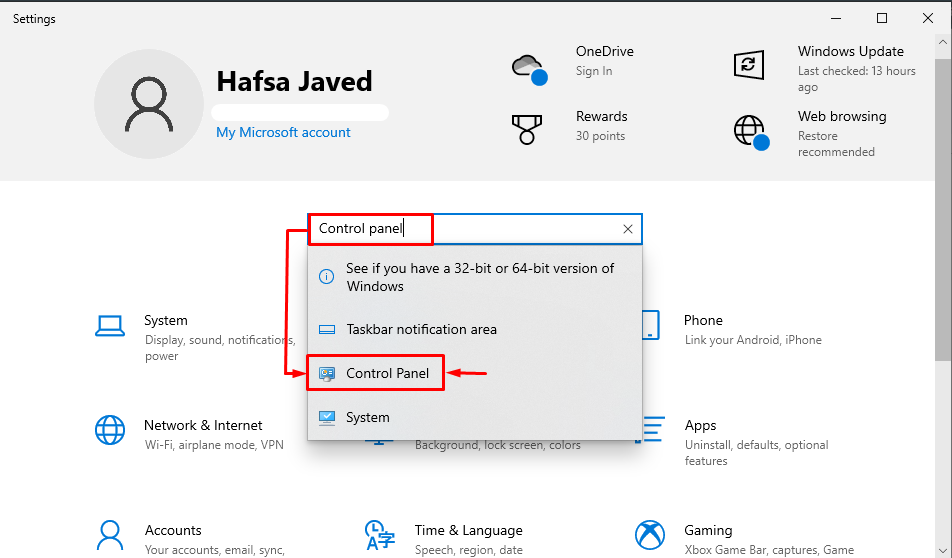
Step 2: Search for Control Panel Setting
Now, search the “Control Panel” and open it:
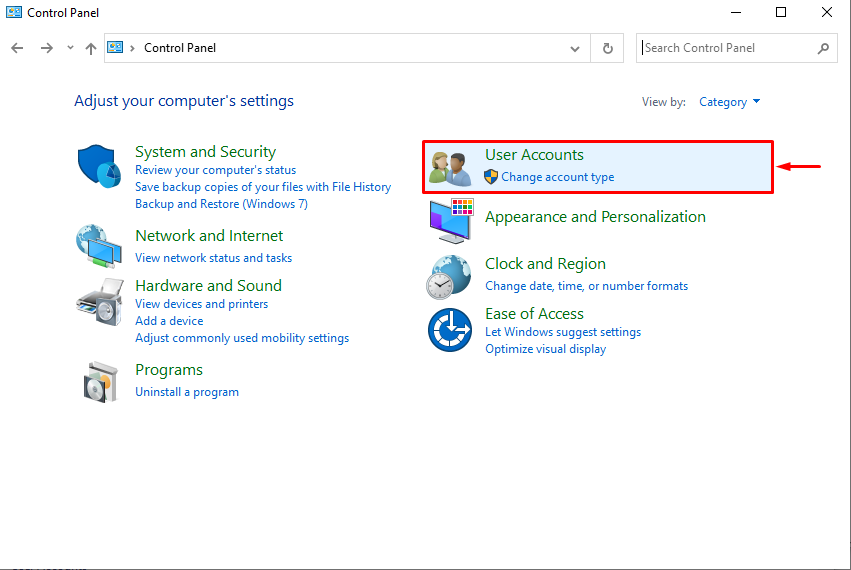
Step 3: Navigate to User Accounts
In the “Control Panel”, select the “User Accounts” settings and launch it:
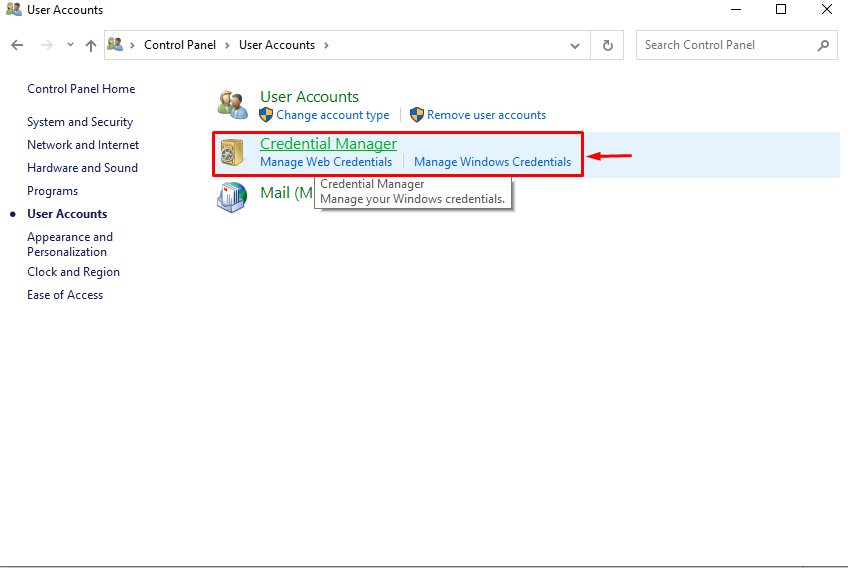
Step 4: Open Credential Manager
Here, move toward the “Credential Manager” to manage the credentials of your preferred application:
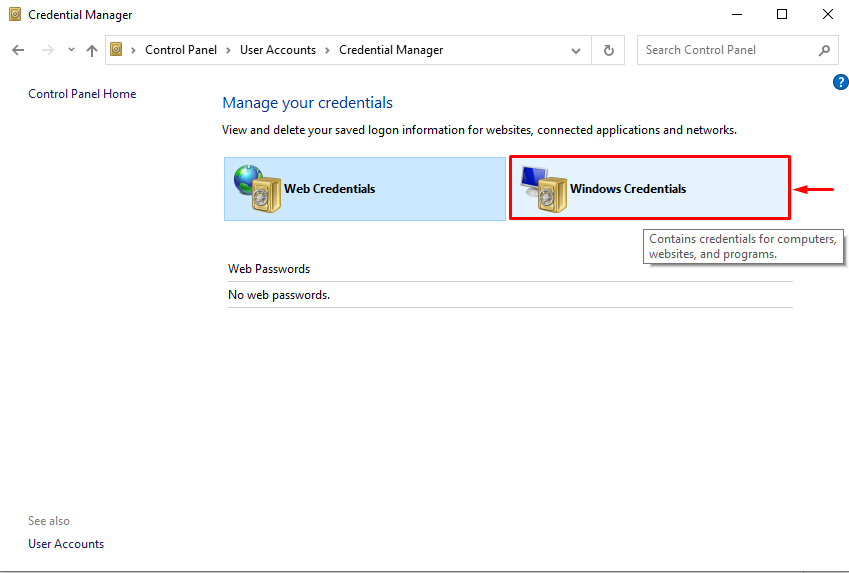
Step 5: Select Windows Credentials
Choose the stated “Windows Credentials” option to manage the Git credentials:
Step 6: Launch Git Drop Down Menu
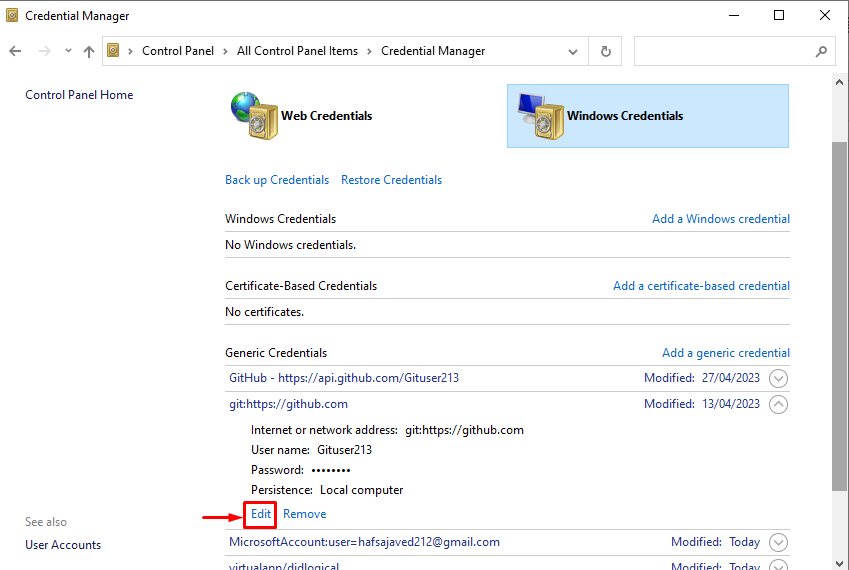
Click on the down arrow of the Git path to open the sub-menu:
Step 7: Change Git Password
Hit the “Edit” option to modify the Git password on Windows directly:
Then, remove the older password and insert a new one. Lastly, hit on the “Save” button for saving it:
That’s all about changing the Git password in Windows.
Conclusion
To change the Git password in Windows, first, launch the setting of your system and navigate to the “Control Panel” setting. Next, open the “User Accounts” setting and go with the “Credential Manager>Windows Credential” tab. Then, open the drop-down menu of Git and click on “Edit” to change the password. This tutorial stated the method for changing the Git password in Windows.

