This tutorial will explain the procedure to install the PowerShell module “Microsoft Teams”.
How to Install Microsoft Teams PowerShell Module?
This post will address the following queries:
- Install PowerShell Module Microsoft Teams.
- Update PowerShell Module Microsoft Teams.
- Uninstall PowerShell Module Microsoft Teams.
How to Install Microsoft Teams PowerShell Module?
To install the PowerShell module “Microsoft Teams”, follow the below-mentioned stepwise instructions.
Step 1: Install PowerShellGet Module
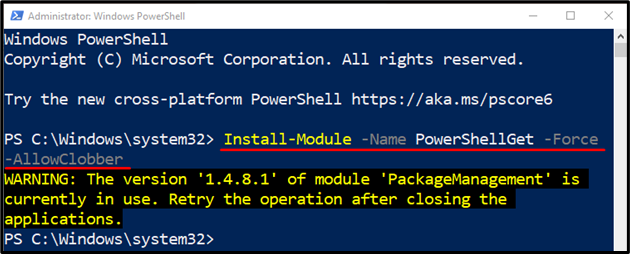
Before installing the module “Microsoft Teams” in PowerShell, it is necessary to install the “PowerShellGet” module first. To do so, first, use the cmdlet “Install-Module”, then place the parameter “-Name” and provide it the “PowerShellGet” value to install it:
Here:
- “-Force” parameter is used to overwrite any existing file in the same path.
- “-AllowClobber” parameter is used to override warning messages about the installation:
Step 2: Install Microsoft Teams PowerShell Module
First, add the “Install-Module” cmdlet. Then, use the “-Name” parameter and assign it the “MicrosoftTeams” value to install it:
How to Update PowerShell Module Microsoft Teams?
An existing installed Microsoft Teams module in PowerShell can be updated. To do so, use the “Update-Module” cmdlet and assign it the “MicrosoftTeams” value:
How to Uninstall PowerShell Module Microsoft Teams?
In order to remove the PowerShell module “Microsoft Teams”, type the “Uninstall-Module” cmdlet and assign it the value “MicrosoftTeams”:
That’s it! We have provided the detailed procedure to install, update, and uninstall Microsoft Teams PowerShell module.
Conclusion
To install Microsoft Teams PowerShell module, first, install the “PowerShellGet” module. After that, execute the “Install-Module -Name MicrosoftTeams -Force -AllowClobber” command. This tutorial has provided complete instructions to install the PowerShell module Microsoft Teams.


