This tutorial will demonstrate the method for setting up a Git server on the local network.
How to Set Up Git Server on Local Network (Windows Tutorial)
To set up a Git server on the local network, check out the below-stated instruction:
- Make a folder where you want to set up the server.
- Open Git bash in the specified folder.
- Initiate a Git empty repository.
- Clone the created repository.
- Change the advanced sharing setting of your local system.
- Move back to the created folder and launch the properties.
- Lastly, share this repository with your preferred users/client.
Step 1: Make a Folder
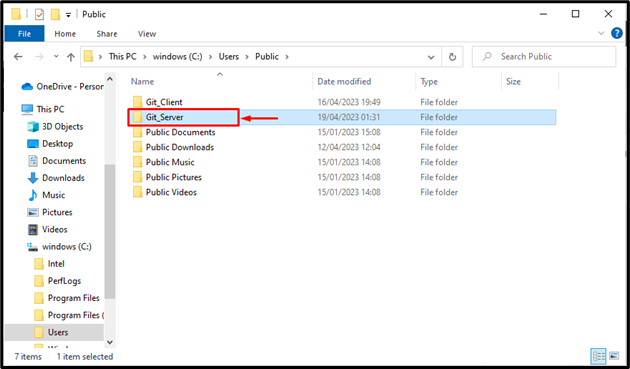
First, create a new folder where you need to set up the Git server:
Note: The name of the folder should not contain any blank spaces.
Step 2: Launch Git Bash
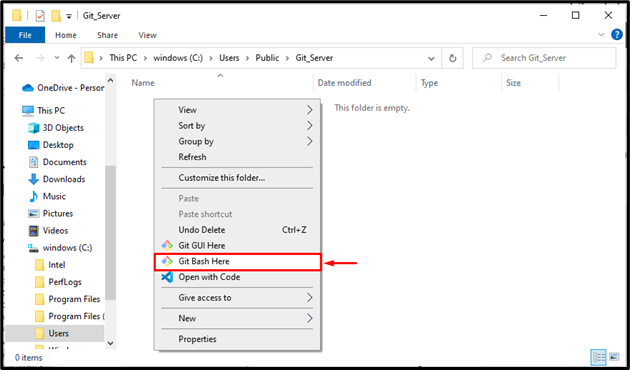
Next, right-click in the created folder. A small menu will appear on the screen. Click on the “Git Bash Here” option to launch the terminal on the screen:
Step 3: Generate an Empty Repository
Utilize the “git init” command to initialize a repository and provide the name of the repository:
The below output indicates that the repository has been initialized successfully in the specified folder:
Step 4: Clone the Repository
Now, clone the created repository by executing the “git clone” command along with the path of the particular repository:
It can be observed that the repository has been cloned successfully:
Step 5: Modify Setting
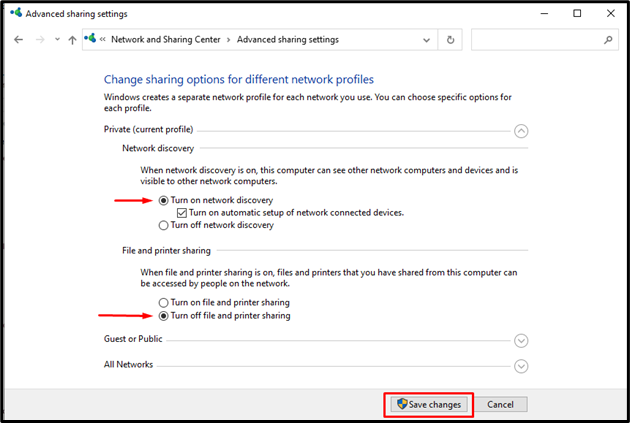
To change the setting, first, navigate toward “Control Panel > Network And Sharing Center > Change advanced sharing settings”. Modify the required setting and save the changes by hitting on the “Save Changes” button:
Step 6: Share With Other Clients
Now, you can share this repository with others for use. For that purpose, open the created folder and move to the properties by right-clicking. Then, click on the “Share” button and choose your preferred User/Client:
That’s all about setting up a Git server on the local network.
Conclusion
To set up a Git server on the local network, first, make a folder where you want to set up the server and open Git bash in the specified folder. Then, initialize a Git empty repository and clone the created repository. Change the advanced sharing setting of your local system, move back to the created folder, and launch the properties. Lastly, share this repository with your preferred users/client. This post stated the method for setting up a Git server on the local network.


