Git is a versioning control system that is used to track changes from the source code files. While the user is working on the Git development project, it is essential for tracking the added files/changes in the staging area. Without tracking the changes, users can not commit/save the changes in the Git repository. If they perform the previously discussed operation, it will show a message as “Changes not staged for commit”.
This post will explain the “changes not staged for commit” means in Git.
What Does “Changes not staged for commit” mean?
“Changes not staged for commit” means that there are some changes that are not tracked in the staging environment. For practical implications, follow the below-provided instructions:
- Navigate toward the Git directory.
- Generate a file using the “touch” command.
- View the status of the Git working directory.
- Add the newly generated file in the staging area.
- Update the file using the “start” command.
- Commit all changes to the Git directory.
Step 1: Go to the Git Directory
Initially, navigate to the Git local directory by using the Git “cd” command:
Step 2: Generate a File
Execute the “touch” command to generate a new file:
Step 3: View Git Status
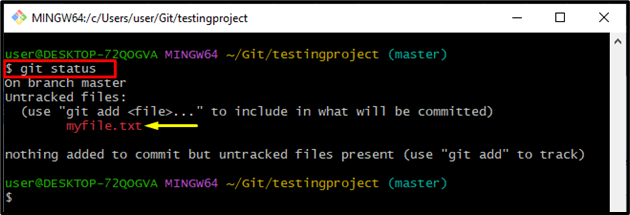
Check the Git status by running the following command to ensure the newly created file:
As you can see, the file has been generated successfully in the working area:
Step 4: Insert File in Staging Area
Run the “git add” command for tracking the file in the staging area:
Step 5: Check Git Status
Check the Git status to ensure that the file has been added in the staging environment or not:
It can be noticed that the file has been tracked successfully:
Step 6: Commit Changes
Then, use the “git commit” command with the “-m” flag and insert the specific commit message:
Step 7: Update File
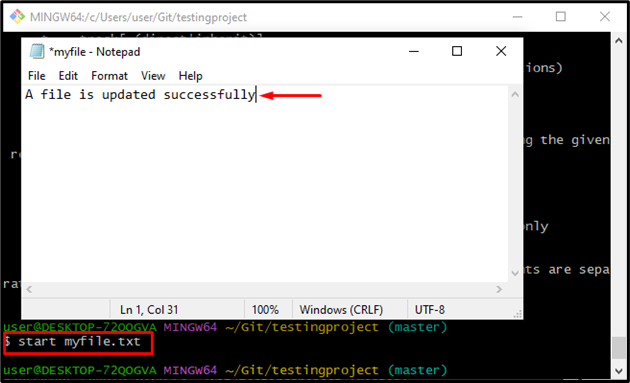
Next, update the file by running the “start” command:
It can be observed that when the above-stated command is executed, the specified file will open with the default text editor. Then, add and save changes:
Step 8: View Git Status
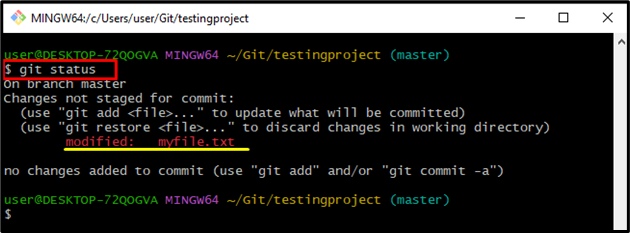
Now, execute the “git status” command to check whether the particular file has been changed or not:
The resultant output shows that the file has been modified successfully:
Step 9: Commit Changes
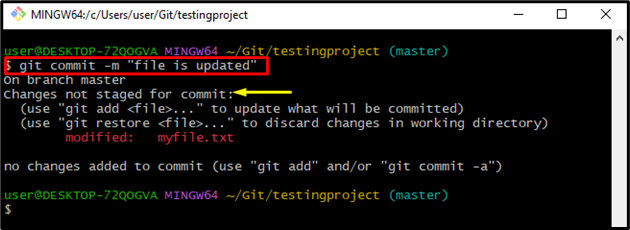
Utilize the “git commit” command with the below mention flag for inserting a commit message and update the Git repository:
As a result, it will display the “changes not staged for commit” until you will not track the file from the working area to the staging environment:
Step 10: Track the File
To resolve the above-stated query, track all the added changes in the staging index by executing the provided command:
Step 11: Save Changes
Now, commit the changes by executing the provided command:
The below-stated output shows that the file has been committed successfully:
Step 12: Verification
Check the working area status using the “git status” for verification:
The provided output indicates that the working area has been cleaned:
That’s all! You have learned about the “Changes not staged for commit” means in Git.
Conclusion
The “Changes not staged for commit” message will display when the users want to commit changes without tracking them in the staging area. To resolve the previously discussed query, execute the “git add .” command and then commit changes. This post briefly explained the “Changes not staged for commit” message in Git.


