Multi-Factor Authentication (MFA) is used to add another security layer to the IAM accounts/identities. AWS allows users to add MFA to their accounts to protect their resources even more. AWS CLI is another method to manage AWS resources that can also be protected through MFA.
This guide will explain how to use MFA with AWS CLI.
How to Use MFA with AWS CLI?
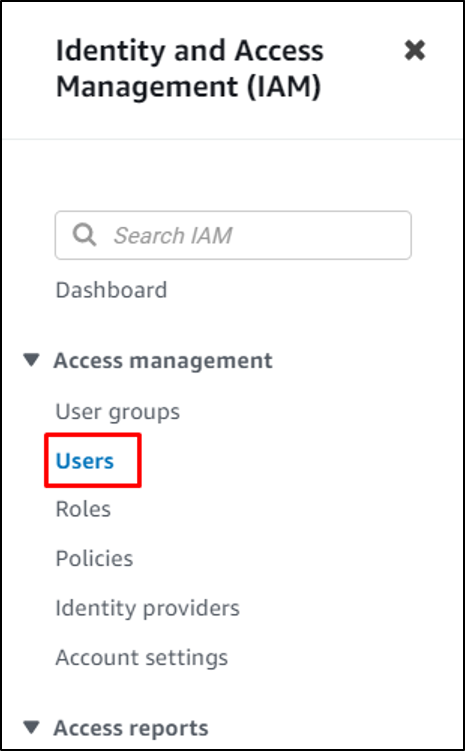
Visit the Identity and Access Management (IAM) from the AWS console and click on the “Users” page:
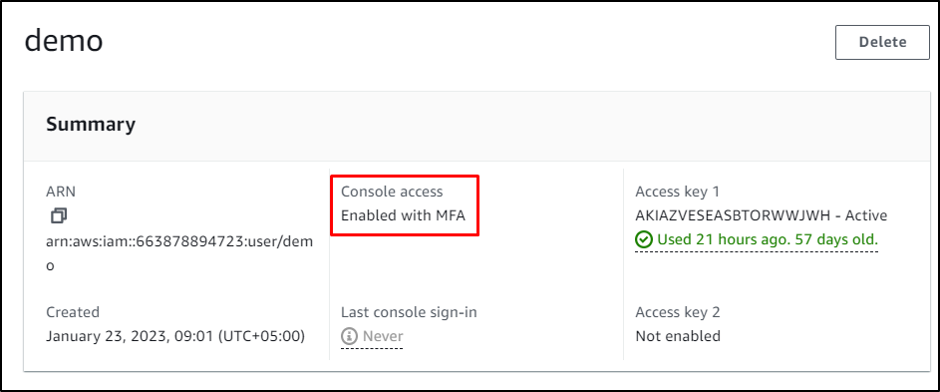
Select the profile by clicking on its name:
It is required to have a profile enabled with MFA:
Visit the Terminal from your local system and configure the AWS CLI:
Use the AWS CLI command to confirm configuration:
Running the above command displayed the S3 bucket name showing that the configuration is correct:
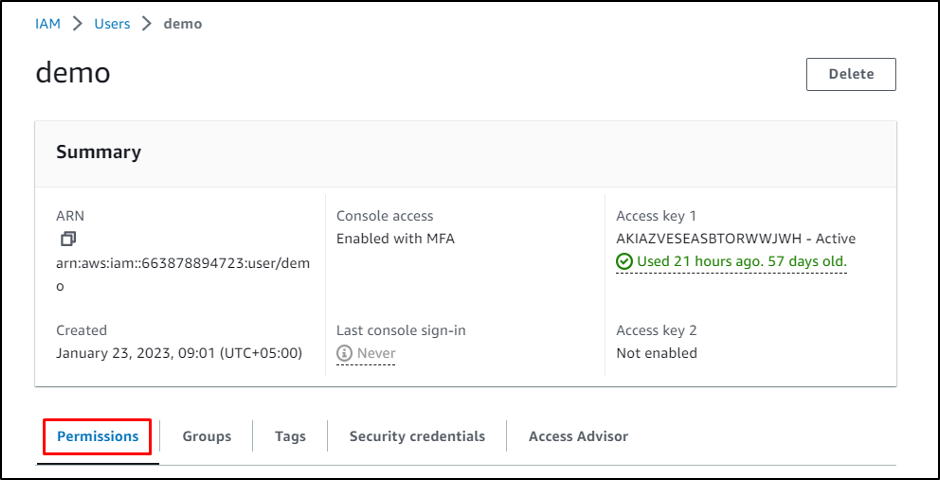
Head back to the IAM Users page and click on the “Permissions” section:
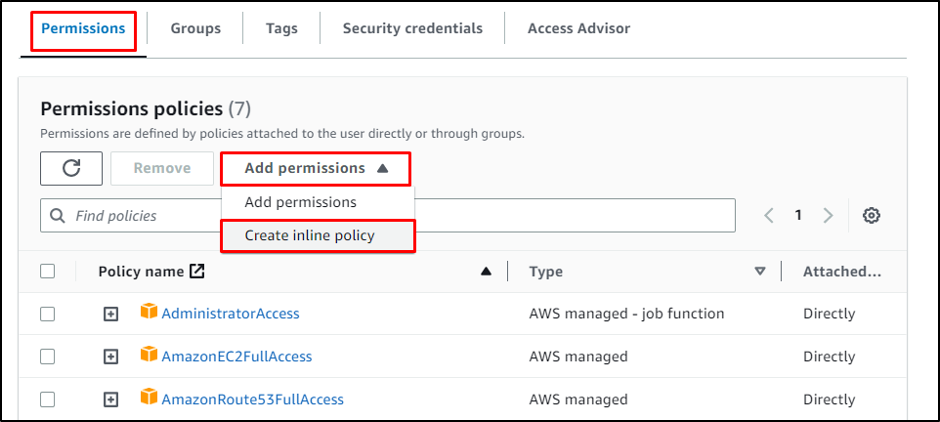
In the permissions section, expand the “Add permissions” menu and click on the “Create inline policy” button:
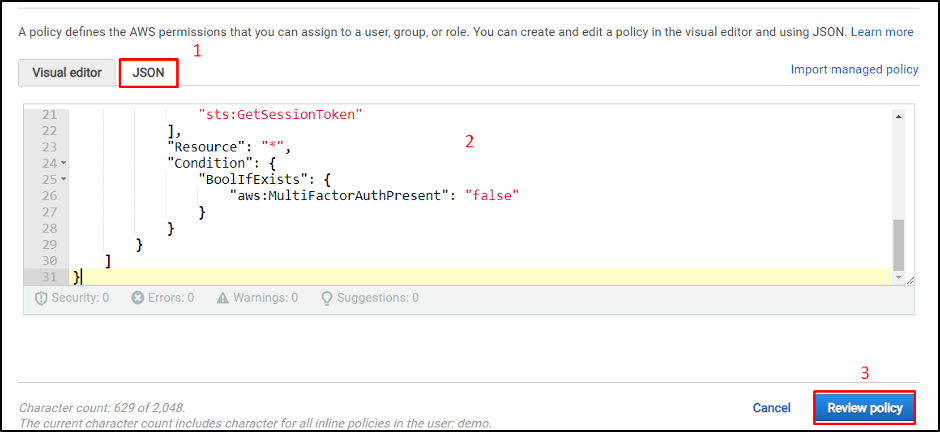
Paste the following code on the JSON section:
"Version": "2012-10-17",
"Statement": [
{
"Sid": "MustBeSignedInWithMFA",
"Effect": "Deny",
"NotAction": [
"iam:CreateVirtualMFADevice",
"iam:DeleteVirtualMFADevice",
"iam:ListVirtualMFADevices",
"iam:EnableMFADevice",
"iam:ResyncMFADevice",
"iam:ListAccountAliases",
"iam:ListUsers",
"iam:ListSSHPublicKeys",
"iam:ListAccessKeys",
"iam:ListServiceSpecificCredentials",
"iam:ListMFADevices",
"iam:GetAccountSummary",
"sts:GetSessionToken"
],
"Resource": "*",
"Condition": {
"BoolIfExists": {
"aws:MultiFactorAuthPresent": "false"
}
}
}
]
}
Select the JSON tab and paste the above code inside the editor. Click on the “Review policy” button:
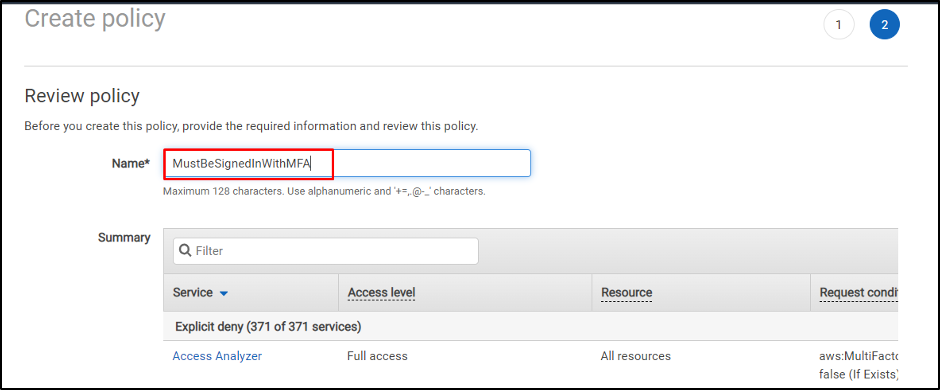
Type the name of the policy:
Scroll down to the bottom of the page and click on the “Create policy” button:
Head back to the terminal and check again the AWS CLI command:
Now the execution of the command displays the “AccessDenied” error:
Copy the ARN from the “Users” MFA account:
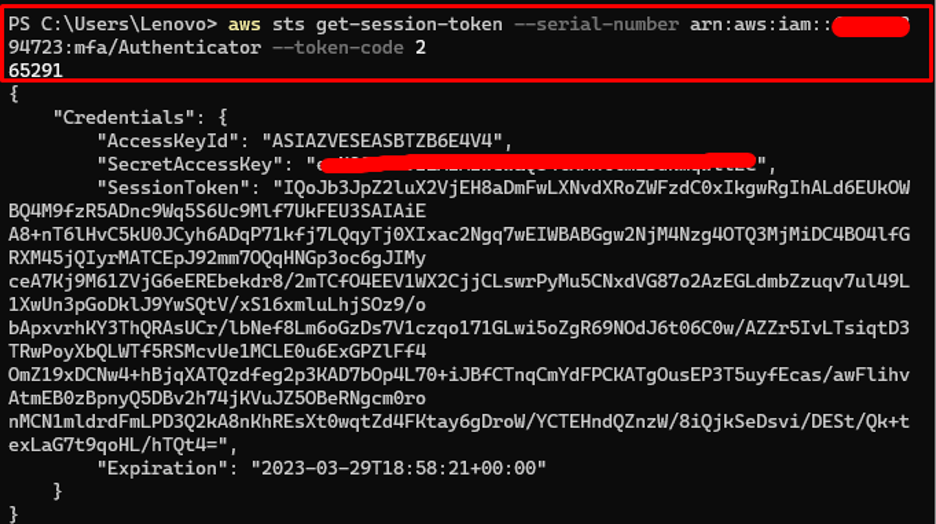
The following is the syntax of the command to get the credentials for the MFA account:
Change the “arn-of-the-mfa-device” with the Identifier copied from the AWS IAM dashboard and change “code-from-token” with the code from the MFA application:
Copy the provided credentials on any editor to be used in the credentials file later:
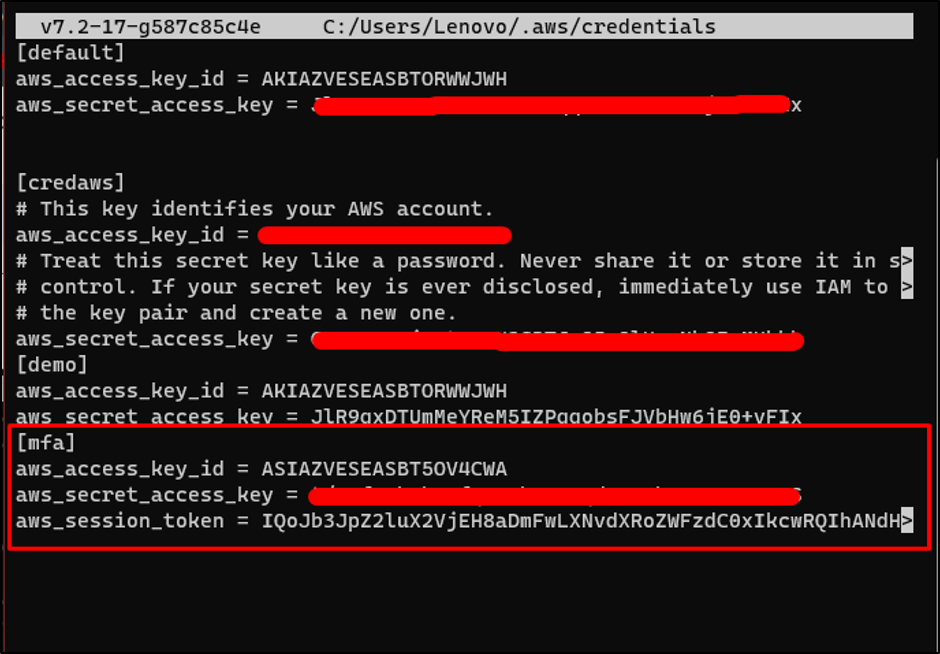
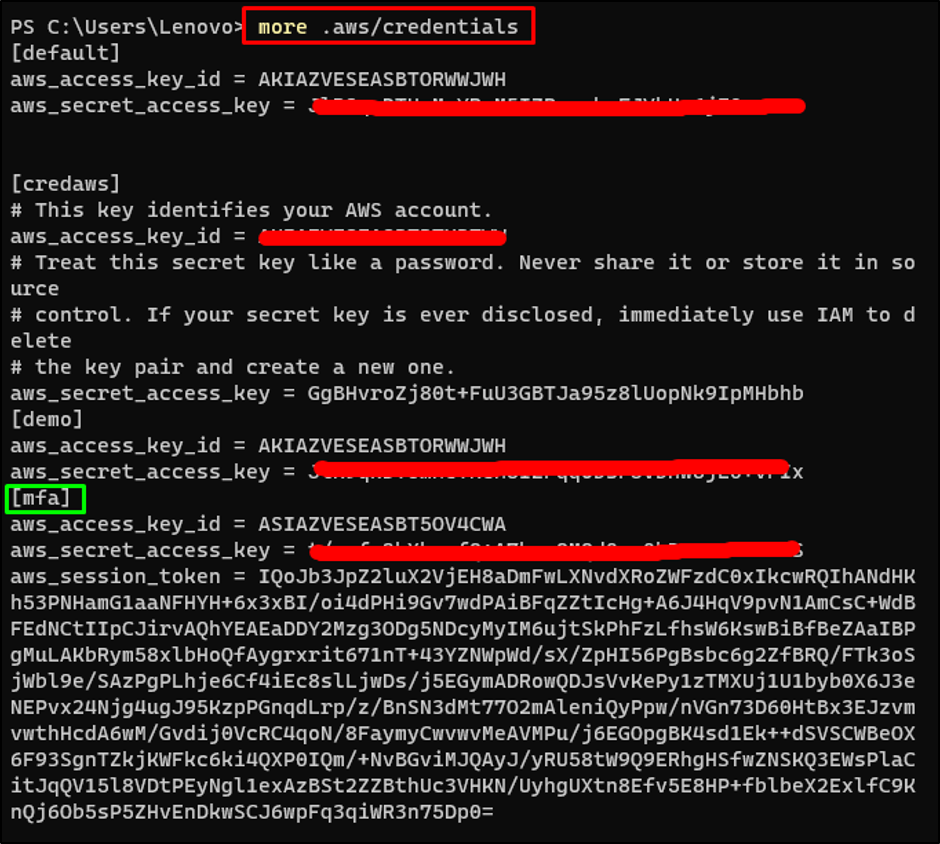
Use the following command to edit the AWS Credentials file:
Add the following code to the credentials file:
aws_access_key_id = AccessKey
aws_secret_access_key = SecretKey
aws_session_token = SessionToken
Change the AccessKey, SecretKey, and SessionToken with the “AccessKeyId”, “SecretAccessId”, and “SessionToken” provided in the previous step:
aws_access_key_id = AccessKey
aws_secret_access_key = t/SecretKey
aws_session_token = IQoJb3JpZ2luX2VjEH8aDmFwLXNvdXRoZWFzdC0xIkcwRQIhANdHKh53PNHamG1aaNFHYH+6x3xBI/oi4dPHi9Gv7wdPAiBFqZZtIcHg+A6J4HqV9pvN1AmCsC+WdBFEdNCtIIpCJirvAQhYEAEaDDY2Mzg3ODg5NDcyMyIM6ujtSkPhFzLfhsW6KswBiBfBeZAaIBPgMuLAKbRym58xlbHoQfAygrxrit671nT+43YZNWpWd/sX/ZpHI56PgBsbc6g2ZfBRQ/FTk3oSjWbl9e/SAzPgPLhje6Cf4iEc8slLjwDs/j5EGymADRowQDJsVvKePy1zTMXUj1U1byb0X6J3eNEPvx24Njg4ugJ95KzpPGnqdLrp/z/BnSN3dMt77O2mAleniQyPpw/nVGn73D60HtBx3EJzvmvwthHcdA6wM/Gvdij0VcRC4qoN/8FaymyCwvwvMeAVMPu/j6EGOpgBK4sd1Ek++dSVSCWBeOX6F93SgnTZkjKWFkc6ki4QXP0IQm/+NvBGviMJQAyJ/yRU58tW9Q9ERhgHSfwZNSKQ3EWsPlaCitJqQV15l8VDtPEyNgl1exAzBSt2ZZBthUc3VHKN/UyhgUXtn8Efv5E8HP+fblbeX2ExlfC9KnQj6Ob5sP5ZHvEnDkwSCJ6wpFq3qiWR3n75Dp0=
Check the added credentials using the following command:
Use the AWS CLI command with the “mfa” profile:
Successfully running the above command suggests that the MFA profile has been added successfully:
This is all about using MFA with AWS CLI.
Conclusion
To use MFA with AWS CLI, assign MFA to the IAM user and then configure it on the terminal. After that, add an inline policy to the user so it can only use certain commands through that profile. Once that is done, get MFA credentials and then update them on the AWS credentials file. Again, use AWS CLI commands with an MFA profile to manage AWS resources. This guide has explained how to use MFA with AWS CLI.

