This write-up will explain the method to set aliases in Git Bash on Windows.
How to Set Aliases in Git Bash?
In Git, there are two possible ways to set aliases, such as:
How to Set Aliases Using Command Line?
To set aliases in Git Bash, the “git config –global alias.<alias-name> <git-command>” command is used. Check out the following examples for a better understanding.
Example 1: Set Alias for “git status” Command
Utilize the below-listed command to set an alias for the “git status” command:
Here, “s” is the shortcut for “status”:

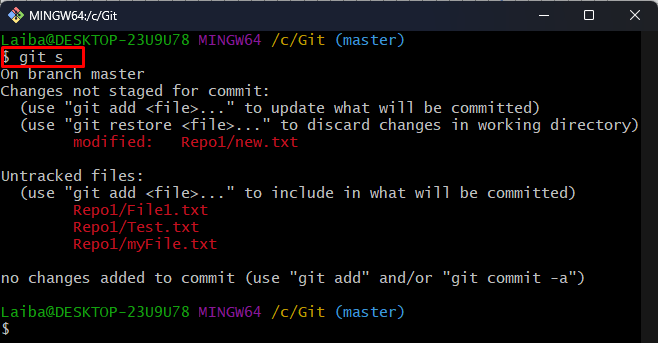
Now, view the Git status using the “git s” command instead of “git status” to ensure whether the alias “s” works or not:
The below output shows the Git status which indicates that the alias has been set successfully:
Example 2: Set Alias for “git add” Command
To set an alias for the “git add” command, run the provided command:
Here, “a” is the shortcut for “add”:

Run the “git a .” command instead of the “git add .” command to verify the alias:
The above-listed command has added the untracked files to the Git index:

Example 3: Set Alias for “git commit” Command
Write out the below-stated command and set the desired alias for “git commit” command:
Here, “c” is the alias for “commit”:

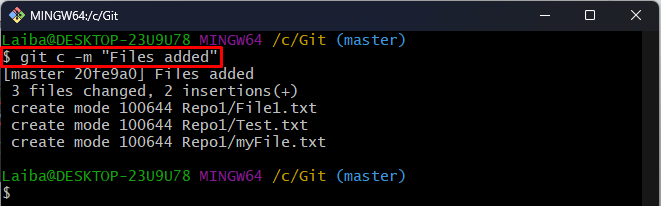
Now, verify the alias by performing the commit operation using the following command:
It can be seen that the files have been committed successfully:
How to Set Aliases Manually?
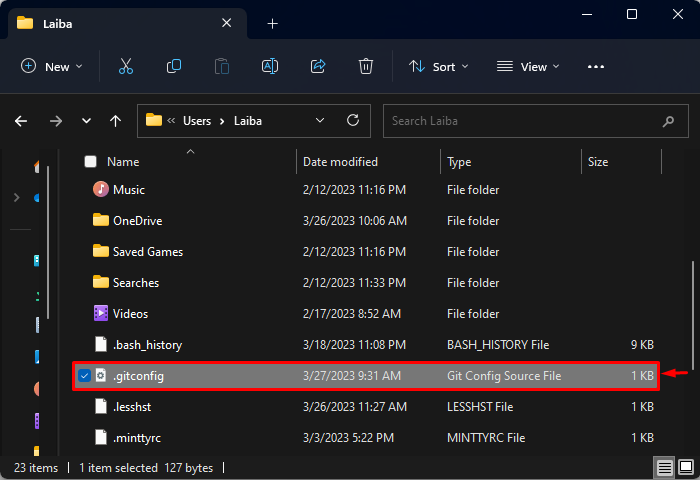
To set the aliases manually, first, move to the “C:\Users\<user-name>” path on your PC. Then, look for the “.gitconfig” file and open it. After that, set the desired aliases in that file.
Step 1: Navigate to Desired Path
First, redirect to the following path on your PC:
Note: This is the general path and works for every Windows system:
Step 2: Open “.gitconfig” File
Now, look for the “.gitconfig” file and open it:
Step 3: Set Aliases in File
Finally, set the desired aliases of the Git commands in the “git config” file:
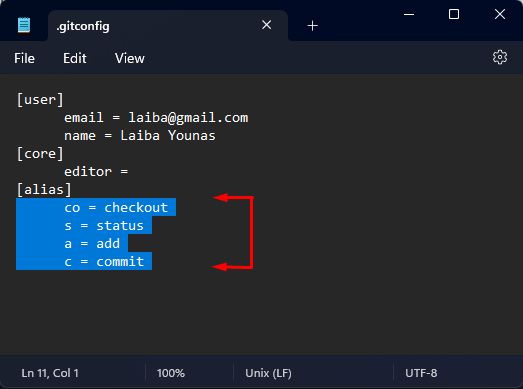
The above output shows the aliases that we have set.
Conclusion
There are two ways to set aliases in Git Bash, such as setting aliases using the command line or setting them manually. To set aliases using the command line, the “git config –global alias.<alias-name> <git-command>” command is used. To set the aliases manually, first, navigate to the “C:\Users\<user-name>” path on your PC and look for the “.gitconfig” file. Next, open the file and set the desired alias in it. This write-up explained the method to set aliases in Git Bash on Windows.