This guide will provide the procedure for removing records from the table with MySQL Workbench using the “TRUNCATE” command.
How to TRUNCATE Table with MySQL Workbench?
Follow the provided steps to remove all rows from the table:
- Open the MySQL Workbench.
- Select and move to the MySQL connection.
- Create a new SQL file.
- Change MySQL database
- Create a new table in the database by utilizing the “CREATE TABLES” command.
- Add records in the table by running the “INSERT INTO <table>” command.
- View table content.
- Execute the “TRUNCATE TABLE <table-name>” command to remove all records.
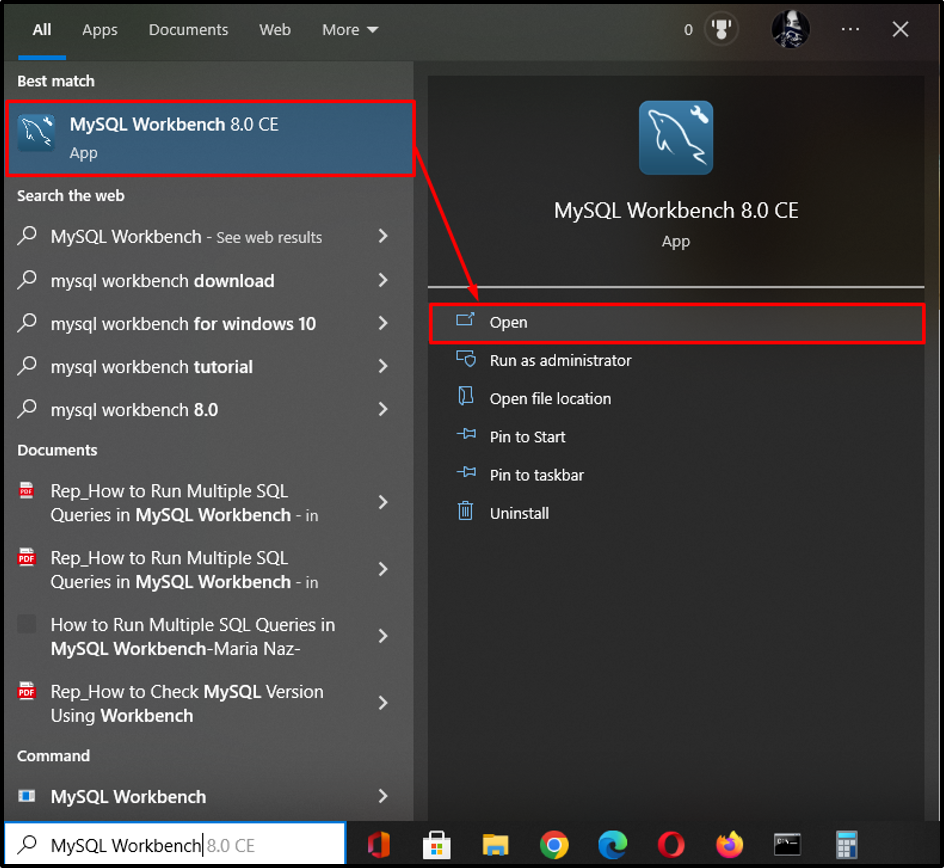
Step 1: Open MySQL Workbench
Initially, search and launch the “MySQL Workbench” through the Startup menu:
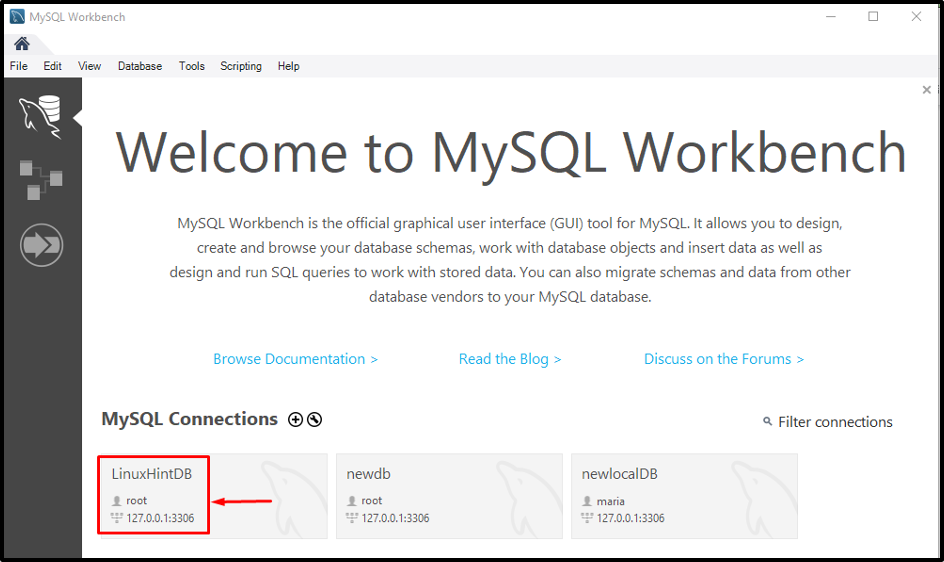
Step 2: Open MySQL Connection
Click on the desired MySQL connection and open it:
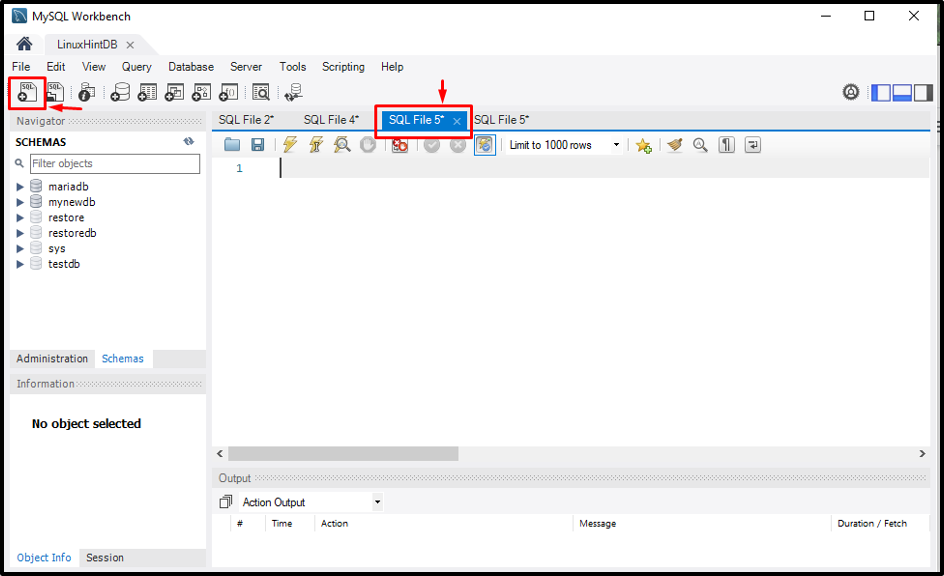
Step 3: Create New SQL File
Next, create a new file by hitting the below-highlighted file button:
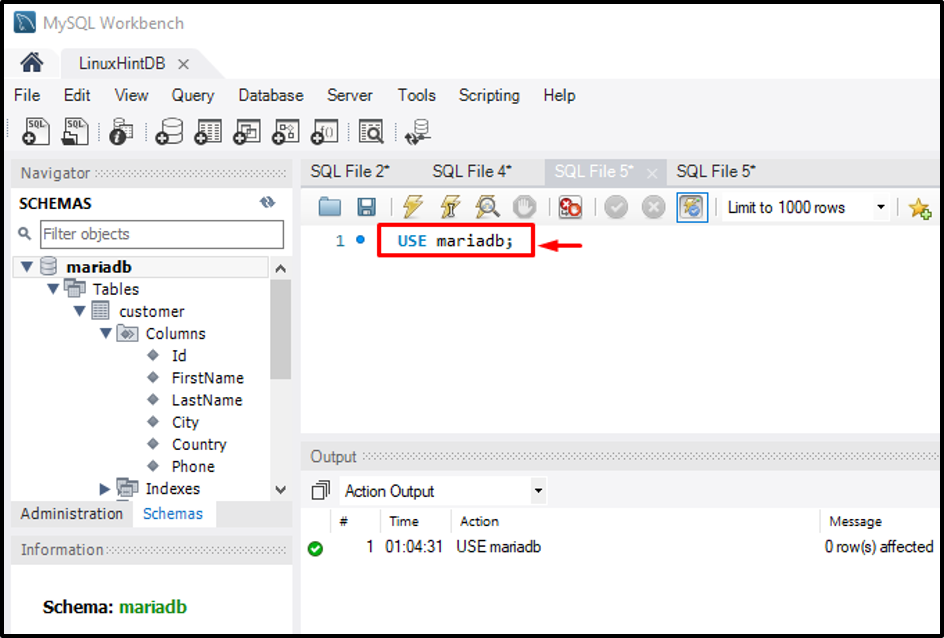
Step 4: Change MySQL Database
Now, run the provided statement to change the database:
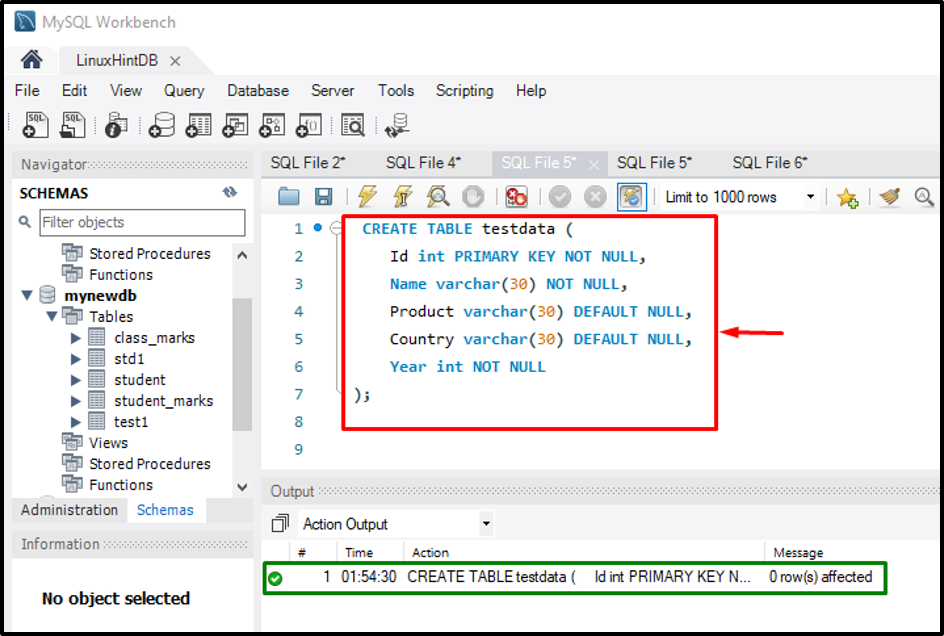
Step 5: Create New Table
Execute the “CREATE” statement with the “TABLE” option, table name, and column names in the “mynewdb” database:
Id INT PRIMARY KEY NOT NULL,
Name VARCHAR(30) NOT NULL,
Product VARCHAR(30) DEFAULT NULL,
Country VARCHAR(30) DEFAULT NULL,
YEAR INT NOT NULL
);
Here, we have created a table by specifying the column’s name as “Id”, “Name”, “Product”, “Country”, “Year” with their suitable data type and “NOT”.
In the above-stated command:
- “CREATE” statement is used for creating a new table in the database.
- “TABLE” is MySQL’s default option.
- “testdata” is the table name.
From the provided screenshot, highlighted output shows that the statement is executed successfully:
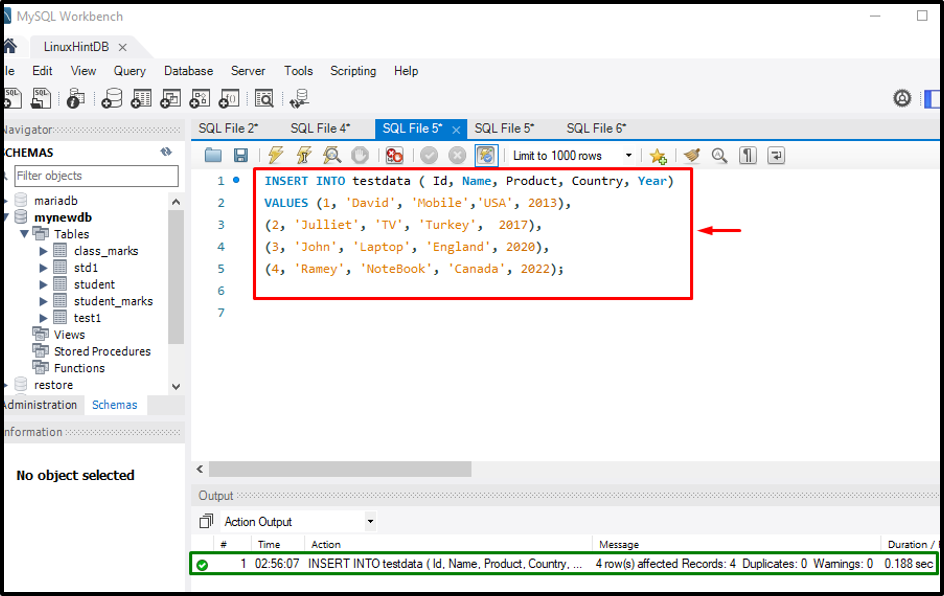
Step 6: Add Records in Table
The “INSERT” command can be used with the “INTO” keyword, table name, and required data:
VALUES (1, 'David', 'Mobile','USA', 2013),
(2, 'Julliet', 'TV', 'Turkey', 2017),
(3, 'John', 'Laptop', 'England', 2020),
(4, 'Ramey', 'NoteBook', 'Canada', 2022);
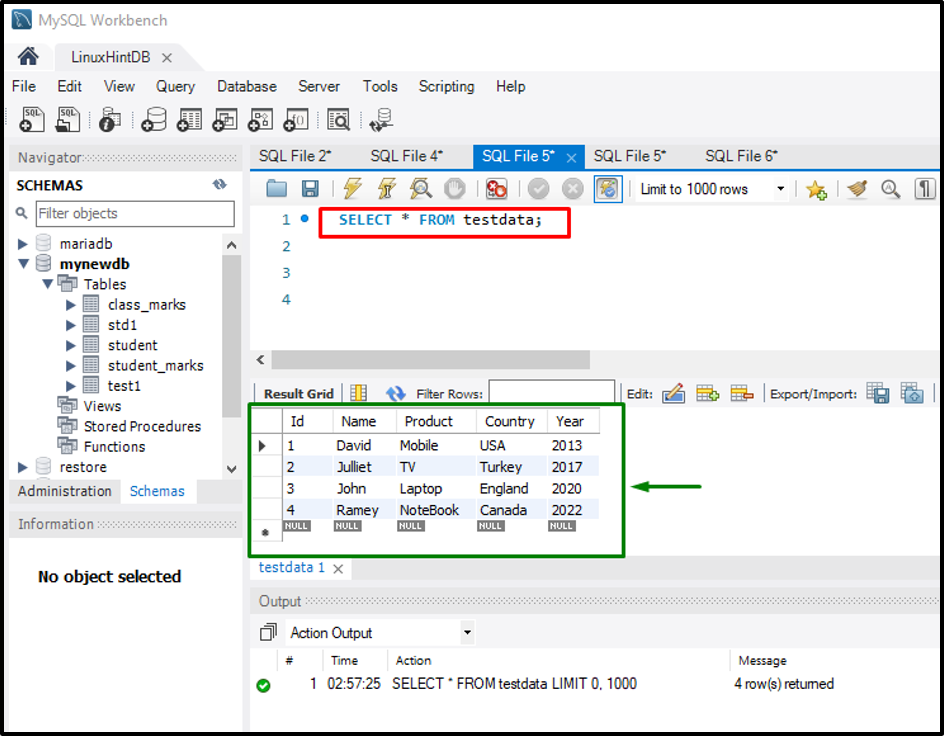
Step 7: View Table Content
Run the “SELECT
” statement with the “*” and table name to view the table content:
The below-given output shows that the specified records have been inserted in the table fields:
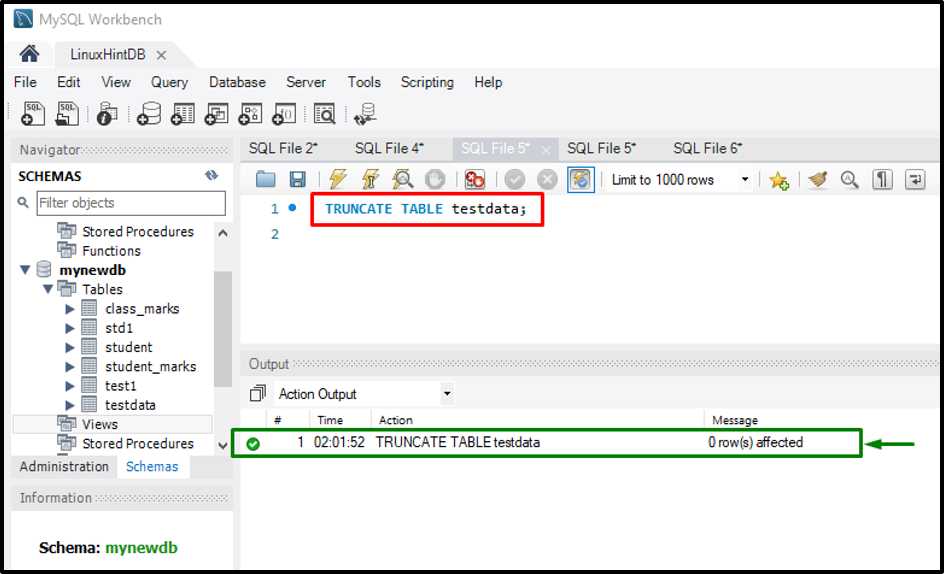
Step 8: TRUNCATE Table
To remove all records from the table, run the “TRUNCATE TABLE <tablename>” command:
Step 9: Verify TRUNCATE Operation
Use the “SELECT * FROM” statement with the table name to display the table content:
It can be observed that all records from the “testdata” table are removed successfully:

That’s it! We have compiled the easiest way to TRUNCATE tables with MySQL Workbench.
Conclusion
The “TRUNCATE” statement is used without the “WHERE” clause that removes the rows from a table and the “TRUNCATE TABLE <tablename>;” command can be executed. This guide explained the method of removing records from tables with MySQL Workbench using the TRUNCATE command.