This blog will provide the method for checking query time in MySQL.
How to Check Query Time in MySQL?
To check query time in MySQL, first, open and connect the Windows terminal with the MySQL server. Then, view all and change the database. Next, set the “profiling” value to “1”. After that, show tables and display their content. Lastly, run the “SHOW PROFILES;” command to list all executed queries time.
Step 1: Access MySQL Server
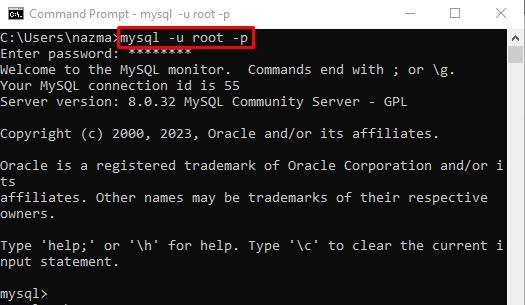
First, open the Windows terminal and run the “mysql” command:
According to provided output, the terminal is connected with the MySQL server successfully:
Step 2: Display Database
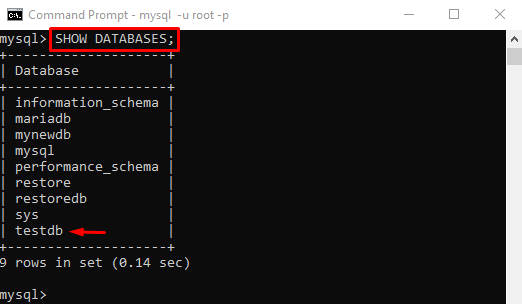
Then, view all the available databases by executing the “SHOW” command with the “DATABASES” option:
From the given output, selected “testdb” database is selected for further process:
Step 3: Set Profile Value
Now, assign the value to the “profiling” variable by running the “SET” command:
Step 4: Change Database
To change the database, execute the “USE” command:
Step 5: Display Tables
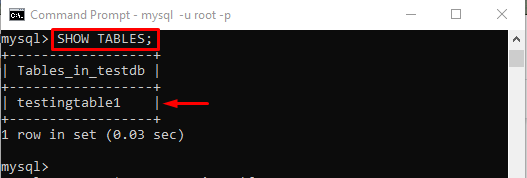
Next, run the following query to list all the existing tables:
According to the below-given output, the current database contains a single table named “testingtable1”:
Step 6: Show Table Content
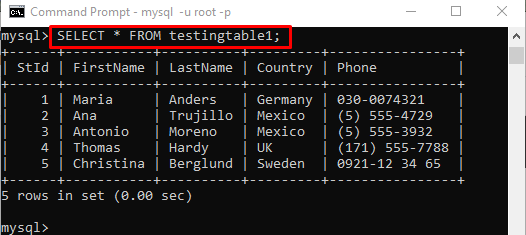
Execute the “SELECT” command to view the table records:
Step 7: Check Query Time
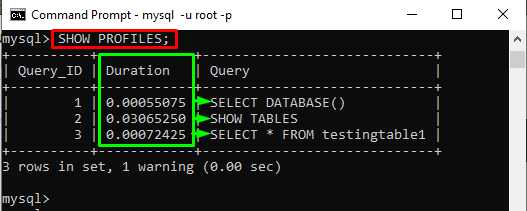
Finally, check all the above-executed queries time, use the “SHOW” command with the “PROFILES” option:
In the above-stated command, the “PROFILES” option is used to show detailed information about each statement:
It can be observed that the previously used queries are displayed in the table with their executed time duration.
Conclusion
To check query time in MySQL, first, open and connect the Windows terminal with the MySQL server. Then, view all and change the database. After that, show tables and display their content. Next, set the “profiling” value to “1” and perform different queries. Finally, execute the “SHOW PROFILES;” command to list all executed queries’ time duration. This blog illustrated the method for checking query time in MySQL.

