VirtualBox is virtualization software which can run different operating systems on a single host machine. With the help of VirtualBox, you can create virtual machines (VMs) and install different operating systems, such as Windows, Linux, and macOS.
However, running a guest operating system on a virtual machine without Guest Additions can be a challenging experience. That’s where VirtualBox Guest Additions come in. In this article, we will guide you on how to install VirtualBox Guest Additions for Linux.
Content for this article includes:
- A: What are VirtualBox Guest Additions?
- B: Install VirtualBox Guest Additions on Linux
- 1: On Ubuntu and Debian
- 2: On Arch-Based Distros
- 3: On Fedora, CentOS, and RHEL
- C: How to Uninstall VirtualBox Guest Additions on Linux
- 1: Uninstall VirtualBox on Ubuntu and Debian
- 2: Uninstall VirtualBox on Arch Linux and Manjaro
- 3: Uninstall VirtualBox on Fedora and Other RPM-Based Distros
What are VirtualBox Guest Additions
VirtualBox Guest Additions are a set of drivers and applications that improve the performance and functionality of a virtual machine. Guest Additions are designed to optimize mouse integration, display resolution, shared clipboard, and other essential features that are required to run a guest operating system smoothly.
How to Install VirtualBox Guest Additions on Linux
To install VirtualBox Guest Additions for Linux, follow these steps:
1: On Ubuntu and Debian
Installing Guest Additions on Ubuntu and Debian in VirtualBox is a simple process that involves mounting the Guest Additions ISO image, running the installation script, and restarting the virtual machine.
Mount VirtualBox Guest Additions ISO Image
To install VirtualBox Guest Additions on Linux, you first need to download the ISO image containing the software. Open VirtualBox and start the virtual machine with the guest operating system you want to install VirtualBox Guest Additions on.
In the VirtualBox menu, go to Devices > Insert Guest Additions CD Image. By doing this step we can mount Guest Additions ISO image as a CD/DVD drive inside the guest operating system.

How to Install VirtualBox Guest Additions for Linux
After you have mounted the VirtualBox Guest Additions ISO image, you can proceed with the installation of the software. Follow the steps below to install VirtualBox Guest Additions on Linux:
Open a terminal window and update the existing packages first.
 Now install the prerequisite packages for virtual box using the command:

Now the Guest Addition Iso file is loaded in the system but not installed. Now this can be installed using the GUI or terminal.
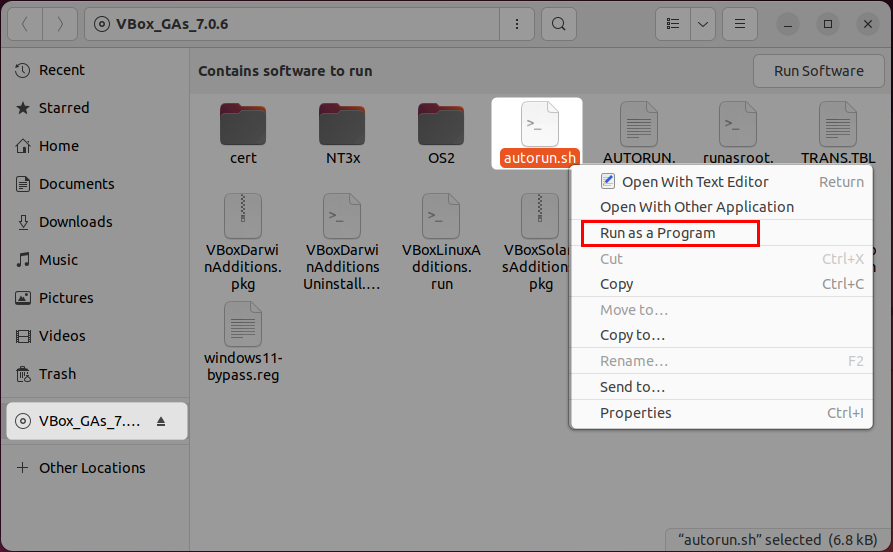
To install it from GUI desktop, open the CD mount directory and select the autorun.sh file. Select and run this file as a program. This will install Virtual box guest addition in the system.
Second method is using the terminal window.
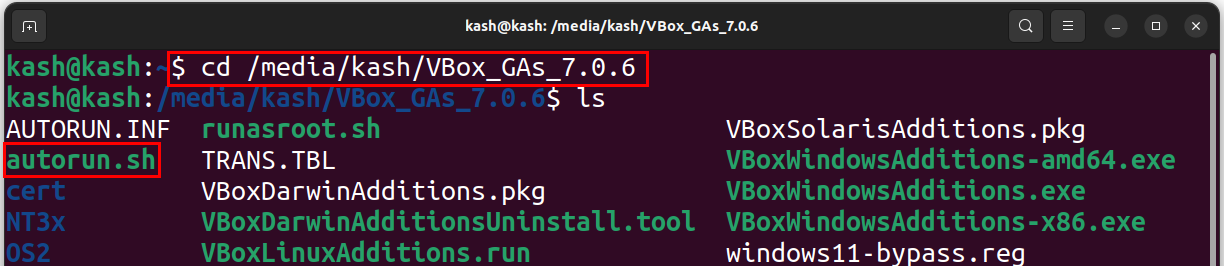
Navigate to the directory where the VirtualBox Guest Additions ISO image is mounted using the command:
After opening the directory list all files present there using ls command:
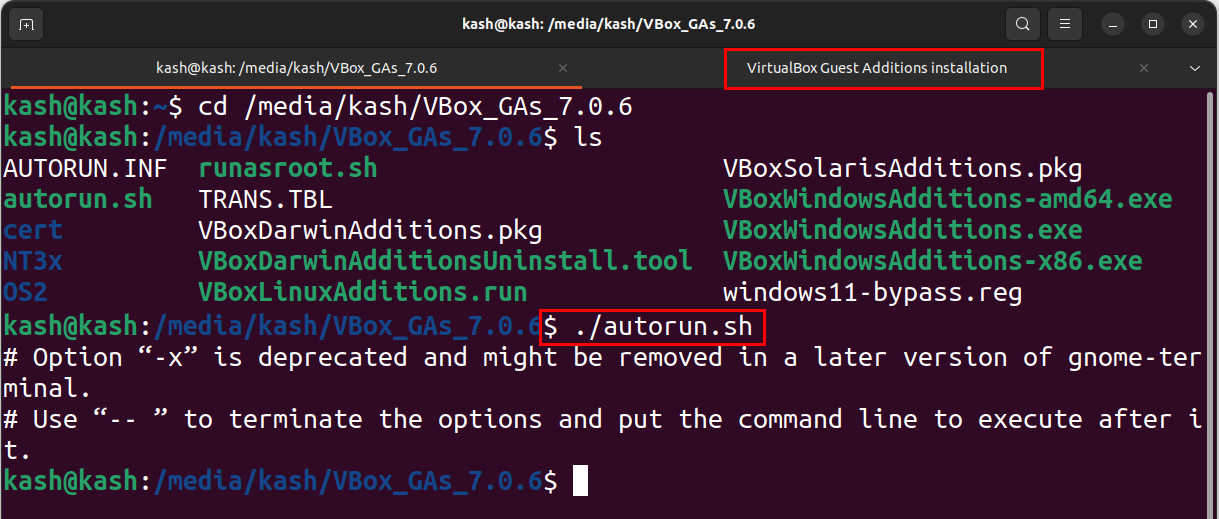
Use the below command to run the auto installer file:
This will begin installation of Guest Additions in the new Terminal window:
Or run below mentioned command to start the installation:
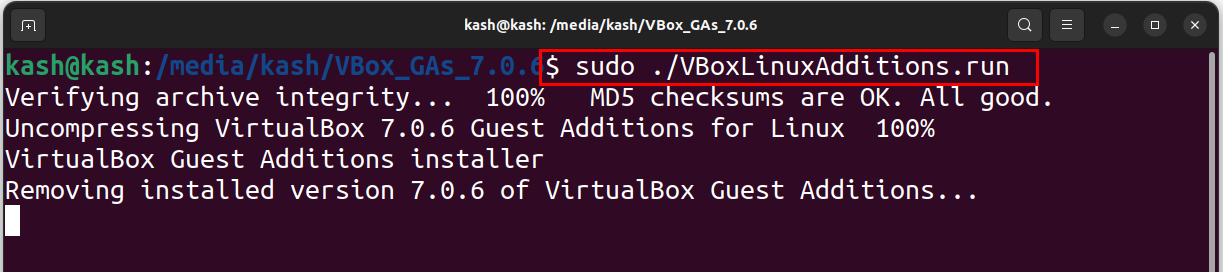
After you have installed VirtualBox Guest Additions on Linux, you should test if it was installed correctly. Run the following command:

2: On Arch-Based Distros
Compared to other Linux distributions, the process of installing VirtualBox Guest Additions on Arch and Manjaro is simple. This is because these two distributions offer the convenience of installing the VirtualBox-guest-utils package directly from the official Arch repository, eliminating the need for a manual installation using a disk.
The Arch-based Linux distributions come pre-installed with the Guest Additions package for virtual machines. However, if your distribution does not have this support, you can begin by updating the package sources on your system using the command:
Now install VirtualBox-guest-utils package using the command:
Finish the setup by rebooting the system.
3: On Fedora, CentOS, and RHEL
The VirtualBox Guest Additions is by default present on the Fedora system. Using this we can adjust the resolution and size of the VirtualBox window. It also enables the clipboard synchronizing between both host and virtual machine.
Fedora on VirtualBox has Guest Additions preinstalled, enabling you to scale VM resolution, share clipboard with the host, and share files via drag-and-drop.
But in case of other RPM-based distributions, mount and install the Guest Additions CD image manually as we did with the Ubuntu and Debian based system.
Or, open the folder and click “Run Software”. Enter the administrator password to complete installation. Once installed press Enter to exit.
How to Uninstall VirtualBox Guest Additions on Linux
Removing VirtualBox Guest Additions is easy and harmless, but if you’re unsure if they’re gone, resize the VM window and try copying text to see if it works. If it doesn’t, Guest Additions have been removed.
1: Uninstall VirtualBox on Ubuntu and Debian
On Ubuntu and Debian systems first change the directory to /opt/VBoxGuestAdditions-[version]. In case you have no idea of version then write command till “Additions” and press tab it will automatically get completed:

Then uninstall using the following script:
Restart system to save changes.
2: Uninstall VirtualBox on Arch Linux and Manjaro
To uninstall VirtualBox Guest Additions on Arch Linux systems like Manjaro use the Pacman command to remove the virtualbox-guest-utils:
3: Uninstall VirtualBox on Fedora and Other RPM-Based Distros
To uninstall Guest Additions on Fedora run following command:
In case of manual installation of Guest Additions, open its directory and run uninstallation script. Remember to change the directory by typing cd command:
Hit Tab key on keyboard if you have no idea about the version of Guest Addition.
After that run following script:
At last restart the system to verify and save changes.
Conclusion
Installing VirtualBox Guest Additions for Linux involves mounting the Guest Additions ISO file and running the installation script. This will provide additional functionality and performance improvements to the virtual machine. This article covers all steps needed to mount and install the VirtualBox Guest Addition in all main Linux systems.