This blog will overview a complete procedure to run the PowerShell and the relevant script in Command Prompt.
How to Run PowerShell in CMD?
PowerShell can easily be launched in CMD by following the given steps.
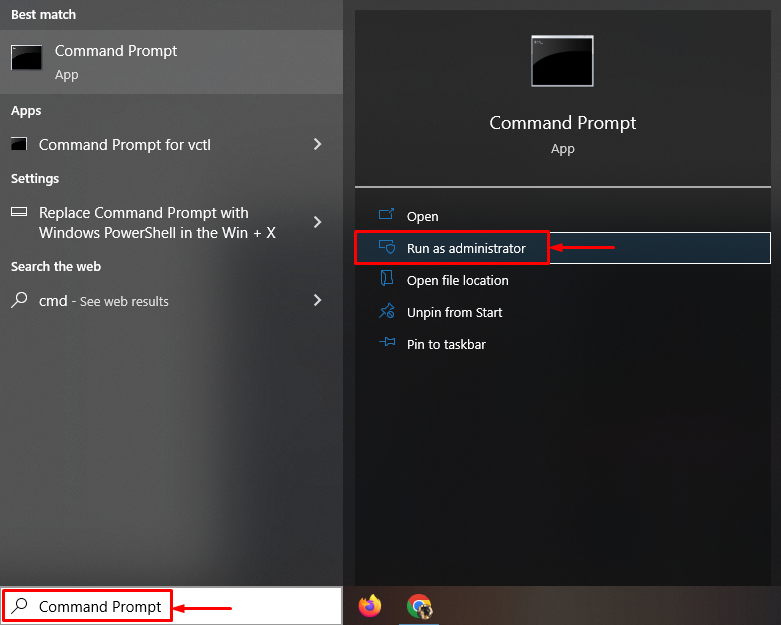
Step 1: Launch CMD
First, navigate to the Start menu and launch “Command Prompt”:

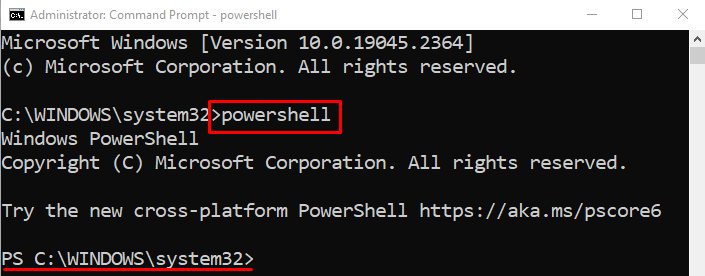
Step 2: Run PowerShell in CMD
Execute the given “powershell” cmdlet to run the PowerShell in CMD:
The “PowerShell” is executed/run successfully in CMD.
How to Run the PowerShell Script in CMD?
After running the “PowerShell” in CMD, let’s test the working of the PowerShell. For that reason, follow the given steps.
Step 1: Enable Remote Signed Execution
In order to run the “PowerShell” script in CMD, the “RemoteSigned” execution policy needs to be enabled. For that reason, execute the given command:
The RemoteSigned policy is used to run the scripts created locally. However, the scripts downloaded from the internet can also be executed, but they need to be digitally signed by the publisher:
Step 2: Execute the PowerShell Script
Now, let’s execute the PowerShell script. To do so, write the “Invocation Operator &” at the start, and specify the script path within inverted commas:
As you can see from the output, the PowerShell script has been executed successfully in CMD.
Conclusion
To run the PowerShell in CMD, first, launch “Command Prompt” and execute the “PowerShell” command. In order to check the working of the PowerShell in CMD, first, enable the execution of the commands/scripts. For that reason, execute the “Set-ExecutionPolicy RemoteSigned” cmdlet and run the relevant script. This tutorial has demonstrated a complete procedure to run PowerShell in CMD.


