Let’s start with the process of running the Ventura OS in the EC2.
Creating a Dedicated Host to run Ventura
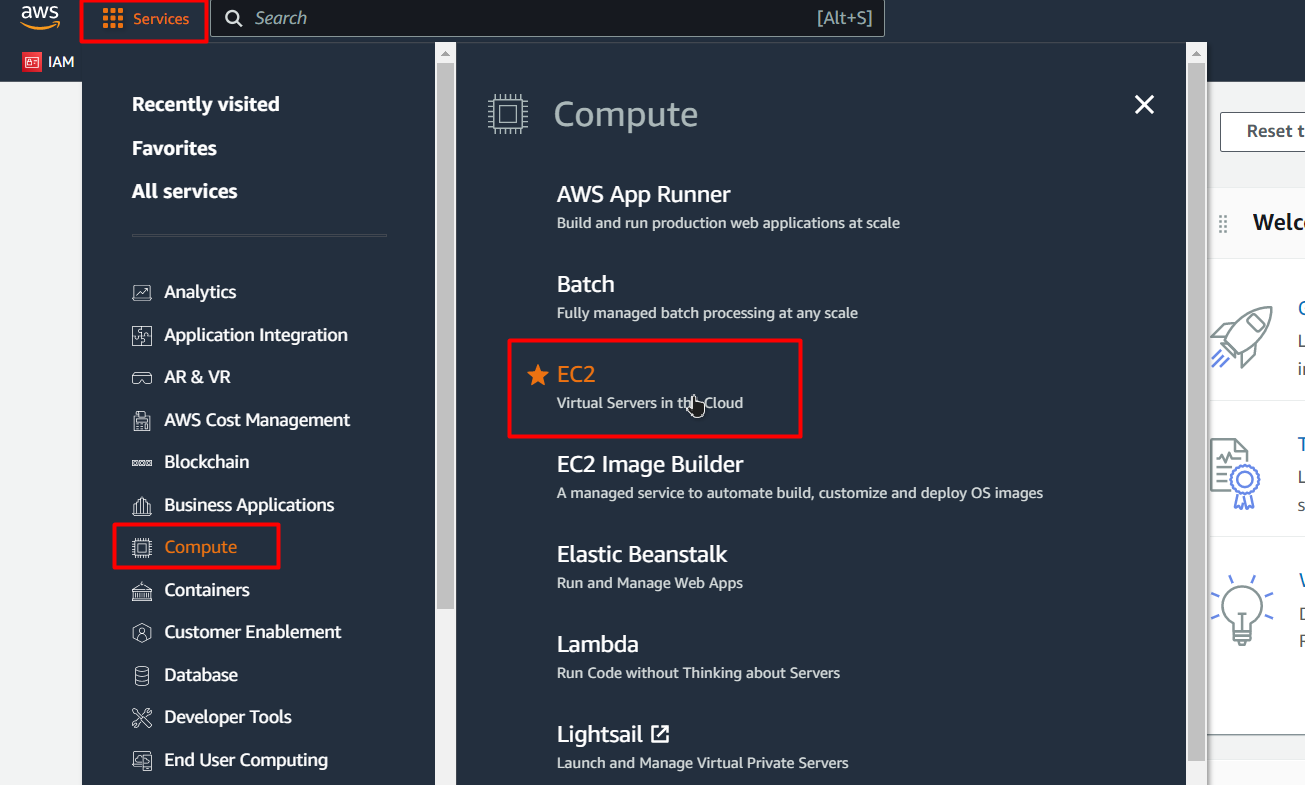
The first step to host Ventura in an EC2 instance is to create a dedicated host in AWS. For that, head inside the EC2 dashboard from the AWS console by clicking on services, choosing “compute,” and then EC2:
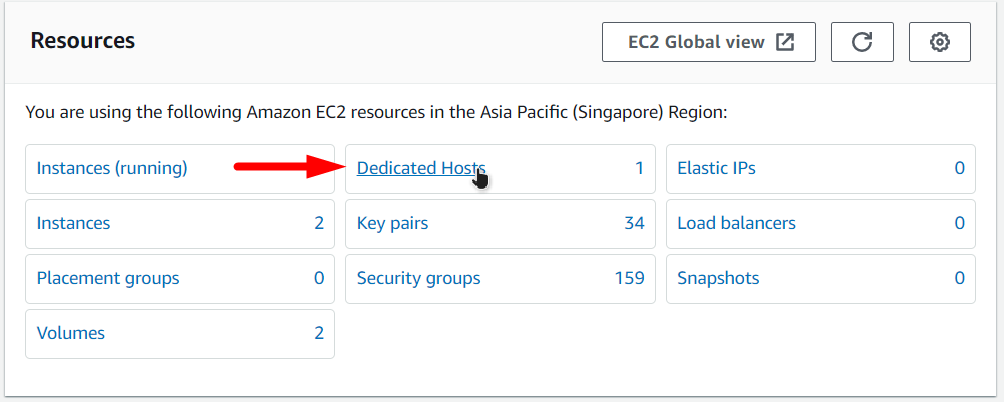
After that, you will be brought to the EC2 dashboard, from the dashboard, click on the button that says “Dedicated Host,” as this will take you to the Dedicated Hosts dashboard:
From the Dedicated Host dashboard, click on the button that says “Allocate Dedicated Host”:
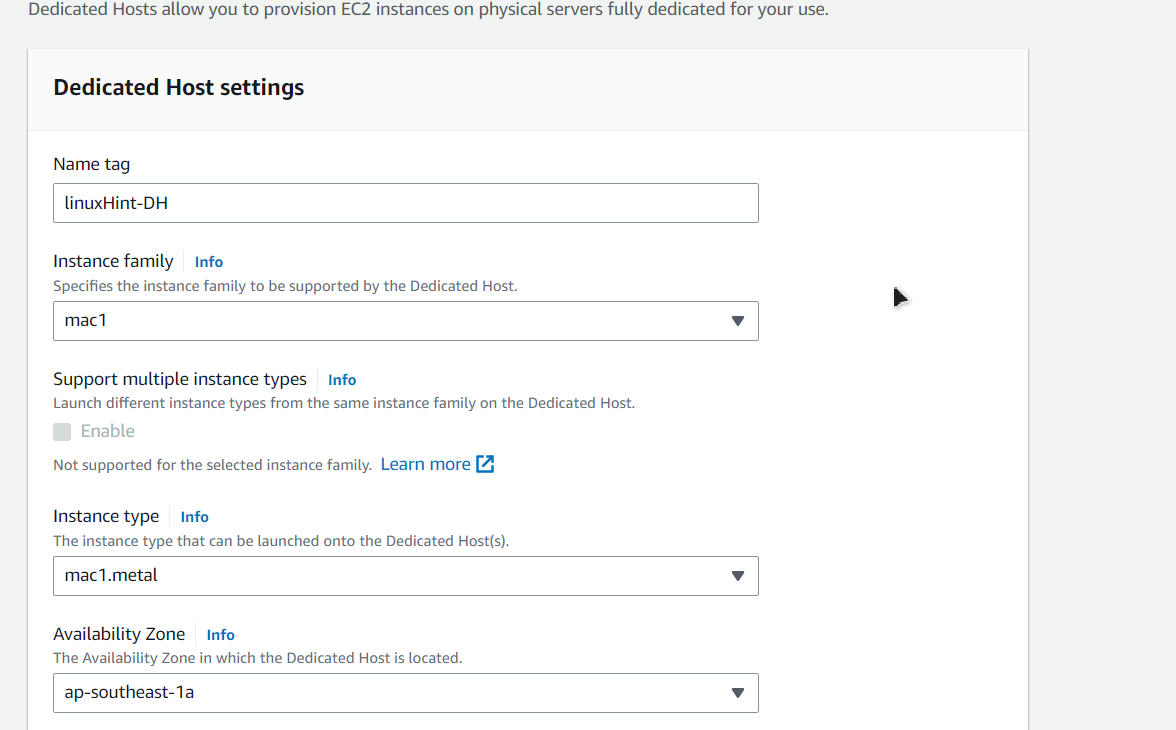
This will take you to the dedicated host creation page, and on this page, you will see a from, and in the form, do the following things:
- Give your Dedicated Host a name
- Chose Instance Family as “mac1”
- Choose Instance Type to mac1.metal
- And choose the availability zone to what your prefer
After, make sure to enable the “Instance Auto-placement” and choose host-recovery if you want that:
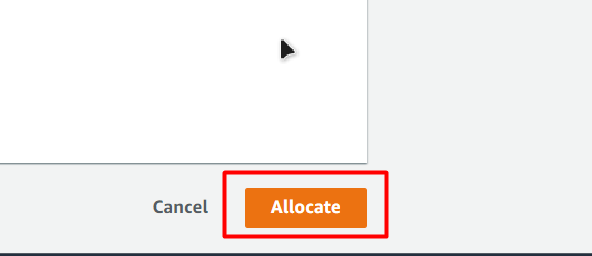
Once that is done, click on the “Allocate” button at the bottom of the page:
After that, you will be taken back to the dedicated host’s dashboard, where you will see your newly created dedicated Host:
Launching Ventura EC2 on the Dedicated Host
Start by heading inside the EC2 dashboard and then head inside the “Instances” section from the side navigation, and then click on the button that says “Launch Instance”:
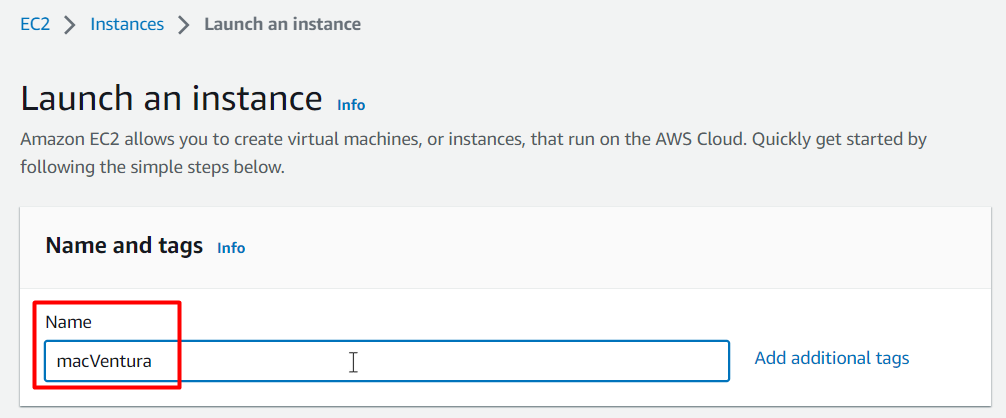
Doing this will take you to the EC2 creation wizard. On this wizard, give your EC2 machine a name:
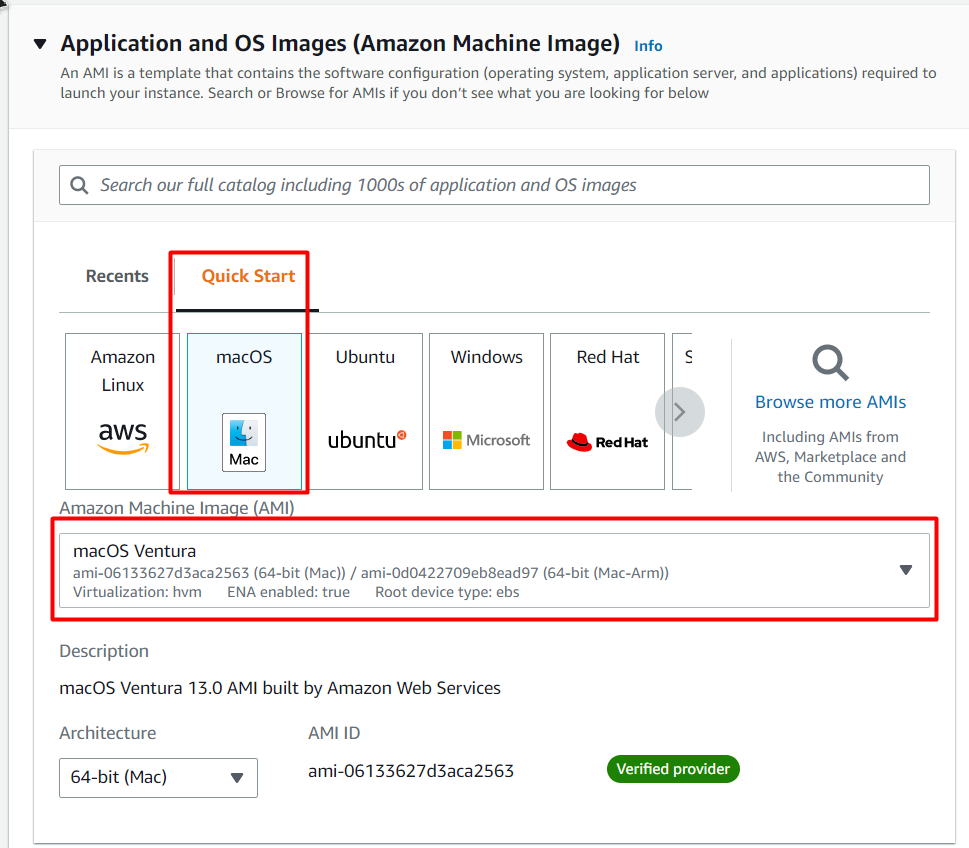
For the AMI, make sure that you choose “macOS” from the QuickStart tab and then choose “Ventura” from the drop-down list:
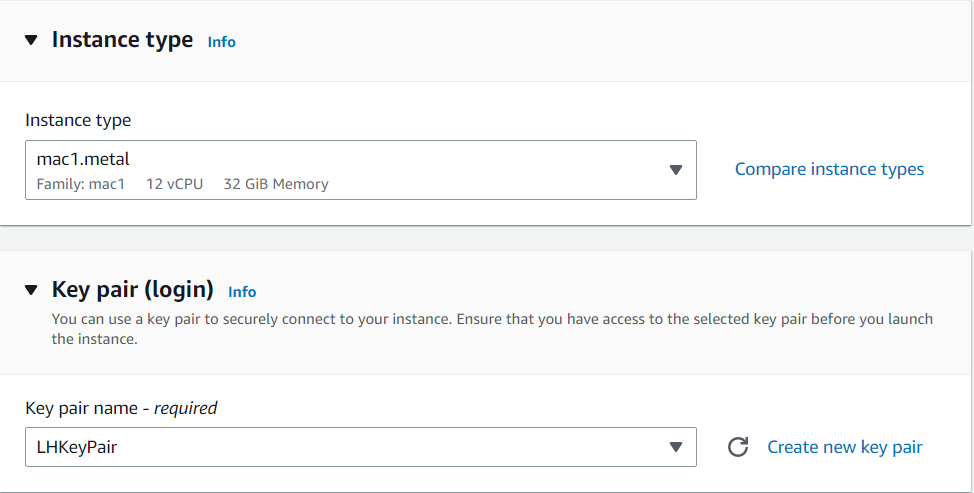
After that, choose the instance type as “mac1.metal” and then choose a key pair by either creating a new one or by choosing an already existing one:
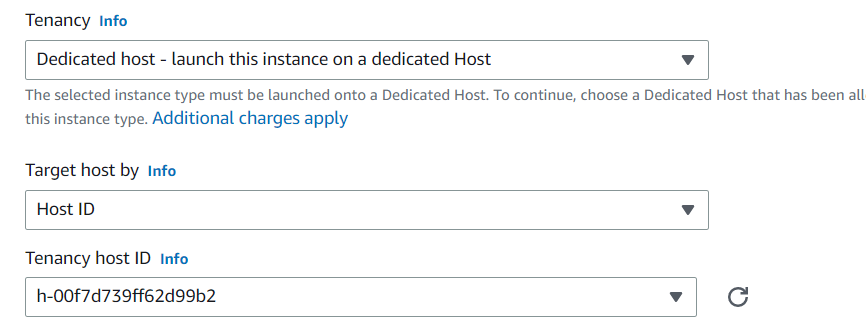
After that, expand the “Advance Details”, set the “Tenancy” option to “Dedicated Host”, “Target Host by” to “Host ID,” and then “Tenancy Host ID” to the ID of the dedicated host that you created in the previous step:
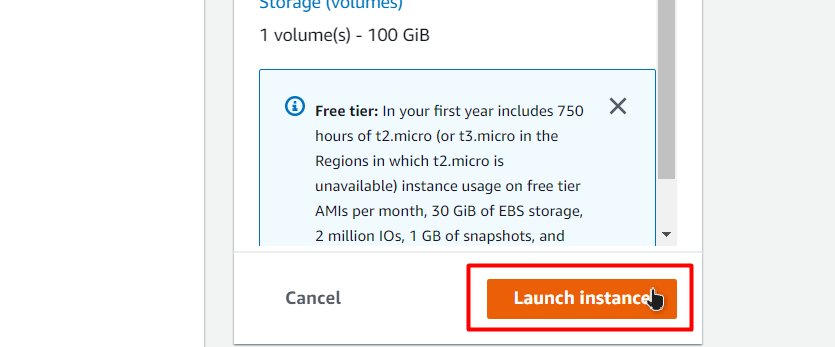
After that, simply click on the “Launch Instance” button to start the initialization process of the EC2 instance:
After that, wait for the launching process to complete:
After that, go back to the instance tab, and you can see your newly created Ventura EC2 in the instances list:
You have successfully created your Mac Ventura OS in the EC2.
Connecting to Ventura EC2 Instance
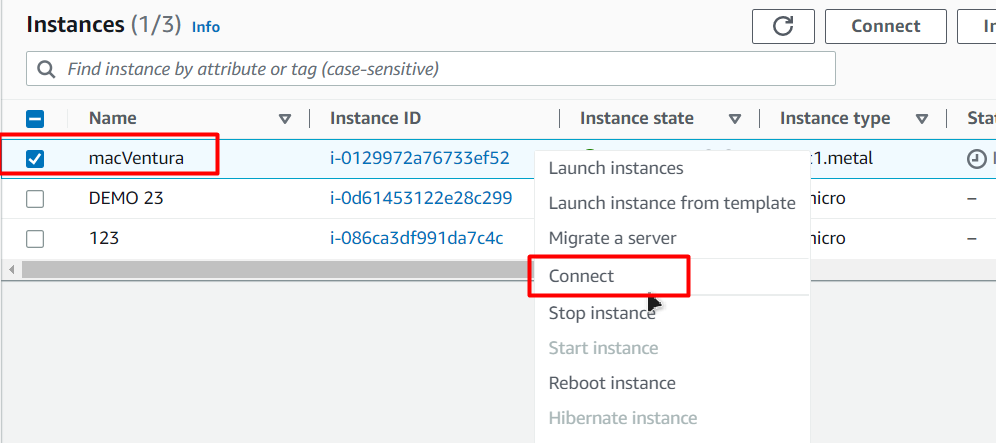
Once you have successfully launched your Ventura OS in the EC2, the next step is to connect to the EC2 instance using an SSH connection, as it would allow you to utilize your Ventura OS. For this, right-click on the newly created EC2 instance and then choose the “Connect” option from the right-click menu:
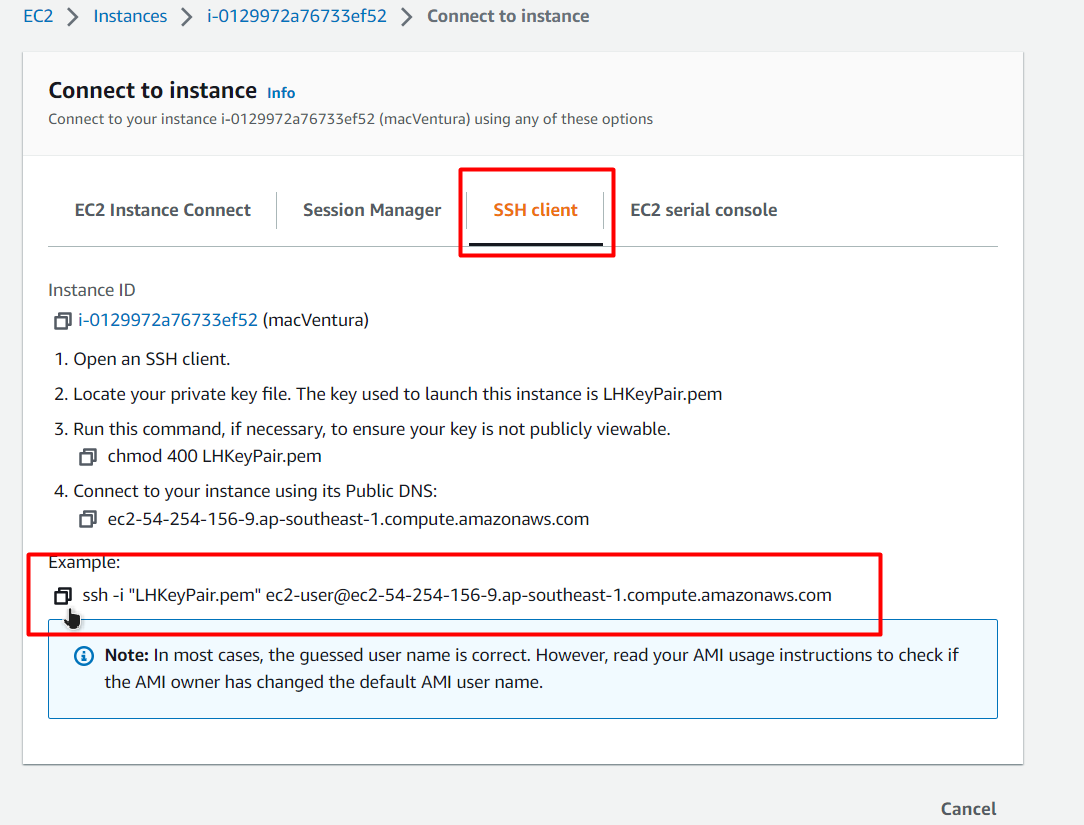
After that, you will be taken to the connection page, and on that page, you need to head over to the SSH Client tab and then copy the last command in that tab:
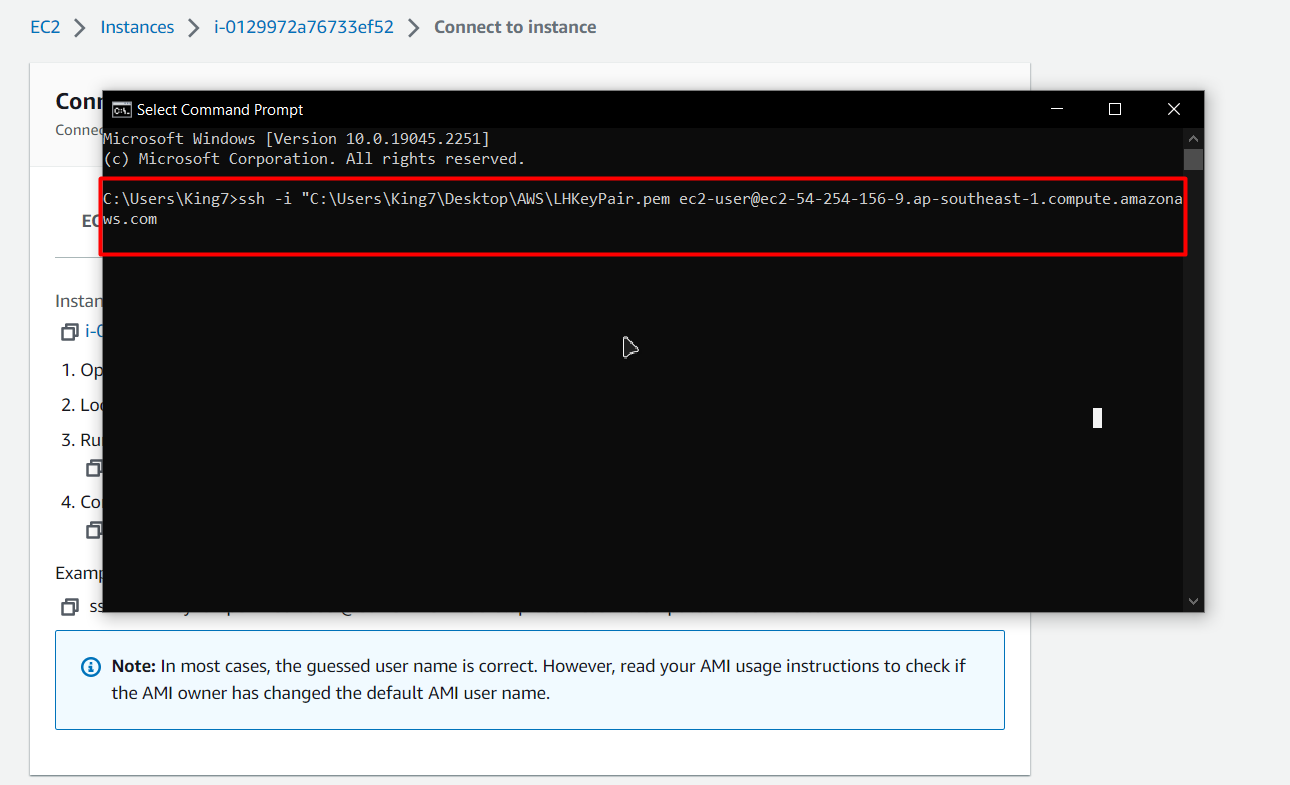
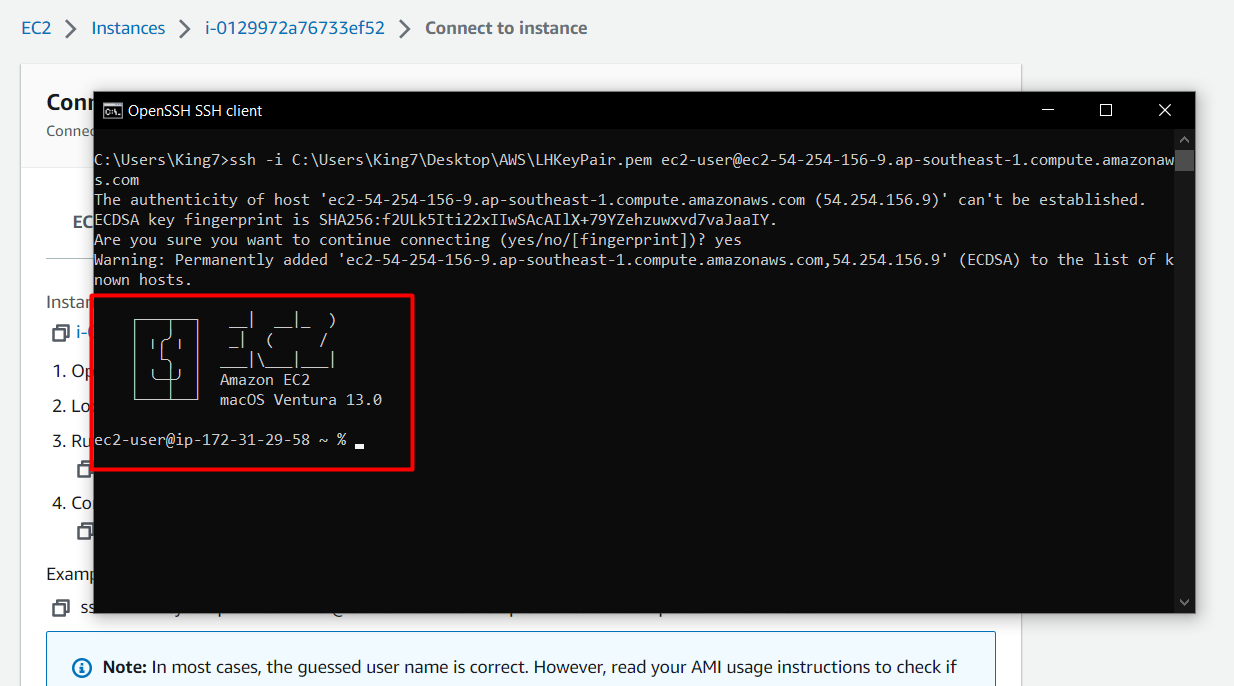
After that, open up either a command prompt or a PowerShell and then paste in your command after replacing the “KeyPiar.pem” part with the path of the key pair on your machine:
After that, hit enter and for confirmation, hit enter once more, and you will be inside the SSH of your Ventura OS running in the EC2 services of AWS:
As you can see, you are inside macOS Ventura version 13.0.
Conclusion
Running Ventura macOS in the EC2 is a rather simple task that does not require much technical knowledge about the AWS platform or its services. The steps include the creation of a dedicated host configured for macOS and then creating \ hosting a new EC2 instance using that specifically dedicated host. Once the EC2 machine has been launched with the Ventura macOS, you can start using it by establishing an SSH connection.

