On Git, developers work with the different branches that hold the project files and folders which contain source code. Git permits their users to create multiple branches in the same local repository. Additionally, they generate an empty branch with any previous commit through the “git switch –orphan <branch-name>” command. After that, they can push it into the remote repository and make GitHub an empty branch.
This article will provide the easiest way to create an empty branch on GitHub using the Git terminal.
How to Create Empty Branch on GitHub Using Git Terminal?
Try out the below-provided instructions to create an empty branch on GitHub using the Git terminal:
-
- Go to the Git root directory and check the list of all branches.
- Create and immediately switch to the new empty local branch through the “git switch –orphan <branch-name>” command.
- Add an empty commit to the repository and check the remote URL list.
- After that, push all added local changes to the remote repository and fetch the updated version of the remote repository.
Step 1: Switch to Root Directory
Execute the “cd” command along with the desired repository path and move to it:
Step 2: View All Branches List
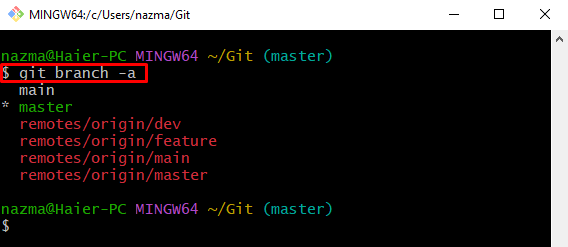
Then, use the “git branch” command to view the list of branches along with the “-a” option for all:
As a result, the list of all of the branches including remote and local will be displayed:
Step 3: Create and Switch to Empty Branch
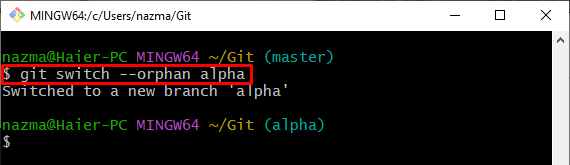
After that, create a new local branch and switch to it immediately by running the “git switch” command:
Here, the “–orphan” option is used to create and start a new branch without any commit and “alpha” is the new branch name:
Step 4: Commit Without Added Changes
Next, update the repository without any modification in the Git local repository through the following command:
In the above-listed command, the “–allow-empty” option is used for committing empty, and the “-m” indicates the commit message:
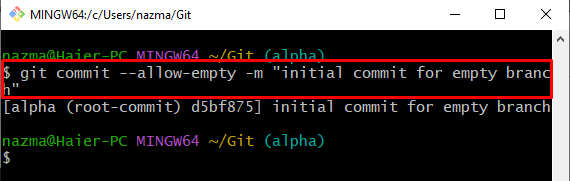
It can be observed in the above output that the initial commit for an empty branch has been successfully added to the repository.
Step 5: Check Remote List
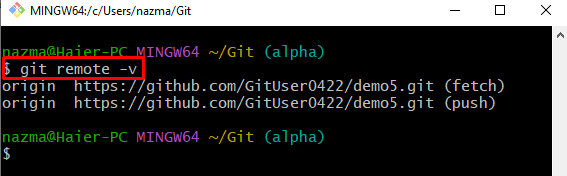
Now, use the “git remote” command to view the list of existing remote URLs:
Step 6: Git Push Local Branch
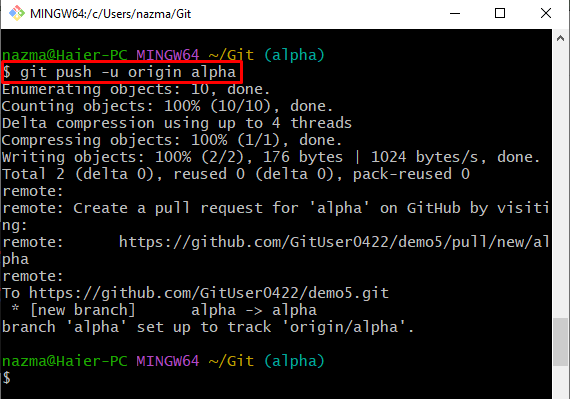
Lastly, push the newly created empty branch to the remote repository with the help of the “git push” command:
Here:
-
- “-u” option represents the “up-stream” operation.
- “origin” is the name of the remote URL.
- “alpha” is the newly created empty local branch:
Step 7: Fetch Remote Origin
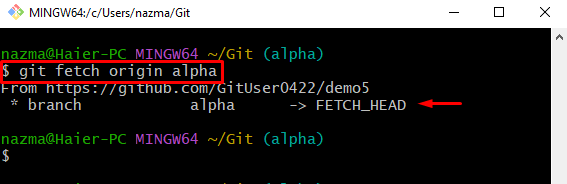
To fetch the remote origin, execute the below-stated command:
As you can see, the new remote “alpha” branch has been fetched successfully:
Step 8: List All Branches
Lastly, list all existing local and fetched remote branches by running the “git branch” command with the “-a” flag:
As you see, the new fetched branch named “remotes/origin/alpha” exists in the list:

We have illustrated the method of creating an empty branch on GitHub using the Git terminal.
Conclusion
To create an empty branch on GitHub using the Git terminal, first, switch to the Git root directory and check the list of all branches and run the “git switch –orphan <branch-name>” command to create and switch to an empty branch. Then, add an empty commit to the repository and check the remote URL list. After that, push all added local changes to the remote repository and fetch the updated version of the remote repository. This article demonstrated the method of creating an empty branch on GitHub using the Git terminal.