This article will discuss what to do when Git push does not send the changes to a remote Git repository.
How to Fix “Git Push Not Send Changes to Remote Git Repository” Issue?
While working on Git, developers add files to the staging area but often forget to commit the new changes. The untracked changes are not pushed when they add the local changes to the GitHub server. Thus, adding files to the staging area and committing new changes is essential before pushing local changes to the remote Git repository.
Check out the following steps for a practical demonstration!
Step 1: Go to Local Repository
Use the “cd” command and move to the particular local Git directory:
Step 2: Check Remote Origin
Verify whether the local repository is connected with the centralized server or not through the below-stated command:
Step 3: Create a New File
Now, run the “touch” command along with the file name to generate it:
Step 4: Track Changes to Git Staging Area
Then, add the newly created file to the tracking area using the “git add” command:
Step 5: Push Local Branch to Git Remote Repository
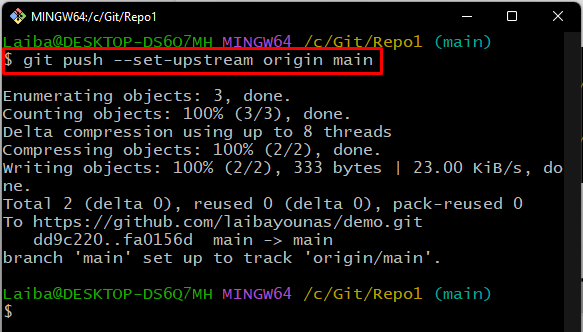
Next, execute the “git push” command along with the remote URL and local branch name to push the changes:
Here, the “–set-upstream” option is used because we are pushing this branch for the first time:
As a result, the local branch has been pushed to the remote branch.
Step 6: View Pushed Content on GitHub
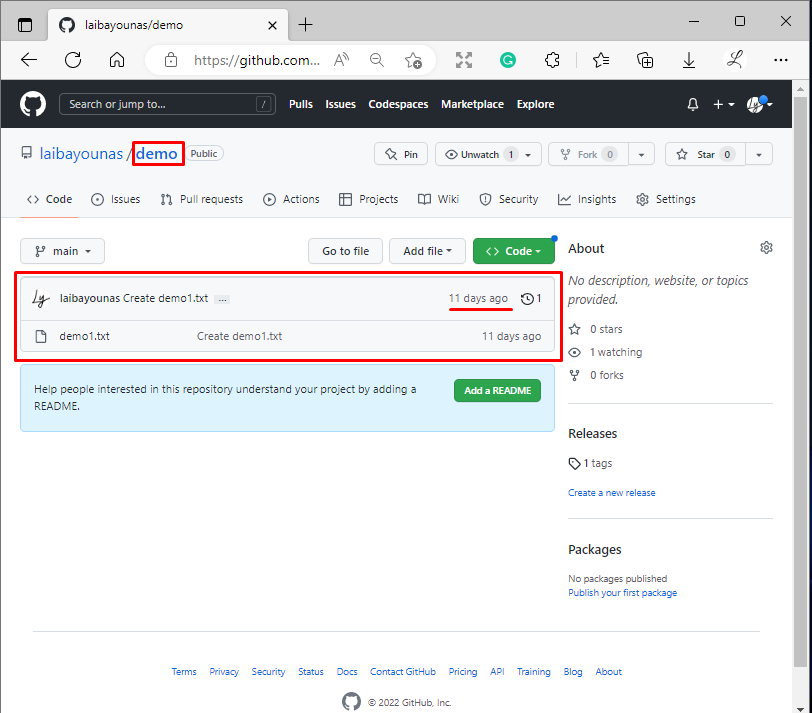
Open GitHub and go to the desired remote repository to ensure whether the local repository content has been pushed to the remote repository or not:
Note: As you can see, the local branch’s content has been pushed to the remote repository, but the unstaged changes have not been added to the remote repository. So, to resolve this issue, follow the next steps.
Step 7: Track All Changes to Git Staging Area
To add all changes to the tracking area, run the “git add .” command:
Step 8: Commit Changes
After that, execute the below-provided command along with the desired message to commit the staged changes:
Here, we have successfully updated the remote repository:
Step 9: Add Local Changes to Git Remote Repository
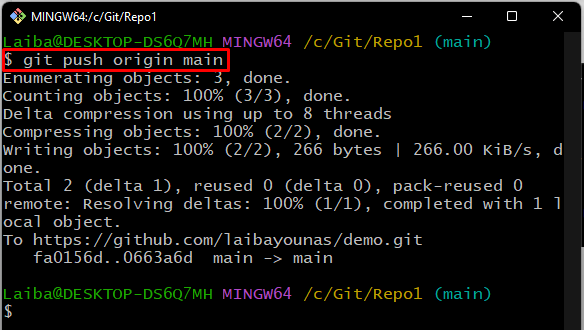
Then, push the new local changes to the remote repository by utilizing the given-below command:
Step 10: Verify Added Changes on GitHub
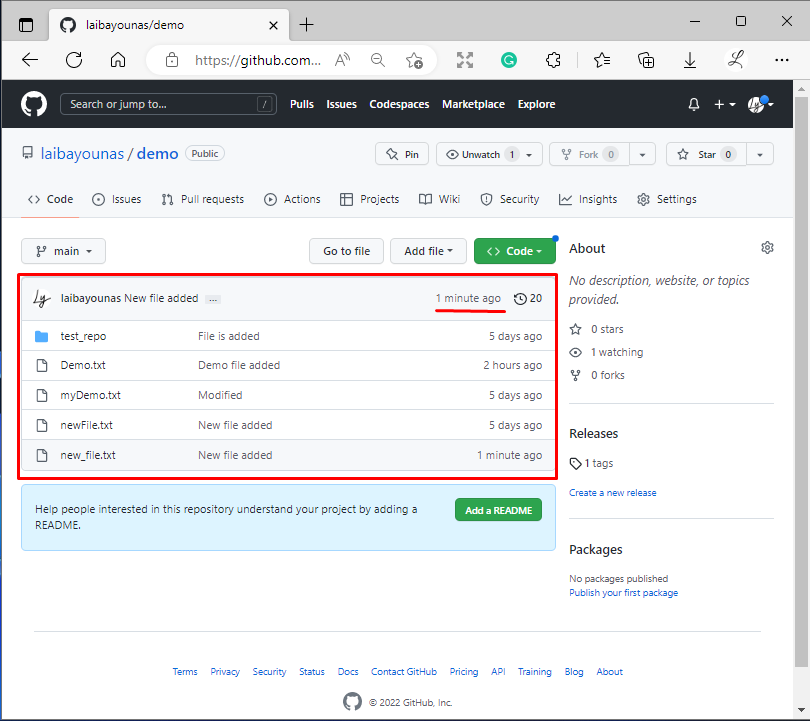
To ensure that the new changes have been pushed to the remote repository, go to the particular repository on GitHub and check the pushed content:
It can be observed that our locally added files have been pushed successfully to the remote server.
Conclusion
When developers push local changes to the remote repository and check it, they realize that the new changes have not been pushed. This issue occurs when developers do not add and commit new changes. So, to resolve this issue, it is required to add new changes to the staging area and commit them before pushing the changes to the remote Git repository. This article illustrated the solution for failing to add changes to the Git remote repository problem.


