Large development projects are divided into small modules for each team member. Every member works on their assigned module on a local machine, where they can work independently. After completing their target, it is required to push the project into the centralized repository known as GitHub hosting service. The “$ git push” command can be used to do so.
This article will provide the easiest way of uploading a Git development project to the GitHub hosting service.
How to Upload a Project to GitHub?
To upload a Git development project into the GitHub remote repository, the following steps can be executed:
- Switch to the Git required repository.
- View the existing content of the repository.
- Create and add a new file to the staging area.
- Save Changes into the Git repository.
- Add new tracking remote URL.
- Run the “$ git push <remote-name> <targeted-remote-branch-name>” command.
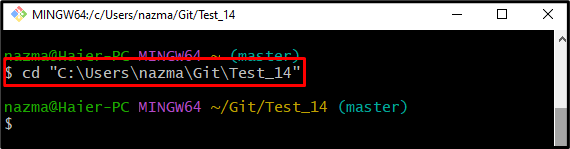
Step 1: Move to Desired Local Repository
At first, developers need to navigate to the particular local repository with the help of the “cd” command:
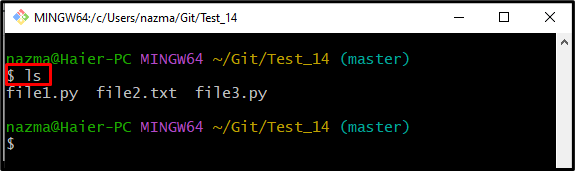
Step 2: View List of Content
Then, list the repository content through the following Git command:
Step 3: Generate New File
Now, run the “touch” command to create a new file:
Here, we have specified the file name “file4” with the “.txt” extension which means we want to create a new text file:

Step 4: Track Created File
Next, track the newly created file to the staging area by utilizing the “git add” command:

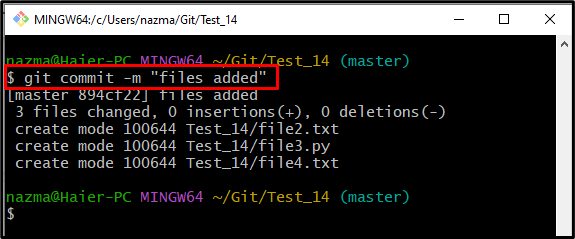
Step 5: Push Changes to Git Repository
Execute the “git commit” command to push all the added changes from the staging index to the Git repository:
In the above-provided command, the “-m” flag let you add the commit message:
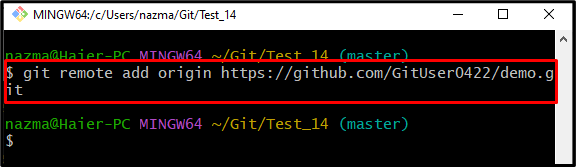
Step 6: Add New Remote URL
Now, set the new remote URL for tracking a remote repository using the “git remote add” command:
Here, the “origin” is the remote name, and the “https://…” is the desired remote repository path:
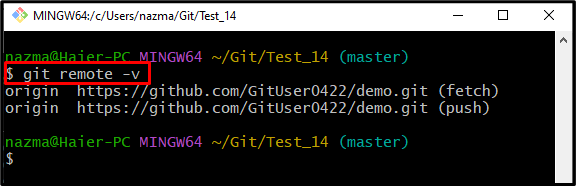
Step 7: Check Remote URLs List
To ensure the new remote URL is added, execute the “git remote” command:
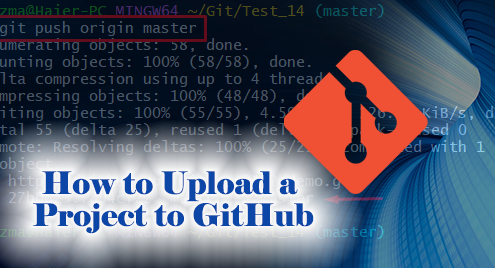
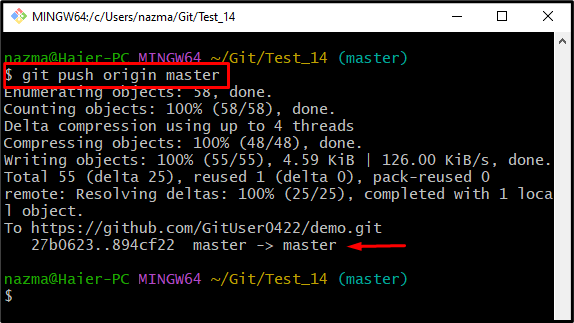
Step 8: Push Git Project
Finally, execute the “git push” command to upload the Git project into the GitHub hosting service:
In the above-stated command:
- “origin” in the name of a remote URL.
- “master” is the local branch name that contains the Git project and all source code files.
According to the below-given output, the Git project has been successfully pushed into the desired remote repository:
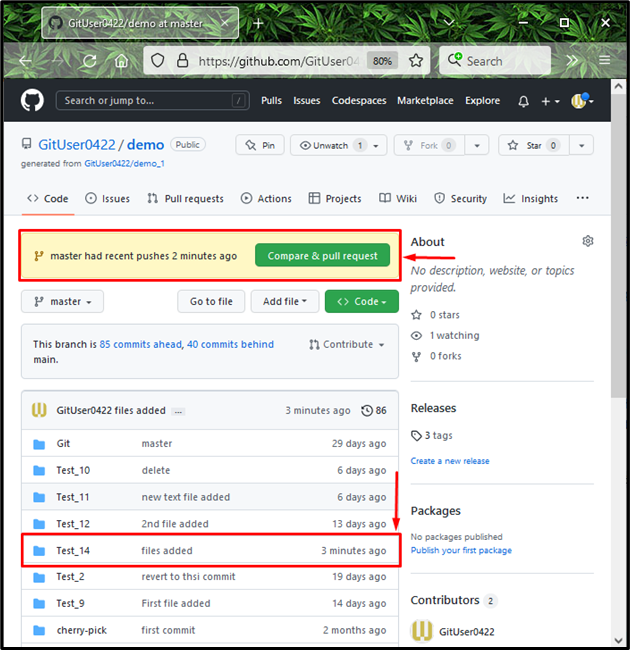
Step 9: Verify Upload Project on GitHub
Lastly, ensure that the project is uploaded to GitHub:
- Open GitHub hosting service in your desired web browser.
- Navigate to the particular remote repository.
- Check the specified branch. For instance, we have pushed into the “master” branch
- Check the repository content.
As you can see in the below-given image, the local repository named “Test_14” has been uploaded successfully into GitHub, which contains the project:
That’s it! We have efficiently explained the process of uploading a Git development project to the GitHub hosting service.
Conclusion
To upload a Git development project to GitHub, navigate to the Git required repository and list its content. Then, create and add a new file to the staging area. After that, commit it and add a remote URL. Next, execute the “$ git push <remote-name> <targeted-remote-branch-name>” command and verify it from the GitHub hosting service. This article demonstrated the method of uploading a Git development project to the GitHub hosting service.