You can’t shrink this file system, which is one of its significant limitations. However, you can use some methods to change the partition of XFS. In this tutorial, we will explain the methods to use the mkfs command for XFS partitions.
How to Use MKFS for XFS Partition
Before moving to the explanation, let’s take a look at the basic steps that we will use to make an XFS file system partition:
- Partition the storage and create volumes
- Format the volume with the XFS format
- Mount the XFS file system for future use
Partition the Disk
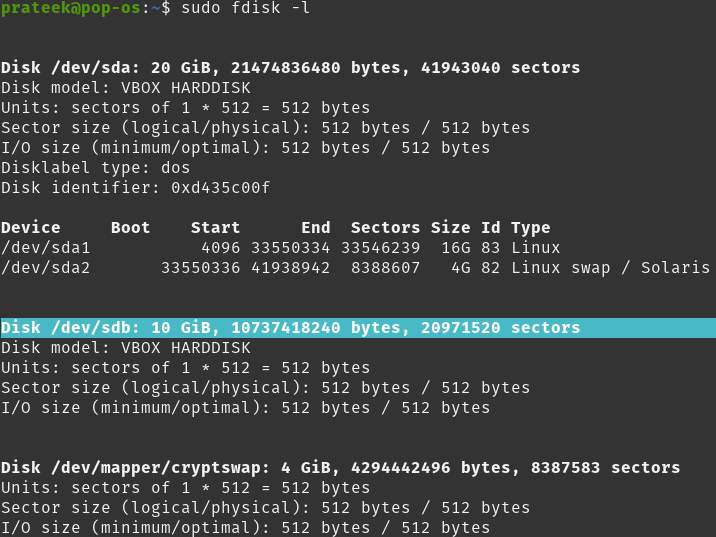
Start by listing all the disks that are present in the system using the following command:
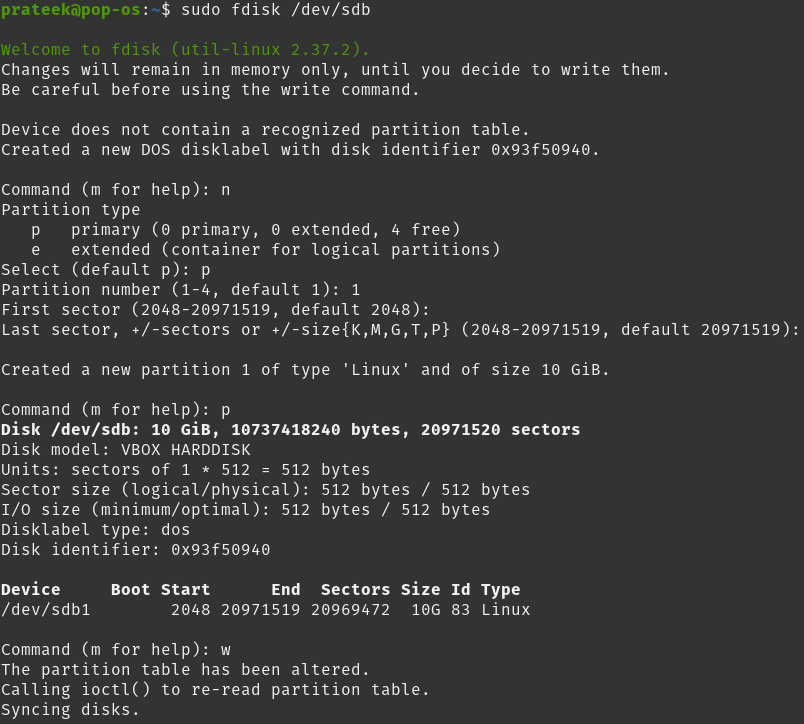
You will later use the /dev/sdb and format it with XFS in this tutorial. After identifying the disk, you can start partitioning it according to your needs. You partition the disk using the fdisk command itself. To partition using fdisk, use the following format:
In this case, it is as follows:
While partitioning the disks using the fdisk command, you must provide the inputs during the process. Here, we use “n” to create a new partition. The “p” is used immediately after the new partition command is used to indicate that the partition is a primary partition. The second “p” is used to print the partition table. And “w” is used to write the partition information to the disk.
Refer to the previous image in case of confusion. It might look confusing, but it is relatively easy once you know what you are doing.
Format the Partition
Once you successfully created the partition for your disk, you can proceed by formatting the partition using the mkfs command. It is done to use the XFS file system for our partition and avoid future issues. Use the following command to format using XFS:
If the format is successful, you should see something like this:
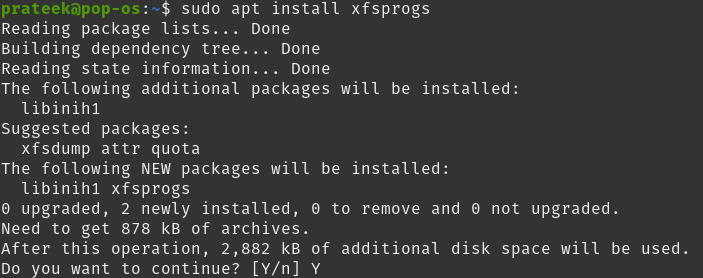
If you get an error which says “command not found”, install the following package. Then, format your partition.
Press “Y” and wait for the installation to finish.
Mounting the XFS File System
After successfully formatting your desired format, you should mount it to the desired location for easier accessibility. We use /mnt/xfs as our mount location.
You can choose a mount point of your choice. To mount, you must first create the directory to mount the file system in it. To do so, use the following command:
In this example, we can mount the recently formatted XFS file system to this directory using the following command:
Conclusion
This is how you can easily use mkfs for XFS partitions. Moreover, we also explained the methods to partition the disk and mount the XFS file system with no trouble. For this tutorial, we used the Pop!_OS operating system to perform the partitioning task.


