This post will describe:
- What is the Meaning of “git reset” Command Along With “–hard” Option and “origin/master”?
- How Does the “git reset” Command Along with “–hard” Option and “origin/master” Works?
What is the Meaning of “git reset” Command Along With “–hard” Option and “origin/master”?
The “git reset –hard origin/master” can be utilized to stage and unstaged changes. It deletes all the changes made on the current local branch, making it the same as the origin/master, and reset the HEAD pointer.
How Does the “git reset” Command Along With “–hard” Option and “origin/master” Works?
To view the working of the previously discussed command, first, navigate to the Git local repository and create a new file in the local repository. Track new files into the staging area and commit changes. Next, check the Git reference log history and display the list of the existing remote URLs. Then, download the updated copy of the remote repository and run the “$ git reset –hard origin/master” command.
Now, implement the above-discussed instructions!
Step 1: Move to Desired Git Local Repository
Navigate to the desired Git repository by executing the “cd” command:
Step 2: Create Local File
Execute the “touch” command to create the file in the Git local repository:
Step 3: Track Local File
Next, track the into the Git staging area using the “git add” command along with the file name:
Step 4: Update Repository
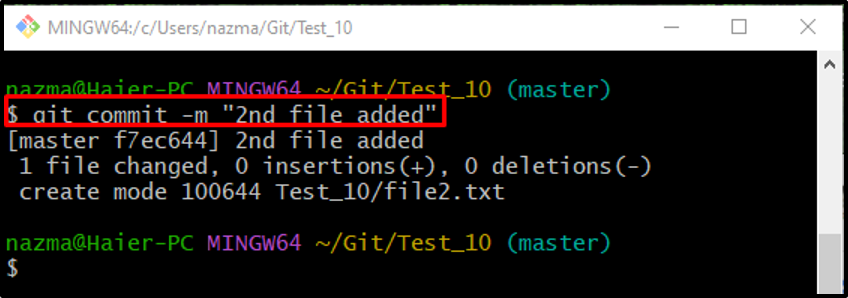
Run the “git commit” command with the “-m” option to commit the make changes and add the desired commit message:
Step 5: Check Git Reference Log History
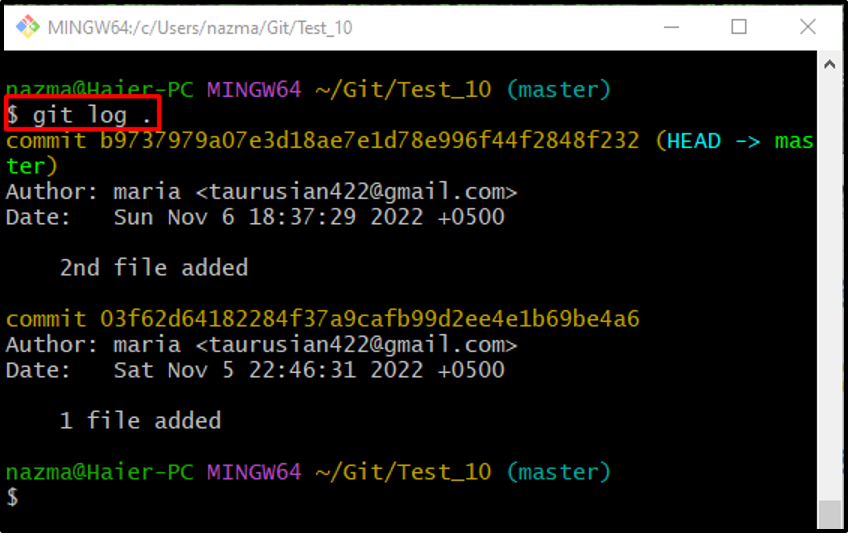
To check the Git reference log history, run the “git log .” command:
Step 6: List Remote URL
Run the “git remote” command with the “-v” option to view the list of existing remote URLs:
Step 7: Git Fetch
Next, fetch the updated remote repository using the “git fetch” command:
Step 8: Git Reset Local Repository
Finally, execute the “git reset” command with the “–hard” option and list the “origin/master” to reset the local repository:
Step 9: Verify Reset Local Repository
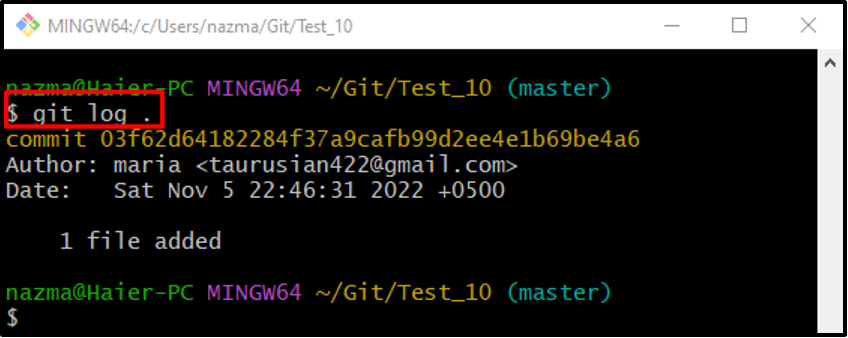
Lastly, to verify the reset local repository, run the “git log .” command:
We have described the meaning of the “git reset –hard origin/master” and how to use it.
Conclusion
The “git reset” command with the “–hard” option along with the “origin/master” is used to staged and unstaged changes, remove all made changes on the current local branch, and make it the same as origin/master. To use this command, first, move to the repository and create a new file, track it into the staging area and commit changes. Next, check the log history and view the list of the existing remote URLs. Then, download the updated copy of the remote repository and run the “$ git reset –hard origin/master” command. This post explained how the “git reset –hard origin/master” works.


