
This guide will demonstrate:
- How to Untrack a File in Git Using “git reset” command?
- How to Untrack a File in Git Using “git rm –cached” command?
Let’s try them out one by one!
How to Untrack a File in Git Using “git reset” command?
To unstage a file using the “git reset” command, firstly, move to the desired repository and create a new file. Then, track into the staging area and commit changes to update the repository.
Now, execute the above-stated procedure to get results!
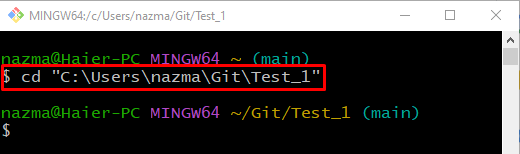
Step 1: Move to Git Repository
First, run the “cd” command and move to the Git local repository:
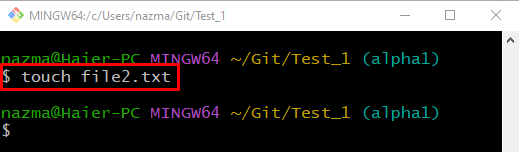
Step 2: Create File
To create a new file, run the “touch” command with the specified file name:
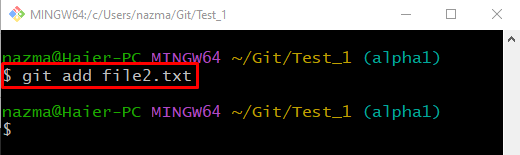
Step 3: Track File
Now, track the file to the Git local repository through the “git add” command:
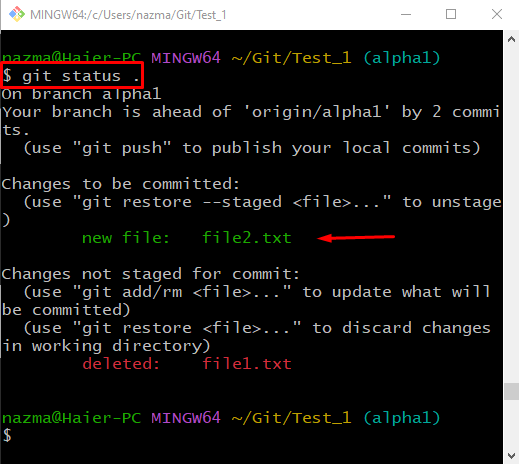
Step 4: Check Status
Execute the provided command to view the repository’s current status:
The below output indicates that the newly created “file2.txt” is tracked and placed in the staging area:
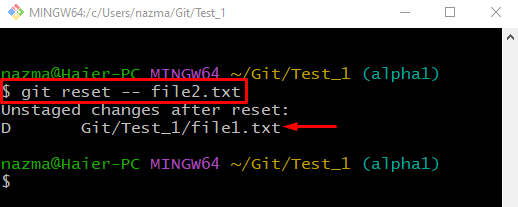
Step 5: Unstaged File
Now, unstaged the file by utilizing the “git reset” command along with “—” and desired file name:
According to the below output, the file is unstaged successfully:
Step 6: Check Status
Lastly, execute the “git status .” command to verify the previously performed operation:

Let’s have a look at another method to unstage a file in Git.
How to Untrack a File in Git Using “git rm –cached” command?
Another way to unstage a file is using the “$ git rm –cached <file-name>” command. To do so, move to the desired repository and create a new file. Then, track into the staging area and commit changes to update the repository. Lastly, execute the “$ git rm –cached <file-name>” command.
Try out the below-given steps to perform it practically!
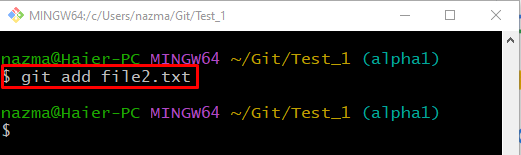
Step 1: Track File
First, run the “git add” command to track the file:
Step 2: Check Status
To check the repository status, execute the below-stated command:
Here, the file is placed in the staging area and ready to commit:

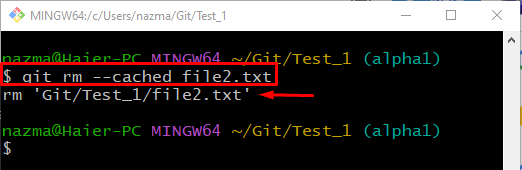
Step 3: Unstage File
Now, unstage a file using the “git rm” command along with the “–cached” option:
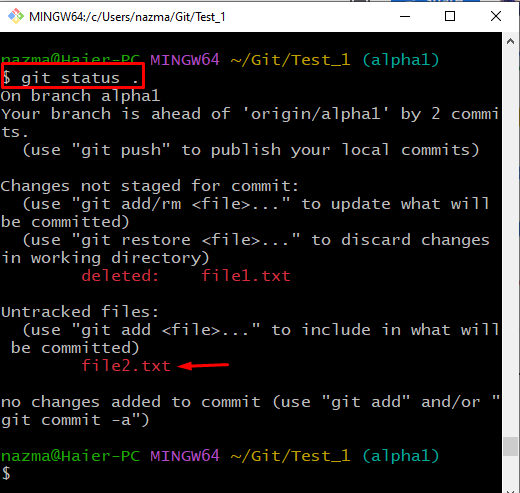
Step 4: Verify Unstaged File
Lastly, to verify if the file is unstaged, execute the “git status .” command:
It can be observed that the file is unstaged successfully:
We have mentioned the two ways to unstaged a file in Git.
Conclusion
To unstage a file using the “git reset” command, firstly, move to the desired repository and create a new file. Then, track into the staging area and commit changes to update the repository. Execute the “$ git reset — <file-name>” command. Another method to perform a similar operation is to execute the “$ git rm –cached <file-name>” command. This guide provided the two methods to unstage a file in Git.