
This post will discuss:
- How to Delete Git Remote Origin from Repository Using git remote rm origin Command?
- How to Delete Git Remote Origin from Repository manually?
Let’s get started!
Method 1: How to Delete Git Remote Origin from Repository Using git remote rm origin Command?
To remove the remote origin from a Git repository, first, switch to the Git repository and check the remote list. Then, run the “$ git remote rm origin” command and verify it by executing the “$ git remote -v” command.
Now, move ahead and understand the stated procedure through implementation!
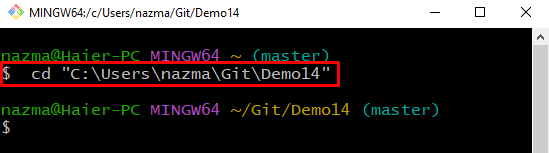
Step 1: Navigate to Git Repository
Move to the Git directory where the desired local repository is located:
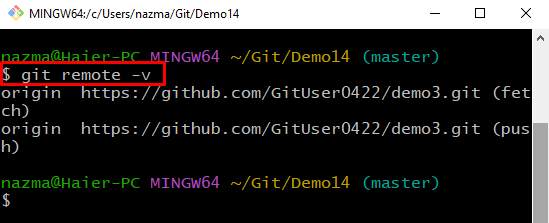
Step 2: Check Remote Connections
Next, run the “git remote” command with the “-v” option to list the existing remote connections:
Step 3: Remove Remote Origin
Now, remove the remote origin by executing the following command:
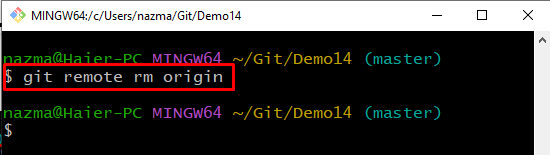
Step 4: Verify Remote List
Lastly, run the following command to ensure that the remote origin has been removed successfully:

Let’s move to the next method to delete the Git remote origin from a local repository.
Method 2: How to Delete Git Remote Origin from Repository Manually?
You can also delete the Git remote origin from the repository by utilizing the configuration file. To do so, first, open the configuration file utilizing the text editor and delete the remote origin manually. Then, run the “$ git remote -v” command for verification.
Follow the below instructions to perform the stated steps!
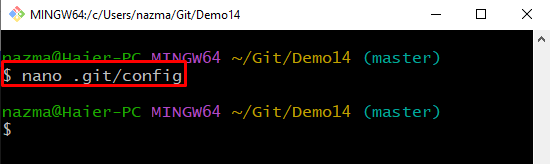
Step 1: Open Configuration File
First, open the Git configuration file in your favorite text editor. For instance, we have used the nano text editor to do so:
Step 2: Delete Remote
Now, remove the below-highlighted lines from the configuration file and save the added changes by pressing “CTRL+S”:
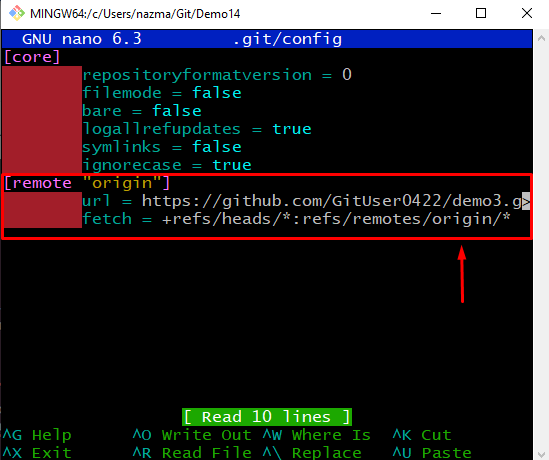
After doing so, press “CTRL+X” to exit.
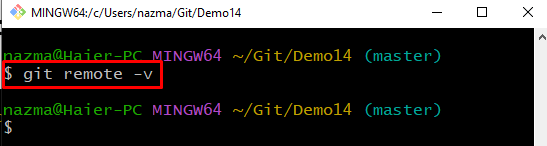
Step 3: Check Remote Connections
Next, list the remote connections by utilizing the following command:
That’s all! We have offered the method to delete the Git remote origin from the repository.
Conclusion
There are two ways to remove the remote origin from a Git repository: using the “$ git remote rm origin” command or manually by utilizing the configuration file. To do so, first, switch to the Git repository and check the remote list. Execute the “$ git remote rm origin” command. In contrast, you can also remove the remote origin using the configuration file. This post demonstrated the procedure for removing the remote origin from the local repository.